
Subscribe to Our Youtube Channel
Related Manuals for Beko WTV 9745 X0A


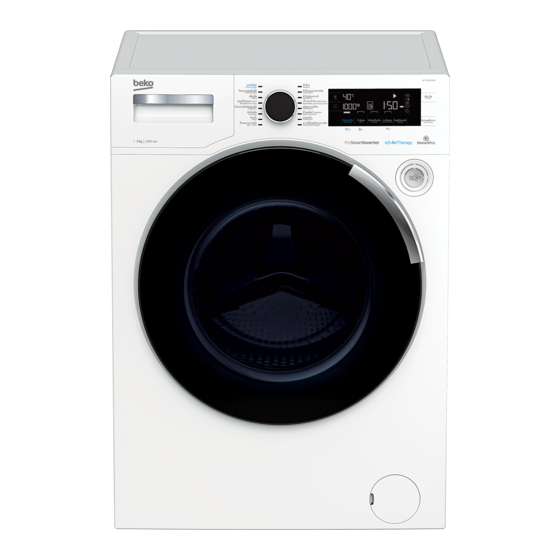
Summary of Contents for Beko WTV 9745 X0A
- Page 1 เครื ่ อ งซั ก ผ้ า คู ่ ม ื อ ผู ่ ใ ชู ง าน Washing Machine User’s Manual WTV 9745 X0A TH / EN 2820525797_TH/ 11-04-19.(15:33) หมายเลขเอกสาร=...
- Page 2 คำ า แนะนำ า ด้ า นความปลอดภั ย ทั ่ ว ไป บทน ี ้ จ ะประกอบด ู ว ยค ำ า แนะน ำ าด ู า นความปลอดภ ั ย ท ี ่ จ ะช ู ว ย ป ู องก ั น ความเส ี ่ ย งจากการบาดเจ ็ บ ของบ ุ ค คลหร ื อ ความเส ี ย หาย ของทรั...
- Page 3 ใชู ผ งซั ก ฟอก นู ำ า ยาปรั บ ผู า นู ุ ม และนู ำ า ยาปรุ ง แตู ง ที ่ เ หมาะสำ า หรั บ เครื ่ อ งซั ก ผู า แบบอั ต โนมั ต ิ เ ทู า นั ้ น ปฏิ...
- Page 4 ในโปรแกรมรี เ ฟรช และการเลื อ กโปรแกรมการทำ า งานสนั บ สนุ น ซั ก และสวมใสู มี ก ระบวนการทำ า ความเย็ น เป็ น ขั ้ น ตอนสุ ด ทู า ยเพื ่ อ รั บ รองวู า เสื ้ อ ผู า จะอยู ่ ใ นอุ ณ หภ่ ม ิ ท ี ่ ไ มู เ ป็ น อั น ตรายตู อ ผู ่ ใ ชู โปรด ระมั...
- Page 5 เสื ้ อ ผู า ขนาดใหญู เชู น ผู า บางเนื ้ อ ละเอี ย ด เสื ่ อ ผู า หู ม ผู า นวม ฯลฯ ตู อ งไมู ใ ชู ใ นโปรแกรมรี เ ฟรช และการเลื อ กฟั ง ก์ ช ั น การทำ า งาน สนั...
- Page 6 1.3 ความปลอดภั ย ทางไฟฟ้ า หากผลิ ต ภั ณ ฑ์ ม ี ค วามผิ ด พลาดใดๆเกิ ด ขึ ้ น ไมู ค วรจะใชู ง าน ผลิ ต ภั ณ ฑ์ ถ ู า ยั ง ไมู ม ี ก ารซู อ มบำ า รุ ง โดยตั ว แทนบริ ก ารที ่ ไ ดู ร ั บ อนุ...
- Page 7 คำ า แนะนำ า ที ่ ส ำ า คั ญ สำ า หรั บ สิ ่ ง แวดล้ อ ม 2.1 การปฏิ บ ั ต ิ ต ามข้ อ กำ า หนดการกำ า จั ด ขยะเครื ่ อ งใช้ ไ ฟฟ้ าและอิ เ ล็ ค ทรอนิ ก ส์ หรื...
- Page 8 ชื ่ อ ผู ่ ส ู ง มอบหรื อ เครื ่ อ งหมายการคู า Beko ชื ่ อ รู ุ น WTV 9745 X0A ความจุ ท ี ่ จ ั ด ระดั บ ไวู (กก.) ความเร็ ว การปั ่ น แหู ง ส่ ง สุ ด (รอบตู อ นาที ) 1400 แบบสรู...
- Page 9 4.1 การติ ด ตั ้ ง • ใชู ต ั ว แทนบริ ก ารที ไ ดู ร ั บ การอนุ ญ าตที ่ อ ยู ่ ใ กลู ท ี ่ ส ุ ด สำ า หรั บ การติ ด ตั ้ ง ผลิ ต ภั ณ ฑ์ น ี ้ •...
- Page 10 4.1.3 การถอดสลั ก ยึ ด เพื ่ อ ความปลอดภั ย ในการขนส่ ง ออก คลายสลั ก ทั ้ ง หมดดู ว ยประแจที ่ เ หมาะสมจนกระทั ่ ง สลั ก เหลู า นั ้ น หมุ น ไดู อ ิ ส ระ ถอดสลั...
- Page 11 4.1.5 การเชื ่ อ มต่ อ ท่ อ ยางเข้ า กั บ ระบบระบายน้ ำ า • ติ ด ปลายของทู อ ยางระบายนำ ้ า เขู า ไปยั ง ทู อ ระบายนำ ้ า เสี ย หู อ งสุ ข าหรื อ หู อ งอาบนำ ้ า โดยตรง คำ...
- Page 12 ทำ า การคลายน็ อ ตล็ อ คที ่ เ ป็ น ขาตั ้ ง โดยใชู ม ื อ ปรั บ ทำ า การปรั บ ตั ้ ง ขาตั ้ ง จนกระทั ่ ง ตั ว เครื ่ อ งตั ้ ง อยู ่ ใ นแนวราบและไดู ส มดุ ล ทำ...
- Page 13 4.2 การเตรี ย มเสื ้ อ ผ้ า 4.2.1 การแยกประเภทเสื ้ อ ผ้ า • คั ด แยกเสื ้ อ ผู า ที ่ จ ะซั ก ตามประเภทของเสู น ใย สี และระดั บ ของคราบสกปรกและอุ ณ หภ่ ม ิ ข อง นำ...
- Page 14 • เสื ้ อ ผู า ที ่ เ ปื ้ อนวั ส ดุ ไดู แ กู แปู ง ผงป่ น ขาว นมผง เป็ น ตู น จะตู อ งทำ า การสะบั ด ออกกู อ นทำ า การใสู ลงไปในเครื ่ อ งซั ก ผู า ฝู ุ น และผงที ่ อ ยู ่ บ นเสื ้ อ ผู า อาจสะสมตั ว กั น บนชิ ้ น สู ว นภายในเครื ่ อ งเมื ่ อ เวลา ผู...
- Page 15 นำ ้ า หนั ก นำ ้ า หนั ก ประเภทของเสื ้ อ ผ้ า ประเภทของเสื ้ อ ผ้ า (กรั ม ) (กรั ม ) เสื ้ อ คลุ ม อาบนำ ้ า 1200 ผู า เช็ ด มื อ ผู...
- Page 16 การปรั บ ปริ ม าณของผงซั ก ฟอก ปริ ม าณของผงซั ก ฟอกที ่ จ ะใชู ง านขึ ้ น อยู ่ ก ั บ ปริ ม าณของเสื ้ อ ผู า ที ่ จ ะซั ก ระดั บ ของการสกปรกและ ความกระดู า งของนำ ้ า •...
- Page 17 ถ้ า ผลิ ต ภั ณ ฑ์ ไ ม่ ม ี ถ ้ ว ยบรรจุ ผ งซั ก ฟอกเหลว: • หู า มใชู ผ งซั ก ฟอกเหลวสำ า หรั บ การซั ก ลู า งขั ้ น ตู น ในโปรแกรมที ่ ม ี ก ารซั ก ลู า งขั ้ น ตู น •...
- Page 18 4.2.7 เกร็ ด สำ า หรั บ การซั ก ที ่ ม ี ป ระสิ ท ธิ ภ าพ เสื ้ อ ผ้ า เสื ้ อ ผ้ า อ่ อ นน่ ุ ม / ผ้ า สี แ ละผ้ า ขาว ผ้...
- Page 19 4.3 การทำ า งานของผลิ ต ภั ณ ฑ์ 4.3.1 แผงควบคุ ม WTV 9745 X0A ล ด ก ล น ่ ิ อ บ ั ผ า ฝ า ย Refresh Cottons โ ป ร แ ก ร ม...
- Page 20 4.3.3 ตารางโปรแกรมและอั ต ราการบริ โ ภคพลั ง งาน ฟั ง ก์ ช ั ่ น การทำ า งานสนั บ สนุ น ชู ว งของอุ ณ หภ่ ม ิ ท ี ่ โปรแกรม (°C) สามารถเลื อ กไดู °C เย็ น • •...
- Page 21 ฟั ง ก์ ช ั ่ น การทำ า งานสนั บ สนุ น ในตารางอาจเปลี ่ ย นแปลงไปตามรู ุ น เครื ่ อ งซั ก ผู า ของคุ ณ การบริ โ ภคนำ ้ า และพลั ง งานอาจเปลี ่ ย นแปลงไปตามการเปลี ่ ย นแปลงของความดั น นำ ้ า ความกระดู า งและอุ ณ หภ่ ม ิ ข องนำ ้ า อุ...
- Page 22 • ผ้ า ใยสั ง เคราะห์ (Synthetics) คุ ณ สามารถซั ก เสื ้ อ ผ้ า (เช่ น เสื ้ อ เชิ ้ต กระโปรง ผ้ า ผสมเส้ น ใยสั ง เคราะห์ / ผ้ า ฝ้ าย ฯลฯ) ได้ ใ นโปรแกรมนี ้ ระยะเวลาของโปรแกรมการซั ก นี ้ จ ะสั ้ น ลงอย่ า งเห็ น ได้ ช ั ด และมี ประสิ...
- Page 23 • ชุ ด เครื ่ อ งนอน / เสื ้ อ ขนเป็ ด (Duvet / Down Wear) ใชู โ ปรแกรมนี ้ ใ นการซั ก ผู า นวมที ่ ท ำ า จากเสู น ใยที ่ ม ี ป ู ายระบุ ใ หู "ซั ก เครื ่ อ งไดู " ตรวจสอบวู า ไดู โ หลด ผู...
- Page 24 • เร็ ว ประจำ า วั น / ซั ก ด่ ว นพิ เ ศษ (Daily Xpress / Xpress Super Short) ใชู โ ปรแกรมนี ้ ใ นการซั ก เสื ้ อ ผู า ที ่ เ ป็ น ผู า ฝู ายซึ ่ ง สกปรกไมู ม ากและไมู ม ี ค ราบฝั ง แนู น โดยใชู เ วลาซั ก ไมู...
- Page 25 • ขจั ด คราบลำ ้ า ลึ ก (StainExpert) เครื ่ อ งซั ก ผู า จะมี โ ปรแกรมซั ก คราบฝั ง แนู น พิ เ ศษซึ ่ ง ทำ า ใหู ส ามารถขจั ด คราบฝั ่ ง แนู น หลายประเภท ออกไดู...
- Page 26 • ของเล่ น น่ ุ ม นิ ่ ม (Soft Toys) ตู อ งซั ก ของเลู น นู ุ ม นิ ่ ม ในโปรแกรมผู า อู อ นนู ุ ม เนื ่ อ งจากมี ส ู ว นประกอบของผู า ฝู ายที ่ อ ู อ นนู ุ ม และ เสู...
- Page 27 4.3.7 การเลื อ กความเร็ ว ของการปั ่ นแห้ ง เมื ่ อ ใดก็ ต ามที ่ ม ี ก ารเลื อ กโปรแกรมใหมู แ ลู ว ความเร็ ว ในการปั ่ น แหู ง ที ่ แ นะนำ า ของโปรแกรมที ่ เลื อ กไวู จ ะแสดงบนไฟแสดงความเร็ ว การปั ่ น เป็...
- Page 28 คุ ณ สามารถเปลี ่ ย นแปลงความเร็ ว การปั ่ น แหู ง หลั ง จากเริ ่ ม ตู น ซั ก ไปแลู ว ไดู หากขั ้ น ตอนการซั ก อนุ ญ าตใหู ก ระทำ า การเปลี ่ ย นแปลงไมู ส ามารถกระทำ า ไดู หากขั ้ น ตอนไมู อ นุ ญ าต รั...
- Page 29 4.3.8.1 ฟั งก์ ช ั ่ น การทำ า งานสนั บ สนุ น • ซั ก ล้ า งเบื ้ อ งต้ น (Prewash) การซั ก ลู า งขั ้ น ตู น มี ค วามคู ุ ม คู า กั บ เสื ้ อ ผู า ที ่ ม ี ค ราบสกปรกมากเทู า นั ้ น การไมู ใ ชู ฟ ั ง ก์ ช ั น ซั ก ลู า งขั ้ น ตู...
- Page 30 4.3.8.2 ฟั งก์ ช ั ่ น /โปรแกรมที ่ เ ลื อ กโดยการกดป่ ุ ม ฟั งก์ ช ั ่ น เป็ นเวลา 3 วิ น าที • การทำ า ความสะอาดถั ง ซั ก + เลื อ กโปรแกรมนี ้ โ ดยการกดปู ุ ม การทำ า งานสนั บ สนุ น อั น ดั บ ที ่ 1 คู า งไวู 3 วิ น าที รั...
- Page 31 • การเชื ่ อ มต่ อ ไร้ ส าย คุ ณ สามารถใชู ฟ ั ง ก์ ช ั น การเชื ่ อ มตู อ ไรู ส ายเพื ่ อ จั บ คู ่ เ ครื ่ อ งของคุ ณ กั บ อุ ป กรณ์ อ ั จ ฉริ ย ะ วิ ธ ี น ี ้ คุ ณ สามารถใชู อ ุ ป กรณ์ อั...
- Page 32 1 เปิ ด ประต่ ส ำ า หรั บ โหลดเสื ้ อ ผู า ลงไป วางเสื ้ อ ผู า ลงไปและใสู ผ งซั ก ฟอก ฯลฯ 2 เลื อ กโปรแกรมการซั ก อุ ณ หภ่ ม ิ ความเร็ ว การปั ่ น แหู ง และถู า ตู อ งการ ใหู เ ลื อ กฟั ง ก์ ช ั ่ น การทำ า งานสนั บ สนุ น 3 ตั...
- Page 33 • ทำ า ความสะอาดฝาตั ว กรองของปั ๊ ม • ปลดที ่ จ ั บ ประต่ โ หลดฉุ ก เฉิ น ดู า นหลั ง ของฝาตั ว กรองของปั ๊ ม • ดึ ง ที ่ จ ั บ ประต่ โ หลดฉุ ก เฉิ น ลงหนึ ่ ง ครั ้ ง และเปิ ด ประต่ โ หลด หลั ง จากเปิ...
- Page 34 การปรั บ เปลี ่ ย นเครื ่ อ งไปส่ ู โ หมดหยุ ด ชั ่ ว คราว: กดปู ุ ม เริ ่ ม ต้ น / หยุ ด ชั ่ ว คราว เพื ่ อ เปลี ่ ย นไปสู ่ โ หมดหยุ ด ชั ่ ว ขณะ สั ญ ลั ก ษณ์ ห ยุ ด ชั ่ ว คราวจะกระ พริ...
- Page 35 4.3.16 ฟั งก์ ช ั น HomeWhiz HomeWhiz ชู ว ยใหู ค ุ ณ ใชู อ ุ ป กรณ์ อ ั จ ฉริ ย ะของคุ ณ เพื ่ อ ตรวจสอบเครื ่ อ งซั ก ผู า ของคุ ณ และรั บ ขู อ ม่ ล เกี...
- Page 36 4.3.16.1 การติ ด ตั ้ ง HomeWhiz ตู อ งมี ก ารสรู า งการเชื ่ อ มตู อ ระหวู า งเครื ่ อ งใชู แ ละแอปพลิ เ คชั น เพื ่ อ ใหู แ อปพลิ เ คชั น ทำ า งานไดู คำ...
- Page 37 หลั ง จากเชื ่ อ มต่ อ เครื ่ อ งซั ก ผ้ า ของคุ ณ กั บ เครื อ ข่ า ยที ่ เ ลื อ ก คุ ณ ต้ อ งเชื ่ อ มต่ อ อุ ป กรณ์ •...
- Page 38 4.3.16.4 ฟั งก์ ช ั น และการใช้ ง าน HomeWhiz หลั ง จากการติ ด ตั ้ ง HomeWhiz จะมี ก ารเปิ ด การเชื ่ อ มตู อ ไรู ส ายโดยอั ต โนมั ต ิ ในการเปิ ด ใชู ง าน หรื อ ปิ ด ใชู ง านการเชื ่ อ มตู อ ไรู ส าย กรุ ณ าด่ 4.6.8.2 “การเชื ่ อ มตู อ ไรู ส าย 3” หากคุ...
- Page 39 4.3.16.5 การแก้ ไ ขปั ญหา ปฏิ บ ั ต ิ ด ั ง ตู อ ไปนี ้ หากคุ ณ มี ป ั ญ หากั บ การควบคุ ม หรื อ การเชื ่ อ มตู อ สั ง เกตวู า ยั ง มี ป ั ญ หาเกิ ด ขึ ้ น หรื อ ไมู...
- Page 40 4.4 การบำ า รุ ง รั ก ษาและการทำ า ความสะอาด ชู ว งอายุ ก ารใชู ง านของผลิ ต ภั ณ ฑ์ จ ะยื ด ยาวออกไปและปั ญ หาที ่ พ บเจอบู อ ยจะลดลงถู า ทำ า ความ สะอาดตามชู ว งเวลาอยู า งสมำ ่ า เสมอ 4.4.1 การทำ...
- Page 41 หลั ง จากการซั ก ลู า งทุ ก รอบ ทำ า ใหู แ นู ใ จวู า ไมู ม ี ส ิ ่ ง แปลกปลอมคู า งอยู ่ ใ นถั ง ถู า ปากของผนั ง ทู อ ในร่ ป ติ ด ขั ด ใหู ใ ชู ไ มู จ ิ ้ ม ฟั น เปิ ด ออก สารแปลกปลอมจะทำ...
- Page 42 นอกจากนี ้ กู อ นจะทำ า การขนสู ง เครื ่ อ งซั ก ผู า (เชู น เมื ่ อ เคลื ่ อ นยู า ยไปยั ง อี ก บู า นหลั ง หนึ ่ ง ) และใน กรณี ข องการเย็ น จนแข็ ง ตั ว ของนำ ้ า นำ ้ า นั ้ น จะตู อ งถ่ ก ระบายออกไปอยู า งสมบ่ ร ณ์ ข้...
- Page 43 การแก้ ไ ขปั ญหา ปั ญ หา สาเหตุ แนวทางแก้ ไ ขปั ญ หา โปรแกรมการซั ก ไมู เ ริ ่ ม ทำ า งาน ไมู ไ ดู ก ดปู ุ ม เริ ่ ม ตู น / หยุ ด ชั ่ ว ขณะ / ยกเลิ ก •...
- Page 44 ปั ญ หา สาเหตุ แนวทางแก้ ไ ขปั ญ หา ประต่ โ หลดไมู ส ามารถเปิ ด ไดู การล็ อ คประต่ จ ะทำ า งานเนื ่ อ งจากระดั บ นำ ้ า ในถั ง ซั ก • ระบายนำ ้ า ออกโดยการใชู ง านโปรแกรมปั ๊ ม นำ...
- Page 45 ปั ญ หา สาเหตุ แนวทางแก้ ไ ขปั ญ หา เวลาของโปรแกรมไมู ม ี ก ารนั บ อาจมี ก ารโหลดที ่ ไ มู ส มดุ ล ในเครื ่ อ งซั ก • ระบบตรวจจั บ การโหลดไมู ส มดุ ล แบบ ถอยหลั ง (*) อั...
- Page 46 ปั ญ หา สาเหตุ แนวทางแก้ ไ ขปั ญ หา สมรรถนะการซั ก ผู า ไมู ด ี : เสื ้ อ ผู า กลิ ่ น และชั ้ น ของแบคที เ รี ย จะกู อ ตั ว ขึ ้ น บนถั ง •...
- Page 47 ปั ญ หา สาเหตุ แนวทางแก้ ไ ขปั ญ หา เสื ้ อ ผู า ที ่ ซ ั ก ไมู ม ี ก ลิ ่ น ของนำ ้ า ยา ใสู ผ งซั ก ฟอกผิ ด ชู อ ง • ถู า ผงซั ก ฟอกถ่ ก ใสู ล งในชู อ งสำ า หรั บ การซั ก ปรั...
- Page 48 ปั ญ หา สาเหตุ แนวทางแก้ ไ ขปั ญ หา ฟองไหลออกมากเกิ น ไปจากลิ ้ น ใชู ผ งซั ก ฟอกมากเกิ น ไป • ผสมนำ ้ า ยาปรั บ ผู า นู ุ ม 1 ชู อ นโต๊ ะ กั บ นำ ้ า ½ ชั...
- Page 49 Washing Machine User Manual WTV 9745 X0A Document Number= 2820525797_EN/ 11-04-19.(15:20)
- Page 50 General safety instructions This section contains safety instructions that will help protect from risk of personal injury or property damage. Failure to follow these instructions shall void any warranty. 1.1 Life and property safety Never place the product on a carpet-covered floor. Otherwise, lack of airflow beneath the machine will cause electrical parts to overheat.
- Page 51 Laundry that is previously washed, cleaned, soiled or stained with petrol / gasoline, dry cleaning solvents or other flammable or explosive substances must not be dried in the machine as they give out flammable or explosive steam. For this reason, they must not be used in the Refresh programme or in the Wash&Wear auxiliary function selection.
- Page 52 Your product is suitable to operate in ambient temperatures between 0 C and +35 Ambient temperatures between 15 C and +25 C are ideal temperatures for your product. Do not let pets enter the product. Check inside the product before using.
- Page 53 Products such as fabric softeners must be used in accordance with manufacturer's instructions. Delicate laundry that contains silk, wool etc. must not be used in the Refresh programme and the Wash&Wear auxiliary function selection. Otherwise, wool clothes may get shrunken and other sensitive clothes may get damaged.
- Page 54 1.3 Electrical safety If the product has a failure, it should not be operated unless it is repaired by the Authorised Service Agent. There is risk of electric shock! This product is designed to resume operating in the event of powering on after a power interruption.
- Page 55 Important instructions for environment 2.1 Compliance with WEEE Directive This product complies with EU WEEE Directive (2012/19/EU). This product bears a classification symbol for waste electrical and electronic equipment (WEEE). This product has been manufactured with high quality parts and materials which can be reused and are suitable for recycling.
- Page 56 Technical specifications Supplier name or trademark Beko Model name WTV 9745 X0A Rated capacity (kg) Maximum spin speed (rpm) 1400 Built-in Height (cm) Width (cm) Depth (cm) Net weight (±4 kg.) Single Water inlet / Double Water inlet • / - • Available Electrical input (V/Hz) 220-240 V / 50Hz Total current (A) Total power (W) 2000-2350 Main model code 1214 56 / EN Washing Machine / User’s Manual...
- Page 57 4.1 Installation • Apply to the nearest authorized service agent for the installation of your product. • Preparation of the location and electrical, tap water and waste water installations at the place of installation is under customer's responsibility. • Make sure that the water inlet and discharge hoses as well as the power cable are not folded, pinched or crushed while pushing the product into its place after installation or cleaning procedures. • Make sure that the installation and electrical connections of the product are performed by authorized service agent. The manufacturer shall not be held liable for damages that may arise from procedures carried out by unauthorised persons.
- Page 58 4.1.3 Removing transportation safety bolts Loosen all transportation safety bolts with an appropriate wrench until they turn freely. Remove transportation safety bolts by turning them gently. Attach the plastic covers supplied in the User Manual bag into the holes on the rear panel.
- Page 59 4.1.5 Connecting the drain hose to the drain • Attach the end of the drain hose directly to waste water drain, washbasin or bathtub. WARNING: Your house will be flooded if the drain hose is dislocated during water draining. Moreover, there is risk of scalding due to high washing temperatures! In order to prevent such situations and make sure that the product performs water intake and drain processes without any problem, fix the drain hose securely.
- Page 60 Loosen the lock nuts on the feet by hand. Adjust the feet until the product stands level and balanced. Tighten all lock nuts again by hand. 4.1.7 Electrical connection Connect the product to a grounded outlet protected by a 16 A fuse. Our company shall not be liable for any damages that may arise when the product is used without grounding in accordance with the local regulations.
- Page 61 4.2 Preparation 4.2.1 Sorting the laundry • Sort laundry according to type of fabric, colour, and degree of soiling and allowable water temperature. • Always obey the instructions given on the garment tags. 4.2.2 Preparing laundry for washing • Laundry items with metal attachments such as, underwiring, belt buckles or metal buttons will damage the product. Remove the metal pieces or wash such clothes by putting them in a laundry bag or pillow case. This kind of clothes may overheat in the Refresh programme and in the Wash&Wear auxiliary function selection and harm your laundry.
- Page 62 4.2.3 Tips for energy saving Following information will help you use the product in an ecological and energy-efficient manner. • Operate the product in the highest load capacity allowed for the programme you have selected, but do not overload. See "4.3.3 Programme and consumption table" • Always follow the instructions on the detergent packaging. • Wash slightly soiled laundry at low temperatures. • Use faster programmes for small quantities of lightly soiled laundry. • Do not use prewash and high temperatures for laundry that is not heavily soiled or stained.
- Page 63 4.2.6 Using detergent and softener When using detergent, softener, starch, fabric dye, bleach and descaling agents; read the manufacturer's instructions written on the package and follow the dosages specified. Use measuring cup if available. The detergent drawer is composed of three compartments: –...
- Page 64 Using softeners Pour the softener into the softener compartment of the detergent drawer. • Do not exceed the (>max<) level marking in the softener compartment. • If the softener has lost its fluidity, dilute it with water before adding it in the detergent compartment. WARNING: Do not use liquid detergents or other cleaning products other than fabric softeners produced for washing machines to soften the clothes. Using liquid detergents If the product contains a liquid detergent cup: •...
- Page 65 Using starch • Add liquid starch, powder starch or the fabric dye into the softener compartment. • Do not use softener and starch together in a washing cycle. • Wipe the inside of the product with a damp and clean cloth after using starch. Using limescale remover • When required, use limescale removers manufactured specifically for washing machines only. Using bleaches • Select a programme with prewash and add the bleaching agent at the beginning of the prewash. Do not put detergent in the prewash compartment. As an alternative application, select a programme with extra rinse and add the bleach while the product is taking water from the detergent compartment during first rinsing step.
- Page 66 4.2.7 Tips for efficient washing Clothes Light Colours and Black/Dark Delicates/ Colours Whites Colours Woolens/Silks (Recommended (Recommended (Recommended (Recommended temperature range based temperature range temperature range temperature range based on soiling level: cold -40 based on soiling based on soiling on soiling level: 40-90 level: cold -40 level: cold -30...
- Page 67 4.3 Operating the product 4.3.1 Control panel WTV 9745 X0A ล ด ก ล น ่ ิ อ บ ั ผ า ฝ า ย Refresh Cottons โ ป ร แ ก ร ม อ ต ั โ...
- Page 68 4.3.3 Programme and consumption table Auxiliary functions Selectable temperature Programme range °C • • • • Cold-90 2,600 1400 Cottons • • • • Cold-90 1,800 1400 • • • • Cold-90 0,950 1400 Cold-60 0,815 1400 Cottons Eco Cold-60 45,5 0,565 1400 Cold-60 45,5 0,560 1400...
- Page 69 The auxiliary functions in the table may vary according to the model of your machine. Water and power consumption may vary subject to the changes in water pressure, water hardness and temperature, ambient temperature, type and amount of laundry, selection of auxiliary functions and spin speed, and changes in electric voltage.
- Page 70 • Synthetics You can wash your laundry (such as shirts, blouses, synthetic/cotton blended fabrics etc.) in this programme. The programme duration gets notable shorter and washing with high performance is ensured. If the quick wash function is not selected, superior washing and rinsing performance is ensured for your heavily soiled laundry.
- Page 71 Do not load more than 1 double fiber duvet (200 x 200 cm). Do not wash your duvets, pillows and etc. that contain cotton in the machine. WARNING: Do not wash the items apart from duvets such as carpets, rugs and etc. in the machine.
- Page 72 • Auto Program Use to wash frequently washable cotton, synthetic or blended (cotton+synthetic) clothes. Programme detects the type and quantity of the laundry to automatically adjust water consumption and programme time. WARNING: Do not wash your woolen and delicate clothes in this programme. Select a suitable temperature if the temperature shown on the temperature display is not compatible with the warnings on the garment label.
- Page 73 When quick function is not selected: Butter Sweat Salad Dressing Grass Collar Soil Make-up Food Machine Oil Coke Mayonnaise Baby Food • Select the stain programme. • Select the stain you want to clean by locating it in the groups above and selecting the related group with the quick auxiliary function button. • Read the garment tag carefully and ensure that correct temperature and spin speed are selected. • Downloaded Program This is a special programme that allows you to download different programmes when you want to.
- Page 74 You can also change the temperature after the washing starts. This change can be made if the washing steps allow it. Changes cannot be made if the steps do not allow it. If you scroll to cold wash option and press Temperature Adjustment button again, the recommended maximum temperature for the selected programme appears on the display.
- Page 75 You can change the spin speed after the washing starts if the washing steps allow it. Changes cannot be made if the steps do not allow it. Rinse hold If you are not going to unload your clothes immediately after the programme completes, you can use rinse hold function to keep your laundry in the final rinsing water in order to prevent them from getting wrinkled when there is no water in the machine.
- Page 76 4.3.8.1 Auxiliary functions • Prewash A Prewash is only worthwhile for heavily soiled laundry. Not using the Prewash will save energy, water, detergent and time. • Fast+ When this function is selected, the durations of the relevant programmes get shorter by 50%. Thanks to the optimised washing steps, high mechanic activity and optimum water consumption, high washing performance is achieved in spite of the reduced duration.
- Page 77 for washing machines into the detergent compartment no. “2”. This programme contains a drying step that runs after the drum cleaning step to dry the inside of the machine. This is not a washing programme. It is a maintenance programme. Do not run the programme when there is something in the machine.
- Page 78 4.3.9 End Time Time display Remaining time for the completion of the programme while it is running is displayed as “01:30” in hours and minutes format. Programme time may differ from the values in section "Programme and consumption table" depending on the water pressure, water hardness and temperature, ambient temperature, amount and the type of laundry, auxiliary functions selected and the changes at the mains voltage.
- Page 79 3 Loading door is locked. The door lock symbol appears on the display after the loading door is locked. 4 Programme follow-up indicator lights on the display will show the current programme step. 4.3.11 Loading door lock There is a locking system on the loading door of the machine that prevents opening of the loading door in cases when the water level is unsuitable.
- Page 80 4.3.12 Changing the selections after programme has started Adding laundry after the programme has started button, the If the water level in the machine is suitable when you press Start/Pause door lock will be deactivated and the door will open, allowing you to add garments. The door lock icon on the display goes off when the door lock is deactivated.
- Page 81 4.3.13 Cancelling the programme The programme is cancelled when the machine is turned off and on again. Press and hold button for 3 seconds. After the countdown as "3-2-1" on the display is over, the On/Off machine turns off. If you press On/Off button when the Child Lock is enabled, the programme will not be cancelled.
- Page 82 When safety warning is given, • To use the HomeWhiz function, the app must be installed on your smart device and your washing machine must be connected to your home network. If your washing machine is not connected to the network it works as an appliance which does not have HomeWhiz function. You product will operate as connected to the wireless network at your home network.
- Page 83 In this step, go to the network settings menu of your smart device and select • “HomeWhiz-Washer-xxxx“. You can see the password of the network on the HomeWhiz app. After connecting your smart device to the "HomeWhiz" network, return to the •...
- Page 84 4.3.16.3 Deleting HomeWhiz Account Linking To delete the linking of a washing machine that has been paired with someone else’s account, follow the steps below. Use the On/Off key to switch on your machine. • When your machine is on, press and hold the auxiliary function button 4 and Time •...
- Page 85 In the event that HomeWhiz function cannot be turned on, the function frame on the button will be off. Wireless settings being Off or the washing machine's door being open are examples for such cases. Once you activate this function on the washing machine, it will remain enabled apart from certain conditions and allow you to control your washing machine remotely via the internet regardless of whether the washing machine is switched on or off and independently from location.
- Page 86 4.4 Maintenance and cleaning Service life of product extends and frequently experienced problems will be reduced if it is cleaned at regular intervals. 4.4.1 Cleaning the detergent drawer Clean the detergent drawer at regular intervals (every 4-5 washing cycles) as shown below in order to prevent accumulation of powder detergent in time.
- Page 87 4.4.4 Cleaning the water intake filters There is a filter at the end of each water intake valve at the rear of the machine and also at the end of each water intake hose where they are connected to the tap. These filters prevent foreign substances and dirt in the water to enter the washing machine.
- Page 88 2. Open the filter cover. 3 Follow the below procedures in order to drain water. The product has an emergency water draining hose, in order to drain the water: Pull the emergency draining hose out from its seat Place a large container at the end of the hose.
- Page 89 Troubleshooting Problem Cause Solution Programs do not start after • Press Start / Pause / Cancel button. Start / Pause / Cancel button is not pressed. the loading door is closed. • Reduce the amount of laundry and It may be difficult to close the loading door in case make sure that the loading door is of excessive loading.
- Page 90 Problem Cause Solution Loading door cannot be Loading door lock is activated because of the • Drain the water by running the Pump or Spin programme. water level in the product. opened. • Wait until the programme completes. Product is heating up the water or it is at the spinning cycle.
- Page 91 Problem Cause Solution Product does not switch to There is unbalanced load in the product. • Automatic unbalanced load detection system is activated due to the spinning step. (*) unbalanced distribution of the laundry in the product. • Check the filter and the draining hose. The product will not spin if water is not drained completely.
- Page 92 Problem Cause Solution Colour of the clothes faded. Excessive laundry was loaded in. • Do not load the product in excess. (**) Detergent in use is damp. • Keep detergents closed in an environment free of humidity and do not expose them to excessive temperatures.
- Page 93 Problem Cause Solution Detergent residue in the Detergent was put in wet drawer. • Dry the detergent drawer before putting in detergent. detergent drawer. (**) • Keep detergents closed in an Detergent has gotten damp. environment free of humidity and do not expose them to excessive temperatures.
- Page 94 Problem Cause Solution Laundry remains wet at the Excessive foam has occurred and automatic foam • Use recommended amount of detergent. absorption system has been activated due to too end of the programme. (*) much detergent usage. (*) The product does not switch to spinning step when the laundry is not evenly distributed in the drum to prevent any damage to the product and to its surrounding environment.
- Page 96 www.beko.com...
Need help?
Do you have a question about the WTV 9745 X0A and is the answer not in the manual?
Questions and answers