
Subscribe to Our Youtube Channel
Related Manuals for Argon 18 GALLIUM PRO DISC 338A 2021


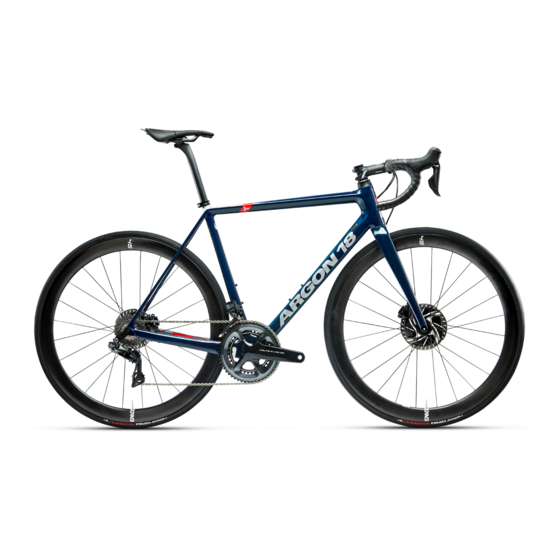
Summary of Contents for Argon 18 GALLIUM PRO DISC 338A 2021
- Page 1 GALLIUM PRO DISC 338A: ASSEMBLY GUIDE Valid for MY2021 Gallium Pro Disc 338A Revision 1.0 - 12.01.2020...
-
Page 2: Table Of Contents
6. Min/Max Seat Post Insertion ......23 For the warranty to be valid, the bicycle must be fully assembled by an authorized Argon 18 dealer. High-end components, particularly carbon parts, need extra care when assembled. -
Page 3: Tools Needed And First Aid Kit
GALLIUM PRO DISC 338A: 1. Tools Needed and First Aid Kit Tools needed for assembly 1: Bearing Cup Press (Park Tool HHP-2) 2: Allen Key Set 3: Grease 4: Utility Pick Set (Park Tool Item #UP-SET) 5: Clean Rags 6: Derailleur Hanger Alignment Gauge (Park Tool Item #DAG-2 or #DAG-2.2) 7: Cables and Housing Cutter 8: Carbon Paste 9: Loctite #242... -
Page 4: Frameset Inspection
GALLIUM PRO DISC 338A: 2. Frameset Inspection BEFORE ASSEMBLING YOUR NEW GALLIUM PRO DISC, MAKE SURE THAT YOU HAVE ALL THE FOLLOWING: 1. Frameset parts (see p.5-6) 2. All the necessary bolts (refer to Frameset Parts, p.5-6) WHEN ASSEMBLING YOUR NEW GALLIUM PRO DISC, MAKE SURE YOU FOLLOW THIS PROCEDURE: 3. -
Page 5: Frameset Parts, Skus And Descriptions
GALLIUM PRO DISC 338A: 3. Frameset Parts 80546 80554 80812 80802 80553 80555 80807 38879 80813 80832 80548 80551 80547 80805 80804 80811 80550 81453 80549 SP.GAPD.338A 80552 FK.GAPD.XXS-S.338A FK.GAPD.M-XL.338A 38446... - Page 6 GALLIUM PRO DISC 338A: 4. Parts’ SKUs and Descriptions* Name Assembled on A18 SKU# Parts already assembled Flat Head Socket Cap Screw - M3 x 0.5 x 10mm LG Frame 80555 Water Bottle Cage Screw - M5 x 16mm LG Frame 80807 Rear Derailleur Hanger Assembly...
-
Page 7: Assembly Instructions
GALLIUM PRO DISC 338A: 4.1. Headset Installation Install the 3D headset (9) according to the pressfit assembly guide. You can choose from 3 different heights: 25mm, 15mm or 0mm. IMPORTANT: No more than 30mm of spacers can be placed between the stem and the top cap of the 3D system. -
Page 8: Seat Post Collar Assembly
GALLIUM PRO DISC 338A: 4.2. Seat Post Collar Assembly Assemble the seat post collar (2) with the seat post (3). Apply carbon paste inside the frame’s seat tube and on the seat post where it inserts inside the frame. Tighten the bolt at 4 Nm. CARBON PASTE... -
Page 9: Seat Post Assembly
GALLIUM PRO DISC 338A: 4.3. Seat Post Assembly The seat post (3) is supplied fully assembled. It’s equipped with a spring-loaded head for easy installation of the saddle. 1. Unscrew both bolts slightly until the top clamp (a) and the cradle (b) are separated enough to insert the saddle rail. - Page 10 GALLIUM PRO DISC 338A: 4.3. Seat Post Assembly 25mm offset 15mm offset The top clamp (a) and the cradle (b) can be flipped to change the saddle offset between 15 or 25mm.
-
Page 11: Rear Derailleur Hanger Adjustment
GALLIUM PRO DISC 338A: 4.4. Rear Derailleur Hanger Adjustment 1. Select the correct rear derailleur hanger depending on the type of derailleur that you have. - Direct mount (15) - Regular mount (1) 2. Make sure to align the rear derailleur hanger. 3. -
Page 12: Mechanical Groupset Specification
GALLIUM PRO DISC 338A: 4.5. Mechanical groupset specification Start installation at this end. Insert derailleur cables with hoses using plastic Cable Stopper (5). Insert hydraulic brake hose as shown, using the Oblong Cable Guide (4). DC+DH DC+DH BR = Brake Hose DC = Derailleur Cable (mech.) DH = Derailleur Housing (mech.) - Page 13 GALLIUM PRO DISC 338A: 4.5. Mechanical groupset specification DC = Derailleur Cable (mech.) Exit derailleur cables through bottom bracket (BB) hole. Insert in the appropriate slots in the BB guide (6). Making sure the pipe is aligned with the top hole, insert BB guide in the square hole until it clicks.
- Page 14 GALLIUM PRO DISC 338A: 4.5. Mechanical groupset specification DC+DH BR = Brake Hose Exit the hydraulic brake hose through DC = Derailleur Cable (mech.) the hole on the chain stay. DH = Derailleur Housing (mech.)
-
Page 15: Electronic (Di2) Groupset Specification
GALLIUM PRO DISC 338A: 4.6. Electronic (Di2) groupset specification Start installation at this end. Insert electronic wire and hydraulic brake hose as shown with the use of the Oblong Cable Guide (4), Oblong Plug (9) and Oblong Grommet (10). BR = Brake Hose EW = Electronic Wire... - Page 16 GALLIUM PRO DISC 338A: 4.6. Electronic (Di2) groupset specification EW = Electronic Wire Use the square hole to connect all the wires to the junction box. Insert the junction box in the hole. Insert the BB cover (11) in the square hole until it clicks. Use the Round Grommet (12) to secure the Di2 cable in the FD hole.
- Page 17 GALLIUM PRO DISC 338A: 4.6. Electronic (Di2) groupset specification BR = Brake Hose Exit the hydraulic brake hose through EW = Electronic Wire the hole on the chain stay.
- Page 18 GALLIUM PRO DISC 338A: 4.6. Electronic (Di2) groupset specification The Di2 battery is hidden in the seatpost; use the Di2 battery holder (13) to fix the battery correctly. Apply a slight amount of grease on both parts. GREASE...
-
Page 19: Electronic (Wireless) Groupset Specification
GALLIUM PRO DISC 338A: 4.7. Electronic (Wireless) groupset specification Start installation at this end. Insert hydraulic brake hose shown with the use of the Oblong Cable Guide (4) and Oblong Plugs (9). BR = Brake Hose... - Page 20 GALLIUM PRO DISC 338A: 4.7. Electronic (Wireless) groupset specification Use the square hole to connect all the wires to the junction box. Insert the junction box in the hole. Insert the BB cover (11) in the square hole until it clicks. Use the Round Plugs (7) to plug holes near the FD hanger and BB.
- Page 21 GALLIUM PRO DISC 338A: 4.7. Electronic (Wireless) groupset specification BR = Brake Hose Exit the hydraulic brake hose through the hole on the chain stay.
-
Page 22: Troubleshooting / Tips / Specification
Axles Thru-axles 12mm, DT Swiss type, with removable handle. Axles are included with frameset. Tire Clearance Up to 30mm tire clearance (28c). Seat Post 27.2mm (Argon 18 Gallium Seat Post Assembly Included) Seat Post Clamp 30.7mm Bottom Bracket BB86 (Press-fit) Headset FSA No 37 + 3D Press-fit (Bearing 1 1/8”... -
Page 23: Min/Max Seat Post Insertion
GALLIUM PRO DISC 338A: 6. Min/Max Seat Post Insertion Refer to the tables below for details on Saddle Height and SeatPost insertion limits. The correct frame size must be determined according to the saddle height limits. A. Minimum Saddle Height D.
Need help?
Do you have a question about the GALLIUM PRO DISC 338A 2021 and is the answer not in the manual?
Questions and answers