Advertisement
Quick Links
Advertisement

Related Manuals for Kogan KAWLM70TLTA


Summary of Contents for Kogan KAWLM70TLTA
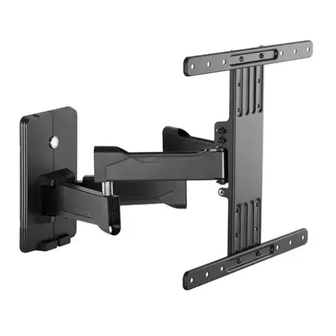
- Page 1 PREMIUM TILT EXTENDABLE FULL MOTION WALL MOUNT (32"-70") KAWLM70TLTA...
-
Page 3: Safety And Warnings
SAFETY & WARNINGS CAUTION: Rated weight is 45kg (99 lbs). Use with products heavier than the rated weights indicated may result in instability causing possible injury. • Please closely follow the assembly instructions. Improper installation may result in damage or serious personal injury. •... - Page 4 COMPONENTS Wall mount assembly: A (x1) B (x1) C (x2) D (x4) E 4mm (x1) F (x1) W-A ST8x90 (x5) W-B Ø12x60 (x5) W-C (x4) Adapters (depends on TV): M-A M5x14 (x4) M-B M6x14 (x4) M-C M6x30 (x4) M-D M8x30 (x4) M-E M8x50 (x4) M-F D5 (x4) M-G D8 (x4)
- Page 5 ASSEMBLY Step 1: Getting started Pull the extendable arms out away from the base, then remove the base cover. A minimum of two people are recommended for this installation. Failure to use safety gear and safe working methods may result in property damage, serious injury, or death.
- Page 6 Step 2: Drywall, plaster or timber walls (with studs) Use a stud finder to locate safe and suitable locations to install into wall. Use a spirit level to double check the correct angle of the mount and mark the intended hole positions with a pencil (2a).
- Page 7 Step 2: Concrete and masonry walls Use a spirit level to double check the correct angle of the mount and mark the intended hole positions with a pencil (2b). Drill holes in the desired locations (95mm deep, 12mm wide) (2b). Insert the screw anchors (W-B) into each pre-drilled hole, then insert the top screw (W-A) first to support the mount (2c).
- Page 8 Step 3: Once the wall mount is secured in place, the base cover can be replaced.
- Page 9 Step 4: Set the mounting brackets for your required VESA configuration 400mm 300mm 200mm...
- Page 10 Step 5: Attaching the mounting brackets to your TV. Depending on your TV, a combination of spacers (M-H, M-I) may be required to help create the correct amount of space for the brackets. Ensure the screws are fitted correctly into your TV’s VESA mount holes, and are not too long or too short in the back of the TV.
- Page 11 Step 6: Attaching the TV to the wall mount. Ensure a gap of at least 4mm on the two upper mount bracket bolts (1) to allow the two openings on the mount to slide into place (2), while also removing the lower screw of the mount bracket (1).
- Page 12 Step 7: Use the supplied cable management clips to secure all of the TV’s power and connection cables, as shown below. For cable management, remove the plastic clips as shown.
- Page 13 ADJUSTING Adjusting level angle: Loosen the nuts on the back of the mount (as shown below) to balance the TV’s level. When done, ensure nuts are securely tightened. Adjusting tilt angle: Loosen the nuts on the side of the mount (as shown below) to adjust the TV’s tilt angle.
- Page 14 NOTES...
- Page 15 NOTES...
- Page 16 Need more information? We hope that this user guide has given you the assistance needed for a simple set-up. For the most up-to-date guide for your product, as well as any additional assistance you may require, head online to help.kogan.com...
Need help?
Do you have a question about the KAWLM70TLTA and is the answer not in the manual?
Questions and answers