
Related Manuals for Edimax BR-6215SRg


Summary of Contents for Edimax BR-6215SRg
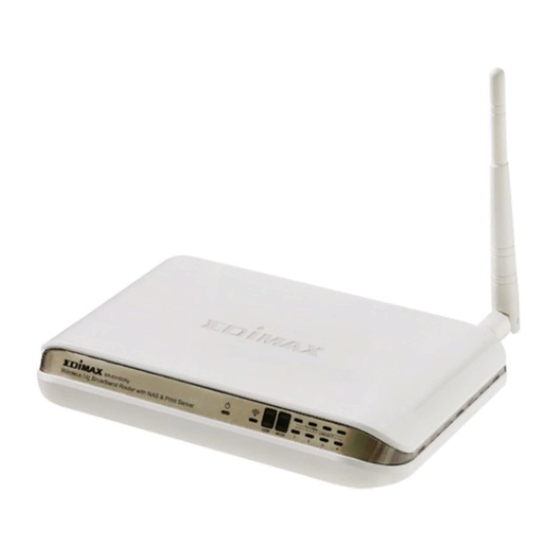
- Page 1 BR-6315SRg Wireless IEEE 802.11b/g Broadband Router with NAS and Print Server User’s Manual Version: 1.0(October, 2007)
- Page 3 Copyright© by Edimax Technology Co, LTD. all rights reserved. No part of this publication may be reproduced, transmitted, transcribed, stored in a retrieval system, or translated into any language or computer language, in any form or by any means, electronic, mechanical, magnetic, optical , chemical, manual or otherwise, without the prior written permission of this company.
-
Page 4: Table Of Contents
Introduction... 5 Chapter 1... 18 1.1 Cable Modem ... 20 1.2 Fixed-IP xDSL ... 21 1.3 PPPoE ... 23 1.4 PPTP ... 25 1.5 L2TP ... 27 1.6 Telstra Big Pond ... 29 Chapter 2... 31 2.1 System... 33 2.1.1 Time Zone... 34 2.1.2 Password Settings ... - Page 5 2.4.4 Access Control... 57 2.5 QoS ... 59 2.6 NAT... 63 2.6.1 Port Forwarding ... 65 2.6.2 Virtual Server ... 67 2.6.3 Special Applications ... 69 2.6.4 UPnP Settings ... 72 2.6.5 ALG Settings... 73 2.6.6 Static Routing ... 74 2.7 Firewall ...
- Page 6 3.7 Statistics ...126 Chapter 4...127 4.1 Configuration Tools ...127 4.2 Firmware Upgrade ...128 4.3 Reset ...129 Appendix A ...131 Glossary ...133...
-
Page 7: Introduction
Introduction Congratulations on purchasing BR-6315SRg wireless broadband router. This wireless broadband router is a cost-effective Internet access sharing router with NAS and print server function, which enables multiple users to share Internet connection, files and printer through a single internet connection. Simply configure Internet connection settings of this wireless broadband router, connect your PC to the LAN port of this router, and you're ready to share files and access the Internet. - Page 8 - Network Interface Card (NIC) for each Personal Computer (PC) - Computer with a Web-Browser (Internet Explorer 5.0 or higher / Netscape Navigator 7.2 or higher) Package Contents - One Wireless broadband router - One Quick Installation Guide - One User Manual CD - One Power Adapter - Ethernet Cable - Antenna...
- Page 9 Back Panel The diagram (fig1.0) below shows the broadband router’s back panel. The router’s back panel is divided into four sections, LAN, WAN, USB, and Reset: Figure 1.0 1) Local Area Network (LAN) The Broadband router’s 4 LAN ports are where you connect your LAN’s PCs, hubs / switches etc.
- Page 10 Light Status Router is powered on WAN port is connected at 100Mbps 10/100M WAN port is connected at 10Mbps WAN is connected WAN is unconnected LNK/ACT Flashing WAN port is sending / receiving data LAN port is connected at 100Mbps 10/100M LAN port is connected at 10Mbps (Port 1-4)
- Page 11 Setup Diagram Figure 1.2 below shows a typical setup for a Local Area Network (LAN). Getting started This is a step-by-step instruction on how to start using the router and get connected to the Internet. 1) Setup your network as shown in the setup diagram above (fig 1.2). 2) You will need to set your LAN PC clients so that it can obtain an IP address automatically.
- Page 12 following is a step-by-step illustration on how to configure your PC to obtain an IP address automatically for: 2a) Windows 95/98/Me 2b) Windows XP 2c) Windows 2000, and 2d) Windows NT. 2a) Windows 95/98/Me 1. Click the Start button and select Settings, then click Control Panel. The Control Panel window will appear.
- Page 13 8. Reboot the PC. Your PC will now obtain an IP address automatically from your Broadband Router’s DHCP server. Note: Please make sure that the Broadband router is the only DHCP server on your LAN. Once you’ve configured your PC to obtain an IP address automatically, please proceed to Step 3 2b) Windows XP 1.
- Page 14 5. Click OK to confirm the setting. Your PC will now obtain an IP address automatically from your Broadband Router’s DHCP server. Note: Please make sure that the Broadband router is the only DHCP server on your LAN. Once you’ve configured your PC to obtain an IP address automatically, please proceed to Step 3 2c) Windows 2000 1.
- Page 15 6. Click OK to confirm the setting. Your PC will now obtain an IP address automatically from your Broadband Router’s DHCP server. Note: Please make sure that the Broadband router is the only DHCP server on your LAN. Once you’ve configured your PC to obtain an IP address automatically, please proceed to Step 3 2d) Windows NT 1.
- Page 16 4. In the Select Network Protocol window, select the TCP/IP Protocol and click the Ok button to start installing the TCP/IP protocol. You may need your Windows CD to complete the installation. 5. After you install TCP/IP, go back to the Network window. Select TCP/IP from the list of Network Protocols and then click the Properties button.
- Page 17 3) Once you have configured your PCs to obtain an IP address automatically, the router’s DHCP server will automatically give each of your LAN clients an IP address. By default the Broadband Router’s DHCP server is enabled so that you can obtain an IP address automatically. To see if you have obtained an IP address, see Appendix A.
- Page 18 four sections, Quick Setup Wizard, General Setup, Status Info and System Tools. Quick Setup Wizard (Chapter 1) Select your Internet connection type and setup the configurations needed to connect to your Internet Service Provider (ISP). General Setup (Chapter 2) This section contains configurations for the Broadband router’s advanced functions such as: address mapping, virtual server, access control, hacker attack prevention, DMZ, special applications and other functions to meet your needs.
- Page 19 backup (save), restore, or restore to factory default configuration for your Broadband router. The firmware upgrade tool allows you to upgrade your Broadband router's firmware. The RESET tool allows you to reset your Broadband router. 7) Click on Quick Setup Wizard (see chapter 1) to start configuring settings required by your ISP so that you can start accessing the Internet.
-
Page 20: Chapter 1
Chapter 1 Quick Setup The Quick Setup section is designed to get you using the broadband router as quickly as possible. In the Quick Setup you are required to fill in only the information necessary to access the Internet. Once you click on the Quick Setup Wizard in the HOME page, you should see the screen below. -
Page 21: Pppoe Xdsl
Click on NEXT to proceed to the next page (step 2): Broadband Type. Step 2) Broadband Type In this section you have to select one of four types of connections that you will be using to connect your broadband router’s WAN port to your ISP (see screen below). -
Page 22: Cable Modem
L2TP xDSL Your ISP requires you to use a Layer Two Tunneling Protocol (L2TP) Telstra Big Pond This Protocol only used for Telstra Big Pond Internet service in Australia Click on one of the WAN type and then proceed to the manual’s relevant sub-section (1.1, 1.2, 1.3, 1.4, 1.5 or 1.6). -
Page 23: Fixed-Ip Xdsl
section or use the “Clone MAC Address” button to replace the WAN MAC address with the MAC address of that PC (you have to be using that PC for the Clone MAC Address button to work). To find out the PC’s MAC address see Appendix A. - Page 24 Click <OK> when you have finished the configuration above. Congratulations! You have completed the configuration for the Fixed-IP x DSL connection. You can start using the router now, if you wish to use some of the advance features supported by this router see chapter 2, 3,...
-
Page 25: Pppoe
1.3 PPPoE Select PPPoE if your ISP requires the PPPoE protocol to connect you to the Internet. Your ISP should provide all the information required in this section. Parameter Enter the User Name provided by your ISP for the PPPoE User Name connection Enter the Password provided by your ISP for the PPPoE... - Page 26 that no one is using the Internet exceeds the “Idle Time”. If you select “Manual”, the router will connect to ISP only when you click “Connect” manually from the Web management interface. The WAN connection will not disconnect because of idle timeout. If the WAN line drops and connected at a latter time again, the router will not connect to the ISP by itself.
-
Page 27: Pptp
1.4 PPTP Select PPTP if your ISP requires the PPTP protocol to connect you to the Internet. Your ISP should provide all the information required in this section. Parameter Obtain an IP The ISP requires you to obtain an IP address by DHCP address automatically before connecting to the PPTP server. - Page 28 Gateway Enter the IP address of the ISP’s Gateway Enter the User Name provided by your ISP for the PPTP User ID connection. Sometimes called as Connection ID Enter the Password provided by your ISP for the PPTP Password connection If your LAN has a PPTP gateway, then enter that PPTP gateway’s IP address here.
-
Page 29: L2Tp
properly when you use this function in the first time, especially your ISP charge you by time used Click <OK> when you have finished the configuration above. Congratulations! You have completed the configuration for the PPTP connection. You can start using the router now, if you wish to use some of the advance features supported by this router see chapter 2, 3, 4. - Page 30 Your ISP may require a particular MAC address to connect to the Internet. This MAC address is the PC's MAC address that you originally made your Internet connection. Type in this MAC address in this section or MAC Address use the "Clone MAC Address" button to replace the WAN MAC address with the MAC address of that PC (you have to be using that PC for the Clone MAC Address button to work).
-
Page 31: Telstra Big Pond
The WAN “idle timeout" auto-disconnect function may not work due to abnormal activities of some network application software, computer virus or hacker attacks from the Internet. For example, some software sends network packets to the Internet in the background, even when you are not using the Internet. - Page 32 Big Pond connection Password Enter the Password provided by your ISP for the Telstra Big Pond connection User decide login Select if you want to assign the IP of Telstra Big Pond’s server manually login server manually. Login Server The IP of the Login Server. Click <OK>...
-
Page 33: Chapter 2
Chapter 2 General Settings Once you click on the General Setup button at the Home Page, you should see the screen below. If you have already configured the Quick Setup Wizard, you DO NOT need to configure anything thing in the General Setup screen for you to start using the Internet. - Page 34 the Quick Setup Wizard section) You can specify the LAN segment’s IP address, subnet Mask, enable/disable DHCP and select an IP range for your LAN Wireless Setup the wireless LAN’s SSID, WEP key, MAC filtering. You can setup the QoS bandwidth control policy. You can configure the Address Mapping, Virtual Server and Special Applications functions in this section.
-
Page 35: System
2.1 System The system screen allows you to specify a time zone, to change the system password and to specify a remote management user for the broadband router. Parameters Select the time zone of the country you are living. The Time Zone router will set its time based on your selection Password Settings Allows you to define a password in order to access the... -
Page 36: Time Zone
2.1.1 Time Zone The Time Zone allows your router to reference or base its time on the settings configured here, which will affect functions such as Log entries and Firewall settings. Parameter Select the time zone of the country you are living. The Set Time Zone router will set its time based on your selection. -
Page 37: Password Settings
2.1.2 Password Settings You can change the password required to log into the broadband router's system web-based management. By default, there is no password. So please assign a password to the Administrator as soon as possible, and store it in a safe place. -
Page 38: Remote Management
2.1.3 Remote Management The remote management function allows you to designate a host in the Internet the ability to configure the Broadband router from a remote site. Enter the designated host IP Address in the Host IP Address field. Parameters This is the IP address of the host in the Internet that will have management/configuration access to the Broadband router from a remote site. - Page 39 e.g. 10.0.0.1:8080 (see below). You’ll also need to know the password set in the Password Setting screen in order to access the router’s web-based management. Port The port number of remote management web interface. Enabled Select “Enabled” to enable the remote management function.
-
Page 40: Wan
2.2 WAN Use the WAN Settings screen if you have already configured the Quick Setup Wizard section and you would like to change your Internet connection type. The WAN Settings screen allows to specify the type of WAN port connect you want to establish with your ISP. -
Page 41: Dynamic Ip
You can specify a DNS server that you wish to use You can specify a DDNS server that you wish to use and DDNS configure the user name and password provided by you DDNS service provider. Once you have made a selection, click <More Configuration> at the bottom of the screen and proceed to the manual’s relevant sub-section 2.2.1 Dynamic IP Choose the Dynamic IP selection if your ISP will assign you an IP address... -
Page 42: Dns
2.2.7 DNS A Domain Name System (DNS) server is like an index of IP addresses and Web addresses. If you type a Web address into your browser, such as www.router.com, a DNS server will find that name in its index and the matching IP address. -
Page 43: Ddns
now configure other advance sections or start using the router (with the advanced settings in place) 2.2.8 DDNS DDNS allows you to map the static domain name to a dynamic IP address. You must get an account, password and your static domain name from the DDNS service providers. - Page 44 Click <Apply> at the bottom of the screen to save the configurations. You can now configure other advance sections or start using the router.
-
Page 45: Lan
2.3 LAN The LAN Port screen below allows you to specify a private IP address for your router’s LAN ports as well as a subnet mask for your LAN segment. Parameters Default IP address 192.168.2.1 IP Subnet Mask 255.255.255.0 802.1d Spanning Disabled Tree DHCP Server... - Page 46 Lease Time IP Address Pool Domain Name Click <Apply> at the bottom of the screen to save the configurations. You can now configure other advance sections or start using the router. router will automatically give your LAN clients an IP address. If the DHCP is not enabled then you’ll have to manually set your LAN client’s IP addresses;...
-
Page 47: Wireless
2.4 Wireless Wireless Access Point builds a wireless LAN and can let all PCs equipped with IEEE 802.11b or 801.11g wireless network adaptor connect to your Intranet. It supports WEP and WPA2 encryption to enhance the security of your wireless network. -
Page 48: Basic Settings
2.4.1 Basic Settings You can set parameters that are used for the wireless stations to connect to this router. The parameters include Mode, ESSID, Channel Number and Associated Client. Parameters Default Mode Band ESSID default Channel Number Description It allows you to set the AP to AP, Bridge or WDS mode. - Page 49 address Set Security Click <Apply> at the bottom of the screen to save the configurations. You can now configure other advanced sections or start using the router (with the advanced settings in place) you have to set this access point to “AP Bridge-Point to Point mode”, “AP Bridge-Point to Multi-Point mode”...
-
Page 50: Advanced Settings
2.4.2 Advanced Settings You can set advanced wireless LAN parameters of this router. The parameters include Authentication Type, Fragment Threshold, RTS Threshold, Beacon Interval, preamble Type, etc. You should not change these parameters unless you know their function and effects. Parameters "Fragment Threshold"... - Page 51 buffered data which still exists on the AP and waiting for pickup. The “Data Rate” is the rate this access point used to transmit data packets. The access point will use the Data Rate highest possible selected transmission rate to transmit the data packets.
-
Page 52: Security
2.4.3 Security This Router provides complete wireless LAN security functions, include WEP, IEEE 802.11x, IEEE 802.11x with WEP, WPA with pre-shared key and WPA with RADIUS. With these security functions, you can prevent your wireless LAN from illegal access. Please make sure your wireless stations use the same security function. - Page 53 Default Key Key 1 - Key Click <Apply> at the bottom of the screen to save the configurations. You can now configure other advance sections or start using the router. "0-9") to be the WEP Key. For example: ASCII Characters: guest Hexadecimal Digits: 12345abcde Select one of the four keys to encrypt your data.
-
Page 54: Only
2.4.3.2 802.1x only IEEE 802.1x is an authentication protocol. Every user must use a valid account to login to this Access Point before accessing the wireless LAN. The authentication is processed by a RADIUS server. This mode only authenticates user by IEEE 802.1x, but it does not encryption the data during communication. -
Page 55: Wep Static Key
2.4.3.3 802.1x WEP Static key IEEE 802.1x is an authentication protocol. Every user must use a valid account to login to this Access Point before accessing the wireless LAN. The authentication is processed by a RADIUS server. This mode also uses WEP to encrypt the data during communication. -
Page 56: Wpa Pre-Shared Key
2.4.3.4 WPA Pre-shared key Wi-Fi Protected Access (WPA) is an advanced security standard. You can use a pre-shared key to authenticate wireless stations and encrypt data during communication. It uses TKIP or CCMP (AES) to change the encryption key frequently. So the encryption key will not be known by hackers easily, and this will improve security. - Page 57 Hexadecimal Digits: 12345abcde The Pre-shared key is used to authenticate and encrypt data transmitted over the wireless network. Fill the text box by Pre-shared following the rules listed here: Hex WEP: input 64-digit Hex values (“A-F”, “a-f” and “0-9”) or at least 8 character pass phrase as the pre-shared keys.
-
Page 58: Wpa Radius
2.4.3.5 WPA Radius Wi-Fi Protected Access (WPA) is an advanced security standard. You can use an external RADIUS server to authenticate wireless stations and provide the session key to encrypt data during communication. It uses TKIP or CCMP (AES) to change the encryption key frequently, and this will improve security. Parameters TKIP will change the encryption key frequently to enhance WPA(TKIP) -
Page 59: Access Control
Click <Apply> at the bottom of the screen to save the configurations. You can now configure other advance sections or start using the router. 2.4.4 Access Control This wireless router provides MAC Address Control, which prevents unauthorized MAC Addresses from accessing your wireless network. Parameters... - Page 60 selections. Click <Apply> at the bottom of the screen to save the configurations. You can now configure other advance sections or start using the router.
-
Page 61: Qos
2.5 QoS The QoS function can classify Internet application traffic by source/destination IP address and port number. You can assign priority for each type of application and reserve bandwidth for it. The packets of applications with higher priority will always go first. Lower priority applications will get bandwidth after higher priority applications get enough bandwidth. - Page 62 Parameters You can check “Enable QoS” to enable QoS function for Enable/Disable the WAN port. You also can uncheck “Enable QoS” to disable QoS function for the WAN port. Total Download Here you can set maximum download bandwidth for all the Bandwidth users of the router.
- Page 63 Parameters Rule Name The name of this rule. You can assign the download or upload bandwidth in Kbps (1024 bit per second). You can limit the maximum Bandwidth bandwidth consumed by this rule by selecting “Maximum”. You also can reserve enough bandwidth for this rule by selecting “Guarantee”.
- Page 64 Enter the remote port range of the packets that this rule will apply to. You can assign a single port number here or assign a range of port numbers by assigning the first port Remote Port number and the last port number of the range. The two Range numbers are separated by a dash “-“, for example “101-150”...
-
Page 65: Nat
2.6 NAT Network Address Translation (NAT) allows multiple users at your local site to access the Internet through a single Public IP Address or multiple Public IP Addresses. NAT provides Firewall protection from hacker attacks and has the flexibility to allow you to map private IP addresses to public IP addresses for key services such as Websites and FTP. - Page 66 others. In this section you can configure the router to support these types of applications. It allows to enable or disable UPnP feature here. After you enable the UPnP feature, all client systems that support UPnP, like Windows XP, can discover this router automatically and access the Internet through this router UPnP Setting without any configuration.
-
Page 67: Port Forwarding
2.6.1 Port Forwarding The Port Forwarding allows you to redirect a particular range of service port numbers (from the Internet/WAN Ports) to a particular LAN IP address. It helps you to host some servers behind the router NAT firewall. Parameters Enable Port Enable Port Forwarding Forwarding... - Page 68 Forwarding "Comment" of the setting to be added and then click "Add". Then this Port Forwarding setting will be added into the "Current Port Forwarding Table" below. If you found any typo before adding it and want to correct it, just click "Clear"...
-
Page 69: Virtual Server
2.6.2 Virtual Server Use the Virtual Server function when you want different servers/clients in your LAN to handle different service/Internet application type (e.g. Email, FTP, Web server etc.) from the Internet. Computers use numbers called port numbers to recognize a particular service/Internet application type. The Virtual Server allows you to redirect a particular service port number (from the Internet/WAN Port) to a particular LAN private IP address and its service port number. - Page 70 packet enters your LAN (to the LAN Server/Client IP) Select the port number protocol type (TCP, UDP or both). Type If you are unsure, keep it untouched. Enter the service (service/Internet application) port number from the Internet that will be redirected to the above Private IP address host in your LAN Public Port Note: Virtual Server function will have priority over the...
-
Page 71: Special Applications
Example: Virtual Server The diagram below demonstrates one of the ways you can use the Virtual Server function. Use the Virtual Server when you want the web server located in your private LAN to be accessible to Internet users. The configuration below means that any request coming form the Internet to access your web server will be translated to your LAN’s web server (192.168.2.2). - Page 72 Parameters Enable Trigger Enable the Special Application function. Port This is the outgoing (Outbound) range of port numbers for Trigger Port this particular application Select whether the outbound port protocol is “TCP”, Trigger Type “UDP” or both. Enter the In-coming (Inbound) port or port range for this type of application (e.g.
- Page 73 automatically list the Public Ports required for this popular application you’d specified. Fill in the "Trigger Port", "Trigger Type”, “Public Port”, "Public Type", "Public Port" and "Comment" of the setting to be added and then click "Add". Then this Special Application setting will be added to the "Current Add Special Trigger-Port Table"...
-
Page 74: Upnp Settings
2.6.4 UPnP Settings With UPnP, all PCs in you Intranet will discover this router automatically. So you do not have to do any configuration for your PC, and they can access the Internet through this router automatically. Parameters Default UPnP Feature Disable Click <Apply>... -
Page 75: Alg Settings
2.6.5 ALG Settings You can select applications that require “Application Layer Gateway” support. Parameters Default Enable Click <Apply> at the bottom of the screen to save the configurations. You can now configure other advance sections or start using the router. Description You can enable “Application Layer Gateway”... -
Page 76: Static Routing
2.6.6 Static Routing This router provides static routing function when NAT is disabled. With static routing, the router can forward packets according to your routing rules. The IP sharing function will not work any more in static routing mode. Note: The DMZ function of firewall will not work if static routing is enabled. Parameters Static routing function is disabled by default. - Page 77 Destination The network address of destination LAN. LAN IP Subnet Mask The subnet mask of destination LAN. The next stop gateway of the path toward the destination Default LAN. This is the IP of the neighbor router that this router Gateway should communicate with on the path to the destination LAN.
-
Page 78: Firewall
2.7 Firewall This broadband router provides extensive firewall protection by restricting connection parameters, thus limiting the risk of hacker attack, and defending against a wide array of common Internet attacks. However, for applications that require unrestricted access to the Internet, you can configure a specific client/server to be located in Demilitarized Zone (DMZ). -
Page 79: Access Control
The Broadband router's firewall can block common hacker attacks and can log the attack activities. The DMZ function allows you to redirect all packets going to your WAN port IP address to a particular IP address in your LAN. Click on one of the firewall selections and proceed to the manual’s relevant sub-section 2.7.1 Access Control If you want to restrict users from accessing certain Internet... - Page 80 by IP You can click Add PC to add an access control rule for Add PC users by IP address. If you want to remove some PC from the "IP Filtering Table", select the PC you want to remove in the table and Remove PC then click "Delete Selected".
- Page 81 Parameters Client PC The description for this client PC rule. Description Enter the IP address range that you wish to apply this access control rule. This is the user’s IP address(es) that Client PC IP you wish to setup an access control rule. Addresses Note: You need to give your LAN PC clients a fixed/static IP address, to make the access control rule working...
- Page 82 Click <Apply Changes> at the bottom of the screen to save the configurations. You can now configure other advance sections or start using the router. Example: Access Control In the example below, LAN client A can only access websites that use Port 80. However, LAN client B is able to access websites and any other service that uses ports between 80 and 999.
-
Page 83: Url Blocking
2.7.2 URL Blocking You can block access to some web sites from particular PCs by entering a full URL address or just keyword of the Web site. Parameters Enable URL Enable/disable URL Blocking Blocking Fill in “URL/Keyword” and then click “Add”. You can enter the full URL address or the keyword of the web site you Add URL want to block. -
Page 84: Dos (Denial Of Service)
2.7.3 DoS (Denial of Service) The Broadband router's firewall can block common hacker attacks, including Denial of Service, Ping of Death, Port Scan and Sync Flood. If Internet attacks occur the router can log the events. Parameters Ping of Death Protect from Ping of Death attack Discard Ping The router’s WAN port will not respond to any Ping From WAN... -
Page 85: Dmz
2.7.4 DMZ If you have a local client PC that cannot run some specific Internet application (e.g. Games) properly from behind the NAT firewall, then you can open the client up to unrestricted two-way Internet access by defining a DMZ Host. The DMZ function allows you to redirect all packets going to your WAN port IP address to a particular IP address in your LAN. -
Page 86: Print Server
Input the IP address of a particular host in your LAN that will receive all the packets originally going to the Client PC IP WAN port/Public IP address listed above. Address Note: You need to give your LAN PC clients a fixed/static IP address for DMZ to work properly. - Page 87 You can check “Enable Internet printing” to share the Enable Internet printer on internet, you can uncheck this option to use printing printer on intranet only. Click <Apply> at the bottom of the screen to save the configurations. You can now configure other advance sections or start using the router.
-
Page 88: Lpr Printing
2.8.1 LPR Printing LPR Printing (Line Printer Remote technology) allows user to connect to printers via TCP/IP protocol for printing sharing. Computer with Windows 98SE/Me/NT/2000/XP/2003 operating system can use the protocol to share printer over the network. To configure the LPR setting in Windows 2000/XP/2003, please follow the instructions listed below: 1) Click “Start”, choose “Settings”... - Page 89 4) Select “Local Printer attached to this computer” and click “Next”. 5) Choose “Create a new port” and “Standard TCP/IP Port”. Click “Next”.
- Page 90 6) Please make sure that the Print Server and the Printer have turned on and connected to the network correctly before you continue. Click “Next”. 7) Enter the IP Address of the Print Server in the “Printer Name or IP Address”. Click “Next”.
- Page 91 8) Select “Custom” and click “Settings”. When you have finished the settings at step 9, click “Next” to continue. 9) Select “LPR” and enter “lpt1” in the “Queue Name”, click “OK”. By default the queue name of the Print Server is “lpt1”.
- Page 93 10) Click “Finish”. 11) Select a suitable printer manufacturer and the printer model and click “Next”. If your printer is not in the list, click “Have Disk…” to install the driver of the printer. After installation, the printer model will be added to the list.
- Page 94 12) Choose to set the print whether as a default printer or not. Click “Next”. 13) You have added the network printer to the PC successfully. The information of the printer is displayed in the windows. Click “Finish”.
-
Page 95: Ipp Printing
2.8.2 IPP Printing IPP (Internet Printing Protocol) Printing provides a convenient way of remote printing service by TCP/IP. The Print Server can support IPP printing in Windows 2000/XP/2003 by default. By using the IPP printing, you can share the printer to all the PC’s that can access the Print Server by Internet Protocol (IP). - Page 96 4) Select “A network printer, or a printer attached to another computer”, then click “Next”. 5) Select “Connect to a printer on the Internet or on a home or office network” and enter the URL of Print Server. The URL format is “http://IP:631/Port Name”. The IP should be the Print Server’s IP.
- Page 98 6) Select a suitable printer manufacturer and the printer model and click “Next”. If your printer is not in the list, click “Have Disk…” to install the driver of the printer. After installation, the printer model will be added to the list. 7) Choose to set the print whether as a default printer or not.
- Page 99 8) Now you have successfully added the network printer to your PC. The information of the printer will be displayed in the window. Click “Finish”.
-
Page 100: File/Ftp Server
2.9 File/FTP Server The router provides File/FTP Server function, which lets you share the USB mass storage device to all PCs in your Intranet or on Internet. It supports SAMBA protocol, let you share files via network neighborhood. And also supports FTP sever function for other computer to upload/download files from the server by FTP client program. -
Page 101: Users Setup
Click on one of the File/FTP server selections and proceed to the relevant sub-sections. Note: The maximum file size of a single file is 2GB when partition type is FAT16/32, if partition type is EXT2/3, the maximum file size is up to 4GB. 2.9.1 Users setup Users setup is used to add/edit users of File/FTP server. - Page 102 Add a New User Parameters User Name The name of this user. Description The description of this user. Password The password of this user. Confirm Re-type the password of this user for confirmation. password Click <Save> at the bottom of the screen to save the configurations. You can now configure other advance sections or start using the router.
-
Page 103: File Server
2.9.2 File Server You can add/edit the file server name, shared folders and sharing policies for shared files. Parameters The file server name that shows in My Network Places on Name client computer. Workgroup The My Network Places group this file server will join. A brief description of this file server. - Page 104 folder page to add a new shared folder for file server. You can select any shared folders in shared folders list and Edit click “Edit” to modify its setting. You can click “Delete All” to delete all shared folders in Delete All shared folders list.
- Page 105 “Add” to add into Share Users. You can also click “Add All” to add all users or remove the selected users from “Share Users”. Authority Here you can assign the read/write privilege for this shared folder. You can select “Read Only” for read only sharing or select “Read &...
-
Page 106: Ftp Server
2.9.3 FTP Server You can add/edit users, shared folders and sharing policies for sharing files via FTP service. Parameters Click “Add” and fill the information of the Add/Edit FTP folder page to add a new shared folder for FTP server. You can select any shared folder in FTP folders list and Edit click “Edit”... - Page 107 Idle Time Set the time that FTP server will wait before disconnecting a FTP client when it is inactive. Internet Check on this option to share FTP server on Internet or Accessible uncheck this option to use FTP server in Intranet only. Add/Edit FTP Folder Parameters User...
- Page 108 storage device. Choose the folder you want to share, and click “Submit” to select this folder for sharing. You can also click “New Folder” to create a new share folder. NOTE: Only the folders in USB storage devices will be shown as icons in open dialog due to the share function is restricted to folders only, but not files.
-
Page 109: Storage Tool
2.9.4 Storage Tool You can use the storage tools here to format, add or remove partitions. Note: You should connect disks which will be used with this broadband router only to USB1 port (i.e. disks will not connect to other computer), and you can use the storage tools menu to partition and format the USB storage disk. - Page 110 NOTE: The partition size of FAT16 file system should be less than 2GB; for FAT32 or EXT2 file system, the partition should be less than 160GB. Auto Partition & Formatting This function will build partition and formats the USB storage disk in USB1 port according to the following rules.
-
Page 111: Storage Status
2.9.5 Storage Status This Page shows the status of attached USB storage devices. Parameters Partition The partition name of the USB storage device. Size Total space of this partition. Total used space of this partition. Here shows the size in Used byte and the percentage of the total space. -
Page 112: Bt Download
2.10 BT Download This broadband router supports BT (stands for BitTorrent) peer-to-peer file download function. You can download files by this broadband router via BitTorrent protocol, without switching your computer on. You can also see all downloading BT items here. Please note that an external USB mass storage device must be attached to this broadband router before you can start BT Download, and make sure it has enough remaining storage space. - Page 113 prompted to provide the location of .torrent file (See detailed description below) Refresh Click this button to get latest information of BT Download. Select one or more downloading BT items in the list, and Pause click this button to pause them. Select one or more paused BT items in the list, and click this Resume button to resume downloading.
- Page 114 http://www.torrentfile.com/files/movie.torrent), upload from your PC, or browse the file from attached USB mass storage device. If you select “Internet Address”, please fill the URL address of torrent file, or you can just copy the URL address of torrent file from web browser; If you select “PC” or “This File Server”, a file browsing window will appear, and you can select the torrent file from your PC or attached USB mass storage device.
-
Page 115: Web/Ftp Download
2.11 Web/FTP Download This broadband router supports downloading file from Web and FTP server, so you can download large file from Web or FTP server without keeping your computer switched on. Before a file can be downloaded and saved, at least a USB mass storage device must be attached to this broadband router. - Page 116 This field is optional. Please input the server’s password Password here if the server requires it. Click this button to add the download job listed above to the download list and start downloading. Reset Reset all fields in this page to default value. Click this button to get latest information of Web or FTP Refresh download.
-
Page 117: Itunes Server
2.12 iTunes Server iTunes is a popular and powerful multi-media player, and supports streaming media. If the USB mass storage device you attached to this broadband router is loaded with media files supported by iTunes, you can use the iTunes server function of this broadband router to let your USB disk become a media server, and you can share these files with other computers or iTunes-compatible media players! - Page 118 create here. All iTunes clients will need this name to locate this iTunes server. Valid server name length is 4 to 20 characters, and is case sensitive. Please specify the folder where the media files are located, and all media files inside the folder you specify here will be Media folder shared with all iTunes clients.
- Page 119 By selecting “Disable”, everyone on the LAN will be able to access your media files, and if there are too much users accessing the media files, iTunes server may respond slower or even stop responding. It’s recommended to select “Enable” to protect your iTunes server by password if you want to prevent unknown people from using your media files.
-
Page 120: Media Server
2.13 Media Server If you have UPnP-compatible media player or device, you can share the media files located in the attached USB mass storage device to these UPnP-compatible media players or devices, so they can access the media files over network. Parameters You can enable or disable media server function here. -
Page 121: Chapter 3
Save Click this button to save general settings for media server. Click this button to add a new folder for media file sharing. You’ll be prompted to select a folder on the attached USB mass storage device where media files are located. Remove Remove selected folder from the list. -
Page 122: Status And Information
Parameters Status and Shows the router’s system information Information Internet View the Broadband router’s Internet connection status Connection and other related information Device Status View the Broadband router’s current settings System Log View the Broadband router’s system log Security Log View any attempts that have been made to gain access to your network. - Page 123 Parameters You can see the router’s system information, such as the router’s LAN MAC address, WAN MAC address, Information hardware version, serial number, boot code version, runtime code version 3.2 Internet Connection View the Broadband router’s current Internet connection status and other related information Parameters This page displays the router’s WAN port information,...
-
Page 124: Device Status
3.3 Device Status View the broadband router’s current configuration settings. The device status displays the configuration settings you’ve configured in the Quick Setup Wizard/General Setup section. Parameters This page shows the broadband router’s current device settings, including: broadband router LAN port’s current Device Status LAN IP address and subnet mask. -
Page 125: System Log
3.4 System Log View the operation log of the system. Parameters This page shows the system log of the broadband router. It displays any event occurred after system start up. At the bottom of the page, the system log can be saved <Save>... -
Page 126: Security Log
3.5 Security Log View any attempts that have been made to gain access to your network. Parameters This page shows the current security log of the Broadband router. It displays all attempts tried to access your network. At the bottom of the page, the security log can be saved Security Log <Save>... -
Page 127: Active Dhcp Client
3.6 Active DHCP Client This page lists all DHCP clients. Parameters This page shows all DHCP clients currently connected to your network. The “Active DHCP Client Table” displays the Active DHCP IP address and the MAC address and expiry time of each Client LAN Client. -
Page 128: Statistics
3.7 Statistics View the statistics of packets sent and received on WAN, LAN and Wireless LAN interface. Parameters Statistics Shows the statistics of packets sent and received on WAN, LAN and Wireless LAN interface. Description... -
Page 129: Chapter 4
Chapter 4 Tool This page includes basic configuration tools of this broadband router, such as Configuration Tools (save or restore configuration settings), Firmware Upgrade (upgrade system firmware) and Reset. Parameters You can save the router’s current configuration, restore Configuration the configuration from previously saved configuration files, Tools and restore the router’s factory default settings Firmware... -
Page 130: Firmware Upgrade
router through the Restore selection. If extreme problems occur you can use the Restore to Factory Defaults selection, this will set all configurations to its original default settings (e.g. when you purchased the router). Parameters Use the "Backup" tool to save the broadband router’s current configuration to a file named "config.bin"... -
Page 131: Reset
Parameters This tool allows you to upgrade the broadband router’s system firmware. To upgrade the firmware of your broadband router, you need to download the firmware file to Firmware your local hard disk, and enter that file name and path in the Upgrade appropriate field on this page. - Page 132 Parameters Description In the event that the system stops responding or stops functioning, you can perform a reset. Your settings will not be changed. To perform the reset, click on the Reset <APPLY> button. You will be asked to confirm your decision.
-
Page 133: Appendix A
Appendix A How to find your PC’s IP and MAC address manually 1) In Window’s open the Command Prompt program 2) Type Ipconfig /all and <enter>... - Page 134 •Your PC’s IP address is the one titled as IP address (192.168.1.77 in this example) •The router’s IP address is the one titled as Default Gateway (192.168.1.254 in this example) •Your PC’s MAC Address is the one titled as Physical Address (00-50-FC-FE-02-DB in this example)
-
Page 135: Glossary
Glossary Default Gateway (Router): Every non-router IP device needs a default gateway. When the device sends out an IP packet, if the destination is not in the same network, the device will send the packet to default gateway, which will then forward it to the destination. DHCP: Dynamic Host Configuration Protocol. - Page 136 11111111.11111111.11111111.00000000. Therefore sometimes a network mask can also be described simply as “x” number of leading 1’s. When both are represented side by side in their binary forms, all bits in the IP address that correspond to 1’s in the network mask become part of the IP network address, and the remaining bits correspond to the host ID.
- Page 137 SMTP POP3 H.323 SNMP SNMP Trap HTTP PPTP PC Anywhere PC Anywhere PPPoE: Point-to-Point Protocol over Ethernet. Point-to-Point Protocol is a secure data transmission method originally created for dial-up connections; PPPoE is for Ethernet connections. PPPoE relies on two widely accepted standards, Ethernet and the Point-to-Point Protocol.
- Page 138 countries). The Internet is a wide area network, too. Web-based management Graphical User Interface (GUI): Many devices support graphical user interface that is based on the web browser. This means the user can use their familiar web browser (ex. Netscape or Microsoft Internet Explorer) to control/configure or monitor the device being managed.
- Page 139 F ederal Communication Commission Interference Statement This equipment has been tested and found to comply with the limits for a Class B digital device, pursuant to Part 15 of FCC Rules. These limits are designed to provide reasonable protection against harmful interference in a residential installation. This equipment generates, uses, and can radiate radio frequency energy and, if not installed and used in accordance with the instructions, may cause harmful interference to radio communications.
Need help?
Do you have a question about the BR-6215SRg and is the answer not in the manual?
Questions and answers