
Related Manuals for Edimax BR-6428nS V3


Summary of Contents for Edimax BR-6428nS V3
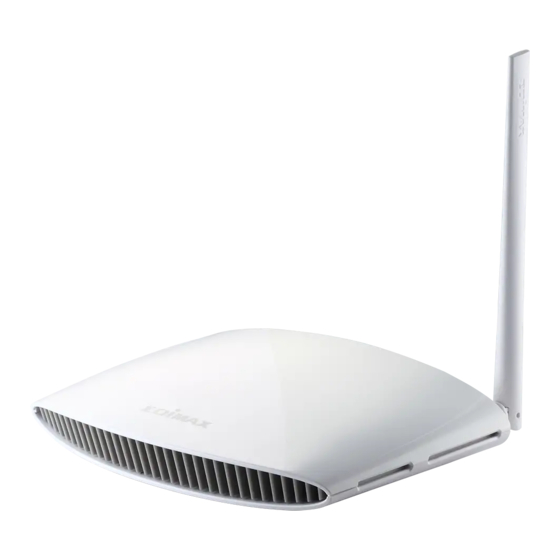
- Page 1 BR-6428nS V3 / BR-6438nS BR-6228nS V3 / BR-6238nS User Manual...
- Page 2 CONTENTS I. Product Information ................1 II. Installation .................... 5 III. Browser Based Configuration Interface ..........37...
- Page 3 IV. Appendix ................... 104...
- Page 5 I. Product Information I-1. Package Contents BR-6428nS Power Adapter BR-6228nS Ethernet Cable Quick Installation Guide CD-ROM...
- Page 6 I-2. LED Status Color LED Status Description...
- Page 7 I-3. Back Panel Internet/WAN Port Reset/WPS Button LAN Ports 1–4 Power Port...
- Page 8 I-4. Safety Information...
- Page 9 II. Installation iOS 4 or Android 4 and above are required for setup on a smartphone or tablet. http://edimax.setup “Get Started”...
- Page 10 If you cannot access http://edimax.setup, please make sure your computer is set to use a dynamic IP address. Refer to IV-1. Configuring your IP address for more information.
- Page 11 Wi-Fi Router Mode The device connects to your modem and provides 2.4GHz Internet (wireless and Ethernet) access for your network devices. Access Point Mode The device connects to an existing router via Ethernet cable and provides 2.4GHz Internet (wireless and Ethernet) access for your network devices.
- Page 12 II-1. Wi-Fi Router Mode Manual configuration is only recommended for advanced users.
- Page 14 If you wish to backup the device’s settings, click “Backup this configuration” to open a new window and save your current configuration to a .txt file.
- Page 16 II-2. Access Point Mode...
- Page 17 “Obtain an IP address automatically” is the recommended setting for most users. For more guidance on static IP addresses, please refer to IV-1. Configuring your IP address.
- Page 18 If you wish to backup the device’s settings, click “Backup this configuration” to open a new window and save your current configuration to a .txt file.
- Page 19 IV-2. Connecting to a Wi-Fi network...
- Page 20 II-3. Range Extender Mode If the Wi-Fi network you wish to connect to does not appear, try clicking “Refresh”.
- Page 21 To connect to a hidden SSID, check the “Setup extender manually” box and enter the details manually on the next page, as shown below.
- Page 22 “Obtain an IP address automatically” is the recommended setting for most users. The IP address will be displayed in brackets.
- Page 23 The device will use the same wireless password/security key as the existing wireless network. If you wish to backup the BR-6428nS V3/BR-6228nS V3’s settings, click “Backup this configuration” to open a new window and save your current configuration to a .txt file.
- Page 25 IV-2. Connecting to a Wi-Fi network...
- Page 26 II-4. Wireless Bridge Mode...
- Page 27 If the Wi-Fi network you wish to connect to does not appear, try clicking “Refresh”. To connect to a hidden SSID, check the “Setup extender manually” box and enter the details manually on the next page, as shown below.
- Page 28 “Obtain an IP address automatically” is the recommended setting for most users. The IP address will be displayed in brackets.
- Page 29 If you wish to backup the BR-6428nS V3/BR-6228nS V3’s settings, click “Backup this configuration” to open a new window and save your current configuration to a .txt file.
- Page 32 II-5. WISP Mode...
- Page 33 Manual configuration is only recommended for advanced users. If the Wi-Fi network you wish to connect to does not appear, try clicking “Refresh”.
- Page 34 To connect to a hidden SSID, check the “Setup extender manually” box and enter the details manually on the next page, as shown below.
- Page 37 If you wish to backup the device’s settings, click “Backup this configuration” to open a new window and save your current configuration to a .txt file.
- Page 39 IV-2. Connecting to a Wi-Fi network...
- Page 40 II-6. WPS Setup WPS button Within two minutes wireless device/client Please check the instructions for your wireless device for how long you need to hold down its WPS button to activate WPS. II-7. Reset to Factory Default Settings flashing.
- Page 41 Please ensure that your computer is set to use a dynamic IP address. Refer to IV-1. Configuring your IP address for more information. III-1. Login http://edimax.setup If you can not access http://edimax.setup, connect the device to a computer using an Ethernet cable and try again.
- Page 43 III-2. Save Settings The device needs to restart in order to bring any changes into effect. After you click “click here to restart”, all saved changes will come into effect.
- Page 44 III-3. Main Menu For Range Extender mode: WPS please refer to 2.4GHz Wireless Wi-Fi Router Access Point Range Extender Wireless Bridge WISP...
- Page 45 III-3-1. Status Screenshots displayed are examples.The information shown on your screen will vary depending on your configuration.
- Page 46 III-3-2. Setup Wizard Setup Wizard II. Installation Switch to Router/Access Point/ Range Extender/ Wireless Bridge/ WISP mode Switch to Router/Access Point/ Range Extender/ Wireless Bridge/ WISP mode:...
- Page 47 II. Installation Step 3 If you don’t see the “Get Started” screen, try reconnecting to the edimax.setup SSID and go to http://edimax.setup in a web browser.
- Page 48 III-3-3. Internet/WISP In WISP mode, the screen below will be displayed: Enable / Disable SSID Site Survey Security Setting III-3-5-1. Basic...
- Page 49 III-3-3-1. WAN Setup In WISP mode, only Dynamic IP, Static IP & PPPoE are available for WAN Connection Mode. III-3-3-1-1. Dynamic IP...
- Page 50 Host Name MAC Address DNS Address DNS Address 1,2 & 3 DNS Proxy DNS Proxy Rules (URL) III-3-3-1-2. Static IP...
- Page 51 Fixed IP Address Subnet Mask Default Gateway Address MAC Address DNS Address 1, 2 & DNS Proxy DNS Proxy Rules (URL)
- Page 52 III-3-3-1-3. PPPoE User Name Password MAC Address...
- Page 53 DNS Address DNS Address 1, 2 & DNS Proxy DNS Proxy Rules (URL) Service Name Connection Type Idle Time Out Enable Dual-WAN Access...
- Page 54 III-3-3-1-4. PPTP Host Name MAC Address...
- Page 55 Static IP Address Subnet Mask Default Gateway Address MAC Address DNS Address DNS Address 1,2 & 3 DNS Proxy DNS Proxy Rules (URL) User ID Password PPTP Gateway Connection ID BEZEQ-ISRAEL Connection Type Idle Time Out...
- Page 56 III-3-3-1-5. L2TP Host Name MAC Address...
- Page 57 Static IP Address Subnet Mask Default Gateway Address MAC Address DNS Address DNS Address 1,2 & 3 DNS Proxy DNS Proxy Rules (URL) User ID Password L2TP Gateway Connection ID Connection Type Idle Time Out...
- Page 58 III-3-3-1-6. WISP WISP SSID Select Site Survey Channel Number Security Settings...
- Page 59 III-3-3-2. DDNS Enable/Disable Provider Domain Name Account/Email Password/Key 3322 http://www.3322.org http://www.dhs.org DynDNS http://www.dyndns.org http://ods.org http://www.tzo.com GnuDIP http://gnudip2.sourceforge.net DyNS http://www.dyns.cx/ ZoneEdit http://www.zoneedit.com CyberGate http://cybergate.planex.co.jp/ddns/...
- Page 60 NS2GO http://www.ns2go.com/ NO-IP http://www.noip.com/...
- Page 61 III-3-4. You can access the browser based configuration interface using the device’s IP address instead of using the URL http://edimax.setup. IP Address Subnet Mask 802.1d Spanning Tree DHCP Server Lease Time...
- Page 62 Start IP End IP Enable Static DHCP Leases MAC Address IP Address Clear Delete Selected / Delete All The LAN IP page will be displayed as below when your device is set to access point mode. You can set theBR-6428nS V3/BR-6228nS V3 to obtain an IP address automatically or you can specify an IP address.
- Page 64 III-3-5. 2.4GHz Wireless Access Point Mode: In Access Point mode, the “Guest” feature in the menu is replaced by “Multiple SSID”. III-3-5-1. Basic Disable Wireless Mode...
- Page 65 Band Wireless Network Name (SSID) Broadcast SSID Enable Wireless Clients Isolation Channel Number Site Survey Wireless Clients...
- Page 66 AP Bridge-WDS: When using WDS, configure the IP address of each access point to be in the same subnet and ensure there is only one active DHCP server among connected access points, preferably on the WAN side. MAC Address 1 - 4 Set Security Please ensure you setup and save wireless security settings before you click “Set Security”...
- Page 67 Wireless Security: “WPA Pre-shared Key” is the recommended and most secure encryption type. In WISP mode, WPA RADIUS is unavailable for the wireless band that is used to connect to WISP’s AP.
- Page 68 III-3-5-1-1. Disable Disabling wireless encryption is not recommended. When disabled, anybody within range can connect to your device’s SSID. Enable 802.1x Authentication...
- Page 69 III-3-5-1-2. Key Length Key Format Encryption Key Enable 802.1x Authentication...
- Page 70 III-3-5-1-3. WPA Pre-Shared Key WPA Unicast Cipher Suite Pre-shared Key Format Pre-shared Key...
- Page 71 III-3-5-1-4. WPA Radius WPA Unicast Cipher Suite RADIUS Server IP address RADIUS Server Port RADIUS Server Password...
- Page 72 “Basic” menu. In access point mode, the “Guest” feature in the menu is replaced by “Multiple SSID”. The BR-6428nS V3/BR-6228nS V3 supports up to four additional SSIDs for each wireless band in access point mode.
- Page 73 Band Channel Number Encryption III-3-5-1. Basic: Wireless Security WPA RADIUS encyrption type is not available for the guest network. MULTIPLE SSID:...
- Page 74 Multiple SSID Wireless Network Name (SSID) Enable Multiple SSID Enable Wireless Clients Isolation Band Channel Number VLAN ID A VLAN is a local area network which maps workstations virtually instead of physically and allows you to group together or isolate users from each other.
- Page 75 III-3-5-3. WPS Enable WPS WPS Status Self PIN Code SSID Authentication Mode Authentication Key Configuration Mode...
- Page 76 Configure via Push Button Configure via Client PIN Code III-3-5-4. Access Control MAC address...
- Page 77 Comment Delete Selected/ Delete All...
- Page 78 III-3-5-5. Schedule The BR-6428nS V3/BR-6228nS V3 must remain connected to the Internet and use an NTP server for the schedule feature to function correctly. Wireless scheduling can save energy and increase the security of your network.
- Page 79 Delete Selected/ Delete All...
- Page 80 III-3-6. Firewall SPI firewall III-3-6-1. URL Blocking...
Need help?
Do you have a question about the BR-6428nS V3 and is the answer not in the manual?
Questions and answers