Table of Contents
Advertisement
Available languages
Available languages
Quick Links
Advertisement
Table of Contents

Subscribe to Our Youtube Channel
Related Manuals for Edimax AR-7064+


Summary of Contents for Edimax AR-7064+
-
Page 1: Quick Installation Guide
Quick Installation Guide Version 1.0 January, 2006... -
Page 2: Table Of Contents
Multi-Languages Content Table English ..……………………...…..…..……….02 eský ...08 Deutsch ……………….…... 14 Español ... 20 Français ... 26 Italiano ……………...32 Magyar ...38 Nederlands ...44 Português ...50 Polski ... 56 ... 62 Türkçe ...69... -
Page 3: Wan Connection
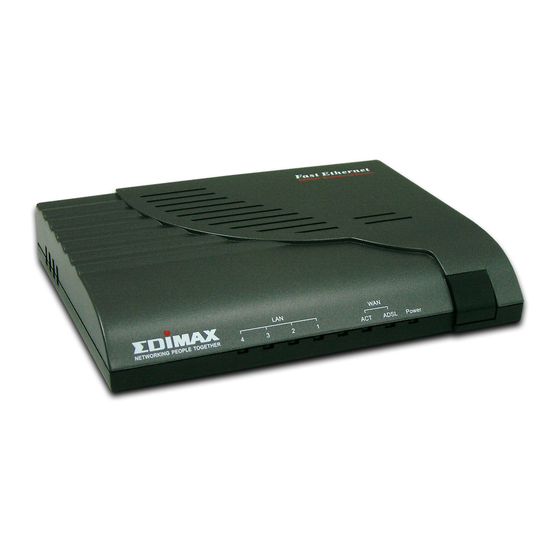
Connect the telephone cable from your home's telephone jacks to the ADSL port of the ADSL2+ Router. Power Adapter Connection: Connect the power adapter to the power inlet and turn the power switch on from the front panel of the ADSL2+ Router. - Page 4 Configure your PC to obtain an IP address By default the ADSL router’s DHCP is on, this means that you can obtain an IP address automatically once you’ve configured your PC to obtain an IP address automatically. This section will show...
-
Page 5: Configuring With Web Browser
Configuring with Web Browser 1. Open web browser and type http://192.168.16.1 in the browser's address box. This number is the default IP address for this device. Press Enter. 2. A user name and password prompt will appear. The username is and password is 'admin'. - Page 6 3. The Quick Setup facility enables you to enter the Username and Password provided by your ISP. 4. To check VPI, VCI and encapsulation with your ISP such as following table:...
- Page 7 Countries Australia Canada Czech Denmark France Deutschland Snafu ADS / Tiscali / T-online Israel Italian Morocco Netherlands New Zealand Portugal Russia Span Jazztel / Ola Internet / Telepac Sri Lanka Switserland Turkey United Kingdom All Internet providers Telus Czech Telecom Telenor Network Cybercity / Tiscali Tiscali / Wannadoo...
- Page 8 Browse the User's Manual: 1. Insert the Manual CD into your CD-ROM, and the CD will be display with Auto-Run. 2. Click Browse CD, the file explorer will list the CD contents, open the folder as same as with your model, then you will see one file names index.htm, double-click for display the manual.
-
Page 9: Eský
eský Instalace a nastavení P ipojení k síti LAN: P ipojte kabel sít Ethernet z portu sít Ethernet na vašem po íta i k sí ovému portu LAN na ADSL2+ routeru. P ipojení k síti WAN: P ipojte telefonní kabel z vaší domácí telefonní zásuvky k sí... - Page 10 nakonfigurujete sv j po íta PC tak, aby adresu IP získával automaticky. Tato ást popisuje, jak nakonfigurovat váš po íta PC tak, aby adresu IP získával automaticky (pro opera ní systémy Windows 95/98/Me, 2000 nebo NT). U ostatních opera ních systém (Macintosh, Sun, atd.) postupujte podle pokyn výrobce.
- Page 11 LAN. Po nakonfigurování vašeho po íta e PC pro automatické získávání adresy IP prosím p istupte k následujícímu kroku. Konfigurování prost ednictvím webového prohlíže e (browseru) 1. Otev ete internetový prohlíže (browser) a jako adresu zadejte http://192.168.16.1. Toto íslo p edstavuje výchozí adresu IP pro toto za ízení.
- Page 12 3. Funkce Quick Setup (rychlé nastavení) umož uje zadání uživatelského jména (Username) a hesla (Password), které jste získali od svého poskytovatele p ipojení k Internetu (ISP). 4. Pro kontrolu VPI, VCI a dalších parametr svého poskytovatele p ipojení k Internetu (ISP) - viz následující tabulka:...
- Page 13 Všichni poskytovatelé p ipojení k Austrálie esko Dánsko Francie AOL DSL / Freenet DSL N mecko Snafu ADS / Tiscali / T-online Izrael Itálie Maroko Holandsko BBeyond PPPoA VC-MuX Nový Zéland Portugalsko Rusko Špan lsko Jazztel / Ola Internet / Telepac Srí...
- Page 14 Prohlížení uživatelské p íru ky: 1. Vložte disk Manual CD do jednotky CD-ROM svého po íta e a po kejte, až se disk spustí prost ednictvím funkce Auto-Run. 2. Klepn te na tla ítko Browse CD, aby pr zkumník soubor zobrazil obsah disku CD, otev ete složku s názvem, odpovídajícímu vašemu modelu, a až...
-
Page 15: Deutsch
Deutsch. Installation & Setup LAN-Verbindung: Verbinden Sie über ein Ethernetkabel den Ethernetanschluss Ihres Computers mit dem LAN-Anschluss des ADSL2+ Routers. WAN-Verbindung: Verbinden Sie das Telefonkabel von der Anschlussdose Ihres Festnetztelefons mit dem ADSL-Anschluss des ADSL2+ Routers. Anschluss des Netzgeräts: Stecken Sie das Netzgerät in die Steckdose und schalten Sie den Netzschalter auf der Vorderseite des ADSL2+ Routers ein. - Page 16 Automatische Zuweisung einer IP-Adresse In der Voreinstellung des ADSL-Routers ist DHCP eingeschaltet. Das heißt, dass Sie automatisch eine IP-Adresse zugewiesen bekommen, wenn Ihr Computer dementsprechend konfiguriert ist. In diesem Abschnitt wird erläutert, wie Sie Ihren Computer mit Windows 95/98/Me, NT, 2000 oder XP so konfigurieren, dass er automatisch eine IP-Adresse zugewiesen bekommt.
- Page 17 Hinweis: Bitte stellen Sie sicher, dass der DHCP-Server des ADSL-Routers der einzige DHCP-Server in Ihrem lokalen Netzwerk ist. Wenn Sie Ihren Computer für die automatische Zuweisung einer IP-Adresse konfiguriert haben, gehen Sie weiter zum nächsten Schritt. Konfiguration mit einem Webbrowser 1.
- Page 18 3. Im Quick Setup können Sie den Benutzernamen und das Kennwort eingeben, welche Sie von Ihrem Internetdiensanbieter erhalten. Überprüfen Sie VPI, VCI und die Verkapselung Ihres ISP wie in der nachfolgenden Tabelle:...
- Page 19 Länder Internetdienstanbieter Australien Kanada Tschechische Republik Dänemark Frankreich Deutschland Snafu ADS / Tiscali / T-online Israel Italien Marokko die Niederlande BBeyond PPPoA VC-MuX Neuseeland Portugal Russland Spanien Jazztel / Ola Internet / Telepac Sri Lanka Schweiz Türkei Vereinigtes Königreich Alle Internetanbieter Telus Czech Telecom Telenor Network...
- Page 20 Benutzerhandbuch durchsuchen: 1. Legen Sie die CD, die das Handbuch enthält, in Ihr CD-ROM-Laufwerk ein. Die CD wird durch Autorun automatisch starten. 2. Klicken Sie auf "Browse CD ( CD durchsuchen)", dann wird der Dateiexplorer den Inhalt der CD auflisten. Öffnen Sie den gleichnamigen Ordner Ihres Modells.
-
Page 21: Español
ADSL2+ Router. Configure su PC para obtener su dirección IP Por defecto, el DHCP del router ADSL se encuentra encendido, lo que significa que podrá obtener su dirección IP de forma... - Page 22 IP de forma automática a partir del servidor DHCP de su router ADSL. Nota: Por favor, compruebe que el servidor DHCP del router ADSL es el único servidor DHCP disponible en su LAN. Una vez que haya configurado su PC para obtener la dirección IP...
- Page 23 de forma automática, siga las instrucciones indicadas en el siguiente paso. Configuración con el navegador Web 1. Abra su navegador web e introduzca la dirección http://192.168.16.1 en la barra de direcciones del navegador. Este número es la dirección IP establecida por defecto para este dispositivo.
- Page 24 y la contraseña es 'admin'. 'admin' 3. La función de instalación rápida le permitirá introducir el nombre de usuario y la contraseña ofrecida por su ISP. Para verificar el VPI, VCI y la correspondencia con su ISP, lea el siguiente cuadro:...
- Page 25 Países Australia República Checa Dinamarca Francia Alemania Snafu ADS / Tiscali / T-online Israel Italia Marruecos Países Bajos Nueva Zelanda Portugal Rusia España Jazztel / Ola Internet / Telepac Sri Lanka Suiza Turquía Reino Unido Todos los distribuidores de Internet Czech Telecom Telenor Network Cybercity / Tiscali...
- Page 26 Navegue por el manual de usuario: 1. Introduzca el CD del manual en su unidad de CD-ROM. El CD aparecerá en pantalla gracias a la opción de lanzamiento automático. 2. Pulse en Navegar por el CD, el explorador de archivos le indicará...
-
Page 27: Installation And Configuration
Français. Installation & Configuration Connexion LAN : Raccordez un câble Ethernet entre le port Ethernet de votre PC et le port LAN du routeur ADSL2+. Connexion WAN : Raccordez un câble téléphonique entre votre prise téléphonique fixe et le port ADSL du routeur ADSL2+. Raccordement de la prise d'alimentation électrique : Raccordez la prise électrique au secteur et allumez l'interrupteur du panneau avant du routeur ADSL2+. - Page 28 Configuration de votre PC pour obtenir une adresse IP Par défaut le DHCP (Protocole de Configuration Dynamique Hôte) du routeur ADSL est activé, ce qui signifie que vous pouvez obtenir une adresse IP automatiquement une fois que votre PC est configuré pour la recevoir. Cette section vous indique comment configurer votre PC pour obtenir une adresse IP automatiquement sous Windows 95/98/Me, 2000 ou NT.
- Page 29 LAN. Une fois votre PC configuré pour obtenir une adresse IP automatiquement, vous pouvez passer à l'étape suivante. Configuration grâce à un navigateur Internet 1. Ouvrez votre navigateur Internet et tapez http://192.168.16.1 dans le champ adresse de ce dernier. Ces chiffres représentent l'adresse IP par défaut de cet appareil.
- Page 30 Le nom d'utilisateur est Le service d'installation rapide vous permet de saisir le nom d'utilisateur et le mot de passe qui vous ont été fournis par votre fournisseur d'accès Internet. Vérifiez le VPI (Indicateur de chemin d'accès virtuel), le VCI (Indicateur de Canal Virtuel) ainsi que l'encapsulation avec votre fournisseur d'accès Internet et suivant le et le mot de passe est 'admin'.
- Page 31 tableau suivant: Pays Fournisseur d'Accès Internet VPI Australie Canada République Tchèque Danemark France AOL DSL / Freenet DSL Allemagne Snafu ADS / Tiscali / T-online Israel Italie Maroc Pays Bas BBeyond PPPoA VC-MuX Nouvelle Zélande Portugal Russie Espagne Jazztel / Ola Internet / Telepac Sri Lanka Suisse Turquie...
- Page 32 Royaume Unis Parcourir le manuel utilisateur : 1. Insérez le CD dans votre lecteur, il se lance automatiquement. 2. Cliquez sur Browse CD (Parcourir le CD), l'explorateur affiche le contenu du CD. Ouvrez le dossier correspondant à votre modèle, double-cliquez sur le fichier intitulé index.htm pour afficher le manuel.
-
Page 33: Italiano
LAN dell'ADSL2+ Router. Collegamento WAN: Collegare il cavo telefonico dalle prese telefoniche di casa vostra alla porta ADSL dell'ADSL2+ Router. Collegamento Adattatore di Alimentazione: Collegare l'adattatore di alimentazione alla presa di alimentazione e attivare l'interruttore di alimentazione dal pannello anteriore... - Page 34 Configurate il vostro PC per ottenere un indirizzo IP Di default, il DHCP del router ADSL è attivo, ciò significa che è possibile ottenere un indirizzo IP automaticamente una volta configurato il vostro PC per ottenere automaticamente un indirizzo IP. Questa sezione vi mostrerà come configurare il vostro PC per ottenere automaticamente un indirizzo IP sia per i sistemi operativi Windows 95/98/Me, 2000 o NT.
- Page 35 volta configurato il vostro PC per ottenere automaticamente un indirizzo IP, si prega di procedere al passo successivo. Configurazione con Browser Web 1. Aprire il browser web e digitare http://192.168.16.1 nella casella di indirizzo del browser. Questo numero è l'indirizzo IP predefinito per questo dispositivo.Premere Invio.
- Page 36 Il nome utente è 3. La funzione di Installazione Rapida vi permette di inserire il Nome utente e la Password forniti dal vostro ISP. Per verificare VPI, VCI e incapsulamento con il vostro ISP come nella seguente tabella: e la password è 'admin'. 'admin'...
- Page 37 Paesi Australia Canada Repubblica Ceca Danimarca Francia Germania Snafu ADS / Tiscali / T-online Israele Italia Marocco Olanda Nuova Zelanda Portogallo Russia Spagna Jazztel / Ola Internet / Telepac Sri Lanka Svizzera Turchia Regno Unito Tutti i provider Internet Telus Czech Telecom Telenor Network Cybercity / Tiscali...
- Page 38 Sfogliare il Manuale per l'Utente: 3. Inserire il CD del Manuale nel vostro CD-ROM, e il CD verrà visualizzato con Auto-Run. Cliccare Sfoglia CD, il file explorer elencherà i contenuti del CD, aprire la cartella corrispondente al vostro modello, quindi vedrete un file con il nome index.htm, fate doppio clic per visualizzare il manuale.
-
Page 39: Magyar
Csatlakoztassa a PC Ethernet porton az Ethernet kábelt az ADSL2 router LAN portjához. WAN kapcsolat: Csatlakoztassa az telefonkábelt az ADSL 2+ router ADSL portjához. Adapter csatlakoztatása: Csatlakoztassa az adaptert a hálózati aljzathoz és kapcsolja be az egységet az ADSL2+ router el lapi panelén. - Page 40 5: Klikkeljen az OK gombra a beállítás véglegesítéséhez és a PC ett l kezdve az IP címet automatikusan beszerzi az ADSL Router DHCP szerverr l. Fontos: ellen rizze, hogy az ADSL router DHCP szervere az egyetlen elérhet DHCP szerver a hálózatban. Ha a PC-t...
- Page 41 sikerült beállítani az IP cím automatikus észlelésére, folytassa az eljárást a következ lépéssel. A böngész beállítása 1. Nyissa meg a böngész t és gépelje be a http://192.168.16.1 parancsot a böngész címsorába. Ez a szám az eszköz alapértelmezett IP címe. Nyomja meg az Enter-t. 2.
- Page 42 3. A gyorsbeállító Quick Setup ablakban megadhatja a szolgáltatói felhasználónevet és jelszót. A VPI, VCI ellen rzéséhez tekintse át a következ táblázatot:...
- Page 43 Countries Ausztrália Kanada Csehország Dánia Franciaország Németország Snafu ADS / Tiscali / T-online Izrael Olaszország Marokkó Hollandia BBeyond PPPoA VC-MuX Új-Zéland Portugália Oroszország Spanyolország Jazztel / Ola Internet / Telepac Sri Lanka Svájc Törökország E-Királyság Minden szolgáltató Telus Czech Telecom Telenor Network Cybercity / Tiscali Tiscali / Wannadoo...
- Page 44 A mellékelt CD-ROM áttekintése: 1. Helyezze a CD-t a CD-ROM-ba, majd megjelenik az Auto-Run menü. 2. Klikkeljen a Browse CD gombra és az intéz felsorolja a CD tartalmát, majd nyissa meg a vásárolt modellnek megfelel mappát és keresse meg az index.htm fájlt. Klikkeljen kétszer a kézikönyv megnyitásához.
-
Page 45: Nederlands
Nederlands. Installatie LAN verbinding: Verbind de Ethernet uitgang van uw computer met een Ethernet kabel aan de LAN poort op de ADSL2+ Router. WAN verbinding: Verbind een telefoonuitgang met een telefoonkabel aan de LAN poort op de ADSL2+ Router. De voeding aansluiten:... - Page 46 Configureer uw computer om een IP adres te verkrijgen De DHCP van ADSL Router is standaard geactiveerd. Dit betekent dat u automatisch een IP adres verkrijgt, van zodra u uw computer alsdusdaning hebt geconfigureerd. Deze sectie licht toe hoe u uw computer kan configureren om automatisch een IP adres te verkrijgen in Windows 95/98/Me, 2000 of NT besturingssytemen.
- Page 47 Opmerking: Gelieve te controleren dat de DHCP Server van de ADSL Router de enige DHCP Server op uw LAN is. Van zodra u uw computer hebt ingesteld om automatisch een IP adres te verkrijgen, kan u verdergaan naar de volgende stap.
- Page 48 wachtwoord is eveneens 'admin'. 3. De Quick Setup laat u toe om de gebruikersnaam en het wachtwoord in te geven dat u hebt verkregen van uw ISP. 4. Controleer de VPI en VCI voor uw ISP met behulp van onderstaande tabel:...
- Page 49 Land Australie Canada Tsjechie Denemarken Frankrijk Duitsland Snafu ADS / Tiscali / T-online Israel Italie Marokko Nederland BBeyond PPPoA VC-MuX Nieuw-Zeeland Portugal Rusland Spanje Jazztel / Ola Internet / Telepac Sri Lanka Zwitserland Turkije Verenigd Koninkrijk Alle Internet Providers Telus Czech Telecom Telenor Network Cybercity / Tiscali...
- Page 50 De gebruikshandleiding op cd rom 1. Steek de meegeleverde cd rom in uw computer. De cd rom zal automatisch van start gaan. Indien de cd rom niet automatisch start, start de cd rom dan manueel op in de Verkenner. 2. Klik op “Browse CD (Browse deze cd rom)” en de inhoudstafel van de cd rom zal verschijnen.
-
Page 51: Português
ADSL2+ Configure o computador para obter um endereço IP Por predefinição, o DHCP do router ADSL está ligado, ou seja, pode obter automaticamente um endereço IP assim que configurar o computador. Esta secção irá mostrar-lhe como... - Page 52 IP a partir do servidor DHCP do router ADSL. Nota: Certifique-se de que o servidor DHCP do router ADSL é o único servidor DHCP disponível na LAN (rede local). Assim que configurar o computador para obter automaticamente um...
- Page 53 Configurar com o Browser Web 1. Abra o browser Web e escreva http://192.168.16.1 na caixa de endereço do browser. Este número é o endereço IP predefinido deste dispositivo. Carregue em Enter. 2. É apresentado um nome de utilizador e o pedido de palavra-passe.
- Page 54 3. A função Configuração rápida permite-lhe introduzir o Nome de utilizador e a Palavra-passe fornecidos pelo Fornecedor de serviços Internet. 4. Para verificar o VPI, o VCI e o encapsulamento fornecidos com o fornecedor de serviços Internet, consulte a seguinte tabela:...
- Page 55 Fornecedor de serviços Países Austrália Todos os fornecedores da Internet Canadá República Checa Dinamarca França Alemanha Snafu ADS / Tiscali / T-online Israel Itália Marrocos Países Baixos Nova Zelândia Portugal Rússia Espanha Jazztel / Ola Internet / Telepac Sri Lanka Suíça Turquia Todos os fornecedores da Internet...
- Page 56 Consulte o manual do utilizador: 1. Insira o CD do manual na unidade de CD-ROM, sendo o CD apresentado no modo de execução automática. 2. Clique em Browse CD (Procurar CD), o explorador de ficheiros apresenta o conteúdo do CD, abra a pasta que corresponda ao seu modelo, sendo apresentado em seguida o ficheiro index.htm, faça duplo clique para visualizar o manual.
-
Page 57: Polski
Polski. Instalacja sprz tu i oprogramowania Poł czenie sieci LAN: Jeden koniec kabla sieciowego Ethernet podł cz do portu Ethernet komputera, a drugi do portu LAN routera ADSL2+. Poł czenie sieci WAN: Jeden koniec kabla telefonicznego podł cz do gniazdka telefonicznego, a drugi do portu ADSL routera ADSL2+. - Page 58 Skonfiguruj komputer w celu uzyskania adresu IP Standardowo w routerze ADSL wł czone jest DHCP, co oznacza, e mo na uzyska adres IP automatycznie tylko po odpowiednim skonfigurowaniu komputera. Ten opis przedstawia jak skonfigurowa komputera, tak aby uzyska adres IP automatycznie w systemach operacyjnych Windows 95/98/Me, 2000 lub NT.
- Page 59 Po zako czeniu konfiguracji komputera, tak aby uzyskiwał adres IP automatycznie, prosz przej Konfiguracja przy pomocy przegl darki internetowej 1. Uruchom przegl dark i wpisz http://192.168.16.1 w pasku adresu przegl darki. Ten numer to standardowy adres IP tego urz dzenia. Wci nij Enter. 2.
- Page 60 3. Program szybkiej instalacji pozwala na wpisanie nazwy u ytkownika i hasła dostarczonych przez dostawc usług internetowych. 4. Aby sprawdzi VPI, VCI i enkapsulacji z dostawc usług internetowych, mo na skorzysta z poni szej tabeli:...
- Page 61 Kraj Dostawca usług internetowych Australia Czechy Dania Francja Anderer Anbieter (inni dostawcy) Niemcy Izrael Włochy Maroko Holandia Nowa Zelandia Todos os apresentador (wszyscy Portugalia Rosja Hiszpania Jazztel / Ola Internet / Telepac Sri Lanka Szwajcaria Alle anbieter (wszyscy dostawcy) Turcja Wielka Brytania Wszyscy dostawcy usług internetowych...
- Page 62 Przegl danie instrukcji u ytkownika: 1. Włó płyt CD z instrukcjami do nap du CD-ROM - płyta uruchomi si automatycznie. 2. Kliknij "Przegl daj" - w eksploratorze pojawi si lista zawarto ci płyty CD. Otwórz folder odpowiadaj cy nazw modelowi zakupionego urz dzenia.
- Page 63 Ethernet Ethernet (LAN) ADSL2+. ADSL ADSL2+. ADSL2+.
-
Page 64: Network Connections
Windows. Windows XP Settings ( Connections ( Area Connection ( Internet Protocol [TCP/IP] ( (TCP/IP)). Properties ( Internet Protocol (TCP/IP) Properties ( address automatically ( Obtain DNS server address automatically ( DNS- DHCP Windows 95/98/Me, 2000 (Macintosh, Sun Windows Start ( ) Network Connections Local Area Connection Network Components (... - Page 65 DHCP ADSL. DHCP ADSL DHCP...
- Page 66 http://192.168.16.1. Quick Setup ( 'admin' Enter ( 'admin'.
- Page 67 VPI, VCI Telus Czech Telecom Telenor Network Cybercity / Tiscali Tiscali / Wannadoo 1 & 1 Internet DSL AOL DSL / Freenet DSL Anderer Anbieter Fireline networks GMX Internet Snafu ADS / Tiscali / T-online Schlund Arcor DSL / Hansenet Netcologne KPN PPPoE LLC Telecom Italia...
- Page 68 Rest oil presente IAM, Wanadoo KPN PPPoA VC-MuX BBeyond Bridge LLC BBeyond PPPoA VC-MuX New Zealand Telecom Todos os apresentador Stream WebPlus Eresmas / Retevision Albura / Tiscali Uni2 Colt Teeccom Telefornica / Wanadoo Ya.com / Earth / Terra Jazztel / Ola Internet / Telepac Sri Lanka Telecom British Telecom...
- Page 69 Browse CD ( index.htm.
-
Page 70: Türkçe
Telefon kablonuzun bir ucunu telefon prizine, di er ucunu ADSL2+ Routerınızın ADSL portuna ba layın. Güç Adaptör Ba lantısı: Kutu içinden çıkan güç kablosunu ADSL2+ routerınızın arkasındaki yuvaya ba layın ve ön taraftaki açma/kapama dü mesinden ADSL2+ Routerınızı çalı tırın. - Page 71 IP adresi elde edebilmek için sisteminizi ayarlayın Varsayılan ADSL router ayarları için, DHCP etkin haldedir,bu da bilgisayarınızın otomatik olarak IP adresi elde edebilmesini sa lar. Bu kısım sisteminiz için (98/Me,/2000 ve NT i letim sistemleri için) IP adresini nasıl alaca ınızı göstermektedir.
- Page 72 Web Konsol Ayarları 1. Web konsolunu açıp http://192.168.16.1 linkine gidiniz. Bu IP adresi aygıt için varsayılan adrestir. 2. Ekrana gelen pencerede. Kullanıcı adı ve parolanız sorulacaktır. Kullanıcı adını (username ) 'admin' , Parolayı (password ) 'admin' olarak ekrana girin.
- Page 73 3. Hızlı kurulum, size ISS (Internet Servis Sa layıcısı) tarafından verilen kullanıcı adı ve ifreyi girme imkanı tanıyacaktır. 4. Örnek olması adına bazı ülkelerdeki VPI, VCI ve encapsulation ayarları alttaki tablodaki gibidir.
- Page 74 Countries Australia Canada Czech Denmark France Deutschland Snafu ADS / Tiscali / T-online Israel Italian Morocco Netherlands New Zealand Portugal Russia Span Jazztel / Ola Internet / Telepac Sri Lanka Switserland Turkey United Kingdom All Internet providers Telus Czech Telecom Telenor Network Cybercity / Tiscali Tiscali / Wannadoo...
- Page 75 Kullanma Kılavuzunu Tarama 1. Kullanma kılavuzu CD sini CD-ROM’unuza yerle tiriniz, CD otomatik olarak okunacaktır. 2. CD yi tara (Browse CD) seçimini yaptıktan sonra kar ınıza CD içeri ini listeleyen bir dosya çıkacaktır. Ürününüzün modelini listeden seçip, kullanma kılavuzunu açmak için dosyasına çift tıklayın.
- Page 76 Garanti Kapsamı 1. Cihazın değiştirilme işlemi 2. Müşteri 3. thalatçı firma 5. Garanti; 6. Onarım Garanti Şartları 1. Garanti süresi, 2. Malın 3. Malın 4. Malın 5. Malın; 6. Malın 7. Garanti süresi 8. Garanti Belgesi...
Need help?
Do you have a question about the AR-7064+ and is the answer not in the manual?
Questions and answers