Table of Contents
Advertisement
Quick Links
Advertisement
Table of Contents

Related Manuals for Electrolux EGD6576


Summary of Contents for Electrolux EGD6576
- Page 1 EGD6576 User Manual...
-
Page 2: Table Of Contents
10. ENERGY EFFICIENCY.................. 25 WE’RE THINKING OF YOU Thank you for purchasing an Electrolux appliance. You’ve chosen a product that brings with it decades of professional experience and innovation. Ingenious and stylish, it has been designed with you in mind. So whenever you use it, you can be safe in the knowledge that you’ll get great results every time. - Page 3 ENGLISH injuries and damages. Always keep the instructions with the appliance for future reference. 1.1 Children and vulnerable people safety This appliance can be used by children aged from 8 • years and above and persons with reduced physical, sensory or mental capabilities or lack of experience and knowledge if they have been given supervision or instruction concerning use of the appliance in a safe way and understand the hazards involved.
-
Page 4: Safety Instructions
After use, switch off the hob element by its control and • do not rely on the pan detector. If the glass ceramic surface / glass surface is cracked, • switch off the appliance to avoid the possibility of electric shock. - Page 5 ENGLISH • If the appliance is installed above mains cable. Contact our Authorised drawers make sure that the space, Service Centre or an electrician to between the bottom of the appliance change a damaged mains cable. and the upper drawer, is sufficient for •...
- Page 6 • Remove all the packaging, labelling • Do not let cookware to boil dry. and protective film (if applicable) • Be careful not to let objects or before first use. cookware fall on the appliance. The • Use this appliance in a household surface can be damaged.
-
Page 7: Product Description
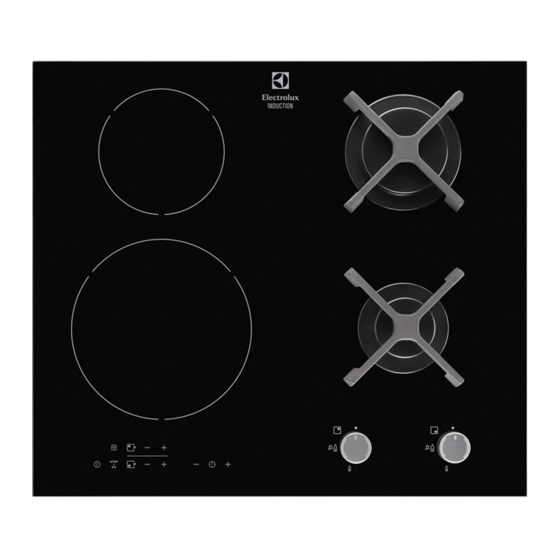
ENGLISH • Disconnect the appliance from the • Contact your municipal authority for electrical supply before maintenance. information on how to discard the • Do not use water spray and steam to appliance correctly. clean the appliance. • Disconnect the appliance from the •... - Page 8 3.3 Control panel layout Use the sensor fields to operate the appliance. The displays, indicators and sounds tell which functions operate. Sensor Function Comment field ON / OFF To activate and deactivate the hob. Lock / The Child Safety To lock / unlock the control panel.
-
Page 9: Daily Use
ENGLISH Display Description There is a malfunction. + digit A cooking zone is still hot (residual heat). Lock / The Child Safety Device function operates. Incorrect or too small cookware or no cookware on the cooking zone. Automatic Switch Off function operates. 3.5 Residual heat indicator The induction cooking zones make the heat necessary for cooking process... - Page 10 Automatic Switch Off WARNING! Do not keep the control knob The function deactivates the hob pushed for more than 15 automatically if: seconds. If the burner does not light after 15 seconds, • all cooking zones are deactivated, release the control knob, •...
- Page 11 ENGLISH for some time and then decreases to the the cooking zone starts to flash quickly. correct heat setting. The display shows the remaining time. To deactivate the function: set the To activate the function the cooking zone must be cold. cooking zone with and touch .
-
Page 12: Hints And Tips
To deactivate the function: touch Power management function The previous heat setting comes on. • All cooking zones are connected to When you deactivate the one phase. See the illustration. hob, you also deactivate this • The phase has a maximum electricity function. - Page 13 ENGLISH 5.2 Diameters of cookware The cooking zone efficiency is related to the diameter of the cookware. The cookware with a smaller diameter than Use cookware with the minimum receives only a part of the diameters applicable to the power generated by the cooking zone. size of burners.
-
Page 14: Care And Cleaning
Heat setting Use to: Time Hints (min) Keep cooked food warm. as nec‐ Put a lid on the cookware. essary 1 - 2. Hollandaise sauce, melt: but‐ 5 - 25 Mix from time to time. ter, chocolate, gelatine. 1 - 2. -
Page 15: Troubleshooting
ENGLISH 6.2 Pan supports the dirt can cause damage to the hob. Put the special scraper on the glass The pan supports are not surface at an acute angle and move resistant to washing in a the blade on the surface. dishwasher. - Page 16 Problem Possible cause Remedy Activate the hob again and set the heat setting in less than 10 seconds. You touched 2 or more Touch only one sensor sensor fields at the same field. time. STOP+GO function oper‐ Refer to "Daily use" chap‐...
- Page 17 ENGLISH Problem Possible cause Remedy The diameter of the bottom Use cookware with correct of the cookware is too dimensions. small for the zone. Refer to “Technical infor‐ mation” chapter. and a number come on. There is an error in the Disconnect the hob from hob.
-
Page 18: Installation
7.2 If you cannot find a during the warranty period. The instructions about the Service Centre solution... and conditions of guarantee are in the guarantee booklet. If you cannot find a solution to the problem yourself, contact your dealer or 7.3 Labels supplied with the... - Page 19 ENGLISH 8.4 Gas Connection For appliances installed in the Republic of Ireland please refer to NSAI- Domestic Gas Installation I.S. 813 Current Editions WARNING! and the ETCI Rules for Electrical Any gas installation must be Installations. carried out by a GAS SAFE REGISTER installer.
- Page 20 4. With a thin screwdriver, adjust the CAUTION! bypass screw position (A). It is important to install the elbow correctly, with the shoulder on the end of the thread, fitted to the hob connecting pipe. CAUTION! Failure to ensure the correct assembly will cause leakage of gas.
- Page 21 ENGLISH 8.8 Replacement of the The manufacturer refuses connection cable to be held responsible, if these safety measures are The replacement of electric not abided by. cable must be carried out exclusively by the service Supply connections force centre or by personnel This hob has to be connected to 230 —...
- Page 22 8.9 Attaching the seal extend it. Make sure that the ends of the seal stripe are located in the 1. Clean the worktop around the cut out middle of one side of the hob. area. 3. Add some mm when you cut the seal 2.
- Page 23 ENGLISH min. 38 mm min. 2 mm R 5mm 600 mm mm 560 min. 55mm min. 12 mm min. 2 mm CAUTION! Install the appliance only on a worktop with a flat surface. min 20 mm 8.11 Possibilities for insertion (max 150 mm) 60 mm Kitchen unit with door...
-
Page 24: Technical Information
9. TECHNICAL INFORMATION 9.1 Hob dimensions Width 590 mm Depth 520 mm 9.2 Cooking zones specification Cooking zone Nominal pow‐ Power func‐ Power func‐ Cookware di‐ er (maximum tion [W] tion maximum ameter [mm] heat setting) duration [min] Left front... -
Page 25: Energy Efficiency
ENGLISH 9.5 Gas burners for NATURAL GAS G20 20 mbar BURNER NORMAL POWER MINIMUM POWER INJECTOR MARK 1/100 mm Rapid 0,75 Semi-rapid 0,45 9.6 Gas burners for LPG G30/G31 28-30/37 mbar BURNER NORMAL MINIMUM INJECTOR NOMINAL GAS FLOW g/h POWER POWER MARK 1/100 G30 28-30... - Page 26 10.2 Energy saving • Before use, make sure that the burners and pan supports are assembled correctly. • Use cookware with diameters applicable to the size of burners. • Center the pot on the burner. • When you heat up water, use only the amount you need.
- Page 27 ENGLISH...
- Page 28 www.electrolux.com/shop...
Need help?
Do you have a question about the EGD6576 and is the answer not in the manual?
Questions and answers