Table of Contents
Advertisement
Advertisement
Table of Contents

Related Manuals for Electrolux EGD6576NOK


Summary of Contents for Electrolux EGD6576NOK
- Page 1 EGD6576NOK EN HOB USER MANUAL...
-
Page 2: Table Of Contents
9. TECHNICAL INFORMATION..................22 WE’RE THINKING OF YOU Thank you for purchasing an Electrolux appliance. You’ve chosen a product that brings with it decades of professional experience and innovation. Ingenious and stylish, it has been designed with you in mind. So whenever you use it, you can be safe in the knowledge that you’ll get great results every time. -
Page 3: Safety Information
ENGLISH SAFETY INFORMATION Before the installation and use of the appliance, carefully read the supplied instructions. The manufacturer is not responsible if an incorrect installation and use causes injuries and damages. Always keep the instructions with the appliance for future reference. 1.1 Children and vulnerable people safety This appliance can be used by children aged from 8 •... -
Page 4: Safety Instructions
Metallic objects such as knives, forks, spoons and lids • should not be placed on the hob surface since they can get hot. Do not use a steam cleaner to clean the appliance. • After use, switch off the hob element by its control and •... - Page 5 ENGLISH prevents hot cookware to fall from the mains cable. Contact an Authorised appliance when the door or the Service Centre or an electrician to window is opened. change a damaged mains cable. • If the appliance is installed above •...
- Page 6 • Remove all the packaging, labelling • Be careful not to let objects or and protective film (if applicable) before cookware fall on the appliance. The first use. surface can be damaged. • Use this appliance in a household •...
-
Page 7: Product Description
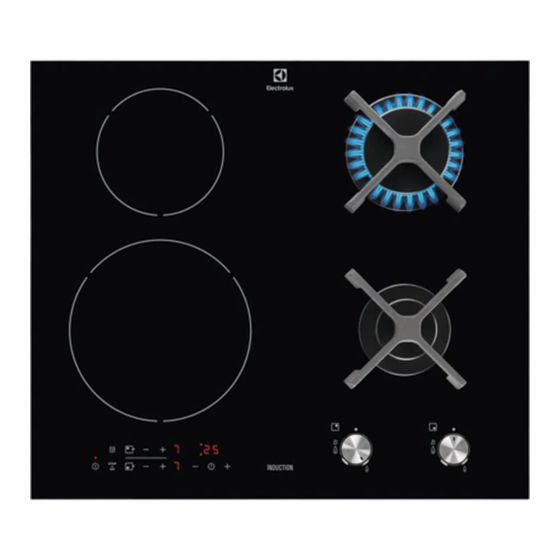
ENGLISH 2.6 Disposal • Disconnect the appliance from the mains supply. WARNING! • Cut off the mains cable and discard it. Risk of injury or suffocation. • Flat the external gas pipes. • Contact your municipal authority for information on how to discard the appliance correctly. - Page 8 Sensor Function Comment field ON / OFF To activate and deactivate the hob. Lock / The Child Safety To lock / unlock the control panel. Device To set a heat setting. Heat setting display To show the heat setting.
-
Page 9: Daily Use
ENGLISH 3.5 Residual heat indicator The induction cooking zones make the heat necessary for cooking process WARNING! directly in the bottom of the cookware. The glass ceramic is heated by the heat of There is a risk of burns the cookware. from residual heat. - Page 10 Turning the burner off The heat setting To put the flame out, turn the knob to the Touch to increase the heat setting. off position Touch to decrease the heat setting. WARNING! Touch at the same time to Always turn the flame down deactivate the cooking zone.
- Page 11 ENGLISH To set the cooking zone: touch To deactivate the function: touch again and again until the indicator of a The previous heat setting comes on. necessary cooking zone comes on. Lock To activate the function or change the time: touch of the timer to set You can lock the control panel while the time (00 - 99 minutes).
-
Page 12: Hints And Tips
• The function activates when the total electricity loading of the cooking zones exceeds 3700 W. • The function decreases the power to the other cooking zones. • The heat setting display of the reduced zones changes between two levels. - Page 13 ENGLISH 5.4 The noises during operation CAUTION! Make sure that the pots are If you can hear: placed centrally on the • crack noise: cookware is made of burners in order to get different materials (sandwich maximum stability and to get construction).
-
Page 14: Care And Cleaning
Heat setting Use to: Time Hints (min) 3 - 4 Steam vegetables, fish, meat. 20 - 45 Add some tablespoons of liq- uid. 4 - 5 Steam potatoes. 20 - 60 Use max. ¼ l water for 750 g of potatoes. -
Page 15: Troubleshooting
ENGLISH 6.4 Cleaning the spark plug the dirt can cause damage to the hob. Put the special scraper on the glass This feature is obtained through a ceramic surface at an acute angle and move ignition candle with a metal electrode. the blade on the surface. - Page 16 Problem Possible cause Remedy The hob deactivates. You put something on the Remove the object from the sensor field. sensor field Residual heat indicator The zone is not hot be- If the zone operated suffi- does not come on.
- Page 17 ENGLISH Problem Possible cause Remedy There is an error in the hob Deactivate the hob. Re- comes on. because a cookware boils move the hot cookware. Af- dry. Automatic Switch Off ter approximately 30 sec- and the overheating protec- onds, activate the zone tion for the zones operate.
-
Page 18: Installation
7.3 Labels supplied with the accessories bag Stick the adhesive labels as indicated below: MOD. MOD. MOD. TYPE PROD.NO. 230V-50Hz PROD.NO. PROD.NO. SER.NO. IP20 0049 SER.NO SER.NO 03 IT DATA DATA MADE IN ITALY A) Stick it on Guarantee Card and send C) Stick it on instruction booklet. - Page 19 ENGLISH • it is no longer than 1500 mm; Make sure that the gas • it shows no throttles; supply pressure of the • it is not subject to traction or torsion; appliance obeys the • it does not get in touch with cutting recommended values.
- Page 20 3. Remove the knob. that the rating plate rates. Make sure 4. With a thin screwdriver, adjust the that you install the plug in a correct bypass screw position (A). socket. • Always use a correctly installed shockproof socket.
- Page 21 ENGLISH 8.9 Assembly min. 650 mm min. 600 mm min. min. 2 mm min. 2 mm < 20 mm > 20 mm min. 500 mm min. 500 mm 30 mm 12 mm 57 mm 12 mm 57 mm 28 mm 41 mm 28 mm 41 mm...
-
Page 22: Technical Information
12 mm min. 2 mm A) Removable panel CAUTION! B) Space for connections Install the appliance only on a Kitchen unit with oven worktop with a flat surface. The electrical connection of the hob and the oven must be installed separately for 8.10 Possibilities for insertion... - Page 23 ENGLISH 9.2 Cooking zones specification Cooking zone Nominal pow- Power func- Power func- Cookware di- er (maximum tion [W] tion maximum ameter [mm] heat setting) duration [min] Left front 2300 3300 180 - 210 Left rear 1400 2500 125 - 140 The power of the cooking zones can be For optimal cooking results use cookware different in some small range from the...
- Page 24 9.6 Gas burners for LPG G30/G31 30/30 mbar BURNER NORMAL MINIMUM INJECTOR NOMINAL GAS POWER kW POWER kW MARK 1/100 FLOW g/h Rapid 0,75 Semi-rapid 0,45 9.7 Gas burners for NATURAL GAS G20 13 mbar BURNER NORMAL POWER MINIMUM POWER...
- Page 25 ENGLISH...
- Page 26 www.electrolux.com...
- Page 27 ENGLISH...
- Page 28 www.electrolux.com/shop...
Need help?
Do you have a question about the EGD6576NOK and is the answer not in the manual?
Questions and answers