
Subscribe to Our Youtube Channel
Related Manuals for Edge10 C172


Summary of Contents for Edge10 C172
- Page 1 COLOUR TFT LCD MONITOR USER’S MANUAL Model: C172 The display comes with a three year on site warranty. To activate your warranty please register your display at http://www.edge10.com by clicking on the help & support link.
-
Page 2: Table Of Contents
Menu: Introduction Product Description ...Page.2 Package Contents...Page.2 Product Features... Page.2 Cleaning...Page.2 Precautions...Page.2 2. Control Function OSD Button ...Page.4 OSD Control...Page.5 ...Page.5 Operating Procedure 3. Inputs Diagram Inputs...Page.10 4. Display Angle...Page.10 Tilting...Page.10 5. Product Specification...Page.11 6. Display Modes...Page.12 7. Service Information...Page.12... -
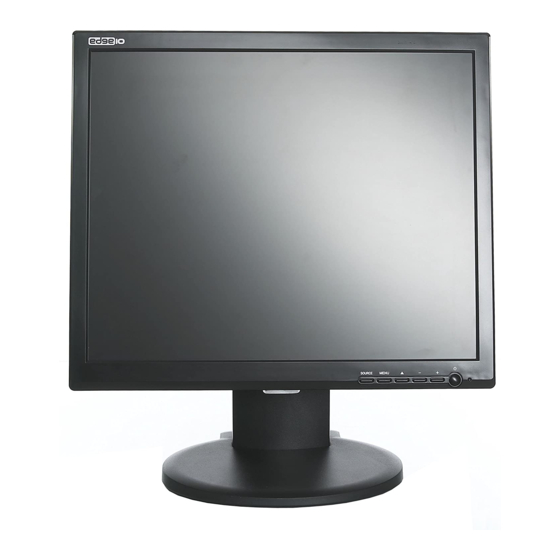
Page 3: Product Description
It has power-saving capabilities and emits no X-ray radiation. You will certainly benefit from this monitor in lots of way to name some of them, comfort safety and environmental protection. - Page 4 ● Ensure that the total ampere ratings on all units plugged into the extension cord is not above the cord s rating. If the power supply cord, which came with your monitor, is to be connected to the PC instead of ●...
-
Page 5: Control Button Front View
Control Function Control Button Front View ① Power LED: Indicates different status (Green---Normal operation; Red---Power Management; Dark---Power turn off;) ② Power switch: Turns power on/off ③ “+” Button: Adjust setting bars i.e. Contrast, Brightness, etc. to increase setting values of the OSD;... -
Page 6: Osd Control
OSD Control Operating Procedure 1) Press “MENU” to enter OSD menu. 2) Press “SOURCE” to Exit OSD menu on screen Display, or Exit adjustment item. Press “+”and “-” to selects main menu item.(left/right) 4) Press “MENU” to confirm, and enter to the sub menu. 5) Press “MENU”... -
Page 7: Timer Function
Phase Press“+” and“-” to adjust the real image value of ADC Colour Press “+”and“-”to adjust the colour mode. ( NORMAL, WARM,COOL,USER) Auto Adjust press “+”and“-”to Auto tuning TIMER FUNCTION Function Description Timer Press “+”and“-”to adjust sub items: (Current, Turn off, Turn on, Turn on program, Switch and Switch program) PIC Misc Not available for this model... -
Page 8: Function Description
Function Description Current Press “+”and“-” to choice the Current mode (hour and minute),and press “MENU” or“▲” button to adjust the setting values Turn off Press “+”and“-” to choice the Turn off mode(hour and minute),and press “MENU” or“▲” button to adjust the setting values Turn on Press “+”and“-”... -
Page 9: Osd Position
OSD POSITION Function Description Language Press“+” and“-”to choice the language,(Chinese, English, Italian, Spanish, Portuguese, German, France) H-Position Press “+” and“-”to move the OSD MENU position to right or left V-Position Press “+” and“-”to move the OSD MENU position to up or down Duration Press “+”... -
Page 10: Video Function
VIDEO FUNCTION Function Description Contrast Press “+”and“-”to adjust the setting value(0~100) to adjust the contrast Brightness Press “+”and“-”to adjust the setting value(0~100) to adjust the brightness Not available for this mode Saturation press “+”and“-”to adjust Sharpness press “+”and“-”to adjust Colour Tome Press “+”and“-”to adjust the colour ( NORMAL, WARM,COOL) Picture Mode Press “+”and“-”to choose the Mode: (DEFAULT, BRIGHT, SOFT,... -
Page 11: Inputs Diagram Inputs
Inputs Diagram Inputs 1. AC POWER INPUT: AC inlet for 100-240V power system. 2. PC INPUT: This D-sub 15 sockets can be connected to a PC. 3. S-VIDEO INPUT: Inputs S-video signal by DIN socket. 4. VIDEO-IN: This BNC socket can be connected to composite video output. Display Angle Tilting For viewing clarity, you can tilt the LCD forward (Down to 5 degrees) or backward (Up to 18... -
Page 12: Product Specification
Product Specification Model Spec LCD Display Pixel pitch Max Resolution Dimensions Packing Dimensions Contrast Ratio Brightness Response Time Display Colour Viewing Angle L/R PC Interface Video Sync Display Mode PC connector Front Control OSD Adjustment Audio speaker Power input Operating Consumption Operating Conditions Storage Conditions... -
Page 13: Display Model
720x400 Service Information Service When you buy this excellent LCD Monitor, you are entitled to the warranty provided by us, please contact us if you need any information on our product. Thank you again for buying our product. Horizontal Clock...
Need help?
Do you have a question about the C172 and is the answer not in the manual?
Questions and answers