Table of Contents
Advertisement
Quick Links
Advertisement
Table of Contents

Related Manuals for Bosch CPA565GS0B


Summary of Contents for Bosch CPA565GS0B
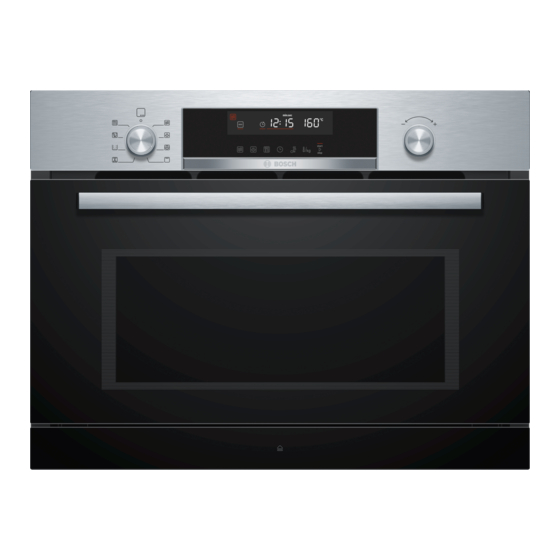
- Page 1 Microwave CPA565GS0B [en] Instruction manual...
-
Page 3: Table Of Contents
Setting the microwave to combined operation ..17 www.bosch-home.com and in the online shop www.bosch-eshop.com Steam ........18 Noise . -
Page 4: Intended Use
Intended use 8Intended use (Important safety information R ead these instructions carefully. Only then I n t e n d e d u s e will you be able to operate your appliance G eneral information safely and correctly. Retain the instruction I m p o r t a n t s a f e t y i n f o r m a t i o n manual and installation instructions for future Warning –... -
Page 5: Microwave
Important safety information Risk of scalding! When you open the appliance door, hot Microwave ■ steam can escape. Steam may not be Warning – Risk of burns! visible, depending on its temperature. When Using the appliance for anything other than opening, do not stand too close to the ■... -
Page 6: Steam
Important safety information Airtight packaging may burst when food is Warning – Risk of electric shock! ■ heated. Always observe the instructions on The appliance is a high-voltage appliance. the packaging. Always use oven gloves to Never remove the casing. remove dishes from the cooking Warning –... -
Page 7: Causes Of Damage
Causes of damage Foil containers: Do not use foil containers in the ]Causes of damage ■ appliance. They damage the appliance by producing sparks. G eneral information Operating the microwave without food: Operating the ■ C a u s e s o f d a m a g e appliance without food in the cooking compartment Caution! may lead to overloading. -
Page 8: Environmental Protection
Environmental protection 7Environmental protection This appliance is labelled in accordance with European Directive 2012/19/EU concerning used electrical and electronic appliances Y our new appliance is particularly energy-efficient. (waste electrical and electronic equipment - E n v i r o n m e n t a l p r o t e c t i o n Here you can find tips on how to save even more WEEE). -
Page 9: Touch Fields And Display
Getting to know your appliance Display Position The display is structured so that the information can be "Off" position In this position, the appliance is Û read at a glance in any situation. switched off and is in energy-saving The value that you can currently set is highlighted. It is mode. -
Page 10: Rotary Selector
Getting to know your appliance Operating modes Water tank status display Symbol Meaning Your appliance has various operating modes which Symbol lights up, Water tank is in the tank recess and make your appliance easier to use. arrow flashes needs filling. You can find more precise descriptions of these in the Symbol without Water tank is not in the tank recess... -
Page 11: Steam
Getting to know your appliance Steam < Hot air 40 °C You can use the steam function on its own or in Find out how to combine the microwave function with all combination with all types of heating and the microwave types of heating and the steam function here: ~ "Setting the microwave to combined operation"... -
Page 12: Water Tank
Accessories To close the tank cover, fold it downwards and briefly _Accessories press the centre of the tank cover. The tank cover is locked. Y our appliance is accompanied by a range of A c c e s s o r i e s accessories. -
Page 13: Additional Accessories
Before using for the first time Additional accessories KBefore using for the first Additional accessories may be enclosed depending on time the appliance model. Wire insert B efore you can use your new appliance, you must For frying. Insert the wire insert B e f o r e u s i n g f o r t h e f i r s t t i m e into the glass tray with its feet to make some settings. -
Page 14: Cleaning The Cooking Compartment And Accessories
Operating the appliance Notes 1Operating the appliance If your water is very hard, we recommend that you ■ use softened water. If you only use softened water, you can set the water Y ou have already learnt about the controls and how ■... -
Page 15: Setting The Heating Function And Temperature
Operating the appliance Setting the heating function and temperature Stopping the appliance from heating Turn the function selector to the "Off" position. Example: Hot air < at 200 °C The appliance will stop heating and all the settings will Use the function selector to set the Hot air < be cleared. -
Page 16: Microwave
Microwave Microwave power settings ^Microwave The microwave power settings are levels and do not always correspond to the exact wattage that the Y ou can use the microwave to cook, heat up or defrost appliance uses. M i c r o w a v e food quickly. -
Page 17: Setting The Microwave To Combined Operation
Microwave Touch the microwave setting field to select the Pausing the operation power setting you require. Touch the start l stop field or open the appliance door. The operation is suspended and the start l stop LED flashes. Close the appliance door. Touch the start l stop field. -
Page 18: Steam
Steam Notes `Steam Touching it several times switches the power levels ■ from the highest to the lowest level. If the microwave function is only added after the Y ou can use the steam function on its own or in ■... -
Page 19: Setting The Steam Combination
Steam Setting the steam The arrow of the water tank symbol $ will go out and the water tank symbol ( will be lit. The Note: If the appliance has not been used for an appliance will start. The start l stop LED will be lit. extended period, start by running a rinse cycle !. -
Page 20: Filling The Water Tank
Steam Notes Caution! If the water tank runs out of water during cooking, The appliance may become damaged due to the use of ■ the appliance will continue cooking, but without unsuitable liquids. steam assistance. No indicator will appear on the Do not use distilled water, highly chlorinated tap water display. -
Page 21: Refilling The Water Tank
Steam Refilling the water tank Slide the water tank in fully. Close the tank cover. The way the appliance responds if the water tank runs Touch the start l stop button. dry when the appliance is in operation depends on what Water is pumped through the pipes.The time operating mode it is in: remaining will count down on the display. -
Page 22: Setting A Programme
Automatic programmes Touch 0 twice. PAutomatic programmes The cooking time symbol y is highlighted in the display. Use the rotary selector to set a cooking time of Y ou can prepare food really easily using the automatic A u t o m a t i c p r o g r a m m e s 15 minutes. -
Page 23: Programme Table
Automatic programmes The appliance automatically sets the right cooking The programme has ended time for that weight. An audible signal sounds. The programme has finished; the appliance stops heating. Turn the function selector to the off position. Changing the programme Touch the start l stop field for approx. - Page 24 Automatic programmes Pro- Meal Weight in kg Cookware/accessories, shelf Information Specific details gramme height P 08 Sirloin, well done 0.50 - 2.00 Glass tray Position 1 P 09 Leg of lamb on the 1.00 - 2.00 Glass tray bone, medium rare Position 1 P 10 Leg of lamb on the 1.00 - 2.00...
- Page 25 Automatic programmes Pro- Meal Weight in kg Cookware/accessories, shelf Information Specific details gramme height P 28 Pasta bake, pre- 0.30 - 1.00 Cookware on glass tray Use microwave-safe Lasagne, cannelloni or pasta bakes cooked and chilled cookware only. using precooked pasta Position 2 P 29 Reheat plated meal,...
-
Page 26: Setting The Time-Setting Options
Setting the time-setting options Changing the timer duration OSetting the time-setting Use the rotary selector to change the timer duration. options The change is applied after a few seconds. Cancelling the timer duration Y our appliance has various time-setting options. You Use the rotary selector to reset the timer duration to - - S e t t i n g t h e t i m e - s e t t i n g o p t i o n s can use the 0 touch field to call up the menu and... -
Page 27: Initial Use
Childproof lock Cancelling the cooking time AChildproof lock If the timer function has been set, first touch the 0 button. You will now be able to adjust the cooking Y our appliance is equipped with a childproof lock so time. C h i l d p r o o f l o c k that children cannot switch it on accidentally or change Use the rotary selector to reset the cooking time to - - : -... -
Page 28: Changing The Basic Settings
Basic settings List of basic settings QBasic settings Basic setting Options Explanation T here are various settings available to you in order to Audible signal ‚ = short = Audible signal ™‹‚ B a s i c s e t t i n g s help use your appliance effectively and simply. -
Page 29: Suitable Cleaning Agents
Cleaning Degreaser DCleaning For intensive removal of stubborn grease deposits from surfaces. W ith good care and cleaning, your appliance will retain Order no. 00311781 C l e a n i n g its appearance and remain fully functioning for a long Descaling agent time to come. -
Page 30: Cleaning Self-Cleaning Surfaces
Cleaning Keeping the appliance clean Stainless-steel Hot soapy water: surfaces Clean with a dishcloth. Always keep the appliance clean and remove dirt Do not scour. immediately so that stubborn deposits of dirt do not build up. Check the position of the door seal after cleaning Tips Accessories Hot soapy water:... -
Page 31: Cleaning Function
Cleaning function Pour the descaling solution into the water tank and .Cleaning function slide the water tank in fully. Close the tank cover. D escaling Touch the start l stop button. C l e a n i n g f u n c t i o n The appliance will now be descaled. -
Page 32: Troubleshooting
Trouble shooting Caution! Insert the drip tray back into the tank recess and slide it in fully. Do not dry the drip tray in the hot cooking ■ Close the tank cover. compartment. This will damage the drip tray. Do not clean the drip tray in the dishwasher. This will ■... - Page 33 Trouble shooting Error message Possible cause Remedy/Note The appliance can be set, but does not The appliance is in demo mode. Deactivate demo mode in the basic settings. heat up. The colon flashes. Note: Demo mode is only visible in the first 5 minutes after connecting the appliance to the mains.
-
Page 34: Customer Service
0216 528 99 99 indicated in the table. Do not place your food and accessory into the cooking compartment until it has Üretici Firma : Robert Bosch Hausgeräte GmbH finished preheating. Carl-Wery Straße 34 81739 München, Germany Some dishes turn out best if they are cooked in multiple www.bosch-home.com... -
Page 35: Defrosting
Tested for you in our cooking studio Remove any accessories that are not being used from Microwave-only operation: Cookware on the bottom ■ the cooking compartment. of the cooking compartment, shelf position 0. Steam-only operation: Glass tray with steamer ■ Accessories basket on shelf position 3. - Page 36 Tested for you in our cooking studio Dish Cookware Shelf posi- Heating Weight Steps Microwave Cooking Notes tion function setting time in min Minced meat, mixed Cookware, 200 g Freeze food flat if possible. uncovered Turn frequently during 500 g defrosting and remove any 10 - 15 minced meat that has already...
-
Page 37: Heating Frozen Food
Tested for you in our cooking studio Heating frozen food After heating, leave the food to stand for a further 2 to 5 minutes to allow the temperature to stabilise. Take ready meals out of the packaging. They will heat Always wear oven gloves or use a pot holder when up more quickly and evenly in microwaveable removing cookware from the appliance. -
Page 38: Cakes, Small Baked Items And Bread
Tested for you in our cooking studio Dish Cookware Shelf po- Heating Weight/ Microwave Steam Cooking time Notes sition function quantity setting setting in min Baby food, e.g. baby bot- Cookware, 150 ml 0.5-1.5 No teats or lids. Always tles uncovered shake well after heating. - Page 39 Tested for you in our cooking studio Bread and rolls Switch on the steam function for hot air. The settings for bread dough apply to both dough placed on a baking Never pour water into the hot cooking compartment or tray and dough placed in a loaf tin.
- Page 40 Tested for you in our cooking studio Bread and rolls Meal Cookware Shelf po- Heating Steps Temperature Grill Steam Duration Notes sition function in °C setting level in min. Bread, 1 kg* Glass tray 10-15 Never pour hot <+" water directly into a 190-200 30-45 hot oven.
-
Page 41: Bakes And Gratins
Tested for you in our cooking studio Bakes and gratins longer to cook in deep, narrow cookware and it browns more on top. Always use the indicated shelf positions. You can use your appliance to cook bakes and gratins. Observe the notes on cookware suitable for The settings tables list the optimum settings for certain microwaves.~ "Microwave"... - Page 42 Tested for you in our cooking studio Place the food to be grilled on the wire rack. Place the When you turn poultry, ensure that the breast side or glass tray underneath the wire rack to collect any the skin side is underneath at first. dripping fat.
- Page 43 Tested for you in our cooking studio Dish Cookware Shelf po- Heating Tempera- Grill set- Microwave Steam Cooking Notes sition function ture ting setting setting time in min Duck breast, 500 g Wire rack + 10-12 Place with the skin (+!+"...
-
Page 44: Vegetables And Side Dishes
Tested for you in our cooking studio Dish Cookware Shelf posi- Heating Tempera- Grill set- Microwave Steam Cooking tion function ture ting setting setting time in °C in min Fish steaks x 2-3, 150 g Wire rack + glass tray 3 ... -
Page 45: Desserts
Tested for you in our cooking studio Dish Cookware Shelf posi- Heating Steps Tempera- Microwave Steam Cooking tion function ture setting setting time in min Mixed vegetables, frozen, Glass tray + steaming 12-15 " 250 g tray Steaming sliced carrots, Glass tray + steaming 18-20 "... -
Page 46: Acrylamide In Foodstuffs
Tested for you in our cooking studio Acrylamide in foodstuffs products that are heated to high temperatures, such as crisps, chips, toast, bread rolls, bread, fine baked Which foods are affected? goods (biscuits, gingerbread, cookies). Acrylamide is mainly produced in grain and potato Tips for keeping acrylamide to a minimum when preparing food General Keep cooking times as short as possible. - Page 47 Tested for you in our cooking studio Combined microwave cooking Dish Cookware Shelf posi- Heating Tempera- Grill set- Microwave Cooking Notes tion function ture ting setting time in °C in min Potato gratin Cookware, 25-32 uncovered Cake, 700 g Cookware, 190-200 20-27 <+!
- Page 48 In respect of products placed onto the UK market, the Producer is: BSH Home Appliances Ltd Grand Union House Old Wolverton Road, Wolverton, Milton Keynes MK12 5PT United Kingdom *9001277222* 9001277222 990813...
Need help?
Do you have a question about the CPA565GS0B and is the answer not in the manual?
Questions and answers