
Related Manuals for Viking Range Tuscany TVDR3614B


Summary of Contents for Viking Range Tuscany TVDR3614B
- Page 1 Use & Care MANUAL Tuscany Freestanding Dual Fuel Ranges TVDR3614B, CTVDR3614B TVDR4816B, TVDR4814G, TVDR4814I, CTVDR4816B, CTVDR4814G, CTVDR4814I TVDR6618B, TVDR6616G, TVDR6616I CTVDR6618B, CTVDR6616G, CTVDR6616I...
-
Page 2: Table Of Contents
Congratulations We hope you will enjoy and appreciate the care and attention we have put into every detail of your new, state-of-the-art range. Your appliance is designed to off er years of reliable service. This use and care manual will provide you with the information you need to become familiar with your range’s care and operation. -
Page 3: Warnings
Warnings Warning and Important Safety Instructions appearing in this manual are not meant to cover all possible conditions and situations that may occur. Common sense, caution, and care must be exercised when installing, maintaining, or operating the appliance. ALWAYS contact the manufacturer about problems or conditions you do not understand. Recognize Safety Symbols, Words, Labels DA NG E R Hazards or unsafe practices which WILL... - Page 4 Warnings To Prevent Fire or Smoke Damage •Be sure all packing materials are removed from the appliance before operating it. • Keep area around appliance clear and free from combustible materials, gasoline, and other fl ammable vapors and materials. • If appliance is installed near a window, proper precautions should be taken to prevent curtains from blowing over burners. •...
- Page 5 Warnings Cooking Safety (con’t) • Once the unit has been installed as outlined in the Installation Instructions, it is important that the fresh air supply is not obstructed. The use of a gas cooking appliance results in the production of heat and moisture in the room in which it is installed. Ensure that the kitchen is well- ventilated.
-
Page 6: Before Using Range
Before Using Your Range All products are wiped clean with solvents at the factory to remove any visible signs of dirt, oil, and grease which may have remained from the manufacturing process. Before starting to cook, clean the range thoroughly with hot, soapy water. There may be some burn off and odors on fi... -
Page 7: Range Features
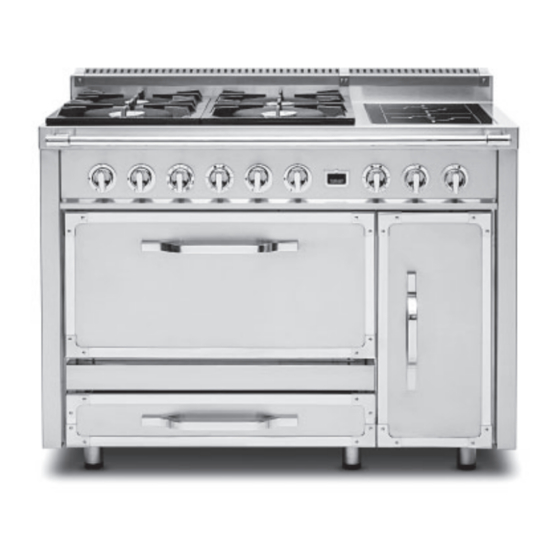
Range Features 36” W /4 Surface Burners 8,500 Nat/ 13,500 Nat/ 7,700 LP 12,500 LP 20,500 Nat/ 20,500 Nat/ 18,500 LP 18,500 LP 48” W /4 Surface Burners/Griddle 48” W /6 Surface Burners 48” W /4 Surface Burners/Induction 13,500 Nat/ 13,500 Nat/ 8,500 Nat/ 13,500 Nat/... -
Page 8: Surface Operation
Surface Operation All ranges are equipped with an exclusive restaurant style sealed burner system. This unique burner system is equipped with three diff erent size burners ranging from 8,500 to 20,500 BTUs. The 20,500 BTU burners are designed to provide extra high heat output, especially when using large pans, and should be used for boiling large quantities or if you need to bring something to a boil quickly. -
Page 9: Induction
Surface Operation INDUCTION (select models) Turning on the Induction Burners To turn on the induction burners, choose the appropriate control knob. Push and turn the control knob clockwise to any position between high and simmer. Induction Cookware Induction cooking utilizes magnetic power which reacts with iron in the base of cookware, instantly transforming the pot or pan into the heat source. -
Page 10: Griddle/Simmer Plate Operation
Surface Operation GRIDDLE/SIMMER PLATE (select models) The optional griddle is constructed of machined steel with a chrome fi nish and is uniquely designed to off er excellent cooking performance as well as easy clean up. The griddle is equipped with an electronic thermostat to maintain an even temperature across the griddle once the desired temperature has been set. -
Page 11: Using The Oven
Using the Oven WARNING NEVER cover any slots, holes or passages in the oven bottom or cover an entire rack with materials such as aluminum foil. Doing so blocks air fl ow through the oven and may cause carbon monoxide poisoning. - Page 12 Using the Oven CONVENTIONAL BAKING CHART Food Pan Size Single Rack Single Rack Temperature Time Position Position (min.) (Lg Oven) (Sm Oven) BREADS Biscuits Cookie sheet 3 or 4 400˚F (204˚C) 10 - 12 Yeast loaf Loaf pan 3 or 4 375˚F (191˚C) 30 - 35 Yeast rolls...
-
Page 13: Convection Bake
Using the Oven Convection Bake Convection cooking is a cooking technique which utilizes fan forced air to circulate heat throughout the entire oven creating the optimum cooking environment. Cooking with convection is recommended when performing multi-rack baking and for baking heavier foods. Below are tips which will allow you to get the best results out of our oven when cooking with convection. - Page 14 Using the Oven CONVECTION BAKING CHART Food Pan Size Single Rack Temperature Time Position (min.) (Lg Oven) BREADS Biscuits Cookie sheet 3 or 4 375˚F (191˚C) 7 - 9 Yeast loaf Loaf pan 3 or 4 375˚F (191˚C) 25 - 30 Yeast rolls Cookie sheet 3 or 4...
- Page 15 Using the Oven Solving Baking Problems Baking problems can occur for many reasons. Check the chart below for the causes and remedies for the most common problems. It is important to remember that the temperature setting and cooking times you are accustomed to using with your previous oven may vary slightly from those required with this oven.
-
Page 16: Truconvection
Using the Oven TruConvection The rear element only operates at full power. There is no direct heat from the bottom or top elements. The motorized fan in the rear of the oven circulates air in the oven cavity for even heating. Use this setting for foods that require gentle cooking such as pastries, souffl es, yeast breads, quick breads and cakes. -
Page 17: Broil
Using the Oven Broil / Convection Broil Broiling is a dry-heat cooking method using direct or radiant heat. It is used for small, individualized cuts such as steaks, chops, and patties. Broiling speed is determined by the distance between the food and the broil element. Choose the rack position based on desired results. Conventional broiling is most successful for cuts of meat 1-2 inches thick and is also more suitable for fl... -
Page 18: Cleaning And Maintenance
Cleaning and Maintenance Any piece of equipment works better and lasts longer when maintained properly and kept clean. Cooking equipment is no exception. Your range must be kept clean and maintained properly. Before cleaning, make sure all controls are in the “OFF” position. Disconnect power if you are going to clean thoroughly with water. -
Page 19: Stainless Steel Parts
Cleaning and Maintenance Control Panel DO NOT use any cleaners containing ammonia or abrasives. They could remove the graphics from the control panel. Use hot, soapy water and a soft clean cloth. Control Knobs MAKE SURE ALL THE CONTROL KNOBS POINT TO THE “OFF” POSITION BEFORE REMOVING. Pull the knobs straight off... -
Page 20: Induction Glass Top
Cleaning and Maintenance Induction Glass Top Cleaning of glass tops is diff erent from cleaning a standard porcelain fi nish. To maintain and protect the surface of your new glass top, follow these basic steps: For normal, light soil: 1. Rub a few drops of a non-abrasive glass cleaning cream to the cool soiled area using a damp paper towel. 2. -
Page 21: Replacing Oven Lights
Replacing Oven Lights WARNING ELECTRICAL SHOCK HAZARD DO NOT touch a hot oven light bulb with a damp cloth as the bulb could break. Should the bulb break, disconnect electric power to the appliance at the main fuse or circuit breaker before removing bulb to avoid electrical shock. -
Page 22: Service Information
Clearly describe the problem that you are having. If you are unable to obtain the name of an authorized service agency, or if you continue to have service problems, contact 1-888-845-4641, or write to: VIKING RANGE, LLC PREFERRED SERVICE 111 Front Street... -
Page 23: Warranty
Inspection of the product should be made at time of delivery. Any defects must be reported to the selling dealer within the 90 day period. Viking Range LLC uses the most up to date processes and the best materials available to produce all color fi... - Page 24 Viking Range, LLC 111 Front Street Greenwood, Mississippi 38930 662-4551200 For more product information, call 1-888-845-4641 or visit our website at www.vikingrange.com F21409H EN (063021)
Need help?
Do you have a question about the Tuscany TVDR3614B and is the answer not in the manual?
Questions and answers