
Related Manuals for Kenwood KID60S17


Summary of Contents for Kenwood KID60S17
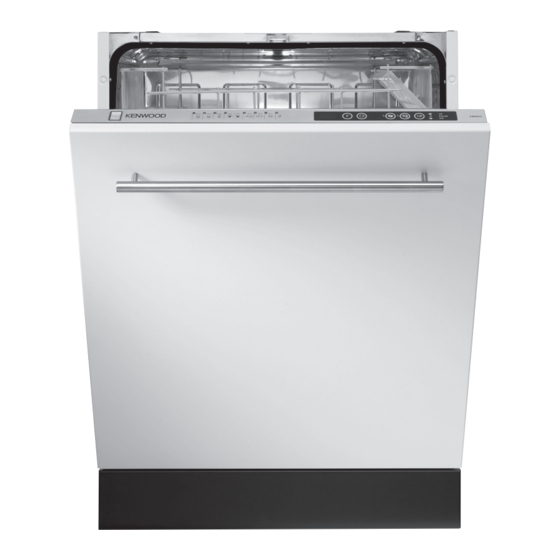
- Page 1 Integrated Dishwasher KID60S17 installation / instructions manual (Aesthetic door not included.) KID60S17_IB.indd 1 30/05/2017 12:41...
- Page 2 KID60S17_IB.indd 2 30/05/2017 12:41...
-
Page 3: Table Of Contents
contents safety warnings ........................5 unpacking ..........................8 location ..........................9 product overview ......................16 front view ........................16 rear view ........................16 upper basket ........................16 lower basket ........................16 cutlery basket ........................ 16 internal view ........................16 control panel ﹠ display window ..................17 before operating ....................... - Page 4 half load ..........................29 cleaning the dishwasher ....................29 external care ........................29 the door and the door seal .................... 29 the control panel ......................29 internal care ........................29 filtering system ......................30 spray arms ........................31 frost precaution ........................ 32 moving the dishwasher....................
-
Page 5: Safety Warnings
safety warnings general use • Switch off and unplug before fitting or removing tools/attachments, after use and before cleaning. • Keep your fingers away from moving parts and fitted attachments. • Never use a damaged machine. • Keep the mains cable out of reach from children. •... - Page 6 proper use • Do not sit or stand on the door or dish rack. • Do not touch the heating element during or immediately after use. • Do not operate your dishwasher unless all enclosure panels are properly in place. Open the door very carefully when there is a programme running as there is a risk of hot water spraying out of the appliance.
- Page 7 earthing instructions WARNING: THIS APPLIANCE MUST BE EARTHED. • This appliance is equipped with a mains cable having an equipment-earthing conductor and an earthing plug. • The plug must be plugged into an appropriate mains socket that is installed and earthed in accordance with local standards and requirements.
-
Page 8: Unpacking
Thank you for purchasing your new Kenwood Dishwasher. These operating instructions will help you use it properly and safely. We recommend that you spend some time reading this installation/instruction manual in order that you fully understand all the operational features it offers. -
Page 9: Location
installation location When selecting a position for your dishwasher you should make sure the installation surface is flat and firm, and the room is well ventilated. Avoid locating your dishwasher near a heat source, eg. cooker, boiler or radiator. Extreme cold ambient temperatures may also cause the appliance to not perform properly. - Page 10 installation 3. Do not connect the unit to the mains socket before installation. Ensure you are not installing the unit right in front of the mains socket. This is to avoid potential damage to the back of the unit. 4. The condensation strip must be fitted to the underside of the worktop above your dishwasher to help protect it against moisture.
- Page 11 installation 6. To secure the unit use the 2 brackets as shown. Note their positioning for the different types of worktops. Wooden Worktop Synthetic/ Ceramic Worktop 7. Remove the backing from the self-adhesive rubber spacer. Stick 1 x spacer to each side of the dishwasher.
- Page 12 installation 9. Adjust the adjustable feet to obtain the optimum levelling of the unit. The adjustment of the rear foot is via a centre screw at the front. 10. Tape the supplied door template to the aesthetic door. Ensure the aesthetic door weight is a minimum of 3kg and a maximum of 8kg.
- Page 13 installation 13. Remove the 3 screws on each side of the door as shown and replace with the longer screws supplied. Tighten screws into front aesthetic door. 14. Adjust the bolts to loosen or tighten the tension of the unit’s door. 15.
- Page 14 installation 16. Cut out a 600 mm wide slot from the plinth so the unit door can fully open downwards. The depth of the cut out should be sufficient to allow the door to open fully and will depend on the thickness of the panel fitted to the door.
- Page 15 installation • You may use the U-shaped drain hose holder to secure your drain hose and to avoid kinking it. U-shaped drain hose holder water drain hose • Secure the water drain hose to the waste pipe to avoid it coming off during the washing process.
-
Page 16: Product Overview
product overview front view rear view control panel water inlet drain hose (connect to supply hose) mains cable (connect to mains socket) upper basket lower basket cutlery basket cup racks internal view spray arm cutlery basket salt reservoir filtering system spray arm rinse aid dispenser detergent dispenser... -
Page 17: Control Panel ﹠ Display Window
﹠ display window KID60S17 ON/OFF button prewash button • turns the dishwasher on and off. • selects an extra pre-wash washing cycle. • the LED light illuminates when the 7. 1/2 half load button dishwasher is on. • Press to select the half load washing cycle. -
Page 18: Before Operating
before operating opening the door • Pull the door handle. • If the door is opened during operation, first open the door slightly to avoid water spillage. If the door is opened during operation, all functions are automatically interrupted. closing the door •... -
Page 19: Adding Detergent
adding detergent Only use detergents specifically designed for use in dishwashers. To be more environmentally friendly, please use no more than the correct amount of detergent. Fill the detergent dispenser with detergent power or tablet. Bleach and Countertop detergent Irritant •... -
Page 20: Adding Rinse Aid
adding rinse aid Rinse aid helps to ensure that washed crockery dries quickly and is free of marks. Only use rinse aid that is made for domestic dishwashers. This model is designed to use liquid rinse aids only. The correct amount needed will be dispensed automatically. Please follow the steps below to fill the rinse aid reservoir. -
Page 21: Adding Salt
adding salt If you live in a hard water area deposits may form on your dishes and utensils. Using salt softens the water and reduces the formation of deposits. Please follow the steps below to fill the salt reservoir. The water hardness level will also need to be set. 1. -
Page 22: Loading The Dishwasher
loading the dishwasher before loading the dishwasher Please observe the following notes before loading your cutlery and crockery into the basket. • Remove lipstick stains and any food residues from crockery and dishes. Rinse if necessary. • Dishes and cutlery must not lay inside one another, or cover each other. •... -
Page 23: Upper Basket
For safety reasons, do not operate the dishwasher without the upper and lower baskets in place. upper basket Use the upper basket for small and lightweight items such as cups, saucers, glasses, dessert bowls, etc. Shallow pans or casserole dishes can also be placed in the upper basket. Long items such as soup ladles, mixing spoons and long knives should be placed lying down across the front of the upper basket. -
Page 24: Hinged Cup Rack
hinged cup rack The cup racks on the upper basket can be lifted up or removed to make room for taller items e.g. you can lean tall glasses against them. To prevent water dripping from the upper basket onto the dishes in the lower basket, we recommend that you empty the lower basket first. -
Page 25: Lower Basket
lower basket loading the lower basket For optimum loading of crockery in the lower basket, please refer to the below table and image. number item Oval platter Dessert dishes Soup plates Dinner plates Cutlery basket Large and difficult to clean items (such as plates, serving platters, saucepans, serving bowls, pots, pans, lids etc.) can placed in the lower basket. -
Page 26: Wash Cycle Table
wash cycle table running energy water cycle selection detergent programme process time consumption consumption information amount ** (min.) (kwh) • pre-wash (5g) Auto 111-183 1.22-1.8 13.3-24.6 • main wash Automatically Automatically Delicate (25g) adjusts the adjusts the washing time with washing time with •... -
Page 27: Using The Dishwasher
using the dishwasher 1. Ensure the unit is connected to the mains power and the water supply is on. 2. Open the door and load the baskets. It is recommended that the lower basket is loaded first, and then the upper basket. Push the baskets back into the dishwasher. 3. -
Page 28: Switching The Dishwasher Off
switching the dishwasher off To save energy, remember to switch the dishwasher off using the ON/OFF button. The dishwasher will continue to use electricity until it is switched off with the ON/OFF button. If the dishwasher is not going to be used for a long period of time, e.g., you are going on holiday, please disconnect the dishwasher from the mains supply and switch off the water supply. -
Page 29: Half Load
half load A half load option can be selected if you do not have enough dishes for a full load. There are three options that can be selected: lower basket, upper basket and both baskets. This will help save hot water and electricity. -
Page 30: Filtering System
filtering system The filtering system in the base of the wash cabinet retains coarse debris from the washing cycle. The collected coarse debris may cause the filters to clog. Check the condition of the filters regularly and clean them if necessary under running water. Follow the steps below to clean the filters in the wash cabinet. -
Page 31: Spray Arms
spray arms • Do not over tighten the filters. • Put the filters back in sequence securely, otherwise coarse debris could get into the system and cause a blockage. • NEVER use the dishwasher without the filters in place. Improper replacement of the filters may reduce the performance level of the appliance and damage dishes and utensils. -
Page 32: Frost Precaution
frost precaution Avoid placing the dishwasher in a location where the temperature is below 0°C. If your appliance is left in an unheated place over the winter, you are advised to: 1. Disconnect the unit from the water inlet. 2. Turn on the unit. Select any washing cycle and let it run for 1 minute only. This will allow all the excessive water that remains in the unit to drain out. -
Page 33: Hints And Tips
hints and tips • Repairs should only be carried out by a qualified technician in strict accordance with current local and national safety regulations. Unauthorised or incorrect repairs could cause personal injury or damage to the unit. • Before calling for service, please refer to Hints and Tips to solve some general problems by yourself. -
Page 34: General Problems
general problems problem possible causes remedy Detergent residue left in The detergent compartment Make sure the compartment is compartment at the end of was still wet when detergent dry before adding detergent. the programme. was added. The detergent dispenser lid Clogged detergent residue Clean the catch. -
Page 35: Disposal Of The Dishwasher
disposal of the dishwasher • When disposing of your old dishwasher, first make it unusable. Disconnect from the electricity and water suppliers, cut off the cable and the plug from the cable. Make the door lock inoperative, so that children cannot accidentally shut themselves in. Make appropriate arrangements for the disposal of the dishwasher. -
Page 36: Product Fiche And Specifications
Brand Kenwood Model KID60S17 Product Type Dishwasher Mass of the Appliance 38kg Dimensions 820 mm - 870 mm (H) x 596 mm (W) x 550 mm (D) Capacity 12 Place Settings Water Pressure Required 0.03 - 1.00MPa... - Page 37 Note: A + + + (highest efficiency) to D (lowest efficiency) Energy consumption 258 kWh per year, based on 280 standard cleaning cycles using cold water fill and the consumption of the low power modes. Actual energy consumption will depend on how the appliance is used. Water consumption 2520 liters per year based on 280 standard cleaning cycles.
- Page 38 KID60S17_IB.indd 38 30/05/2017 12:41...
- Page 39 KID60S17_IB.indd 39 30/05/2017 12:41...
- Page 40 DSG Retail Ltd. (co. no. 504877) 1 Portal Way, London, W3 6RS, UK Manufactured for DSG Retail Limited under Licence from Fisher ﹠ Paykel Appliances Italy SpA. DSG Retail Limited is responsible for after sales service. IB-KID60S17-170530V1 KID60S17_IB.indd 40 30/05/2017 12:41...
Need help?
Do you have a question about the KID60S17 and is the answer not in the manual?
Questions and answers