Table of Contents
Advertisement
Quick Links
Advertisement
Table of Contents

Subscribe to Our Youtube Channel
Related Manuals for Leica Geosystems Builder Series


Summary of Contents for Leica Geosystems Builder Series
- Page 1 Leica Builder Series How to Guide Version 1.0 English...
-
Page 2: Table Of Contents
Builder, Table of Contents To use the product in a permitted manner, please refer to the detailed safety instructions in the User Manual. Table of Contents In this manual Chapter Page How to Getting Started Description of the User Interface Explanation of the Screen Explanation of the Displayed Data How to Set Up Builder Anywhere or over a Ground Point... - Page 3 How to Set Up Builder with Height Transfer Elevation to Builder Placed over Height Benchmark Transfer Height from Benchmark to Builder How to Measure Measure a Site Surface Make a Site Survey with Point Descriptions Measure the Centre of Trees or Columns Measure the Angle between Inlet and Outlet of a Planned Concrete Manhole How to Layout...
-
Page 4: Builder, Table Of Contents
Builder, Table of Contents How to Measure Areas & Volumes Measure and Calculate a Plane Area Measure and Calculate a Tilted Area Measure and Calculate Volumes How to Check Verticality Check the Verticality of a Wall How to Check Plane or Tilted Surfaces Check a Plane Surface Check a Tilted Surface... -
Page 5: How To Getting Started
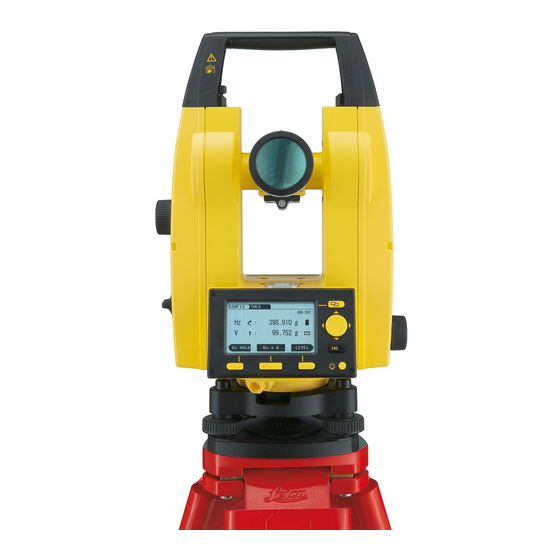
How to Getting Started Depending on the Builder model some functions might not be available. Description of the User Interface Keyboard Builder 100, 200 and 300 Builder 400 and 500 a) Page key 10-digit keypad b) Navigation keys g) EDM key c) ESC h) LED d) Light... - Page 6 Builder, How to Getting Started Keys for all Builder models: Description Changes tab in the tab bar. Press to switch between the CONFIG, THEO, PROG and DATA tab pages. • Move the focus on the screen. • Start the edit mode for edit fields. •...
- Page 7 Keys only for Builder 400 and 500: Key/LED Description • Press button short: to access the EDM settings. • Press button long: to toggle between red dot and prism. Alphanumeric keys _@& ± • LED white: EDM type is prism. •...
- Page 8 Builder, How to Getting Started Sidecover keys Description On / Off key. Switches the instrument on or off. Switch key. The top end of the Switch key is Switch Key 1, the lower end is Switch Key 2. Switch key functionality Builder model Switch key 1 Switch key 2...
-
Page 9: Explanation Of The Screen
Explanation of the Screen Screen a) Tab bar b) Time c) Icons d) Screen area e) Softkeys Element Description Tab bar The current active tab is shown in black. Time Shows the current time provided that the setting is made in the configurations. -
Page 10: Explanation Of The Displayed Data
Builder, How to Getting Started Explanation of the Displayed Data Overview E, N, H Abbreviation Description Indicated meteorological corrected slope distance between instru- ment tilting axis and centre of prism/laser dot. Indicated meteorological corrected horizontal distance. Height difference between station and target point. - Page 11 Abbreviation Description Reflector height above ground. Instrument height above ground. Easting of Station. Northing of Station. Height of Station. Easting of target point. Northing of target point. Height of target point. Builder, How to Getting Started...
-
Page 12: How To Set Up Builder Anywhere Or Over A Ground Point
Builder, How to Getting Started How to Set Up Builder Anywhere or over a Ground Point Setup step-by-step 1. Extend the tripod legs to allow for a comfortable working posture (a). Position the tripod over the marked ground point, centring Over a ground point: it as good as possible (b). - Page 13 Move the tripod legs (a) and use the tribrach footscrews (e) Over a ground point: to centre the plummet over the ground point (f). 6. Adjust the tripod legs (g) to level the circular level (h). 7. By using the electronic level turn the tribrach footscrews (e) to precisely level the instrument.
-
Page 14: How To Level Up Builder
Builder, How to Getting Started How to Level Up Builder Levelling up with The electronic level can be used to precisely level the instrument using the foot- the electronic level screws of the tribrach. step-by-step 1. Turn on the instrument by pressing the key. - Page 15 5. Centre the electronic level for the second axis by turning the last footscrew. An arrow shows the direction for rotating the footscrew. When the electronic level is centred, the arrow is replaced by a checkmark. When the electronic level is centred and three checkmarks are shown, the instrument has been perfectly leveled 6.
-
Page 16: How To Set Up Builder To Gain A Known Station
Builder, How to Set Up Builder to Gain a Known Station How to Set Up Builder to Gain a Known Station Set Up Anywhere Based on Given Control Line Station (sought) Start point Direction point Control line Given: • Start point of control line and one direction point. •... - Page 17 In the PROG Tab page, press SETUP. Select Control Line... and press OK. Select Anywhere... and press OK. After selecting a programme or setup, you always have to press OK. This will from now on no longer be stated but implied. Sight start point of control line [2a] with the telescope and press M &...
-
Page 18: Set Up Over Control Line
Builder, How to Set Up Builder to Gain a Known Station Set Up over Control Line Station (sought) Direction point Control line Given: • Start point of control line and one direction point. • Builder is set up over start point of control line. - Page 19 In the PROG Tab page, press SETUP. Select Control Line... and Over 1st point..Sight direction point and press OK. Confirm new Station and Orientation with YES. Builder, How to Set Up Builder to Gain a Known Station...
-
Page 20: Set Up Anywhere With Given Coordinates
Builder, How to Set Up Builder to Gain a Known Station Set Up Anywhere with Given Coordinates Station (sought) P1... Known points Given: • Two or more points with coordinates have been stored in Builder’s memory. • Builder is set up anywhere on site and levelled. - Page 21 In the PROG Tab page, press SETUP. Select Coordinates... and Anywhere..Enter instrument height (hi) and reflector height (hr). It is not required to enter a value for hi. It is only needed if you want to know the height of the ground point.
- Page 22 Builder, How to Set Up Builder to Gain a Known Station Select the first point and sight it. Press M & R. Select the second point and sight it. Press M & R.
- Page 23 Check the results. If they are within the correct deviation, press YES. You can measure additional points by pressing NEXT PT. Confirm new Station and Orientation with YES. If the results are not within the correct deviation, press NO and restart at step 1. Builder, How to Set Up Builder to Gain a Known Station...
-
Page 24: Set Up Over One Known Point With Second Known Point
Builder, How to Set Up Builder to Gain a Known Station Set Up over One Known Point with Second Known Point Station (sought) Known point Given: • Two known points with coordinates. • Builder is set up over one known point and levelled. - Page 25 In the PROG Tab page, press SETUP. Select Coordinates... and Over Known Station..Enter instrument height (hi) and reflector height (hr). Select Station Number (Pt). Select Known Backsight Point. The known backsight point is the second known point. Builder, How to Set Up Builder to Gain a Known Station...
- Page 26 Builder, How to Set Up Builder to Gain a Known Station Select number of backsight point (Pt). Sight backsight point and press OK. Confirm new Station and Orientation with YES. Only the angle will be measured for the backsight point, not the distance. Therefore it is not necessary to use a target on the point.
- Page 27 Builder, How to Set Up Builder to Gain a Known Station...
-
Page 28: Set Up Using Nails From Profile Boards
Builder, How to Set Up Builder to Gain a Known Station Set Up Using Nails from Profile Boards Station (sought) P1... Known point Control line Given: • Profile boards with nails and plan. • Builder is set up anywhere on site and levelled. - Page 29 In the PROG Tab page, press SETUP. Select Control Line... and Anywhere..Sight one nail of a line as start point and press M & R [2a]. Sight the other nail of the line as second point and press M & R [2b]. Builder, How to Set Up Builder to Gain a Known Station...
- Page 30 Builder, How to Set Up Builder to Gain a Known Station Press SHIFT to move control line in line direction. Press MEASURE. Now sight third nail, measure it and press RECORD. Select Offset and press Set=0. Press OK to confirm it. Confirm new Station and Orientation with YES.
- Page 31 Afterwards, store three or more permanent points outside of the construction site as described in "3.1 Measure a Site Surface" on page 38. In case the profile boards are no longer available, use these points to set up Builder according to "1.3 Set Up Anywhere with Given Coordinates"...
-
Page 32: How To Set Up Builder With Height
Builder, How to Set Up Builder with Height How to Set Up Builder with Height Transfer Elevation to Builder Placed over Height Benchmark Instrument height Benchmark Given: Builder is placed over benchmark with given elevation and levelled. - Page 33 In the PROG Tab page, press SETUP. Select Height..Enter elevation of benchmark (Station H), height from benchmark to telescope (hi) and reflector height (hr). Press OK to confirm. Builder, How to Set Up Builder with Height...
-
Page 34: Transfer Height From Benchmark To Builder
Builder, How to Set Up Builder with Height Transfer Height from Benchmark to Builder 2.50 m 8.20 feet Benchmark Given: • One benchmark with known elevation. • Builder is placed anywhere on site and levelled. - Page 35 In the PROG Tab page, press SETUP. Select Height..Station H shows the previous station height. Enter instrument height (hi) and reflector height (hr). Press HTRANS for height transfer. It is not required to enter a value for hi. It is only needed if you want to know the height of the ground point.
- Page 36 Builder, How to Set Up Builder with Height Select benchmark from list (Pt) or enter new point. For new point enter elevation of benchmark and press OK as shown in centre and right screen. Measure benchmark. Confirm new Station Height with YES.
- Page 37 Builder, How to Set Up Builder with Height...
-
Page 38: How To Measure
Builder, How to Measure How to Measure Measure a Site Surface Known station P1... Target • You can also do this with application Measure & Descriptor or Angle & Distance. • This procedure can also be used, for example, by architects and civil engineers for quan- tity surveying or by carpenters for receiving exact dimensions for the roof framework. - Page 39 In the PROG Tab page, press APPL. Select As Built..Enter ID of starting point (Pt), sight target and press MEASURE. After measuring, press RECORD to store the point. Measure and record as many points as needed. • For storing points automatically after measuring, switch to measurement mode All in 1 by pressing Switch key 2.
-
Page 40: Make A Site Survey With Point Descriptions
Builder, How to Measure Make a Site Survey with Point Descriptions Known station P1... Target This procedure can also be used, for example, by architects and civil engineers for quantity surveying or by carpenters for receiving exact dimensions for the roof framework. Given: Builder is set up with known station and height. - Page 41 In the PROG Tab page, press APPL. Select Measure & Descriptor..Enter ID of starting point (Pt), enter a description (Desc.) and press OK. Sight target and press MEASURE. After measuring, press RECORD to store the point. Describe, measure and record as many points as needed.
-
Page 42: Measure The Centre Of Trees Or Columns
Builder, How to Measure Measure the Centre of Trees or Columns Known station Target Centre point Given: • Builder is set up with known station. • Measure and Record mode is set to Measure/Record. Refer to "Sidecover keys" on page 8 on how to switch modes. - Page 43 In the PROG Tab page, press APPL. Select As Built..Place prism next to tree or column in the same distance as the centre. Enter point ID and sight prism. Press MEASURE. Builder, How to Measure...
- Page 44 Builder, How to Measure Before storing the point, turn instrument and sight the centre of the tree or column. Now press RECORD to store the point with the new angle. This method of turning the instrument before storing a point works in most of the appli- cations.
- Page 45 Builder, How to Measure...
-
Page 46: Measure The Angle Between Inlet And Outlet Of A Planned Concrete Manhole
Builder, How to Measure Measure the Angle between Inlet and Outlet of a Planned Concrete Manhole Hz = 0.00 Known station P1... Target This procedure can also be used, for example, to check a right angle or to determine the angle for an elbow in power line constructions. - Page 47 In the THEO Tab page, press Hz = 0. Sight the first manhole and confirm new Orientation with OK. Sight the second manhole and notice the shown angle (Hz). Builder, How to Measure...
-
Page 48: How To Layout
Builder, How to Layout How to Layout Layout Points from Memory Known station Layout point This procedure can also be used for all other points you want to layout. Given: • Builder is set up with known station. Setup with height is optional. •... - Page 49 In the PROG Tab page, press APPL. Select Layout..Enter ID of point to layout (Pt). Turn Builder in the shown direction. Measure until results are within the correct deviation. Builder, How to Layout...
-
Page 50: Layout Points From Plan With Line & Offset
Builder, How to Layout Layout Points from Plan with Line & Offset 7.00 2.50 0.00 Known station Layout point This procedure can also be used for all other points you want to layout. Given: • Builder is set up with known station. Setup with height is optional. •... - Page 51 In the PROG Tab page, press APPL. Select Layout..Use Navigation keys to navigate to Line. Enter given value and press OK. Repeat this for offset (Offs) and height (H). Builder, How to Layout...
- Page 52 Builder, How to Layout Turn Builder in the shown direction. Measure until results are within the correct deviation.
- Page 53 Builder, How to Layout...
-
Page 54: Layout Nails On Profile Boards From Control Line
Builder, How to Layout Layout Nails on Profile Boards from Control Line Known station Layout point Control line Enable EDM tracking and Laser pointer while sighting the profile board for a faster workflow. For improved accuracy or for final layout also use a reflector target. Given: •... - Page 55 In the PROG Tab page, press APPL. Select As Built..Sight target on profile board and press MEASURE. Verify offset value (Offs). Note that this value is an absolute value to the control line. Move target to designated offset dimension [2a]. Measure target again until results are within the correct deviation and mark the point on the profile board [2b].
-
Page 56: Layout Nails On Profile Boards From Coordinates
Builder, How to Layout Layout Nails on Profile Boards from Coordinates Known station Layout point P2a.. Coordinate point Enable EDM tracking and Laser pointer while sighting the profile board for a faster workflow. For improved accuracy or for final layout also use a reflector target. Given: •... - Page 57 In the PROG Tab page, press APPL. Select Layout Line/Arc/Spiral..and Basic..Select Line. Enter ID of start point (Start Pt) and of end point (End Pt) and press OK. Then press Check. Builder, How to Layout...
- Page 58 Builder, How to Layout Sight target on profile board and press MEASURE. Verify line (Line) and offset (offs) values. Note that these values are absolute values to the control line. Move target along board until offset value is 0.000 [2a]. Measure and record target to verify results. Mark the point on the profile board [2b].
- Page 59 Builder, How to Layout...
-
Page 60: Layout Pins With Offset For Rounded Curbs
Builder, How to Layout Layout Pins with Offset for Rounded Curbs Known station P1... Layout point Radius Offset This procedure can also be used, for example, for building up any round formworks. Given: • Builder is set up with known station. Setup with height is optional. •... - Page 61 Select Arc. Select the method of how to define the arc, for example Start Point&End Point&Radius, enter or change the other values and press OK. Refer to the Builder Series User Manual for more details about the different methods. Builder, How to Layout...
- Page 62 Builder, How to Layout Press LAYOUT. Enter values for chainage of the arc (Arc) and Offset (Offs) and begin with layouting.
- Page 63 Builder, How to Layout...
-
Page 64: How To Measure Heights
Builder, How to Measure Heights How to Measure Heights Measure the Height of Inaccessible Points H=8.50 Lower point Upper point This procedure can be used to measure, for example, the height of buildings, power lines, cranes, ridges, overhead clearances and trees. Given: •... - Page 65 In the PROG Tab page, press SETUP. Select Height..Enter 0.000 m for both instrument height (hi) and reflector height (hr) and press HTRANS for height transfer. Press NEW PT. Enter a point ID (Pt) and press OK. Builder, How to Measure Heights...
- Page 66 Builder, How to Measure Heights Press ENH=0 to set coordinates to 0.000 then press OK to store the point. Sight lower point and press M & R. Confirm new Station Height with YES. Press APPL. Select Angle & Distance..
- Page 67 Press MEASURE to measure the point again. H should still be 0.000. If this is not the case, restart from step 1. Sight upper point. Now, H shows the height of the upper point. Builder, How to Measure Heights...
-
Page 68: Measure The Height Difference Between Two Inaccessible Points
Builder, How to Measure Heights Measure the Height Difference between Two Inaccessible Points Start point Target point This procedure can be used to measure, for example, the height of buildings, power lines, cranes, ridges, overhead clearances and trees. Given: •... - Page 69 In the PROG Tab page, press APPL. Select Tie Distance..Select the method most suitable to your workflow. Radial always shows the height difference to the first measured point while Polygonal always shows the height difference to the last measured point. Sight start point and press M &...
-
Page 70: Place A Datum Line
Builder, How to Measure Heights Place a Datum Line Reference point Target point You can also use elevations above sea level for this procedure. Given: • Builder is levelled. • Target is measurable reflectorless. - Page 71 In the PROG Tab page, press SETUP. Select Height..Enter 0.000 m for both instrument height (hi) and reflector height (hr) and press HTRANS for height transfer. Press NEW PT to enter a new point. Enter a Point ID (Pt) and press OK. Press ENH=0 to set coordi- nates to 0.000.
- Page 72 Builder, How to Measure Heights Sight a point at the bottom of the wall or a point of a reference height and press M & R. New Station Height shows the height difference between point and telescope height. Confirm new Station Height with YES.
- Page 73 Press to open the EDM Settings. Select On for both Laser Pointer and Tracking and press OK. Sight wall for the datum line. Move telescope vertically until H shows correct value. Make mark at red dot on wall. Builder, How to Measure Heights...
-
Page 74: Determine The Height Of The Bottom Of A Manhole
Builder, How to Measure Heights Determine the Height of the Bottom of a Manhole Known station Upper point on rod Lower point on rod This procedure can be used for every point which cannot be measured directly, for example points behind corners and trees, in chambers and in building pits. Given: •... - Page 75 In the PROG Tab page, press APPL. Select Hidden Point..Select Rod and press OK. Enter the Rod’s length and press OK. Builder, How to Measure Heights...
- Page 76 Builder, How to Measure Heights Sight upper point on rod and press MEASURE. Sight lower point and press MEASURE. H shows the height of the bottom of the manhole. Press RECORD to store the point.
- Page 77 Builder, How to Measure Heights...
-
Page 78: How To Measure Areas & Volumes
Builder, How to Measure Areas & Volumes How to Measure Areas & Volumes Measure and Calculate a Plane Area Known station P1... Corner point Given: Builder is set up anywhere. To use the measurement afterwards, Builder must be set up with known station and height. - Page 79 In the PROG Tab page, press APPL. Select Area & Volumes..and Area plane. Sight, measure and store the corner points either in clockwise or counter-clockwise direction. Builder, How to Measure Areas & Volumes...
- Page 80 Builder, How to Measure Areas & Volumes After the third point has been measured and stored, a result screen will pop up with an overview about the measured points, the covered area and perimeters. To add more points, press OK and sight, measure and store as many points as needed.
- Page 81 Builder, How to Measure Areas & Volumes...
-
Page 82: Measure And Calculate A Tilted Area
Builder, How to Measure Areas & Volumes Measure and Calculate a Tilted Area Known station P1... Corner point Given: Builder is set up anywhere. To use the measurement afterwards, Builder must be set up with known station and height. - Page 83 In the PROG Tab page, press APPL. Select Area & Volumes..and Area tilt. Sight, measure and store the corner points either in clockwise or counter-clockwise direction. Builder, How to Measure Areas & Volumes...
- Page 84 Builder, How to Measure Areas & Volumes After the third point has been measured and stored, a result screen will pop up with an overview about the measured points, the covered area and perimeters. To add more points, press OK and sight, measure and store as many points as needed.
- Page 85 Builder, How to Measure Areas & Volumes...
-
Page 86: Measure And Calculate Volumes
Builder, How to Measure Areas & Volumes Measure and Calculate Volumes Known station P1a.. Boundary point P2a.. Breakline point Given: Builder is set up anywhere. To use the measurement afterwards, Builder must be set up with known station and height. - Page 87 In the PROG Tab page, press APPL. Select Area & Volumes..and Volumes. Sight first point of boundary and press MEASURE. Press RECORD to store the point. Proceed in the same way for the second point and the third point. ...
- Page 88 Builder, How to Measure Areas & Volumes After the third point has been measured and stored, a result screen will pop up with an overview about the measured points, the covered area and perimeters. To add more points of the boundary, press OK and sight, measure and store as many points as needed.
- Page 89 After the first point of the breakline has been measured and stored, a result screen will pop up with additional volume information. To add more points of the breakline, press OK and sight, measure and store as many points as needed. To leave the application, press Builder, How to Measure Areas &...
-
Page 90: How To Check Verticality
Builder, How to Check Verticality How to Check Verticality Check the Verticality of a Wall Known station Checkpoint Control line This procedure can also be used to build up and check the verticality of formworks. Given: • Builder is set up as described in chapter "1.1 Set Up Anywhere Based on Given Control Line" centrally in front of the wall using the lower left and lower right corner of the wall as the two points of control line. - Page 91 In the PROG Tab page, press APPL. Select As built..Enter ID of start point (Pt). Press to open the EDM Settings. For EDM Type select red dot and for Tracking select On and press OK. Builder will automatically switch back to application As Built. Builder, How to Check Verticality...
- Page 92 Builder, How to Check Verticality Press MEASURE and start moving the telescope up and down. Builder will constantly measure the distance and update line and offset values without storing points. Check Offs to monitor the wall’s deviation from verticality. To store the last measured point, press RECORD. To stop EDM Tracking, press...
- Page 93 Builder, How to Check Verticality...
-
Page 94: How To Check Plane Or Tilted Surfaces
Builder, How to Check Plane or Tilted Surfaces How to Check Plane or Tilted Surfaces Check a Plane Surface Setup point P1... Checkpoint Given: Builder is set up anywhere. - Page 95 In the PROG Tab page, press APPL. Select Tie Distance... and Radial. Sight start point and press MEASURE. Sight target point and press MEASURE. The result screen shows the deviations for height ( ) and Grade. For a plane surface both values should show 0. Builder, How to Check Plane or Tilted Surfaces...
-
Page 96: Check A Tilted Surface
Builder, How to Check Plane or Tilted Surfaces Check a Tilted Surface Setup point Checkpoint Given: Builder is set up anywhere. - Page 97 In the PROG Tab page, press the APPL button. Select Tie Distance..Select the method most suit- able to your workflow. Radial always shows the height difference to the first measured point while Polygonal always shows the height difference to the last measured point. Sight start point and press MEASURE.
- Page 98 Total Quality Management: Our commitment to total customer satisfaction. Leica Geosystems AG, Heerbrugg, Switzerland, has been certified as being equipped with a quality system which meets the International Standards of Quality Management and Quality Systems (ISO standard 9001) and Environmental Management Systems (ISO standard 14001).
Need help?
Do you have a question about the Builder Series and is the answer not in the manual?
Questions and answers