
Related Manuals for Beko WTE10745X0D


Summary of Contents for Beko WTE10745X0D
- Page 1 Washing Machine User Manual WTE10745X0D Document Number : 2820526378_EN/ 27-01-21.(18:07)
- Page 2 This product was manufactured using the latest technology in environmentally friendly conditions.
-
Page 3: General Safety Instructions
General safety instructions This section contains safety instructions that will help protect from risk of personal injury or property damage. Failure to follow these instructions shall void any warranty. 1.1 Life and property safety Never place the product on a carpet-covered floor. Otherwise, lack of airflow beneath the machine will cause electrical parts to overheat. -
Page 4: Electrical Safety
Packaging materials are dangerous for the children. Keep packaging materials in a safe place away from reach of the children. Electrical products are dangerous for the children. Keep children away from the product when it is in use. Do not allow them to play with the product. Use child lock to prevent children from intervening with the product. -
Page 5: Important Instructions For Environment
Important instructions for environment 2.1 Compliance with WEEE Directive This product complies with EU WEEE Directive (2012/19/EU). This product bears a classification symbol for waste electrical and electronic equipment (WEEE). This product has been manufactured with high quality parts and materials which can be reused and are suitable for recycling. -
Page 6: Technical Specifications
Technical specifications Supplier name or trademark Beko Model name WTE10745X0D Rated capacity (kg) Maximum spin speed (rpm) 1400 Built-in Height (cm) Width (cm) Depth (cm) Net weight (±4 kg.) Single Water inlet / Double Water inlet • / - • Available... -
Page 7: Appropriate Installation Location
4.1 Installation • Preparation of the location and electrical, tap water and waste water installations at the place of installation is the customer's responsibility. • Make sure that the water inlet and discharge hoses as well as the power cable are not folded, pinched or crushed while pushing the product into its place after installation or cleaning procedures. -
Page 8: Connecting The Water Supply
4.1.4 Connecting the water supply It is necessary to have 10 – 80 litres of water flowing from the fully open tap in one minute to have your machine run smoothly. Attach a pressure reducing valve if the water pressure is higher. CAUTION: Models with a single water inlet should not be connected to the hot water tap. -
Page 9: Electrical Connection
4.1.7 Electrical connection Connect the product to a grounded outlet protected by a 13 A fuse. Our company shall not be liable for any damages that will arise when the product is used without grounding in accordance with the local regulations. •... -
Page 10: Transportation Of The Product
As the colours of the wires in the mains lead of this appliance may not correspond with the coloured markings identifying the terminals on your plug, proceed as follows: Connect the green - yellow or green (earth) wire to the terminal in the plug marked ‘E’... -
Page 11: Preparing Laundry For Washing
4.2 Preparation 4.2.1 Sorting the laundry * Sort laundry according to type of fabric, color, and degree of soiling and allowable water temperature. * Always observe the instructions given on the garment care labels. 4.2.2 Preparing laundry for washing • Laundry items with metal attachments such as, underwiring, belt buckles or metal buttons will damage the product. -
Page 12: Using Detergent And Softener
4.2.6 Using detergent and softener When using detergent, softener, starch, fabric dye, bleach and descaling agents to be added through the detergent container 2, read the manufacturer's instructions written on the package and follow the dosages specified. Use a measuring cup, if any. For programmes where liquid detergent dosing is selected, do not add any powder detergent. - Page 13 • Pull the detergent drawer towards yourself to open it. • To add liquid detergent (left) and softener (right), open the lid of the relevant container upwards as shown in the image. • When adding liquid detergent or softener, do not exceed the tip of the «Max»...
- Page 14 • The machine will measure the load, and determine the detergent amount depending on the load amount and selected functions. During the washing operation, the detergent intake is not visible, it will be taken in directly with the water. • If it is requested to use powder detergent in programmes where detergent dosing system activates required amount of powder detergent should be added to the detergent compartment.
- Page 15 When you press the Auto Dosing key for the third time, powder detergent will become on and softener will become off. Finally, when you press it for the fourth time, it will return to the initial position. 4.2.6.3 When the Detergent and/or Softener Run(s) Out: •...
-
Page 16: Operating The Product
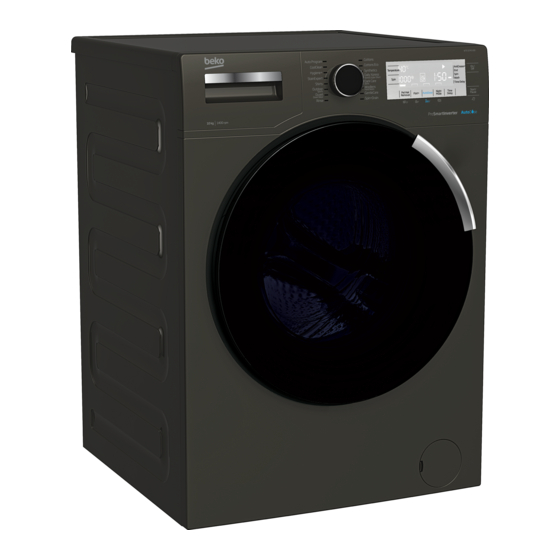
4.3 Operating the product 4.3.1 Control panel WTE 10745 X0D Cottons Cottons Eco AntiCrease+ On / Synthetics Temperature Daily Xpress Xpress Super Short Dark Care Wash Jeans Outdoor Woollens Sports Hand Wash Duvet Start/ Pet Hair Night Time Down Wear Fast+ AutoDose Pause... -
Page 17: Programme And Consumption Table
4.3.3 Programme and consumption table Auxiliary functions Programme 2,25 1600 • • • • Cottons 1,40 1600 • • • • 1,10 1600 • • • • 60** 1,27 1600 Cotton Economic 60** 5,5 58,5 0,88 1600 40** 5,5 58,5 0,86 1600 1,50 1200 •... -
Page 18: Programme Selection
4.3.4 Programme selection 1 Determine the programme suitable for the type, quantity and soiling level of the laundry in accordance with "Programme and consumption table". Programmes are limited with the highest spin speed appropriate for that particular type of fabric. When selecting a programme, always consider the type of fabric, colour, degree of soiling and permissible water temperature. - Page 19 Allergy UK, is the brand of the British Allergy Association. Seal of Approval is created to guide people that require recommendation about a product that the related product restricts / reduces / eliminates the allergens or reduces the allergen content significantly in the ambient where allergy patients exist.
- Page 20 You can wash your delicate clothes such as cotton/synthetic blended knitwear or hosiery in this programme. It washes with more delicate washing action. Wash your clothes whose colour you want to preserve either at 20 degrees or by selecting the cold wash option. •...
-
Page 21: Temperature Selection
4.3.6 Temperature selection Whenever a new programme is selected, the recommended temperature for the programme appears on the temperature indicator. It is possible that the recommended temperature value is not the maximum temperature that can be selected for the current programme. Press the Temperature Adjustment button to change the temperature. -
Page 22: Rinse Hold
If you want to spin your laundry after the Rinse Hold function: - Adjust the Spin Speed. - Press Start / Pause / Cancel button. The programme will resume. Machine drains the water and spins the laundry. If you want to drain the water at the end of the programme without spinning, use No Spin function. No change can be made in programmes where spin speed adjustment is not allowed. -
Page 23: Functions/Programmes Selected By Pressing The Function Keys For 3 Seconds
4.3.8.1 Auxiliary functions • Tidspar (Fast+) When this function is selected, the durations of the relevant programmes get shorter by 50%. Thanks to the optimised washing steps, high mechanic activity and optimum water consumption, high washing performance is achieved in spite of the reduced duration. •... - Page 24 • Skrynkelfritt (AntiCrease+) This function is selected when the 4th auxiliary function is pressed and held for 3 seconds and the programme follow-up light for the relevant step turns on. When the function is selected, the drum rotates for up to 8 hours for preventing the laundry from creasing at the end of the programme.
-
Page 25: Starting The Programme
With the End Time function, the startup of the programme may be delayed up to 24 hours. After pressing End Time button, the programme's estimated ending time is displayed. If the End Time is set, End Time indicator is illuminated. In order for the End Time function is activated and the programme is completed at the end of the specified time, you must press Start/Pause button after adjusting the time. -
Page 26: Changing The Selections After Programme Has Started
Opening the loading door in case of power failure: In case of power failure, you can use the loading door emergency handle under the pump filter cap to open the loading door manually. CAUTION: To avoid any water overflow before opening the loading door, make sure there is no water left inside the machine. -
Page 27: Cancelling The Programme
Switching the machine to pause mode: Press the Start/Pause button to switch the machine to pause mode. Pause symbol will flash on the display. Changing the programme selection after programme has started: The programme change is not allowed when the current programme is running. You can select the new programme after switching the current programme to pause mode. -
Page 28: Maintenance And Cleaning
4.4 Maintenance and cleaning Service life of product extends and frequently experienced problems will be reduced if it is cleaned at regular intervals. 4.4.1 Cleaning the detergent drawer When to clean • If you see hardened, viscous detergent or softener when you open the dosing container lid, •... -
Page 29: Cleaning The Loading Door And The Drum
• Use a flat screwdriver to remove the tabs holding the upper cover of the detergent drawer (there are 6 tabs in total: two on the right side of the drawer, two on the left and two at the back) and wash the inside of the drawer. -
Page 30: Draining Remaining Water And Cleaning The Pump Filter
Close the taps. Remove the nuts of the water intake hoses to access the filters on the water intake valves. Clean them with an appropriate brush. If the filters are too dirty, remove them from their places with a pliers and clean in this way. -
Page 31: Troubleshooting
Troubleshooting Problem Cause Solution Programs do not start after the Start / Pause / Cancel button is not pressed. • *Press Start / Pause / Cancel button. loading door is closed. It may be difficult to close the loading door in case of •... - Page 32 Problem Cause Solution Programme time does not Timer may stop during water intake. • Timer indicator will not countdown until the product countdown. (On models with takes in adequate amount of water. The product display) (*) will wait until there is sufficient amount of water to avoid poor washing results due to lack of water.
- Page 33 Problem Cause Solution Washing machine does not rinse The amount, brand and storage conditions of the • Use a detergent appropriate for the washing well. detergent used are inappropriate. machine and your laundry. Keep detergents closed in an environment free of humidity and do not expose them to excessive temperatures.
- Page 34 Problem Cause Solution WARNING: If you cannot eliminate the problem although you follow the instructions in this section, consult your dealer or the Authorised Service Agent. Never try to repair a nonfunctional product yourself. 34 / EN Washing Machine / User’s Manual...
Need help?
Do you have a question about the WTE10745X0D and is the answer not in the manual?
Questions and answers