Advertisement
Owner's
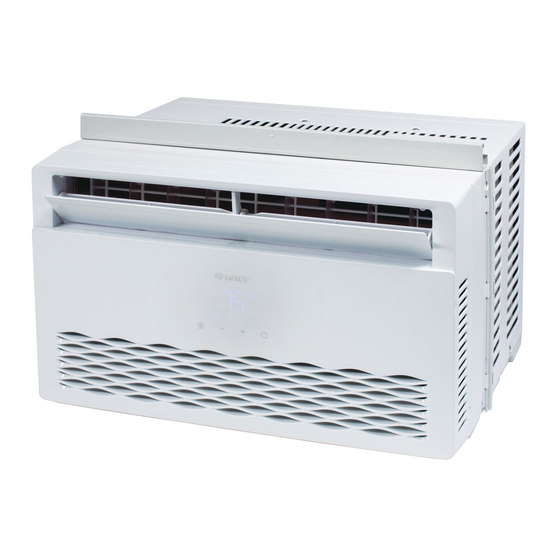
Manual
Window
Air Conditioner
G17-10ESHWAC-CA
Write the model and serial numbers below for your records:
Model #
Serial #
Date Purchased
Please read the entire manual carefully to
ensure proper operation of the product.
To find an electronic version of this manual,
please visit www.greeproducts.com
Phone: 1-866-658-0466
Email: customerservice@greeproducts.com
Advertisement

Subscribe to Our Youtube Channel
Related Manuals for Gree G17-10ESHWAC-CA


Summary of Contents for Gree G17-10ESHWAC-CA
- Page 1 Owner’s Manual Window Air Conditioner G17-10ESHWAC-CA Write the model and serial numbers below for your records: Model # Serial # Date Purchased Please read the entire manual carefully to ensure proper operation of the product. To find an electronic version of this manual, please visit www.greeproducts.com...
-
Page 2: Table Of Contents
TABLE OF CONTENTS PAGE IMPORTANT SAFETY INFORMATION ....................3-4 INSTALLATION INSTRUCTIONS ......................5-10 OPERATING INSTRUCTIONS ......................11-14 CLEANING & MAINTENANCE ......................15-16 BEFORE YOU CALL ........................17-19 WARRANTY ............................20 NOTICE: Pictures within this manual are for reference only. Please refer to the actual product for the appearance. -
Page 3: Important Safety Information
SAFETY INFORMATION SYMBOL INDICATES A HAZARDOUS SITUATION WHICH IF NOT AVOIDED COULD RESULT IN SERIOUS INJURY OR DEATH. Please read and understand this entire manual before attempting to assemble, operate or install your window air conditioner unit. Use this air conditioner only as instructed in this manual. While this manual covers a wide variety of troubleshooting, the instructions are not meant to cover every situation that may occur. - Page 4 SAFETY INFORMATION SAFETY INFORMATION Electrical Information The power cord with this air conditioner contains a current detection device designed to reduce the risk of fire. Please refer to the section “operation of current device” for details. In the event that the power cord is damaged, it cannot be repaired. It must be replaced with a power cord from the product manufacturer.
-
Page 5: Installation Instructions
INSTALLATION INSTRUCTIONS INSTALLATION INSTRUCTIONS Before You Begin CAUTION When handling the unit be careful to avoid cuts from any sharp metal edges and the aluminum fins on the front / rear coils. IMPORTANT : Save these instructions for future reference. Product failure due to any improper installation is not covered under the One Year Limited Warranty. - Page 6 INSTALLATION INSTRUCTIONS Where to Install the Unit • Ensure there is no obstruction near the air-inlet or air-outlet. • Select a window where the condensation water can be dispersed easily out the back of the unit and won’t affect others. •...
- Page 7 INSTALLATION INSTRUCTIONS Parts and Tools Needed Upper Guide Rail location* Air-outlet frame Power plug *Upper guide rail may be attached on some units Parts List Window Unit Flexible Screen (2) Window Sill And Sash Seal Upper Guide Rail (With Adhesive) (2) Flathead screwdriver Foam Top Gasket Top Mounting Rail...
- Page 8 INSTALLATION INSTRUCTIONS Upper Guide Rail Upper Guide Rail* Note: For safety, all four screws must be SECURELY Remove fastened. Mounting backing from seal Rail Seal strip Strip To install the Upper Guide Rail, peel off the back side of the Top Mounting Rail Seal Strip and align it on the bottom edge of the upper guide rail.
- Page 9 INSTALLATION INSTRUCTIONS NOTE: Top Rail and sliding panels at each side are offset to provide the proper pitch to the rear of .8 cm (5/16”). This is necessary for proper condensed water utilization and drainage. If you are not using the side panels for any reason, this pitch to the rear must be maintained. Front View Window Sill &...
- Page 10 INSTALLATION INSTRUCTIONS Width Foam Top Gasket (Without Adhesive) Width Insert the Foam Top Gasket between the glass After finishing installation, measure the width between and the window to prevent air from getting into the outer case of the air conditioner and the window the room.
-
Page 11: Operating Instructions
OPERATING INSTRUCTIONS Features of Your Window Air Conditioner i-Feel LCD Remote Control The remote acts as a separate thermostat for enhanced comfort. The mini thermostat in the remote control can sense its surrounding temperature and transmit the signal back to the unit. The unit will cool the room until the desired temperature is met at the location of the remote. - Page 12 OPERATING INSTRUCTIONS Function & Control Display Display Control AUTO Mode Display Power Function (-) Button (+) Button Button Filter Button COOL Check Mode Button ENERGY SAVER NOTE: On the remote control, use the fan speed Increase + / Mode Decrease – pads to set the fan speeds to Low, Med or High. Use the Auto pad to turn Auto fan on.
- Page 13 OPERATING INSTRUCTIONS Remote Control Operation NOTICE: • The distance between remote and receiving window should be no more than 8 m (26 ft.), and there should be no obstacles between them. • When not using the remote control for extended periods of time, please take out the batteries.
- Page 14 OPERATING INSTRUCTIONS Air Flow Adjustment Adjust the air frame left or right to direct the air flow according to the user’s preference. Adjust the air frame up or down to direct the air flow according to the user’s preference. NOTICE: This picture is for reference only.
-
Page 15: Cleaning & Maintenance
CLEANING AND MAINTENANCE WARNING • Turn off the air conditioner and disconnect the power cord from outlet before cleaning the air conditioner to avoid electric shock. • Do NOT wash the air conditioner with water to avoid electric shock. • Do NOT use harsh cleansers to clean the air conditioner. •... - Page 16 CLEANING AND MAINTENANCE Remote Control Battery Replacement AAA Battery Signal Sender Reinstall Remove Battery Cover Replacement of Batteries in Remote Control 1. Press the back side of remote control marked with OPEN, as shown in the figure, and then push out the BATTERY COVER of battery box along the arrow direction.
-
Page 17: Before You Call
BEFORE YOU CALL WARNING If the below errors occur, please turn off the air conditioner and disconnect the power cord from the outlet immediately. Please contact Customer Service at once. • Power cord is overheating or damaged. • Abnormal sound during operation. •... - Page 18 BEFORE YOU CALL Malfunction Code If any of the following Malfunction Codes appear, please call Customer Service. MALFUNCTION CODE SOLUTION Please contact Customer Service. IF THESE SOLUTIONS FAIL, PLEASE CALL 1-866-658-0466 FOR GREE CUSTOMER SERVICE...
- Page 19 (26 ft.) of the unit. Remote sensing deactivating (some models) Remote control signal is obstructed- remove any item blocking front of unit. Low batteries. Replace batteries on remote control. IF THESE SOLUTIONS FAIL, PLEASE CALL 1-866-658-0466 FOR GREE CUSTOMER SERVICE...
-
Page 20: Warranty
Air Conditioner unit. This warranty does not cover, and is not intended to exclude any liability on the part of GREE, whether under this warranty or implied by law for any indirect or consequential damages for breach of warranty. - Page 21 Gree Customer Service Hours: 9am–5pm CST Monday–Friday Phone: 1-866-658-0466 Email: customerservice@greeproducts.com Website: www.greeproducts.com M110316-10WAC-CA...
Need help?
Do you have a question about the G17-10ESHWAC-CA and is the answer not in the manual?
Questions and answers