Table of Contents
Advertisement
Quick Links
Advertisement
Table of Contents

Subscribe to Our Youtube Channel
Related Manuals for Athena RMB/1


Summary of Contents for Athena RMB/1
- Page 1 RMB/1, RMB/2 RMB/3 SERIES NON-MODULAR HOT RUNNER CONTROLLER OPERATION MANUAL...
-
Page 2: Precautions
These notes impart important information about the controller and may answer questions you may have about its setup or operation. If you still have questions or require any assistance, please contact your Athena representative or call technical support at (+1) 610-828-2490. -
Page 3: Table Of Contents
6.4 Manual Tuning (Zeigler-Nichols PID Method) 7. Restricting Access To Controller Functions 8. Resetting Parameters To Default Values 9. Warranty/Repairs 7/24/2020 DESCRIPTION REVISION DATE Models RMB/1, RMB/2 and RMB/3 Non-Modular Hot Runner TITLE Controller Operation Manual 900M544U00 DATE SCALE DRAWN CHECKED... -
Page 4: Introduction
INSTALLATION ABOUT THIS MANUAL This manual contains all the information needed to configure and operate the RMB/1, RMB/2 and RMB/3 Non-Modular Hot Runner controllers. Wiring diagrams, mounting instructions, and other information about installing the hardware are on the installation diagrams shipped with the unit. -
Page 5: What Happens When You Power Up The Controller
F (93 C), and • every time the controller is returned to Normal (automatic) operation and the PROC (displayed as PROCESS on RMB/1) is less than 200 F (93 1.2.4 PROGRAMMABLE BOOST FUNCTION Every RMB/X Hot Runner controller supports a boost function. For each zone you can use the... -
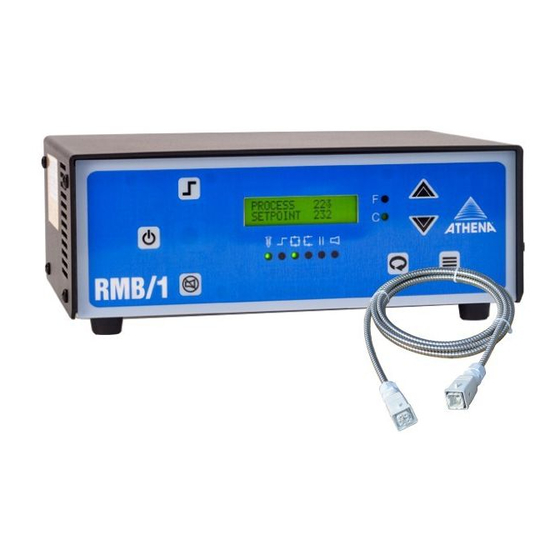
Page 6: Controls And Connections
3. RMB/2 BACK This shows the back of the RMB/2. The RMB/1 and RMB/3 are similar but the number of connectors for zone power and thermocouple depends on how many zones the unit is designed for. - Page 7 Exit the mode-selection function by pressing the menu-access/exit button confirmation message will be displayed briefly and then the PROC (displayed as PROCESS on RMB/1) and SETP (displayed as SETPOINT on RMB/1) for the zone will be displayed as “OFF.”...
- Page 8 A few seconds after you stop pressing an arrow button, the main display (PROC (displayed as PROCESS on RMB/1) and SETP {displayed as SETPOINT on RMB/1}) will return. 7) Autotune all zones that will operate in Normal (closed loop) mode; see Section 6. When Autotuning has been completed successfully for all Normal zones, the controller is ready to use.
-
Page 9: User Interface
This display can also be used to view and change controller settings as described in subsection 3.5. Parameters are grouped into menus. An overview of the menus is in section 3.6 If a zone is in alarm, an alarm code alternates with the SETP (displayed as SETPOINT on RMB/1) Note that the default value. -
Page 10: Selecting One Or All Zones
The modes available for selection are: Normal—zone uses closed-loop PID automatic control based on the entered SETP (displayed as SETPOINT on RMB/1) and measured PROC (displayed ass PROCESS on RMB/1) Standby—zone uses Standby Setpoint or Standby Percentage as configured using the Control Config menu. -
Page 11: Changing The Setpoint
— OR — — OR — is pressed to put all Idle zones in the Run state Offline—zone’s output is off and PROC (displayed as PROCESS on RMB/1) is not monitored by the controller CHANGING THE SETPOINT To change Normal mode (closed loop) setpoint or Manual mode (open loop) output percentage: 1) Select a zone or, if all zones are in the same mode (Normal or Manual), select all zones as described in section 3.2. -
Page 12: Alarms And Alarm Indication
ALARMS AND ALARM INDICATION ALARMS TYPES OF ALARMS The RMB/X Hot Runner controllers support high and low deviation alarms, confi gurable separate- ly for each zone (see subsection 5.6). The unit also recognizes process problems (such as loop break, reversed and open sensors, and process temperature exceeding confi gured safety limit) and problems with its own operation. - Page 13 Priority Code Condition Controller How Alarm Is Cleared Response reversed thermocouple zone goes to button to put the zone in Idle detected confi gured as described in section 3.3.3, and failsafe then after problem is fi xed, put zone state in Normal (closed loop) or Manual (open loop) mode high-temperature...
-
Page 14: Parameter Characteristics
Name Default Description and Interations Choices asterisks between zones. This first step is not relevant on the RMB/1 model. 2. Press and hold Bias –100 to 100 zero number of degrees that will be for several seconds to –55 to 55... -
Page 15: Boost Parameters 1
This first step is not relevant on the Range / Name Default Description and Interations RMB/1 model. Choices 2. Press and hold for several seconds to enter the menu system. 3. Press until the Boost... -
Page 16: Control Parameters
Description and Interations until all zones are Choices shown with two asterisks between zones.This first step is not relevant on the RMB/1 model. Standby Open Loop Open type of control used while the Type Closed Loop Loop controller’s front panel buttons 2. - Page 17 Applies To Range / Name Default Description and Interations Choices The integral action for PID control is not confi gurable; the integral (reset) action is always equal to six times the confi g- ured derivative (rate) action. Disable One try whether and when Autotune Autotune Once (then...
-
Page 18: Display Units 1
5.5.2 DISPLAY PARAMETERS AND SETTINGS until all zones are shown with two asterisks between zones. This Applies To first step is not relevant on the RMB/1 model. Range / Name Default Description and Interations 2. Press and hold Choices for several seconds to enter the menu system. -
Page 19: Alarm Parameters
This first into alarm (Low Deviation) step is not relevant on the RMB/1 model. • the number of seconds the audible alarm on the RMB/6 or RMB/12 unit will be silenced 2. Press and hold when (on the front of the controller’s case) is pressed;... -
Page 20: Supervisor Parameters
SUPERVISOR PARAMETERS SUPERVISOR 5.7.1 INTRODUCTION PARAMETERS You can use the Superv [Supervisor] Config menu to specify the values of several parameters related to process protection for the selected zones. You can also use this menu to set up parameters that apply to the whole controller. The Superv Config menu can be password protected. - Page 21 Applies To Range / Name Default Description and Interations Choices Soft Start Disable Enable gradual increase of output to Enable slowly dissipate moisture in heaters; see 1.2.3 Mode Key Disable Enable enables/disables button Enable Enable Boost Key Disable Enable enables/disables button Enable Enable...
-
Page 22: Tuning The Controller For Pid Control
Athena’s PID (three mode) controllers are capable of exceptional control stability when properly tuned and used, allowing operators to achieve the fastest response time with the smallest overshoot. -
Page 23: Procedure For Autotuning 2
Autotune to work, the difference must be at least 9 F (5 The startup curve (change in PROC, displayed as PROCESS on RMB/1) was not acceptable to the Autotune algorithm. This problem could be caused by a process upset that occurred during tuning. Try Autotuning again when the process is stable. -
Page 24: Manual Tuning (Zeigler-Nichols Pid Method)
Autotuning. Manual tuning requires that zones be tuned one at a time and that the PROC (displayed as PROCESS on RMB/1) be tracked over time. (Graph the displayed PROC (displayed as PROCESS on RMB/1) against time manually.) All zones should be running while manually tuning one zone. -
Page 25: Restricting Access To Controller Functions
4) Choose “Disable” or “Enable” by pressing 5) Exit the menu system by pressing and holding until the standard operating display (PROC (displayed as PROCESS on RMB/1) and SP) is displayed. -
Page 26: Resetting Parameters To Default Values 2
SETP and PROC are displayed. Alternatively, select all zones by pressing until all zones’ RMB/1 Jump to step SETP and PROC are displayed with asterisks between the values for the zones. 3) Access the menu system by pressing until a menu name is displayed, and then press repeatedly until the name of the Superv Confi... -
Page 27: Warranty/Repairs
Proprietary information of Athena Controls, Inc. is furnished for customer use only. No other use is authorized without the written permission of Athena Controls, Inc. - Page 28 Athena Controls, Inc. Plymouth Meeting, PA +1 (610) 828 2490 AthenaControls.com sales@athenacontrols.com 7/24/2020 DESCRIPTION REVISION DATE Models RMB/1, RMB/2 and RMB/3 Non-Modular Hot Runner TITLE Controller Operation Manual 900M544U00 DATE SCALE CHECKED DRAWN...
Need help?
Do you have a question about the RMB/1 and is the answer not in the manual?
Questions and answers