Table of Contents
Advertisement
Available languages
Available languages
Quick Links
Advertisement
Chapters
Table of Contents

Related Manuals for Smalvic 1023850400


Summary of Contents for Smalvic 1023850400
- Page 1 MANUALE USO E MANUTENZIONE INSTRUCTIONS FOR USE...
- Page 2 Etichetta dati caratteristici del prodotto Rating plate of the product Informazioni strettamente confidenziali. Tutti i diritti sui contenuti di questo documento sono riservati. È vietato copiare, utilizzare, distribuire anche parzialmente o mettere altrimenti in circolazione tali informazioni, salvo espressa autorizzazione del produttore. Le violazioni saranno perseguite ai sensi di legge.
- Page 3 PIANO COTTURA INDUZIONE DA INCASSO Libretto istruzioni per: Installazione - Uso - Manutenzione Istruzioni originali INDUCTION BUILT-IN HOB Operating instructions for: Installation - Use - Maintenance Translate of the original instruction Man. L001_003 Rev. 01_06/2018 Leggere attentamente le presenti istruzioni prima del primo impiego Read this operator manual carefully before the first use...
-
Page 5: Table Of Contents
INDICE ARGOMENTI INSTALLAZIONE Istruzioni per l’incasso dei mobili 1.1 Avvertenze 1.2 Collegamento elettrico 1.3 Funzionamento del piano ad induzione 2.1 Accensione delle zone di cottura 2.2 Spegnimento delle zone di cottura 2.3 Visualizzazioni display: note - errori - allarmi 2.4 Blocco tasti 2.5 Avvertenze 2.6 Impostazione del limite massimo di potenza 2.7... -
Page 6: Istruzioni Per L'incasso Dei Mobili
MANUALE DI UTILIZZO INSTALLAZIONE Istruzioni per l’incasso nei mobili L’apparecchio può essere incassato in tutti i tipi di mobili le cui pareti resistano ad una sovratemperatura di almeno 70 °C oltre a quella ambiente (EN 60335 - 2 - 6). Evitare di installarlo in prossimità di materiali infiammabili ad esempio tendaggi, canovacci, ecc. - Page 7 INSTALLAZIONE MANUALE DI UTILIZZO Avvertenze L’eventuale presenza di un pensile al di sopra del piano di cottura deve prevedere una distanza minima dal top di 600 mm. Per evitare eccessivi surriscaldamenti, anche in assenza di un forno sottostante, é necessario prevedere un settore di separazione, almeno della dimensione del foro di incasso.
- Page 8 MANUALE DI UTILIZZO INSTALLAZIONE Collegamento elettrico Il collegamento elettrico deve essere effettuato solamente da personale qualificato a conoscenza delle norme di installazione in vigore. L’apparecchio è predisposto per il funzionamento in corrente alternata, alla tensione indicata sulla targhetta “dati caratteristici” riportata a fine libretto e sul prodotto (vedere anche l’eventuale schema di collegamento sul prodotto).
-
Page 9: Funzionamento Del Piano Ad Induzione
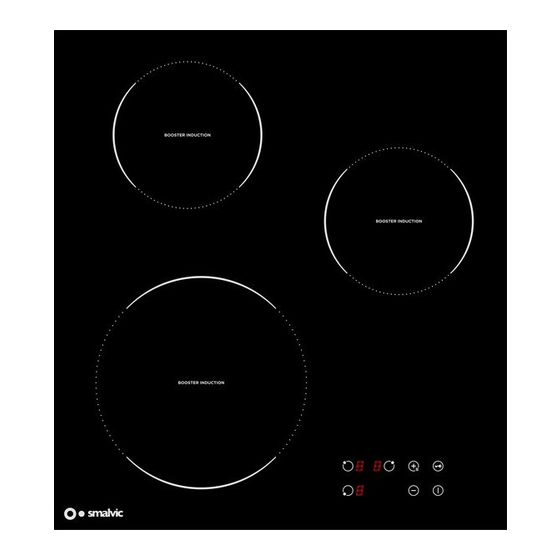
MANUALE DI UTILIZZO Funzionamento del piano ad induzione Il piano è dotato di zone cottura ad induzione che si caratterizzano per efficienza e risparmio energetico. Quando viene accesa una zona cottura, la bobina situata sotto la superficie in vetroceramica genera un campo magnetico che riscalda direttamente il fondo della pentola, quindi gli alimenti al suo interno. -
Page 10: Spegnimento Delle Zone Di Cottura
MANUALE DI UTILIZZO 1 - toccando il simbolo “ ” il display propone la regolazione “ ”, è possibile a questo punto aumentare o diminuire la regolazione da un minimo di “ ” ad un massimo di “ ” (la regolazione su spegne la zona cottura). -
Page 11: Impostazione Del Limite Massimo Di Potenza
MANUALE DI UTILIZZO • Le zone cottura hanno un tempo massimo di funzionamento in base al livello selezionato: livello da a massimo 10 ore, livello massimo 3 ore, livello massimo 10 minuti. • La comparsa del simbolo “ ” indica un anomalo surriscaldamento della componentistica elettronica (se si ripete dopo il raffreddamento è... - Page 12 MANUALE DI UTILIZZO Procedura: Entro 30 secondi dal collegamento elettrico del piano o ad ogni ripristino di tensione, con blocco tasti disattivato, toccare contemporaneamente i simboli della zona cottura anteriore sinistra e posteriore destra per circa 2 secondi, i display mostreranno la regolazione di potenza impostata; toccando i simboli “ ”...
-
Page 13: Manutenzione
MANUTENZIONE MANUALE DI UTILIZZO Manutenzione e pulizia Prima di ogni operazione disinserire elettricamente l’apparecchiatura. Dopo ogni utilizzo, una volta raffreddato, pulire il piano di cottura eliminando anche i piccoli residui che in caso di riaccensione possono diventare irremovibili. Utilizzare soltanto prodotti adeguati, evitando pagliette, spugne abrasive e detergenti in polvere in quanto tali prodotti possono graffiare la superficie del vetro. - Page 15 INDIEX INSTALLATION Instructions for fitting into kitchen units 1.1 Warnings 1.2 Electric connection 1.3 Functioning of the induction hob 2.1 Switching on the hob 2.2 Switching off the cooking areas 2.3 Displays: notes - errors - alarms 2.4 Keypad lock 2.5 Warning 2.6 Setting the maximum limit of power 2.7 MAINTENANCE...
-
Page 16: Instructions For Fitting Into Kitchen Units
INSTRUCTIONS FOR USE INSTALLATION 1.1 Instructions for fitting into kitchen units The appliance can be fitted into all types of units the walls of which resist an extra temperature of at least 70° C above the ambient temperature (EN 60335 - 2 - 6). Avoid installing it near inflammable materials, for example curtains, cloths etc. - Page 17 INSTALLATION INSTRUCTIONS FOR USE Warnings Any presence of a cupboard above the hob must have a minimum distance from the top of 600 mm. In order to avoid excessive overheating, even in the absence of an oven underneath, a sector of separation is necessary to avoid excessive overheating, at least of the dimension of the fitting bolts.
- Page 18 INSTRUCTIONS FOR USE INSTALLATION Electric connection The appliance must be connected electrically only by qualified person- nel aware of the current regulations on installation in force. The appliance is ready for operating in alternating current, at the voltage shown on the “characteristic data” plate shown at the end of the booklet and on the product (also see any connection diagram on the product).
-
Page 19: Functioning Of The Induction Hob
INSTRUCTIONS FOR USE 2.1 Functioning of the induction hob The hob has induction cooking areas with characteristics of efficiency and ener- gy saving. When one cooking area is on, the coil located under the glass cera- mic surface generates a magnetic field which directly heats the bottom of the pan and the food it contains. -
Page 20: Switching Off The Cooking Areas
INSTRUCTIONS FOR USE 1 - touching the “ ” symbol the display suggests the setting “ ”, you can now increase or decrease the setting from a minimum of “ ” to a maximum of “ ” (the setting on switches off the cooking area). -
Page 21: Setting The Maximum Limit Of Power
INSTRUCTIONS FOR USE • If the “ ” symbol appears, it means there is an anomalous overheating of the electronic components (if this is repeated after cooling, please contact the Technical Assistance Service). • If the “ ” symbol appears, this means that the individual heating area is overheated (e.g. - Page 22 INSTRUCTIONS FOR USE Procedure: Within 30 seconds of connecting the hob to the mains or whenever power is restored, with the keypad lock deactivated, touch the symbols of the front left cooking and back right cooking areas simultaneously for about 2 seconds, the displays will show the power setting selected;...
-
Page 23: Maintenance
MAINTENANCE INSTRUCTIONS FOR USE Maintenance and cleaning Before each operation, disconnect the appliance from the mains. After each use, when cool, clean the hob eliminating even the small residues which, when the hob is switched on again, can become impossible to remove. Only use suitable products, avoiding steel wool pads, abrasive sponges and powder detergents as these products can scratch the surface of the glass. - Page 24 OFFICINE E SMALTERIE VICENTINE - SMALVIC S.p.A. Via Ca’Fusa, 1 36030 - Sarcedo (VI) ITALIA www.smalvic.it...
Need help?
Do you have a question about the 1023850400 and is the answer not in the manual?
Questions and answers