Table of Contents
Advertisement
Quick Links
Advertisement
Table of Contents

Related Manuals for Eagle 202AKR Series

Summary of Contents for Eagle 202AKR Series
- Page 1 Operation Manual for 202AKR Series EEC approved Golf Cart —1—...
- Page 2 Preface Thanks for purchasing our electric vehicle. This manual contains information for proper operating,maintaining and caring of your electric vehicle. A thorough understanding of this manual will help you to obtain maximum enjoyment from this electric vehicle. Please keep it properly for future reference. Important Information: Particularly important information is distinguished by the following notations: WARNING!
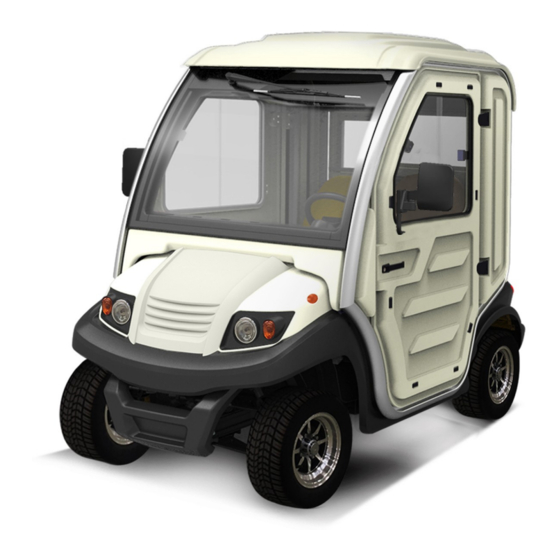
- Page 3 EG202AKR EG204AKR (L6e) (L7e) EG204AHCXR (L7e) —3—...
-
Page 4: Table Of Contents
INDEX 1. Overview ................... Error: Reference source not found 2. Technical Data ................Error: Reference source not found 3. Controls ............................9 4. Operation ............................. 16 SAFE OPERATION INSTRUCTIONS....................17 6. MAINTENANCE..........................18 6.1 Maintenance of Battery.......................18 6.2 Operation and Maintenance of Charger................22 6.3 Maintenance of the Traction Motor..................22 6.4 Maintenance of the Speed Controller:................24 6.5 Maintenance of Rear Axle:....................25... - Page 5 1.OVERVIEW This vehicle is manufactured under the EU standard and requirement of category L7e and L6e ((L6e:EG202AKR,L7e:EG204AKR/EG204AHCXR). It’s a street legal vehicle, and can be driven on public road after registered in local transportation authority. It’s ideal vehicle for short travel. WARNING! Before drive the vehicle on public road, please always register it in local transportation authority and get the license plate.
- Page 6 Fig.1 VIN plate and Vehicle label plate 2. SAFE OPERATION INSTRUCTIONS Our electric vehicle is designed for simple operation; however, please make sure to observe following safe operation instructions: BEFORE OPERATING THE VEHICLE: ALWAYS read this first before you start driving the vehicle. ...
- Page 7 D r i v e t h e v e h i c l e O N L Y i n a r e a s w h e r e i t i s a l l o w e d t o u s e b y l a w o r regulations and the conditions are safe to do so.
- Page 8 ● Do not use a clip or other item to adjust the seat belt (for example, passenger should adjust the length of the seat belts according to their own stature). ● Only buckle up the seat belts to the lock which it belongs. Wearing the seat belt incorrectly can affect its protection and increase the risk of personal injury.
- Page 9 Range (loaded) based on flat road at a speed of ≥85 ≥70 ≥70 20km/h (km) Max.speed(km/h) Minimum turning radius (m)(m) Max. climbing ability (loaded) Noise(dB) ≤68 ≤68 ≤68 Wheelbase (mm)(mm) 1690 2460 2460 Front wheel tread (mm) (mm) Rear wheel tread (mm) Max.
- Page 10 Light switch wiper switch Key switch Steering wheel Switch panel Brake pedal Accelerator pedal Hand brake level Switch panel Coulombmeter Ready signal Heating switch F/R switch Notes:When the vehicles is turn on, the F/R switch is switched to the position of “F”or “R”, the “Ready Signal” is ON. —10—...
- Page 11 Adjustable steering handle Brake pedal Accelerator pedal Hand brake level Lighting system Digital meter wiper Combination Digital Meter Key switch —11—...
- Page 12 Left turn signal Left turn signal Reverse light Netural position High beam light Forward signal 2 Operation instruction Ignition key —— The Ignition key is used to switch on the electrical system of the vehicle. The ignition key has three position, insert the key to let it on the first position; turn it clockwise to the second position to engage the 12V accessory system (including the headlight, turn signal, taillight, brake light, horn, wiper and digital meter);...
- Page 13 Hand brake for parking The hand brake is used for parking. The hand brake pedal should be engaged into parking position whenever the vehicle is left unattended: pull up the hand brake to the end position in order to park the vehicle completely.
- Page 14 push down the brake lever to the bottom. Steering wheel The steering wheel is used to control the driving direction. Please avoid any sudden and big turning. Battery Power Meter The battery power meter is combined in the digital meter. There are 10 divisions in this meter (from 0 to 1).
- Page 15 To control the heater, press the lower part of the switch, the heater is turned on, press the higher part of the switch, the heater is turned off. There is no Neutral position. Combined Switch The left lever of the switch is used to switch on/off the lighting system including headlight, front turn signal, rear turn signal, taillight;...
-
Page 16: Operation
Adjustable steering column handle ——turn the steering handle in the anticlockwise direction, the steering column is adjustable; turn the steering handle in the clockwise direction, the steering column is locked. 5. OPERATION OPERATION FOR VEHICLE WITH MECHANICAL BRAKE SYSTEM STARTING: a)press the forward/reverse switch to the neutral position b) Insert the key and turn it to the second position to switch on the power. -
Page 17: Maintenance
To stop the vehicle, gradually press down on the brake pedal When the vehicle stops, apply the hand parking brake press the F/R switch to the neutral position. turn the power key to OFF position and pull out the key ... - Page 18 Do not place any objects on the battery and do not connect the positive pole to the negative pole. This may cause a short circuit, dangerous spark or may cause damage to the battery or injury to your body. 4) Recharging a.
- Page 19 WARNING! Before you use the charger, please read the operation manual provided with the charger. WARNING! Explosive hydrogen gas is produced while battery is charged. Only charge the battery in well-ventilated areas. WARNING! Before using the charger, please check if the battery charger you are getting to use is correctly rated as per your local AC electricity network.
-
Page 20: Maintenance Of The Traction Motor
10) When charging, the charger will automatically shut down if the local power grid is too high or two low, meanwhile the trouble light will be on to bring the user’s attention. Maintenance of the Traction Motor WARNING! No explosive gas vapor is in the air, otherwise, it may cause serve injury and damage to your body and property if the explosive gas vapor contacts the sparks generated from the motor. - Page 21 The controller has anti-slip function and ramp start assist function, which automatically detects the vehicle status and finds that the vehicle will automatically brake when it taxis. The controller has temperature monitoring and protection function to prevent the motor from overheating and avoid damage to the motor.
-
Page 22: Maintenance Of Rear Axle
By check the new history file at a later date, you can readily determine whether the problem was in deed fixed. Or checking the problems according the flashing way of the STATUS light on the top of the controller, please refer to the details of the controller manual which is available separately. - Page 23 1. Periodic maintenance means the driver should do some daily maintenance before, in or after driving to prevent something unexpected happens. The maintenance is focused on clearance and examine as followed: 1) Clean the dust and mud on the cover to keep the axle clean 2) C h e c k a l l t h e...
-
Page 24: Wheel Replacement
5.The final drive is too noisy: 1)Check if Remove the there is any impurity 2.check the if the gear impurity, replace the is damaged gear Adjust or replace a new 6.Axle 1 strikes heavily 7.The rear axle is out of shape(check if it is Replace over loaded)... -
Page 25: Brake Adjustment
1) Blocking the wheel, then loosen the wheel nuts 2) Use a jack to lift the vehicle, and then remove the wheel nuts and the wheel. To install a wheel on the vehicle: 1) U s e a j a c k t o l i f t t h e v e h i c l e , a n d t h e n p u t t h e w h e e l o n t o t h e w h e e l h u b w i t h l u g nuts. -
Page 26: Lubrication
Brake drum(internally ) brake drum(externally) 7. Lubrication 1) Use 90GL hypoid gear oil of 1 liter for the rear end. Mixed brand of brake liquid is prohibited, the brake liquid tank is located under the accelerator pedal. (underneath the floor mat) 2) Lubrication points: redirector, steering knuckle 3.) s 85W/90GL hyperbolic gear oil should be filled in the rear axle, capacity is 0.8 liter. -
Page 27: Running-In Of New Vehicle
Steering redirector Right steering knuckle(Passenger side) right steering knuckle(driver side) 8. Running-in of new vehicle In order to guarantee the performance of the vehicle and enhance its reliability and working life, its parts should experience a certain period of running-in before it works under peak load. -
Page 28: Periodic Maintenance Charts
9. PERIODIC MAINTENANCE CHARTS Regular maintenance is required for the best performance and safe operation of the vehicle. WARNING! 1. Before parking, the parking brake must be placed in the end to avoid burning the brake pads. 2. Check the powertrain every three months and fill or replace the grease. 3. - Page 29 Battery 1. Check the liquid level. Please add the distilled water if necessary. 2. Charge the battery 3. Tighten the nut on the battery cable 4. Check if the battery is over-discharged (the battery power meter is flashing) 5. Check the liquid density of the battery, standard density should be 1.275±0.005 (25℃).
-
Page 30: Storage
21. Check if the shock absorber has any oil leaking, flat or abnormal noise. 22. Check if there is oil leaking on the gear box and the rear end. 23. Add the lubricant inside the wheel hub, steering system. 24. Adjust the toe-in of the front end 25. - Page 31 This manual tries to be as sound and elaborate as possible in literal and figurative description as well as technical description on the basis of existent data. At the same time, our company reserves the right to alter the content of this manual and this manual is subject to change without prior notice;...
- Page 32 Diagram Description High beam light relay Low beam light relay Electric flasher Wiper and park brake light Brake light signal Reverse light signal Position light Turn light High beam light Low beam light Main fuse coulombmeter Cover of fuse box Fuse box The main fuse is located on the controller mounting board.
Need help?
Do you have a question about the 202AKR Series and is the answer not in the manual?
Questions and answers