Table of Contents
Advertisement
Advertisement
Table of Contents

Related Manuals for Titan PGD2000


Summary of Contents for Titan PGD2000
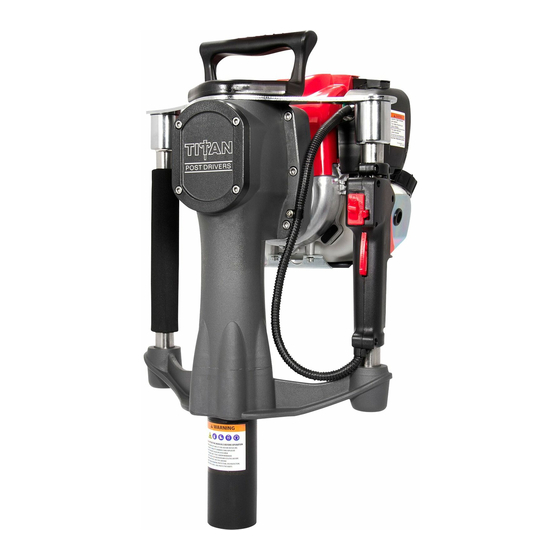
- Page 1 Operator’s Manual PGD2000 & PGD3200...
-
Page 2: Table Of Contents
Table of Contents Introduction..............3 Safety Warnings ............4 Operating Instructions..........6 Service and Maintenance..........10 Servicing of Hammer and Anvil........13 Reassembly..............15 Troubleshooting............17 Warranty................19 Parts Diagram/List......…......20 Contact Info ..............24... -
Page 3: Introduction
Follow all recommended maintenance for both the Titan Post Driver and the Honda engine. Your Titan Post Driver comes with a one-year parts warranty (see the Warranty section of this manual). We suggest that you read the warranty information and fully understand its coverage and your responsibilities of ownership. -
Page 4: Safety Warnings
Always use an approved gas storage container for your fuel. Never attempt to add gasoline to your Titan Post Driver while the engine is hot or running, as there is a chance of fumes igniting and causing severe personal damage, as well as damage to your machine. - Page 5 Always keep a firm grip on the handles, but DO NOT excessively squeeze the handles. Maintenance Warning If the warning label on your post driver is not able to be read clearly, replace it immediately. Call Titan Post Drivers for a new warning label at no cost to you.
-
Page 6: Operating Instructions
Operating Instructions Your Titan Post Driver is designed to be as effective and efficient as possible, while being extremely powerful and lightweight. It is very important to understand that your post driver is a powerful machine. With proper use and maintenance, your Titan Post Driver will provide you with many years of service. - Page 7 Check all fasteners and tighten as necessary. Follow torque requirements specified in the Reassembly section of this manual. • DO NOT use your Titan Post Driver if there is any damage or wear to any of the controls or safety devices. •...
- Page 8 Driving a Post • Be sure to use all personal protective equipment as outlined in the Safety Warnings section of this manual. • Start the engine safely as outlined on the previous page. • Take a firm stance with weight evenly distributed on both feet. Keep both feet securely planted at a minimum of shoulder width apart.
- Page 9 Ensure the fuel cap is adequately tightened before restarting the engine. Installing the Adapter Sleeve • A 1” adapter sleeve is included with each PGD2000 Post Driver and a 2” adapter sleeve is included with each PGD3200 Post Driver. •...
-
Page 10: Service And Maintenance
The following maintenance guidelines will keep your machine in top-performing condition. Be sure to properly store your Titan Post Driver. DO NOT lay it horizontally on the driver side or resting on the engine. The recommended method of storing is in an upright position, however, if this is not possible, place it on a flat surface with the barrel and brush-guard supporting the machine at an angle, so that the top handle is the highest point. - Page 11 walls. DO NOT OVERFILL THE CRANK CASE WITH GREASE. This can damage the driver and Honda engine. See Figure 3. Figure 3: Grease ring example If the grease is very dark or black in color or full of debris, the driver will require further maintenance as detailed in the Servicing of the Hammer and Anvil section of this manual.
- Page 12 Loctite is available from Titan Post Drivers. The amount and type of grease used in your Titan Post Driver is critical for the performance and service life of your post driver. Not enough grease will cause failure, and too much grease will overburden the piston and affect the hammering power of the machine.
-
Page 13: Servicing Of Hammer And Anvil
Servicing of Hammer and Anvil (Rebuild) Bottom Driver Body • Wear eye protection. • Remove the 6 bolts on the bottom half of the lower driver body. Be aware that the handle tubes have anti-vibration springs that are installed under tension. The damper assembly washer will sometimes be removed with the lower driver body, or it may remain in place in the upper driver body. - Page 14 Top Driver Body • Wear eye protection. • To remove the hammer, gently tap the main cast housing vertically down on a soft bench top, and it should slide out of the barrel. Locate the Viton O-ring and replace it at this time. The hammer is made of high-quality, hardened-tool steel and should not show any signs of wear.
-
Page 15: Reassembly
Reassembly After thoroughly cleaning and drying the hammer components and the cylinder, reassembly can be done. 1. Wear eye protection. 2. Apply a wipe of EP 0 grease around the O-ring and outside of the piston, and gently push it back into the housing. - Page 16 All screws should be correctly tightened in an alternate pattern as machine damage will occur from loose or lost bolts due to improper installation. Please contact Titan Post Drivers directly at (702) 293-4262 if you need parts or have any servicing questions.
-
Page 17: Troubleshooting
10-12 pounds of down-pressure at all times. 2. Check the type of grease in the crank. REPAIR/SERVICE ONLY WITH TITAN EP 0 GREASE. EP 0 is a low-viscosity grease for machinery with rapid moving parts that produce a lot of friction. - Page 18 If you are experiencing an issue with the Honda engine, please contact your local Honda dealer for parts and service. Titan Post Drivers does not carry the engine parts for Honda, nor does Titan Post Drivers determine the warranty, which is honored by Honda.
-
Page 19: Warranty
Honda GX35 engine, please refer to the separate warranty in the Honda manual provided with your post driver. Titan Post Drivers is an authorized Honda OEM for use of Honda brand engines on our products. Titan PGD2000 and PGD3200 post drivers have undergone and passed the testing requirements for the engines to be warranted... -
Page 20: Parts Diagram/List
Parts Diagram 1 of 2... - Page 21 Parts Diagram 2 of 2...
- Page 22 GASKET CLUTCH TO BODY DESCRIPTION PGDRS##-1 REDUCER SLEEVE CRANK PIN MULTIPLE SIZES AVAILABLE CRANK SHAFT PGDLUBE TITAN EP 0 GREASE, 4oz 6004-2RS BEARING 6000-2RS BEARING 42MM SNAP RING 20MM SNAP RING KEY 6x6x12 HARDWARE KIT GASKET CLUTCH TO BODY SERVICE CODE: PGDHDWKIT...
- Page 23 GASKET CLUTCH TO BODY SERVICE CODE: PGDCRKIT PGDRSM## REDUCER SLEEVE DESCRIPTION MULTIPLE SIZES AVAILABLE CRANK PIN PGDLUBE TITAN EP 0 GREASE, 4oz CRANK SHAFT 6004-2RS BEARING 6000-2RS BEARING 42MM SNAP RING 20MM SNAP RING HARDWARE KIT KEY 6x6x12 SERVICE CODE: PGDHDWKIT...
-
Page 24: Contact Info
Contact Info: Hours: Monday-Friday 8 AM to 5 PM CST Address: 713 E Austin Blvd, Nevada, MO 64772 Phone: (702) 293-4262 Email: info@titanpostdrivers.com...
Need help?
Do you have a question about the PGD2000 and is the answer not in the manual?
Questions and answers