Table of Contents
Advertisement
Available languages
Available languages
Quick Links
Advertisement
Table of Contents

Related Manuals for Atlantis A03-OP1001-RC


Summary of Contents for Atlantis A03-OP1001-RC
- Page 2 ITALIANO Questo prodotto è coperto da garanzia Atlantis On-Site della durata di 2 anni. Per maggiori dettagli in merito o per accedere alla documentazione completa in Italiano fare riferimento al sito www.atlantis-land.com. ENGLISH This product is covered by Atlantis On-Site 2 years warranty. For more detailed informations please refer to the web site www.atlantis-land.com.
-
Page 3: Table Of Contents
ITALIANO Manuale d’Uso ..................9 1.0 INTRODUZIONE AL PRODOTTO ..........9 1.1 Verifica Iniziale ................. 9 1.2 Contenuto della confezione ............9 1.3 Accessori ................10 2.0 INSTALLAZIONE e CONFIGURAZIONE........12 2.1 Pannello Posteriore ..............12 2.2 Installazione ................13 2.3 Setup dell’UPS ................ - Page 4 1.7 Configurazione ............... 56 1.8 Accesso via WEB ..............58 1.9 Shutdown Rapido via ShutdownWizard o SSH......58 ENGLISH MANUAL ................... 65 1.0 UPS ................65 1.1 Inspection ................65 1.2 Package Contents ..............65 1.3 Placement ................65 2.0 INSTALLATION and SETUP............66 2.1 Rear Panel Explanation ............
- Page 5 A03-OPX001-RC_MX01(rel 19.0)(2-2020)
- Page 6 Atlantis. Tutti i nomi di produttori e dei prodotti e qualsiasi marchio, registrato o meno, menzionati in questo manuale sono usati al solo scopo identificativo e rimangono proprietà...
- Page 7 Attenzione: Non introdurre mai liquidi di nessun genere all’interno della macchina. Attenzione: Collegare al dispositivo esclusivamente apparati e cavi certificati CE. Attenzione: Atlantis non è responsabile di danni causati a prodotti terzi imputabili all’utilizzo, all’installazione in ambienti non ignifughi o non idonei, alla rottura o al...
- Page 8 Restrizioni di responsabilità Il software di controllo, ove presente, è dato in licenza. Atlantis non offrirà supporto sull’utilizzo/installazione né potrà essere ritenuta responsabile per malfunzionamenti e/o perdita di dati da questo generati. Tutte le condizioni di utilizzo e clausole contenute in questo manuale e nella garanzia si intendono note ed accettate.
-
Page 9: Manuale D'uso
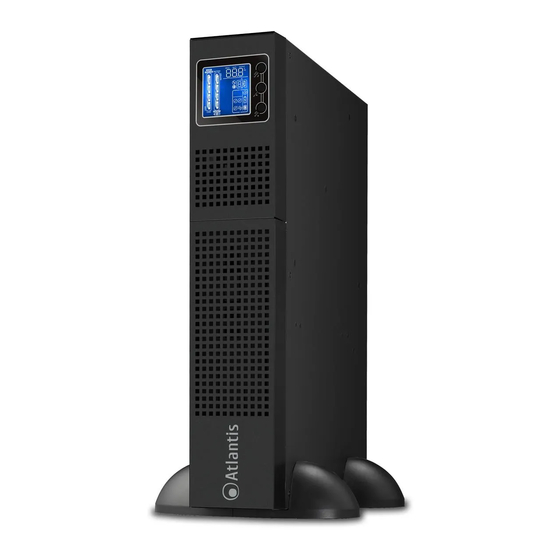
Manuale d’Uso La ringraziamo per aver scelto un apparato Atlantis. Si raccomanda la lettura completa di questo manuale prima di utilizzare il prodotto. 1.0 INTRODUZIONE AL PRODOTTO Seguire attentamente tutte le istruzioni durante l’installazione. 1.1 Verifica Iniziale Controllare immediatamente il dispositivo. Rivolgersi al rivenditore qualora il dispositivo fosse danneggiato. -
Page 10: Accessori
È opportuno lasciare almeno 15 cm dalle feritoie al fine di consentire un’opportuna areazione. Non va collocato in ambienti infiammabili (va messo lontano da legno, parquet, tappeti e superfici simili). Assicurarsi che il cavo di alimentazione non sia schiacciato dall’UPS o da altri oggetti pesanti. - Page 11 A03-RailKit: Staffe a scorrimento per UPS/Battery Bank adatte per armadio rack da 19", 2U, max 80Kg, regolabili in lunghezza (sinoa 70cm). Nella confezione sono incluse le viti per il fissaggio. Compatibili con A03-OP1001-RC, A03-OP2001-RC, A03-OP3001-RC, A03-BBX001-RC ed A03-BB3001-RC A03-PDUMBS-R: Maintenace ByPass Switch Esterno metallico per manutenzione sino a 3KW con funzione PDU.
-
Page 12: Installazione E Configurazione
Conservare l’imballo per usi futuri. 2.1 Pannello Posteriore In alto è riportato il pannello posteriore del A03-OP3001-RC ed in basso del modello A03-OP1001-RC/A03-OP2001-RC. Identificativo Utilizzo Uscite programmabili (IEC 320 C13): connettere carichi non critici. -
Page 13: Installazione
Slot per la connessione della scheda SNMP (la scheda SNMP compatibile è il modello A03-SNMP1-IN). Connettore per battery bank esterno (opzionale). I moduli sono: A03-BBX001-RC (con 4 Batterie per A03-OP1001-RC) A03-BBX001-RC (con 6 Batterie per A03-OP2001-RC) A03-BB3001-RC (con 12 Batterie per A03-OP3001-RC) 2.2 Installazione... - Page 14 Step 3 (Riposizionare il pannello frontale). Installazione su Armadio Rack Step 1 (Fissare tramite le apposite vite le staffe al prodotto). Step 2 (Fissare alla struttura Rack).
- Page 15 Il Kit Rack incluso è formato da 2 staffe ed 8 viti per il fissaggio di queste alla struttura dell’UPS. Eventuali piani, staffe scorrevoli(A03-RailKit), viti di fissaggio al Rack sono accessori non inclusi. Dato il peso dell’UPS si raccomanda di appoggiarlo su di una superficie stabile.
-
Page 16: Setup Dell'ups
RS232 Port Intelligent Slot Tramite il software di gestione (scaricabile all’indirizzo www.atlantis-land.com) è possibile controllare lo stato di funzionamento dell’UPS e permettere lo spegnimento controllato del PC collegato tramite RS232/USB. La scheda SNMP opzionale (A03-SNMP1-IN) permette inoltre di gestire l’UPS tramite LAN (anche da postazioni remote) e permette lo spegnimento di diversi PC in LAN (con il rispettivo client installato). - Page 17 Le porte USB e RS232 non possono funzionare contemporaneamente. Step 4: Network/Phone Nella parte posteriore dell’UPS è presente una porta di protezione compatibile con RJ11/RJ45 (Fax/Phone/Network). Collegare nella porta IN la linea FAX/Telefonica o il cavo LAN entrante e da OUT collegare il dispositivo ad un FAX/TELEFONO o periferica di rete.
- Page 18 E’ opportuno per utilizzare al meglio l’UPS e garantire uno spegnimento controllato del PC collegato installare il software di gestione. Scaricare il software da www.atlantis-land.com alla pagina di prodotto ed installarlo. Seguire le istruzioni a schermo per completare l’installazione.
-
Page 19: Utilizzo Dell'ups
3.0 UTILIZZO DELL’UPS Nelle sezioni seguenti verrà illustrato come configurare e utilizzare propriamente il dispositivo. 3.1 Bottoni Frontali di Selezione Bottone Funzione Accensione dell’UPS: Premere per circa 2 secondi il bottone ON/Mute per accendere il dispositivo. Silenziare l’allarme acustico: Quando l’UPS va in modalità... - Page 20 Cambio messaggio sull’LCD: Premere questo bottone per cambiare l’informazione visualizzata sul display. Una segnalazione acustica avviserà del cambiamento avvenuto. In sequenza verranno mostrate le seguenti informazioni: Voltaggio in Ingresso, Frequenza in Ingresso, Voltaggio delle SELECT Batterie, Voltaggio in Uscita, Frequenza in Uscita. ...
-
Page 21: Panello Lcd
3.2 Panello LCD Informazioni sul carico Carica connesso residua nelle batterie Informazioni Allarmi & Guasti/ Input/Output Impostazioni e Batteria Informazioni Stato dell’UPS circa il Backup-time Battery info Input/output and Battery info Warning & Fault / Setting operation UPS status Load info Backup time info... - Page 22 Display Funzione Informazioni circa il tempo di Backup Indica il tempo di Backup stimato. Indica il tempo di Backup stimato. H: ore, M: minuti Messaggi di Allerta e Malfunzionamento Indica la presenza di un messaggio di allerta o malfunzionamento nel dispositivo. Viene indicato codice...
-
Page 23: Allarmi Acustici
Indica che il carico è alimentato direttamente dalla rete elettrica (questa è ritenuta accettabile ed entro i limiti di tolleranza dal dispositivo). Indica che l’allarme sonoro è disattivato. Indica che il caricatore delle batterie sta funzionando. Informazioni sulla batteria Indica il livello di carica residuo delle batterie tra: 0- 24%, 25-49%, 50-74% e 75-100%. -
Page 24: Lcd Display
3.4 LCD Display Abbreviazione Display Significato Funzione Abilitata. Funzione non Abilitata. Uscire. Estremo superiore (High Loss). Usati per limitare superiormente il voltaggio delle finestre ECO (progr 6) e Voltaggio/Frequenza Bypass (prog 8/9). Estremo inferiore (Low Loss). Usati per limitare inferiormente il voltaggio delle finestre ECO (progr 6) e Voltaggio/Frequenza Bypass (prog 8/9). -
Page 25: Modalità Configurazione (Ups Setting)
Display configurato per modalità Tower (verticale). 3.5 Modalità Configurazione (UPS Setting) Parametri 2 Parametri 1 Si ricorda che i programmi disponibili sono i seguenti 16. I programmi 13/14 non vanno MAI attivati: 1. Configurazione Voltaggio Uscita(V) 2. Modalità FC 3. Impostazione Frequenza di uscita (Hz) 4. - Page 26 Scollegare il cavo di connessione alla rete elettrica ed aspettare che il Display sia spento. Alla riaccensione il dispositivo utilizzerà la configurazione appena impostata. Parametri 1: Visualizzano uno dei 16 programmi disponibili. Parametri 2: Visualizzano le opzioni selezionabili. 01: Configurazione Voltaggio Uscita (Output voltage setting) Interfaccia Configurazione [Parametri 2]...
- Page 27 03: Impostazione Frequenza di uscita (Output Frequency Setting) Interfaccia Configurazione [Parametri 2] Premere i bottoni per spostarsi tra le opzioni disponibili programma selezionato. BAT 50: Imposta a 50Hz la frequenza in modalità batteria. BAT 60: Imposta a 60Hz la frequenza in modalità...
- Page 28 06: Finestra di Ingresso ECO (Input Acceptable Voltage Range Setting) Interfaccia Configurazione [Parametri 1/2] Premere i bottoni per spostarsi tra le opzioni disponibili programma selezionato. E’ possibile selezionare per ECO/AECO la finestra di tolleranza del voltaggio. HS: È possibile impostare il limite superiore tra +7V e +24V rispetto alla tensione uscita...
- Page 29 07: Modalità ByPass ad UPS spento (ByPass Enable/Disable when UPS is off) Interfaccia Configurazione [Parametri 2] Se attiva, quando l’UPS viene spento passa in modalità ByPass (se le condizioni sull’ingresso impostate sono rispettate) ENA: Abilita la modalità ByPass. DIS: Disabilita la modalità ByPass. Valore di Default.
- Page 30 08: Finestra di Ingresso Bypass (ByPass Voltage Range Setting) Interfaccia Configurazione [Parametri 1/2] Premere i bottoni per spostarsi tra le opzioni disponibili nel programma selezionato. È possibile selezionare per la modalità ByPass la finestra di tolleranza del voltaggio. HS: È possibile impostare (parametro 3) il limite superiore tra 230V e 264V, il valore di default è...
- Page 31 09: Finestra Frequenze in ByPass (Bypass frequency range ) Interfaccia Configurazione [Parametri 1/2] Premere i bottoni per spostarsi tra le opzioni disponibili programma selezionato. È possibile selezionare per la modalità ByPass la finestra di tolleranza delle frequenze. HS: È possibile impostare (parametro 3) il limite superiore tra...
- Page 32 Attivazione Uscite Programmabile (Programmable outlets enable/disable) Interfaccia Configurazione [Parametri 2] Premere i bottoni per spostarsi tra le opzioni disponibili programma selezionato. ENA: Abilita uscite (IEC) programmabili. DIS: Disabilita uscite (IEC) programmabili. Alle uscite programmabili (limitabili temporalmente modalità batteria) vanno collegati i carichi meno critici.
- Page 33 12: Impostazione Autonomia (Autonomy Limitation setting ) Interfaccia Configurazione [Parametri 2] Impostazioni della durata della batteria. 0-999: Inserire, in minuti, il tempo massimo di backup. 0: il tempo di backup è impostato a 10 secondi. DIS: il tempo di backup è disabilitato, quindi l’UPS va sino a che le batterie lo permettono (Default)
- Page 34 14: Impostazione Corrente Massima Batterie (Maximum current charging setting ) Interfaccia Configurazione [Parametri 2] Impostazioni della corrente massima utilizzata dal caricabatterie. 1-8: Inserire il valore delle batterie. Si raccomanda di non alterare tale parametro. 15: Impostazione di picco per il Caricatore (Charger Boost Voltage setting ) Interfaccia Configurazione [Parametri 2]...
- Page 35 16: Impostazione Voltaggio Float del Caricatore (Charger Float Voltage setting ) Interfaccia Configurazione [Parametri 2] Impostazioni del voltaggio di float utilizzato dal caricatore delle batterie. 220-233: selezionare il boost di voltaggio (228 è il valore di default). Valgono considerazioni fatte precedentemente, scegliendo 228 si applica alla singola cella un valore di...
-
Page 36: Esempio Di Configurazione (Ups Setting)
3.6 Esempio di configurazione (UPS Setting) Si voglia seguire l’esempio seguente per impostare le uscite programmabili per un funzionamento sino a 5 minuti. Step Configurazione Prima entrare modalità configurazione l’UPS deve essere spento (con le batterie connesse) e collegato alla linea elettrica. Il display dovrebbe essere... - Page 37 confermare i settaggi ed uscire. Selezionare il programma 10 e cliccare su OFF/Enter, cliccare su ON/MUTE sino a che sul display venga visualizzato ENA e cliccare OFF/Enter per uscire. Selezionare il programma 11 e cliccare su OFF/Enter, cliccare su ON/MUTE sino a che sul display venga visualizzato 5 e cliccare OFF/Enter per uscire.
-
Page 38: Modalità Operative
3.7 Modalità Operative Modalità Descrizione Online L’UPS quando la tensione in Mode ingresso è nella soglia tolleranza può caricare le batterie (se necessario) e provvedere, tramite inverter, produrre l’uscita preimpostata. ECO mode Quando rete elettrica ingresso è dentro la soglia di tolleranza, l’uscita è... - Page 39 Battery Quando l’ingresso è fuori soglia o Mode assente, l’UPS (emette un suono ogni 5 secondi) alimenta il carico tramite batterie. ByPass Quando la tensione in ingresso è Mode dentro la soglia di accettabilità ma l’UPS è in sovraccarico (Overload) l’UPS si sposta in modalità...
-
Page 40: Tabella Errori
3.8 Tabella Errori Malfunzionamento Indicativo Icona errore Problemi sul BUS (Bus start fail) Tensione elevata sul Bus (Bus over) Tensione bassa sul Bus (Bus over) Problemi all’Inverter (Inverter soft start fail) Voltaggio Elevato sull’inverter (Inverter voltage high) Voltaggio Basso sull’inverter (Inverter voltage Low) Corto Circuito in uscita (Inverter output short) -
Page 41: Allarmi
3.9 Allarmi Allarme Icon (Lampeggiante) Allarme Sonoro Batterie Scarica (Low Suono ogni Battery) secondi. Sovraccarico Suono ogni secondo. (Overload) Batterie non connessa Suono ogni (Battery is not secondi. connected) Suono ogni Sovraccarico delle secondi. batterie (Overcharge) Connessione a Suono ogni terra/fase errata (Site secondi. - Page 42 Sostituzione Batterie Suono ogni 2 (Battery Replacement) secondi...
-
Page 43: Appendice A: Risoluzione Dei Problemi E Supporto
APPENDICE A: Risoluzione dei problemi e Supporto Questo capitolo illustra come identificare e risolvere eventuali problemi riscontrati con l’utilizzo del dispositivo. A.1.1 Problematiche dell’UPS I Led ed i segnali acustici sono un utile strumento per individuare eventuali problemi, osservandone lo stato e/o ascoltandone il tipo di beep è possibile individuare velocemente un eventuale malfunzionamento. - Page 44 riprodotta segnalazione acustica (beep ogni 2 secondi). Sul display sono visualizzate Voltaggio della batteria Contattare è troppo elevato (errore l’assistenza tecnica. 27) o basso (errore 28) oppure il caricatore è accese le icone e viene guasto. mostrato l’errore 27/28 mentre viene riprodotta segnalazione...
-
Page 45: Batterie
Controllare nella sezione alle fine del manuale. Che tipo di batterie Le batterie utilizzate in serie sono: sono incluse 2 x 12VDC- 9A/h nell’A03-OP1001-RC nell’UPS? 3 x 12VDC- 9A/h nell’A03-OP2001-RC 6 x 12VDC- 9A/h nell’A03-OP3001-RC Ogni quanto vanno Dipende dal tipo di utilizzo. -
Page 46: Problematiche Del Software Viewpower
USB in dotazione. Il PC provvederà al rilevamento del dotazione? dispositivo ed alla sua corretta installazione. A questo punto scaricare dal sito (www.atlantis-land.com) il software di gestione. Software 1. Verificare che il cavo sia correttamente connesso. gestione non rileva 2. -
Page 47: Conservazione
A.1.6 Supporto Offerto Per qualunque altro problema o dubbio sul funzionamento del prodotto, è possibile contattare il servizio di assistenza tecnica Atlantis tramite l’apertura di un ticket on- line sul portale http://www.atlantis-land.com/ita/supporto.php. Nel caso non fosse possibile l’accesso al portale di supporto, è altresì possibile richiedere assistenza telefonica al numero 02-93550066 (consultare il sito per verificare gli orari in cui il servizio viene erogato). -
Page 48: Appendice B: Cambio Delle Batterie
APPENDICE B: Cambio delle Batterie Questo dispositivo permette il cambio delle batterie interne senza necessità interrompere funzionamento del dispositivo (mantenendo quindi il carico funzionante). In questo caso però, in caso di problemi alla rete elettrica, l’UPS non potrà garantire la corretta alimentazione al carico collegato. - Page 49 Benché il gruppo supporti la modalità Hot Swap è consigliabile spegnere e scollegare tutti i carichi, spegnere il gruppo e staccarlo dalla linea elettrica. Sostituzione del pacco batterie Step 1 (Rimuovere il pannello frontale). Step 2 (Sconnettere il pacco batterie, scollegando i 2 appositi connettori). ...
- Page 50 Step 4 (Rimuovere la copertura superiore del battery-box e sostituire le batterie con batterie nuove equivalenti). Si veda il paragrafo seguente. Step 5 (Riposizionare delicatamente il battery-box nel proprio alloggiamento). Step 6 (Avvitare le 2 viti e connettere il pacco batterie, collegando i 2 appositi connettori.
- Page 51 Assemblaggio del Battery Kit Assembly Il pacco batteria va rimosso dall’UPS, va aperto e vanno cambiate le batterie e va poi nuovamente inserito nell’UPS. Seguire la procedura seguente per il cambio delle batterie. Step 1 (Rimuovere le batterie esauste). ...
-
Page 52: Appendice C: Scheda Snmp (Opzionale)
SMS. Per gestire macchine VMWare con VCenter/vSAN, CITRIX, AS400 è opportuno utilizzare una scheda SNMP differente (A03-SNMP1PRO-IN). Questa scheda (chiedere a info@atlantis-land.com). Nel pacchetto è inclusa 1 licenza per RCCMD. Compatibile, previa installazione del SW RCCMD, per AS400/Novell/Citrix Windows ®... -
Page 53: Introduzione Al Prodotto
1.2 Introduzione al prodotto Seguire attentamente tutte le istruzioni durante l’installazione. Leggere attentamente l’intero manuale prima di iniziare l’installazione del dispositivo. Questo manuale è stato redatto per la versione di scheda A03-SNMP1-IN(V19.0) con FW V1.1.4.2 (accedere via WEB e poi controllare la voce SNMP FW Version, in Information->Basic Information). -
Page 54: Overlook
1.5 Overlook 1. Ethernet port (10/100Base-T) 2. Porta per connessione sensori opzionali (EMD) o GSM Modem. 3. Connettori per lo slot dell’UPS 4. LED della porta Ethernet 5. PIN per il reset SNMP I Ethernet port status LEDs: 100M LED Acceso La porta funziona a 100Mbps. -
Page 55: Installazione Meccanica E Connessione Alla Lan
1.6 Installazione meccanica e Connessione alla LAN Si prega di seguire gli step seguenti per installare e configurare il dispositivo. Step 1: Rimuovere la cover dello Slot SNMP posto nel pannello posteriore dell'UPS svitando delicatamente le viti di bloccaggio. Step 2: Inserire delicatamente la scheda all'interno dello slot ed avvitare le viti ... -
Page 56: Configurazione
1.7 Configurazione Installare SNMP WB manager, disponibile per il download alla pagina del prodotto. Lanciare sul desktop l’icona [ ] per far partire il software. Cliccare su Scan per effettuare la scansione della LAN alla ricerca della scheda SNMP (dovrebbe essere visualizzato l'indirizzo IP della scheda di rete del PC su cui viene eseguito il SW). - Page 57 La scheda SNMP può anche attivare l’esecuzione di comandi SSH verso Host ESXi e controllarne lo spegnimento. La scheda SNMP è configurabile completamente, via SNMP manager, quando il gruppo è spento ma collegato alla rete elettrica. Quando il gruppo è acceso il software di controllo SNMP Manager può...
-
Page 58: Accesso Via Web
1.8 Accesso via WEB Digitando l’indirizzo IP della scheda SNMP, è possibile accedere alla sezione WEB per controllare e configurare il dispositivo. La password di default è 12345678. 1.9 Shutdown Rapido via ShutdownWizard o SSH La scheda SNMP permette lo spegnimento di tutti i PC collegati alla rete e anche lo spegnimento dell’UPS (che va in modalità... - Page 59 In ogni PC o sull’HOST Anzitutto configurare lo Shutwdown Wizard per accettare il comando dall’indirizzo IP assegnato alla scheda SNMP agendo sui bottoni ADD e DEL. Spuntare la voce shutdown delay Time ed impostare il tempo, in secondi, di spegnimento del PC, dalla ricezione del comando di spegnimento ricevuto dalla scheda SNMP.
- Page 60 Shutdown Wizard per Linux 32 bit supporta i seguenti sistemi operativi: Linux RedHat 8, 9 Linux RedHat Enterprise AS3, AS5, AS6 (32-bit) Linux Cent OS 5.4 (32-bit) Linux Ubuntu 8.X, 9.X, 10.X ,12.x ,14.x ,16.x,18.x(32-bit) Linux Fedora 5 Linux OpenSUSE 10,11.2 (32-bit) Linux Debian 5.x, 6.x ,8.x(32-bit) Linux Mint 14.x (32bit) Linux CentOS 5,6.x (32bit)
- Page 61 Nella scheda SNMP Accedere via WEB alla scheda SNMP. Accedere alla sezione System Configuration->Event Action Spuntare la voce Shutdown the PC while battery mode per inviare il comando di spegnimento e selezionare poi la condizione di invio (in figura si è scelto un tempo di 150s).
- Page 62 Accedere alla sezione System Configuration->Shutdown In IP address digitare l’indirizzo del PC da spegnere (su cui gira ShutDownWizard). Spuntare la voce AES Encryption e cliccare su Apply. Ripetere l’operazione per ogni altro PC. In IP address digitare l’indirizzo dell’Host ESXi da spegnere (su cui è abilitato l’SSH) e digitare le credenziali di accesso.
- Page 63 Copyright The Atlantis logo is a registered trademark of Atlantis. All other names mentioned mat be trademarks or registered trademarks of their respective owners. Subject to change without notice. No liability for technical errors and/or omissions. IMPORTANT SAFETY INSTRUCTIONS This manual contains important safety instructions. Please follow all instructions carefully during installation.
- Page 64 Caution: In a domestic environment, this product may cause radio interference, in which case the user may be required to take adequate measures. Caution: Do not try to repair the unit yourself, contact your local supplier or your warranty will be void. Caution: Before carrying out any kind of service and/or maintenance, disconnect the batteries and verify that no current is present and no hazardous voltage exists in the terminals of high capability capacitor such as BUS-capacitors.
-
Page 65: Manual
MANUAL Congratulations on your purchase of Atlantis OnLine Double Conversion Tower UPS. This manual discusses how to install and use this device. 1.0 UPS This manual contains important safety instructions. Please follow all instructions carefully during installation. Read this manual thoroughly before attempting to unpack, install or operate. -
Page 66: Installation And Setup
To eliminate any overheating of the UPS, keep all ventilation openings free from obstruction and do not place any foreign objects on top of the UPS. Keep the UPS 15 cm away from the wall. 2.0 INSTALLATION and SETUP Before installation, please inspect the unit. -
Page 67: Install The Ups
Number Explanations Programmable outlets (IEC 320 C13): connect to non-critical loads. Output receptacles(IEC 320 C13/C19): connect to mission- critical loads. AC input. A03-OP3001-RC (IEC C20), A03-OP(1)2001-RC(IEC C14) Input circuit breaker. Network/Fax/Modem surge protection. Emergency power off function connector (EPO). USB communication port. RS-232 communication port. - Page 68 Step 3 (Put the front panel back to the unit). Rack Mount Installation Step 1 Step 2...
- Page 69 Tower Installation Step 1 Step 2...
-
Page 70: Setup The Ups
2.3 Setup The UPS Step 1: UPS input connection Plug the UPS into a two-pole, three-wire, grounded receptacle only. Avoid using extension cords. Step 2: UPS output connection Simply plug devices to output sockets. During power failure, UPS will provide power to connected devices. - Page 71 For optimal computer system protection, install UPS monitoring software to fully configure UPS shutdown. Please follow steps below to download and install monitoring software: Download and install software from www.atlantis-land.com. See software document for installation instruction. When your computer restarts, the monitoring software will appear as an orange plug icon ( ) located in the system tray, near the clock.
-
Page 72: Ups Management
3.0 UPS MANAGEMENT 3.1 Button Operation Button Function Turn on the UPS: Press and hold ON/Mute button for at least 2 seconds to turn on the UPS. Mute the alarm: After the UPS is turned on in battery mode, press and hold this button for some seconds to ON/MUTE disable or enable the alarm system (... -
Page 73: Lcd Panel
UPS setting mode. Switch to bypass mode: When the main power is normal, press ON/Mute and Select buttons simultaneously for 3 seconds. Then UPS will enter to bypass mode. This action will be ineffective when the input voltage/frequency is out ON/MUTE + of acceptable range. - Page 74 Setting Operation Indicates the setting operation. Input/Output & Battery information Indicates input voltage, input frequency, battery voltage, output voltage and output frequency. V: voltage, Hz: frequency Load information Indicates the load level by 0-24%, 25-49%, 50-74%, and 75-100%. Indicates overload. Indicates the load or the UPS output is short circuited.
-
Page 75: Audible Alarm
Indicates there is something wrong with battery. 3.3 Audible Alarm Battery Mode Sounding every 5 seconds. Low Battery Sounding every 2 seconds. Overload Sounding twice every second. Fault Continuously sounding. 3.4 LCD Display Wordings Index Display Abbreviation Meaning content Enable. Disable. - Page 76 EEprom error. FAN. Battery Replacement. Rack display. Tower display.
-
Page 77: Ups Setting
3.5 UPS Setting Parameter 2 Parameter 1 There are three parameters to set up the UPS. Parameter 1: It’s for program alternatives. There are 16 programs to set up. Refer to below table. Parameter 2 and parameter 3 are the setting options or values for each program. - Page 78 02: Frequency Converter Enable/Disable Interface Setting [Parameter 2] CF ENA: FC mode enable. CF DIS: FC mode disable(default). 03: Output Frequency Setting Interface Setting [Parameter 2] You may set the initial frequency on battery mode: BAT 50: presents output frequency is 50Hz ...
- Page 79 04/05: ECO/AECO Enable/Disable Interface Setting [Parameter 2] Enable or disable ECO function. You may choose the following two options: ENA: ECO mode enable DIS: ECO mode disable (Default)
- Page 80 06: Input Acceptable Voltage Range Setting Interface Setting [Parameter 1/2] Press the Down key or Up key to set the acceptable high point and acceptable low point of input voltage for ECO & AECO mode: HS: High loss voltage in ECO/AECO mode (parameter 2) (the setting range (par 3) is from +7V to +24V of the nominal voltage).
- Page 81 07: ByPass Enable/Disable when UPS is off Interface Setting [Parameter 2] Enable or disable Bypass function. You may choose the following two options: ENA: Bypass enable DIS: Bypass disable (Default)
- Page 82 08: ByPass Voltage Range Setting Interface Setting [Parameter 1/2] Set the acceptable high voltage point and acceptable low voltage point for Bypass mode by pressing the Down key or Up key. HS: Bypass high voltage point 230-264: setting the high voltage point in parameter 3 from 230Vac to 264Vac.
- Page 83 09: Bypass frequency range Interface Setting [Parameter 1/2] Set the acceptable high frequency point and acceptable low frequency point for Bypass mode by pressing the Down key or Up key. HS: Bypass high frequency point 51-55: setting the high frequency point in parameter 2 from 51Hz to 55Hz.
- Page 84 10: Programmable outlets enable/disable Interface Setting [Parameter 2] Enable or disable programmable outlets. ENA: Programmable outlets enable DIS: Programmable outlets disable (Default) 11: Configurazione Uscite Programmabile (Programmable outlets setting) Interface Setting [Parameter 2] backup time limits programmable outlets. ...
- Page 85 12: Autonomy Limitation setting Interface Setting [Parameter 2] Set up backup time on battery mode for general outlets. 0-999: setting the backup time in minutes from 0-999 for general outlets on battery mode. 0: When setting as “0”, the backup time will be only 10 seconds.
- Page 86 14: Maximum current charging setting Interface Setting [Parameter 2] Set up the maximum charger current. 1-9: setting maximum charger current in Ampere. 15: Charger Boost Voltage setting Interface Setting [Parameter 2] Set up the charger boost voltage. 225-240: setting charger boost voltage from 225 to 240...
- Page 87 16: Charger Float Voltage setting Interface Setting [Parameter 2] Set up the charger float voltage. 220-233: setting charger boost voltage from 220 to 233 (unit: 0.01V/cell). (Default: 228) 220=13,2V (for each battery) 233=13,98V (for each battery) 228=13,68V (for each battery) 00: Exit setting Exit the setting mode.
-
Page 88: Operating Mode Description
3.6 Operating Mode Description Mode Description Online When the input voltage is within Mode acceptable range, will provide pure and stable AC power to output. The UPS will also charge the battery at online mode. ECO mode Energy saving mode: When the input voltage is within voltage regulation range, UPS will bypass voltage to output for... - Page 89 Battery When the input voltage is beyond Mode the acceptable range or power failure and alarm is sounding every 5 second, UPS will backup power from battery. ByPass When input voltage is within Mode acceptable range but UPS is overload, UPS will enter bypass mode or bypass mode can be set by front panel.
-
Page 90: Faults Reference Code
3.7 Faults Reference Code Fault Event Fault Code Icon Bus start fail Bus over Bus under Inverter soft start fail Inverter voltage high Inverter voltage Low Inverter output short Battery voltage too high Battery voltage too low Over temperature Over load Charger Failure 3.8 Warning Indicator Warning... - Page 91 Sounding every Charger failure seconds. Sounding every seconds (At this time, Battery Fault UPS is off to remind users of something wrong with battery). Out of ByPass Voltage Sounding every Range seconds. Out of ByPass Sounding every Frequency Unstable seconds. Sounding every EEProm Error...
-
Page 92: Appendix A: Trouble Shooting & Support
APPENDIX A: TROUBLE SHOOTING & SUPPORT If the UPS is not functioning properly, you can refer first to this chapter for simple troubleshooting before contacting your reseller. This could save you time and effort but if the problem persist, then consult your service provider. A.1.1 UPS The LED and the acoustic signals are a profit tool to individualize immediately possible problems... - Page 93 The code is show as 27/28 and Battery voltage is too Contact Atlantis. high(27)/low(28) or the charger is fault. the icon is lighting on LCD display alarm continuously sounding. UPS is overload. Remove excess loads from UPS output. The icon UPS is overloaded.
-
Page 94: Battery
UPS use? 3 x 12VDC- 9A/h (A03-OP2001-RC) 6 x 12VDC- 9A/h (A03-OP3001-RC) How often do I have Atlantis recommends to replace the batteries after 12-18 to change battery? months. Where can I find 1. please contact Your reseller. -
Page 95: Operation/Storage
Every 2 months 1-2 hours A.1.5 Support For technical questions and support, please contact our help-desk by ticket on http://www.atlantis-land.com/ita/supporto.php. For generic informations, please send an e-mail to info@atlantis-land.com. For presales informations, please send an e-mail to prevendite@atlantis-land.com. Atlantis Website: http://www.atlantis-land.com Email:... -
Page 96: Appendix B: Battery Replacement
APPENDIX B: Battery Replacement This UPS is equipped with internal batteries and user can replace the batteries without shutting down the UPS or connected loads.(hot-swappable battery design) Replacement is a safe procedure, isolated from electrical hazards. Consider all warnings, cautions, and notes before replacing batteries. - Page 97 Step 4 (Remove the top cover of battery box and replace the inside batteries). Step 5 (After replacing the batteries, put the battery box back to original location and screw it tightly). Step 6 (Connect the battery wires and put the front panel back to the unit).
- Page 99 Battery Kit Assembly Please assemble battery kit first before installing it inside of UPS. Please select correct battery kit procedure below to assemble it. Step 1 (Remove adhesive tapes). Step 2 (Connect all battery terminals by following below chart). ...
-
Page 101: Technical Features
Technical Features Model A03-OP1001-RC A03-OP2001-RC A03-OP3001-RC Release Rel 19.0 Rel 19.0 Rel 19.0 Power Rating(VA) 1000 2000 3000 Power Rating(W) 1350 2700 Line 160VAC(load <=80%), 140VAC(80%-70%), 120VAC(70%- Transfer 60%), 110VAC(load <60%) (±5%) Line 170VAC, 150VAC, 130VAC, 120VAC (±5%) Comeback High Line 300VAC (±5%) - Page 102 Capacity 12V/9.0Ah 12V/9.0Ah 12V/9.0Ah Quantity Recharge Time 4 hours to (90%) Type Sealed Maintenance Free Lead Acid VRLA Type Design easy-swappable battery design Charging Voltage 27,4VDC ±1% 41,1VDC ±1% 82,1VDC ±1% Charging I 1.5A Max INDICATORS(Displa UPS status, Load level, Battery level, Input/Output/battery y LCD) info, Discharge time and Fault indicators PROTECTION...
- Page 103 (DxWxH Weight( 11,6 Kg 14,5 Kg 27,4 Kg with Battery): ENVIRONMENTS Temperature 0°-40° C Humidity 20-90% (non-condensing) Noise Level Less then 55 dBA @ 1.0 meter (battery full charged, without buzzer) Package Contents On-Line Double Conversion Rack/Tower UPS Power cable and 1 IEC cable ...
-
Page 104: Backup Time & Battery
Backup TIME & Battery A03-OP1001-RC Only UPS With 1 A03- With 2 A03- BBX001-RC(4) BBX001-RC(4) 100% Load (900W) 3,5 min 10,5 min 25 min 75% Load (675W) 6 min 17 min 39 min 50% Load (450W) 11 min 27 min... -
Page 105: Voltage Range (Online Mode)
A03-OP3001-RC Battery Low 67.68V -69.12V± 1% Battery CutOFF 60.12V -67.68V± 1% Battery Charging Voltage 82,1VDC ±1% Charging Current (max) 1.5A Voltage Range (Online Mode) Vin(V) Action Vout(V) Note the UPS returns to Vin≦ 160 ± 3% AC output mode Switch to Battery INV Battery (220±... -
Page 106: Voltage Range (X Bypass Mode)
Voltage Range (x ByPass Mode) Vin(V) Action Vout(V) Note 170Vac Switch to Battery INV Battery (220± Vin≦ LS <LS< Mode 220Vac LS≦ Vin≦ HS ByPass Mode Vout=Vin 230Vac Vin ≧HS Switch to Battery INV Battery (220± <HS< Mode 264Vac... - Page 107 Atlantis via C. Chiesa, 21 Pogliano Milanese (MI) 20010 Italy info@atlantis-land.com...
Need help?
Do you have a question about the A03-OP1001-RC and is the answer not in the manual?
Questions and answers