Table of Contents
Advertisement
Quick Links
KA01246S/00/EN/03.19
71457307
2019-10-18
Products
Brief Operating Instructions
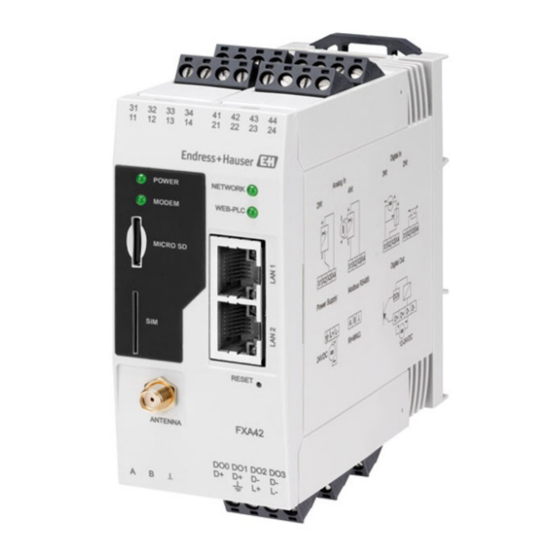
Fieldgate FXA42
System Products
These Instructions are Brief Operating Instructions; they are
not a substitute for the Operating Instructions pertaining to
the device.
Detailed information about the device can be found in the
Operating Instructions and the other documentation:
Available for all device versions via:
• Internet:
www.endress.com/deviceviewer
• Smart phone/tablet: Endress+Hauser Operations App
Solutions
Services
Advertisement
Table of Contents

Related Manuals for Endress+Hauser Fieldgate FXA42


Summary of Contents for Endress+Hauser Fieldgate FXA42
- Page 1 Operating Instructions pertaining to the device. Detailed information about the device can be found in the Operating Instructions and the other documentation: Available for all device versions via: • Internet: www.endress.com/deviceviewer • Smart phone/tablet: Endress+Hauser Operations App...
- Page 2 Fieldgate FXA42 Order code: XXXXX-XXXXXX Ser. no.: XXXXXXXXXXXX Ext. ord. cd.: XXX.XXXX.XX Serial number www.endress.com/deviceviewer Endress+Hauser Operations App A0023555 Endress+Hauser...
-
Page 3: Table Of Contents
Fieldgate FXA42 Table of contents Table of contents About this document ............. . 3 Symbols . -
Page 4: Basic Safety Instructions
Basic safety instructions Fieldgate FXA42 CAUTION This symbol alerts you to a dangerous situation. Failure to avoid this situation can result in minor or medium injury. NOTICE This symbol contains information on procedures and other facts which do not result in personal injury. -
Page 5: Designated Use
The manufacturer is not liable for damage caused by improper or non-designated use. Verification for borderline cases: ‣ For special fluids and fluids for cleaning, Endress+Hauser is glad to provide assistance in verifying the corrosion resistance of process-wetted materials, but does not accept any warranty or liability. -
Page 6: Product Safety
It meets general safety standards and legal requirements. It also complies with the EU directives listed in the device-specific EU Declaration of Conformity. Endress+Hauser confirms this by affixing the CE mark to the device. Endress+Hauser... -
Page 7: Product Description
Fieldgate FXA42 Product description Product description Product design Four versions of the Fieldgate FXA42 are available. These versions differ in terms of the device features and data transmission technology. C / D 11 12 A0030516 1 Fieldgate FXA42 versions and design... -
Page 8: Incoming Acceptance And Product Identification
• Enter the serial number on the nameplate into W@M Device Viewer (www.endress.com/deviceviewer): all the information about the gateway is displayed. • Enter the serial number on the nameplate into the Endress+Hauser Operations App or scan the 2-D matrix code (QR code) on the nameplate with the Endress+Hauser Operations App: all the information about the gateway is displayed. -
Page 9: Scope Of Delivery
Fieldgate FXA42 Installation Scope of delivery • Fieldgate FXA42 for DIN rail mounting • SD card (card type: microSD), 1 GB • Hard copy of Brief Operating Instructions For detailed information on "Accessories", see the Operating Instructions. Manufacturer address Endress+Hauser SE+Co. KG Hauptstraße 1... -
Page 10: Dimensions
Installation Fieldgate FXA42 Dimensions 45 (1.77) 118 (4.65) A0030517 2 Dimensions in mm (in) Mounting procedure A0011766 Endress+Hauser... -
Page 11: Antenna
Cat M1 and Cat NB1 (2G/4G) and WLAN. The antenna can be purchased as an accessory from Endress+Hauser. The antenna cable is screwed onto the connection on the front of the device. The antenna must be mounted outside the cabinet or field housing. In areas with weak reception, it is advisable to first check the communication before securing the antenna permanently. -
Page 12: Post-Installation Check
WLAN receivers Uplink to Internet or LAN via router Antenna for Fieldgate FXA42 SMA connection Fieldgate FXA42 Ethernet and WLAN Control cabinet Post-installation check • Is the DIN rail clip clicked into place? • Is the device securely seated on the DIN rail? •... -
Page 13: Terminal Assignment
Fieldgate FXA42 Electrical connection External termination required ( 120 Ω) Terminal assignment 31 32 33 34 41 42 43 44 11 12 13 14 21 22 23 24 L+ L– D+ D+ D– D– DO0 DO1 DO2 DO3 A0030525 Terminal... - Page 14 Electrical connection Fieldgate FXA42 Terminal assignment Properties Terminal assignment Properties High-side driver, 12 to 24 V DO0 DO1 DO2 DO3 D+ D+ D– D– sourcing, DC-PNP. 12 to 24 V Output current: 500 mA Digital outputs Power supply for digital...
-
Page 15: Commissioning
Fieldgate FXA42 Commissioning Power supply connection and digital output connection Power supply Digital output L+ L- 24VDC A0031288 12 - 24VDC A0031286 Commissioning Display elements (device status indicator / LED) A0030608 Power Modem (mobile communications versions) / WLAN / Ethernet... - Page 16 Commissioning Fieldgate FXA42 Identifier State Color Meaning Comment Ethernet Green (GN) Power supply for Ethernet Only Ethernet version interface ON Network Green (GN) Data connection established Ethernet version: valid fixed IP address configured or DHCP completed successfully Network Data connection interrupted...
-
Page 17: Preparatory Steps
• User name for the administrator: super • Password for the administrator: super • Users who do not wish to configure the Fieldgate FXA42 or who do not have the necessary authorization can log on with the following default login data. User name: eh; password: eh Connect the device directly to a PC or laptop using an Ethernet cable. - Page 18 Commissioning Fieldgate FXA42 Assign the computer an IP address that is in the same subnet as the device itself. Therefore, select the IP address so that it is similar to, but not identical to, the preconfigured IP address of the device. The IP address of the computer and that of the device may not be identical.
- Page 19 Enter the user name and password. Press OK to confirm your entry. The connection is now established and the Fieldgate FXA42 welcome screen is displayed. The display changes automatically after a few seconds and the home screen to access the configuration menus appears.
-
Page 20: Installing The Latest Firmware
Installing the latest firmware Due to storage and transportation times, the latest firmware version might not be installed on your Fieldgate FXA42. It is therefore advisable to update the firmware when the device is put into operation. For detailed information on "Updating", see the Operating Instructions. - Page 21 If this happens, the device then does not transmit any more data and can no longer be configured. ‣ Pay attention to the warning information on the Update screen of the Fieldgate FXA42 user interface. ‣ Once the update has started, make sure to wait until it has finished. This can take a few minutes.
-
Page 22: Configuration Examples
Fieldgate FXA42 Manual update with SD card If there is no data connection to the Fieldgate FXA42, the user can also copy the current firmware to the SD card using the PC. Comply with the conditions for a manual update specified at the start of this chapter. - Page 24 *71457307* 71457307 www.addresses.endress.com...
Need help?
Do you have a question about the Fieldgate FXA42 and is the answer not in the manual?
Questions and answers