
Related Manuals for BERMAD 700 Series


Summary of Contents for BERMAD 700 Series
- Page 1 BERMAD CELESCO POTENTIOMETER INSTALLATION—700 SERIES CONTROL VALVES 1- 1/2 IN-32 IN SIZES 4070 LEAVERTON COURT ANAHEIM, CA. 92807 USA...
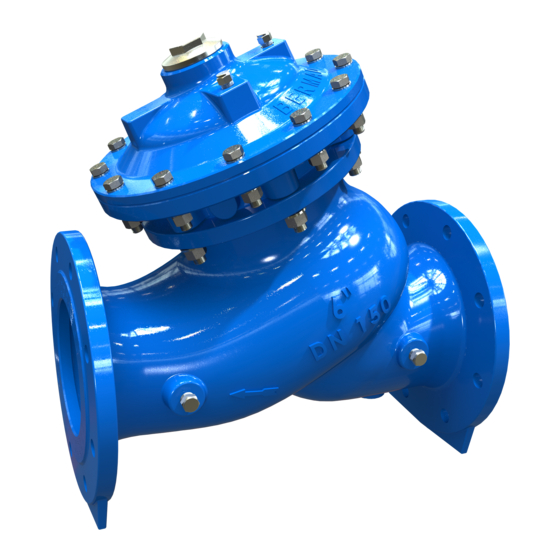
- Page 2 PROCEDURES TO INSTALL THE RT9420 POTENTIOMETER TO THE 700 SERIES BASIC CONTROL VALVE Page 1 Disassembly I– INITIALLY, SEE FIGURE 00 ON PAGE 6 TO MAKE SURE THAT THE POTENTIOMETER PART# MATCHES AND CORRESPONDS TO THE RIGHT SIZE VALVE OR CALIBRATION WILL NOT BE ABLE TO BE ACCOMPLISHED.
- Page 3 PROCEDURES TO INSTALL THE RT9420 POTENTIOMETER TO THE 700 SERIES BASIC CONTROL VALVE Page 2 Inspection/Assembling Clean the cover plug hole of any debris or build-up of organics and inspect the indicator locknut which can be seen when looking down into the cover plug hole (FIG. 0&4). The indicator locknut (19) has a hole and either a tapered slot or machined recess in the middle of it.
- Page 4 PROCEDURES TO INSTALL THE RT9420 POTENTIOMETER TO THE 700 SERIES BASIC CONTROL VALVE Page 3 Set-Up Calibration Assemble the potentiometer (1) and bracket assembly leaving the lever arm and collar adjusting screws (4&4A– FIG.2 loose for later calibration adjustments. A 5 /64” allen tool is needed to loosen or tighten adj. screws. The objective is to have the valve fully stroke open and closed without binding within the collar (8) that rides on the indicator rod (48).
- Page 5 PROCEDURES TO INSTALL THE RT9420 POTENTIOMETER TO THE 700 SERIES BASIC CONTROL VALVE Page 4 Set-Up Calibration (Continued) This could not only give an erroneous reading at the multi-meter but could possibly damage the meter or the potentiometer (1). It is important to not let the connections between pin A and pin B (FIG.
- Page 6 PROCEDURES TO INSTALL THE RT9420 POTENTIOMETER TO THE 700 SERIES BASIC CONTROL VALVE Page 5 Actual Calibration (Continued) A fine blade screwdriver an 1/8 in width or less must be used to adjust these small ‘S’ and ‘Z’ fine-tuning screws (FIG. 1).
- Page 7 PROCEDURES TO INSTALL THE RT9420 POTENTIOMETER TO THE 700 SERIES BASIC CONTROL VALVE Page 6 FIG. 00 VALVE SIZE CELESCO MODEL # SPAN ADJ. RANGE CELESCO (LOCATED ON THE HARWARE KIT # SIDE OF POTENTIOMETER- 11.25-22.5 9603603-0000 1-1/2”-4” RT9420-R062-111-1210 DEGREES 22.5-45...
- Page 8 Page 7 FIG. 1 INDICATOR ROD 24”-32”= 7-13/32” 24”-32”= 17-1/2” 24”-32”= 12” VALVE COVER 700 SERIES VALVE STROKE CHART MEASURED BETWEEN A & B STD. METRIC 1-1/2”-2-1/2”= 5/8” 16.5 MM 3” = 15/16” 23 MM. 4” = 1-1/8” 28 MM.
- Page 9 Page 8 FIG. 2 PART# LOCATION 700 SERIES VALVE STROKE CHART MEASURED BETWEEN A & B STD. METRIC 1-1/2”-2-1/2”= 5/8” 16.5 MM ** 1A 3” = 15/16” 23 MM. 4” = 1-1/8” 28 MM. 6” 2” 50 MM. 8” = 2-3/8”...
- Page 10 Page 9 FIG.3 DC mA POSITIVE + AND NEGATIVE— MARKS ARE ON THE SIDE OF THE BATTERIES. THE BATTERIES CAN BE TAPED TOGETHER WITH ELECTRICAL TAPE FOR BETTER HANDLING AND EASIER CONNECTION.
- Page 11 Page 10 FIG. 4 INDICATOR PLUG ASSEMBLY-6”-UP (1-1/2” THRU 4” - SIZE VALVES DO NOT HAVE 47 AND USE 46 PLUG ONLY) 46 INDICATOR COVER PLUG (1-1/2” THRU 4” USED BY ITSELF) O-RING INDICATOR COVER PLUG (6” TO 32” USE WITH 46) INSPECT RECESS E-CLIP (RETAINING RING) INDICATOR LOCKNUT...
Need help?
Do you have a question about the 700 Series and is the answer not in the manual?
Questions and answers