Table of Contents
Advertisement
Quick Links
Advertisement
Table of Contents

Subscribe to Our Youtube Channel
Related Manuals for Anybus Wireless Bolt Serial AWB2010


Summary of Contents for Anybus Wireless Bolt Serial AWB2010
- Page 1 ® ™ Anybus Wireless Bolt Serial USER MANUAL SCM-1202-143 1.11 en-US ENGLISH...
- Page 2 The effects caused by any direct or indirect use of such aspects of the product are undefined and may include e.g. compatibility issues and stability issues. ® ™ SCM-1202-143 1.11 en-US Anybus Wireless Bolt Serial User Manual...
-
Page 3: Table Of Contents
RS485 Typical Connection ....................39 RS232 Typical Connection....................39 Wireless Technology Basics ....................40 Radio Antenna Patterns....................41 Azimuth (Horizontal) View ....................41 Vertical Views........................ 42 Throughput Diagram....................... 43 ® ™ SCM-1202-143 1.11 en-US Anybus Wireless Bolt Serial User Manual... - Page 4 This page intentionally left blank...
-
Page 5: Preface
Preface 3 (44) Preface About This Document This manual describes how to install and configure Anybus Wireless Bolt Serial. For additional documentation and software downloads, FAQs, troubleshooting guides and technical support, please visit www.anybus.com/support. Document Conventions Numbered lists indicate tasks that should be carried out in sequence:... -
Page 6: Safety
If this equipment is used in a manner not specified by the manufacturer, the protection provided by the equipment may be impaired. ® ™ SCM-1202-143 1.11 en-US Anybus Wireless Bolt Serial User Manual... -
Page 7: Preparation
Connecting to other types of wireless devices or a WLAN infrastructure. • High data throughput speed is more important than connection reliability. • Large file transfers are expected. • WLAN channel frequency planning is possible. ® ™ SCM-1202-143 1.11 en-US Anybus Wireless Bolt Serial User Manual... -
Page 8: Installation
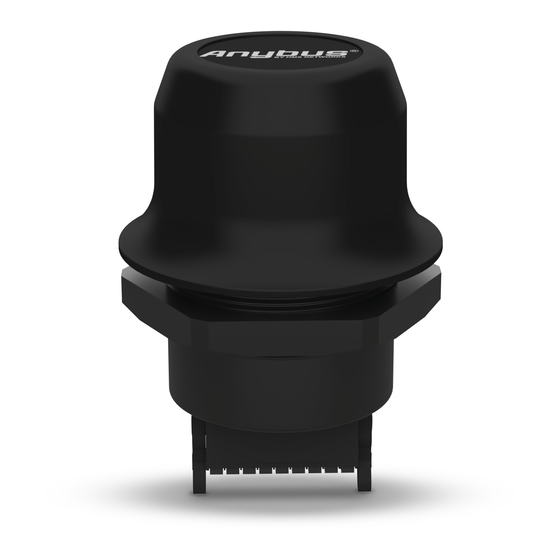
Always hold the BOTTOM part of the unit when untightening the nut, not the top part (the cap). Fig. 1 Installation drawing All measurements are in mm. ® ™ SCM-1202-143 1.11 en-US Anybus Wireless Bolt Serial User Manual... -
Page 9: Connector
Installation 7 (44) Connector The 18-pin connector is common for several models of the Anybus Wireless Bolt. Some pins may have a different function depending on model. Unused pins should not be connected. Fig. 2 Connector The location of the RESET button can be used as a reference for the pin numbering when the connector is attached to the Bolt Serial. -
Page 10: Cabling
When using Easy Config Modes, the Bolt Serial that is to be configured as a Client does not need to be connected to the Ethernet wires. Only power and Serial wiring are used. To make an Ethernet, Serial and power connector cable for Anybus Wireless Bolt Serial: Fig. 3 To maintain signal integrity, low emission and high immunity to EMI, untwist the twisted pair cable as little as possible. -
Page 11: Reset Button
Recovery Mode If the web interface cannot be accessed, the unit can be reset by starting in Recovery Mode and reinstalling the firmware using Anybus Firmware Manager II, which can be downloaded from www.anybus.com/support. To enter Recovery Mode, press and hold RESET during startup. -
Page 12: Configuration
10 (44) Configuration Anybus Wireless Bolt Serial should normally be configured via the web interface. Parameters can be set individually or using one of the pre-configured Easy Config modes. The web interface is accessed by pointing a web browser to the IP address of the Bolt Serial. The default address is 192.168.0.99. -
Page 13: Web Interface
Save and Reboot This button will be enabled if the unit must be restarted to apply a change. Cancel All Changes Resets parameter changes that have not been applied. ® ™ SCM-1202-143 1.11 en-US Anybus Wireless Bolt Serial User Manual... - Page 14 Mode 7 locks the unit in ConfigLock mode, where the configuration cannot be changed without physical access. To cancel this mode the unit must be restored to factory defaults by pressing and holding the RESETMODE button. ® ™ SCM-1202-143 1.11 en-US Anybus Wireless Bolt Serial User Manual...
- Page 15 After factory reset, Wireless Bolt will by default start in Easy Config Mode 4, if there is no Ethernet connection. When connection is established via the wireless interface, the Wireless Bolt or Bridge Client does not need to be connected with an Ethernet cable during configuration. ® ™ SCM-1202-143 1.11 en-US Anybus Wireless Bolt Serial User Manual...
- Page 16 To avoid IP address conflict if a DHCP server is already active on the network, use the DHCP Interfaces setting to limit the internal DHCP server to the correct interface. ® ™ SCM-1202-143 1.11 en-US Anybus Wireless Bolt Serial User Manual...
- Page 17 DHCP range = 192.168.0.101 – 192.168.0.107 IP Address: 192.168.0.103, Start Address: 101 DHCP range = 192.168.0.101 – 192.168.0.108 7 addresses are allocated but the address of the unit is skipped. ® ™ SCM-1202-143 1.11 en-US Anybus Wireless Bolt Serial User Manual...
- Page 18 Select the authentication/encryption mode required by the network. Open = No encryption or authentication Passkey Enter the passkey when using WPA/WPA2-PSK or WEP64/128. Username, Domain, Authentication details when using LEAP or PEAP (WPA2 Enterprise). Passphrase ® ™ SCM-1202-143 1.11 en-US Anybus Wireless Bolt Serial User Manual...
- Page 19 The IP address to use with Layer 2 cloned MAC only (see above). WLAN Roaming Anybus Wireless Bolt Serial supports Fast Roaming according to IEEE 802.11r. This enables a WLAN client to roam quicker between WLAN Access Points that have the same SSID and support IEEE 802.11r.
- Page 20 WLAN Channels and World Mode (Client Mode only) Which channels are available for WLAN communication is restricted by the regulatory domain where the unit is operating. Anybus Wireless Bolt Serial supports regulatory domain detection according to the IEEE 802.11d specification.
- Page 21 For plain text passwords a combination of upper and lower case letters, numbers, and special characters is recommended. Example of a strong plain text password: uS78_xpa&43 Example of hexadecimal password: 0x000102030405060708090a0b0c0d0e0f101112131415161718191a1b1c1d1e1f Do not use the example passwords above in a live environment! ® ™ SCM-1202-143 1.11 en-US Anybus Wireless Bolt Serial User Manual...
- Page 22 (not with third-party devices). PIN codes must consist of 4 to 6 digits. Just Works = Encrypted connection without PIN code. Paired Devices Lists the currently connected Bluetooth devices. ® ™ SCM-1202-143 1.11 en-US Anybus Wireless Bolt Serial User Manual...
- Page 23 Connecting to MAC will lock the connection to a specific hardware while connecting to Name allows for more flexibility. MAC/Name MAC address or Name of the Bluetooth device to connect to. ® ™ SCM-1202-143 1.11 en-US Anybus Wireless Bolt Serial User Manual...
- Page 24 This mode must be used when connecting to an Android device over Bluetooth. The network must have an active DHCP server. List Nearby Devices Scans the network and lists discoverable Bluetooth devices. Pairing cannot be initiated in NAP mode. ® ™ SCM-1202-143 1.11 en-US Anybus Wireless Bolt Serial User Manual...
- Page 25 Setting Up Serial Communication Fig. 15 Example | Serial Settings, TCP Mode Server with Modbus TCP to Modbus RTU Gateway function enabled Fig. 16 Example | Serial Settings, TCP Mode Client ® ™ SCM-1202-143 1.11 en-US Anybus Wireless Bolt Serial User Manual...
- Page 26 Overrun: Occur when the buffer is full, but still tries to handle incoming data traffic. Underrun: Occur when the incoming data traffic is at a lower speed than the outgoing data traffic. ® ™ SCM-1202-143 1.11 en-US Anybus Wireless Bolt Serial User Manual...
- Page 27 Send to send it to the unit. Fig. 18 Firmware update in progress Both progress bars will turn green when the firmware update has been completed. The unit will then reboot automatically. ® ™ SCM-1202-143 1.11 en-US Anybus Wireless Bolt Serial User Manual...
- Page 28 Configuration 26 (44) Fig. 19 Firmware update completed Updating the firmware will not change the configuration settings. ® ™ SCM-1202-143 1.11 en-US Anybus Wireless Bolt Serial User Manual...
- Page 29 Enter or paste the commands into the text box, then click on Send. The result codes will be displayed below the text box. Click on Help for a complete list of supported AT commands. ® ™ SCM-1202-143 1.11 en-US Anybus Wireless Bolt Serial User Manual...
- Page 30 Reboots the system without applying changes. Cancel All Changes Restores all parameters in the web interface to the currently active values. Factory Reset Resets the unit to the factory default settings and reboots. ® ™ SCM-1202-143 1.11 en-US Anybus Wireless Bolt Serial User Manual...
-
Page 31: Use Cases
When installing more than one Bolt Serial in the bridge, configure the Bolt Serial connected to the: • Master device as the Access Point (AP). • Slave as a Client. ® ™ SCM-1202-143 1.11 en-US Anybus Wireless Bolt Serial User Manual... - Page 32 Master device as the Wireless Access point (AP). • Slave as a Wireless Client. In the Bolt Serial access point web interface Serial Settings tab, select the Modbus Optimization checkbox. ® ™ SCM-1202-143 1.11 en-US Anybus Wireless Bolt Serial User Manual...
- Page 33 Slave ID 1 connected to Bolt Serial Client C: IP address 192.168.0.101 and unit identifier 1. • Slave ID 2 connected to Bolt Serial Client C: IP address 192.168.0.101 and unit identifier 2. ® ™ SCM-1202-143 1.11 en-US Anybus Wireless Bolt Serial User Manual...
- Page 34 Serial payload data can now be sent as is via the TCP socket to the Bolt Serial and transparently forwarded to the serial port. Incoming data from the serial port is forwarded transparently to all open TCP sockets. ® ™ SCM-1202-143 1.11 en-US Anybus Wireless Bolt Serial User Manual...
-
Page 35: Set Up A Wireless Infrastructure
Connect Client unit 1 to a Serial device. Connect Access Point unit 2 to the master device. Connect Access Point unit 2 to your PC, with an Ethernet cable. Connect Access Point unit 2 to power. ® ™ SCM-1202-143 1.11 en-US Anybus Wireless Bolt Serial User Manual... - Page 36 To add more Client units, repeat Connecting the Devices step 1 and the Activate Easy Config steps. → Each new Client unit will be assigned the next free IP address in the current Ethernet subnet. ® ™ SCM-1202-143 1.11 en-US Anybus Wireless Bolt Serial User Manual...
- Page 37 When Modbus Gateway Mode is active, the port automatically changes to Modbus TCP port 502. 5.3.5 Serial Installation Connect each Bolt Serial unit to a device or machine equipped with a Serial port. For more information, refer to Connector, p. 7 Cabling, p. ® ™ SCM-1202-143 1.11 en-US Anybus Wireless Bolt Serial User Manual...
-
Page 38: Factory Restore
Default Serial Settings RS232 Operating Mode Baud Rate 57600 bits/s Data bits Stop bits Parity No parity Modbus optimization TCP Mode Server Modbus Gateway Mode Disabled TCP port 5005 ® ™ SCM-1202-143 1.11 en-US Anybus Wireless Bolt Serial User Manual... -
Page 39: Technical Data
Technical Data 37 (44) Technical Data For complete technical specifications and regulatory compliance information please visit www.anybus.com/support. Technical Specifications Order code AWB2010 AWB2011 Color Black White top and black base Connector Included plug connector (2x9p; 3.5mm, Phoenix DFMC 1.5/9-ST-3.5, push-in spring connection). - Page 40 This page intentionally left blank...
-
Page 41: Ars232/Rs485 Electrical Connection
RS485 Typical Connection The resistors on the Bolt Serial side are termination resistors which form an active termination of the RS485 line. Fig. 28 RS485 RS232 Typical Connection Fig. 29 RS232 ® ™ SCM-1202-143 1.11 en-US Anybus Wireless Bolt Serial User Manual... -
Page 42: B Wireless Technology Basics
It is therefore recommended to use a wireless signal analysis tool for determining the optimal placement and configuration of a wireless device. ® ™ SCM-1202-143 1.11 en-US Anybus Wireless Bolt Serial User Manual... -
Page 43: C Radio Antenna Patterns
41 (44) Radio Antenna Patterns This section presents information about the radio antenna patterns for the Anybus Wireless Bolt. The diagram scale shows relative RSSI values, where the outer ring represents maximum radio power and is labelled 0 dB. The inner rings represent the increasing attenuation in dB measured in different angles around the Bolt, while maintaining the same distance. -
Page 44: Vertical Views
Bolt is mounted will increase the gain “upwards” in reference to the surface where the Bolt is mounted. Thus the gain “downwards” is limited as expected. C.2.1 Front View – Vertical 0° ® ™ SCM-1202-143 1.11 en-US Anybus Wireless Bolt Serial User Manual... -
Page 45: Throughput Diagram
Using a backshield can greatly increase radio coverage if used correctly. The diagram covers both the Anybus Wireless Bolt and the Anybus Wireless Bridge when using Wi-Fi (WLAN) 2.4 GHz. - Page 46 last page © 2021 HMS Industrial Networks Box 4126 300 04 Halmstad, Sweden info@hms.se SCM-1202-143 1.11 en-US / 2021-08-30 / 23148...
Need help?
Do you have a question about the Wireless Bolt Serial AWB2010 and is the answer not in the manual?
Questions and answers