
Related Manuals for Hoshizaki ROX-10WB3-EW


Summary of Contents for Hoshizaki ROX-10WB3-EW
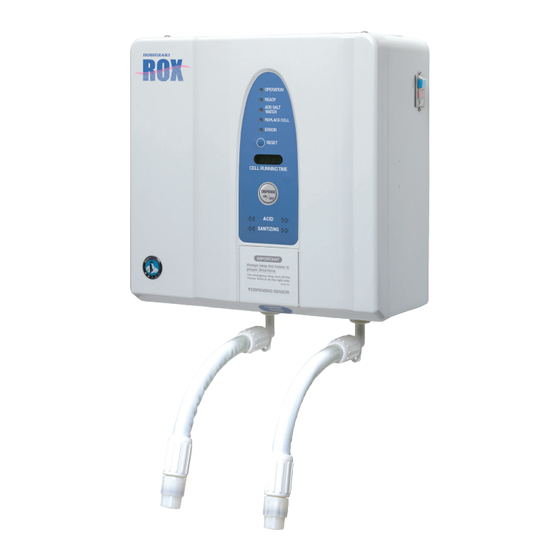
- Page 1 WATER ELECTROLYZER ROX-10WB3-EW ROX-20TB2-EW INSTALLATION MANUAL FOR QUALIFIED INSTALLER ONLY 3-16 Minamiyakata, Sakae, Toyoake, Aichi 470-1194 Japan L2X002111 (070116)
- Page 2 HOSHIZAKI provides this manual primarily to assist qualified service technicians in the installation, maintenance and service of the product. Connection of the water supply to the HOSHIZAKI water electrolyzer shall be undertaken in accordance with AS/NZS 3500.1. Should the reader have any questions or concerns which have not been satisfactorily...
-
Page 3: Table Of Contents
This manual should be made available to the technician prior to installation, maintenance or service. * Keep this manual with the water electrolyzer for later reference. CONTENTS PAGE I. INSTALLATION OF ROX-10WB3-EW ------------------------------------------------------------1 1. UNPACKING -----------------------------------------------------------------------------------------2 2. CHECKS BEFORE INSTALLATION -----------------------------------------------------------2 3. INSTALLATION -------------------------------------------------------------------------------------2 [a] REQUIRED TOOLS ---------------------------------------------------------------------------3 [b] SET UP -------------------------------------------------------------------------------------------4 4. - Page 4 [b] LOCATION ------------------------------------------------------------------------------------- 19 [c] SET UP ----------------------------------------------------------------------------------------- 20 [d] ELECTRICAL CONNECTION ------------------------------------------------------------- 20 7. INSTALLATION OF OUTLET VALVES (OPTION) --------------------------------------- 21 [a] CHECKS BEFORE INSTALLATION ----------------------------------------------------- 21 [b] LOCATION ------------------------------------------------------------------------------------- 22 [c] SET UP ----------------------------------------------------------------------------------------- 22 8. WATER SUPPLY AND PLUMBING CONNECTIONS ----------------------------------- 23 [a] UNIT WITH REMOTE CONTROLLER, WATER SOFTENER &...
-
Page 5: Installation Of Rox-10Wb3
In the context of this manual, the term "sanitizing water" refers to acidic water and "cleaning water" refers to alkaline water. I. INSTALLATION OF ROX-10WB3-EW WARNING 1. To prevent a possible water leak, electric shock or fire, the installation must be carried out by qualified personnel. -
Page 6: Unpacking
2) Check for missing or damaged accessories according to “I. 3. ACCESSORIES” in the instruction manual. * If any part is found missing or damaged, contact an authorized Hoshizaki service company. * The instruction manual must be handed over to the user. -
Page 7: [A] Required Tools
3. Do not install the unit where exposed to humidity or water splashes. Degradation of insulation may cause an electric leak or shock. 4. Do not use heat producing equipment in contact with or near the unit. The plastic parts may melt. CAUTION 1. -
Page 8: [B] Set
[b] SET UP (1) Horizontal Adjustment Level the unit in both the left-to-right and front-to- rear directions. Max 5mm (1/5”) Max 5mm (1/5”) (2) Spacing Min 50mm (2”) Allow the following clearance around the unit for proper operation and ease of maintenance and/or service. -
Page 9: Electrical Connections
* Use of potable water containing a large amount of carbon dioxide can cause reduction in electrolyzed capacity and production of cleaning and sanitizing water with improper pH levels. In such case, contact an authorized Hoshizaki service company. * Water left inside the water softener may be stained light yellow when discharged, which is not harmful to the health. -
Page 10: [A] Water Supply Connections
Example Sink Water Electrolyzer Outlet Ends Water Supply Hose (accessory) Pressure Reducing Valve (accessory) Dual Check Max 1500mm Valve (accessory) (60”) Cartridge Filter Water Softener Set Water Softener Shut-off Valve Water Supply (13A) Drain Salt Water Tank Pressure Water Supply Valve (accessory) Gauge... -
Page 11: [B] Remote Pipe Connections
3) Install the pressure gauges in the locations as shown below. Cartridge Filter Pressure Gauge Pressure (water supply) Gauge (unit) Pressure Reducing Valve Water Supply Dual Check Valve Pressure Reducing Water Softener (accessory) Valve (accessory) * The pressure reducing valve (accessory) must be installed in the proper direction between the pressure gauge (unit side) and the water inlet on the unit. -
Page 12: [C] Drain Connections
* Check that the O-rings (accessory) are provided inside, and tightly secure the remote pipes (accessory) to the bottom of the unit. Loose connections may result in water leaks. [c] DRAIN CONNECTIONS * Make drain connections, if the unit needs to be drained. * Drain connections are required in cold regions where water may freeze inside the unit. -
Page 13: Trial Run
“8. ADJUSTMENT”. If it still stays outside the range, contact an authorized Hoshizaki service company. * If a problem is found with operation of the unit, contact an authorized Hoshizaki service company. * In the initial setting of the water softener, regeneration is required to flush the ion exchange resin. -
Page 14: Adjustment
* When adjustment is required, contact an authorized Hoshizaki service company. * If the water softener needs adjustment, contact its manufacturer or an authorized Hoshizaki service company (see the instruction manual provided with the water softener). 1) Turn on the power switch. - Page 15 10) Press the * button once. 11) The display window will flash the current setting. The factory settings are as follows: Current: “10.0” (10A) Portion control dispensing time: “1” (1 minute) 12) Press the display select button (up) or * button (down) until the desired value is displayed.
-
Page 16: Installation Of Rox-20Tb2-Ew
II. INSTALLATION OF ROX-20TB2-EW 1. CHECKS BEFORE INSTALLATION IMPORTANT 1. Remove shipping carton and tape(s). If packaging material is left in the water electrolyzer, it will not work properly. 2. Use potable water. If water other than potable water is used, it may clog pipes, cause poor performance, etc. -
Page 17: Electrical Connection
CAUTION 1. To prevent damage to the unit, do not move the unit with the door open. 2. The unit should not be submerged in water or become wet. 3. Use glass, plastic or stainless steel containers for electrolyzed water. Sanitizing water may corrode metal. -
Page 18: Installation Of Water Softener (Sold Separately) And Water Filter (Sold Separately)
4. INSTALLATION OF WATER SOFTENER (SOLD SEPARATELY) AND WATER FILTER (SOLD SEPARATELY) [a] CHECKS BEFORE INSTALLATION 1) Unpack and remove shipping carton, tape(s) and other packaging material(s). 2) Check that all the necessary accessories are included. 3) Follow the instruction manual for the water softener and the water filter. [b] LOCATION * Install the water softener and water filter under the same ambient temperature and water temperature conditions as the water electrolyzer. -
Page 19: [E] Water Supply And Plumbing Connections
* Usually an electrical permit and services of a licensed electrician are required. [e] WATER SUPPLY AND PLUMBING CONNECTIONS CAUTION Do not run the water softener and the water filter until the proper water pressure is reached. * For piping of the water softener and water filter, follow the instruction manual for the water softener and the water filter. -
Page 20: [B] Location
[b] LOCATION WARNING 1. This remote controller is not intended for outdoor use. Normal operating ambient temperature should be within 5°C to 35°C (40°F to 95°F); Normal operating water temperature should be within 5°C to 30°C (40°F to 85°F). Operation of the remote controller for extended periods outside of these normal temperature ranges may affect performance. - Page 21 2) Attach the connectors to the water electrolyzer Gasket Cleaning Water Hose with the gaskets between the connectors and the water electrolyzer. Make sure to check the connection locations for the sanitizing and Sanitizing cleaning water hoses. Water Hose 3) Drive M6 anchor bolts into the wall or attach Water Electrolyzer a sheet metal part to the wall to attach the bracket.
-
Page 22: [D] Electrical Connection
[d] ELECTRICAL CONNECTION Unit Side Panel * Usually an electrical permit and services of a licensed electrician are required. 1) Remove the three screws securing the side panel. Control Box 2) Connect the cable connector on the Remote remote controller with the connector on Controller the control box. -
Page 23: [B] Location
3) Check that the water electrolyzer and water tank are installed so that the cables of the float switches can reach from the water electrolyzer to the water tank. 4) A stand may be needed to support the water tank depending on the application. Check if the floor can support the weight of the water tank when it is full. -
Page 24: [C] Set Up
[c] SET UP CAUTION Use the PVC pipes, connectors and gaskets or PVC pipes for electrolyzed water piping. Other materials may cause corrosion and water leakage. 1) Drill two attachment holes each in the Hole Diameter sanitizing water tank and cleaning water tank 14mm (9/16”) to attach the float switches. -
Page 25: Installation Of Outlet Valves (Option)
4) Route one pair of float switch wires through one hole and the other pair of float switch wires through the other hole. 5) Connect the connectors attached to the float switches so that the colors of the connectors match. White Black 6) Connect round eyelet contacts to the terminal block... -
Page 26: [B] Location
[b] LOCATION WARNING 1. This outlet valve is not intended for outdoor use. Normal operating ambient temperature should be within 5°C to 35°C (40°F to 95°F); Normal operating water temperature should be within 5°C to 30°C (40°F to 85°F). Operation of the outlet valve for extended periods outside of these normal temperature ranges may affect performance. -
Page 27: Water Supply And Plumbing Connections
2) Connect the valve with the flexible pipe. Note: Before fitting the flexible pipes into the valves, wrap the pipe threads with thread sealant tape. Do not misconnect the accessory flexible pipes: Yellow pipe - Sanitizing water Blue pipe - Cleaning water The valves are common to both sanitizing and cleaning water. - Page 28 3. Keep the end of the electrolyzed water pipes open. Do not install a shut-off valve on the end of the pipe, connect a hose with the end of the water outlet or immerse the end of the pipe in water. Different pipe lengths may cause an unstable amount of sanitizing and cleaning water to be generated, poor performance or damage to the unit.
- Page 29 Vinyl or PVC Hose Shut-off Valve Rear Panel (Plastic) Joint (Plastic) Drain Cap * Put the salt water hose through the cap (Accessory) and push in the salt water hose until the stopper hits the cap. Note: Install the remote controller so that the outlets are located above the salt water filter on the end of the salt water hose.
-
Page 30: [B] Unit With Water Tank, Water Softener & Water Filter
* Piping Example Remote Controller Water Outlet Sink Water Supply Hose Pressure Braided Water Filter Reducing Valve Hose (accessory) Water Softener Assembly Water Softener Shut-off Valve Water Supply Unit Dual Check Salt Water Tank Water Pressure Valve (accessory) Gauge Drain Water Supply Water Supply Valve... - Page 31 6. Maintain water supply pressure to the unit within 0.1 - 0.6 MPa (100 - 600 kPa). Excessively low or high water pressure may cause poor performance of sanitizing and cleaning water, trouble or water leakage from the connections. 7. Use the accessory braided hoses, connectors and gaskets or PVC pipes for electrolyzed water piping.
- Page 32 * Put the salt water hose through the cap (accessory) and push in the salt water hose until the stopper hits the cap. In case of using a larger tank, install the salt water hose so that the filter on the salt water hose can reach the bottom of the tank. Note: Install the piping so that the outlets are located above the salt water filter on the end of the salt water hose.
- Page 33 3/4” Vent Pipe Inspection Valve 3/4” Horizontal Pipe Inspection Valve Pitch: 5/100 3/4” Downward Pipe Vertical piping length: Maximum 2m Install the piping to (80”) the Water Tank so that the outlets are located above the unit. 1/2-3/4” Vertical Pipe Union * Be sure to install overflow pipes and drain 3/4”...
-
Page 34: Adjustment
* Piping Example Vent Pipe Inspection Valve Water Tank To drain Dual Check Valve (accessory) Water Pressure Gauge Water supply Neutralizer Shut-off Valve Pressure Reducing Union Valve (not provided) Drain Salt Water Tank To drain Valve Water Softener Unit Shut-off Valve Water Filter Pressure Reducing Valve (accessory) -
Page 35: [B] Current, Voltage, Portion Control Dispensing Time, Handwashing Time (Rox-20Tb2-Ew)
[b] CURRENT, VOLTAGE, PORTION CONTROL DISPENSING TIME, HANDWASHING TIME (ROX-20TB2-EW) IMPORTANT Contact an authorized Hoshizaki service company before adjusting the current or voltage. Improper adjustment may cause an excessive chlorine concentration in sanitizing water, resulting in health problems, corrosion, or deviation from the food additive or disinfectant requirements. - Page 36 8) Check that the display window is showing ”A1“. “A1” indicates that the unit is in stage 1 of the adjust mode. Press the display select button to select the appropriate stage. Current Voltage Portion control dispensing time Handwashing time [cleaning water] Handwashing time [sanitizing water] 9) If the display select button is pushed more than necessary and the display window shows a code other than desired, continue to push the display select button until the...
-
Page 37: Final Check List
10. FINAL CHECK LIST 1) Is the water electrolyzer level? 2) Is the water tank level? 3) Is the water electrolyzer in a site where the ambient temperature is within 5°C to 35°C (40°F to 95°F) and the water temperature within 5°C to 30°C (40°F to 85°F) all year around? 4) Is there at least 15 cm (6”) clearance at rear, sides and top of the water electrolyzer for maintenance or service? -
Page 38: Water Tank Float Switches (Option)
11. WATER TANK FLOAT SWITCHES (OPTION) Includes the upper and lower sanitizing water tank level float switches and upper and lower cleaning water tank level float switches. 12. OUTLET VALVES (OPTION) Connected with the electrolyzed water outlets [for sanitizing and cleaning water outlets] on the water tank.
Need help?
Do you have a question about the ROX-10WB3-EW and is the answer not in the manual?
Questions and answers