Belkin F1DN116KVM-UN-4 Quick Installation Manual
8/16 port secure single/dual-head dp/hdmi-dp/hdmi kvm switches
Hide thumbs
Also See for F1DN116KVM-UN-4:
- User manual (32 pages) ,
- Administrator's manual (17 pages) ,
- Regulatory information (2 pages)
Table of Contents
Advertisement
Quick Links
Quick Installation Guide
8/16 Port Secure Single/Dual-Head DP/HDMI-DP/HDMI KVM Switches
Objectives
• This guide includes instructions for installing Belkin F1DN108KVM-UN-4, F1DN208KVM-UN-4, and F1DN116KVM-UN-4 KVM Switches.
• A KVM allows sharing keyboard, video, mouse, audio and USB peripherals between multiple computers.
• This Manual and additional product documentation is available for online download on Belkin website. For further assistance please refer to: http://www.belkin.com/
us/Resource-Center/Cybersecurity/Secure-KVM-Switching/.
General
• Verify that all peripherals and computers are turned OFF prior to
connecting them to the product.
• The KVM's back panel is divided into sections of Console Ports and
Computer Ports.
– Connect the peripherals to be shared by the KVM to the Console
Ports.
– Connect each computer that needs access to shared peripherals to a
specific Computer Ports section.
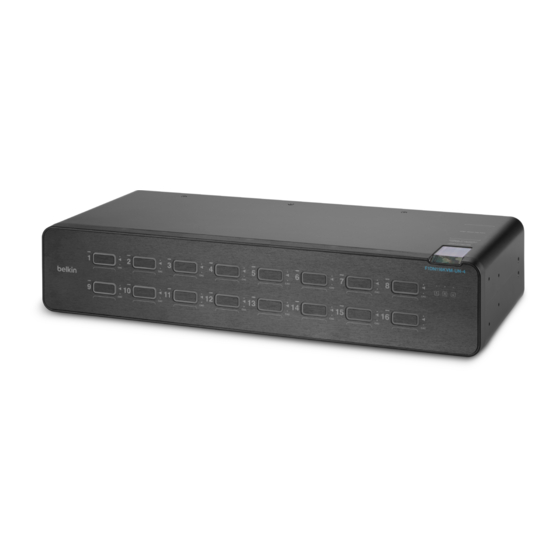
F1DN116KVM-UN-4 Model is shown
Connect peripherals to the KVM
Console Ports:
• Keyboard & Mouse: Connect a USB keyboard
and mouse to the corresponding KVM console
port. The Keyboard and mouse connected
lights (rear panel) will illuminate green. If the
keyboard or mouse are not authorized, the
lights will flicker or not lilluminate.
• Video: Connect the monitor cable to the KVM
console video port. The EDID LEDs (rear
panel) will operate as follows:
– Off: no EDID
– Flicker: EDID read in progress
– On: EDID received
Note: EDID is only read in the first few
seconds of device boot. The secure switch
does not support hot plug or swap of displays.
In any swap of display(s) it is required to
restart the KVM.
• Audio peripherals: Connect headphones /
speakers to the KVM console audio-out port.
• Common Access Card (CAC) Configuration
and Operation: Please refer to relevant
section.
Connect computers to the KVM
Computer (Host) Ports:
• Computer keyboard & mouse connection:
Connect each computer to the KVM keyboard
& mouse computer port using a USB A to
USB B cable. Connect the USB A end to the
computer and the USB B end to KVM.
• Computer Video connection: Connect
each computer to the KVM computer video
port using the corresponding video cable
(DisplayPort/HDMI), if two video connections
F1DN108KVM-UN-4: Belkin 8-Port Single Head DP/HDMI to DP/HDMI Video Secure Desktop KVM Switch PP4.0
F1DN208KVM-UN-4: Belkin 8-Port Dual Head DP/HDMI to DP/HDMI Video Secure Desktop KVM Switch PP4.0
F1DN116KVM-UN-4: Belkin 16-Port Single Head DP/HDMI to DP/HDMI Video Secure Desktop KVM Switch PP4.0
exist, make sure each PC video 1 is in the
bottom connector.
• Computer audio connection
computer to the KVM audio-in port using an
audio cable. Connect one end of the cable
to the computer's audio-out port using the
1/8" (3.5mm) stereo plug. Connect the other
end of the audio cable to the KVM audio-in
computer port.
– Audio can be frozen on a channel and allow
for the operator to hear the frozen channel
audio when switched to another channel.
An audio channel can be frozen by pressing
and holding the channel button to be
frozen for 3 seconds. The audio active light
will illuminate. To disable the freeze, press
and hold any channel button for 3 seconds.
The audio active light will move to the
active channel.
– Make sure that every computer is connected to a separate Computer
Ports section.
– The push buttons on the product's front panel indicate which
computer has current access to shared peripherals.
– To switch peripherals between computers, press the appropriate push
button on the product's front panel.
•
Before installing an administrator may have a need to configure the
KVM for CAC or DPP, and channel Illumination colorization. Consult your
administrator for details.
1
3
2
: Connect each
• Step 1 – Installation:
X16
Common Access Card (CAC)/DPP
Configuration and Operation (If
Equipped):
CAC connection to the computer requires a
separate USB cable connection and allows
the user to specify whether there is a CAC
required for that computer or not. This allows
the CAC to be connected and controlled
separately to the keyboard, mouse, video, and
audio.
1.1 Using the appropriate USB cable, connect
one end of the cable to the computer that
8820-02952 Rev.A00
Advertisement
Table of Contents

Related Manuals for Belkin F1DN116KVM-UN-4


Summary of Contents for Belkin F1DN116KVM-UN-4
- Page 1 • This guide includes instructions for installing Belkin F1DN108KVM-UN-4, F1DN208KVM-UN-4, and F1DN116KVM-UN-4 KVM Switches. • A KVM allows sharing keyboard, video, mouse, audio and USB peripherals between multiple computers. • This Manual and additional product documentation is available for online download on Belkin website. For further assistance please refer to: http://www.belkin.com/ us/Resource-Center/Cybersecurity/Secure-KVM-Switching/.
- Page 2 F1DN108KVM-UN-4: Belkin 8-Port Single Head DP/HDMI to DP/HDMI Video Secure Desktop KVM Switch PP4.0 F1DN208KVM-UN-4: Belkin 8-Port Dual Head DP/HDMI to DP/HDMI Video Secure Desktop KVM Switch PP4.0 F1DN116KVM-UN-4: Belkin 16-Port Single Head DP/HDMI to DP/HDMI Video Secure Desktop KVM Switch PP4.0 requires CAC, and the other end to the CAC recognized USB devices defined by the with active anti-tamper triggers.
Need help?
Do you have a question about the F1DN116KVM-UN-4 and is the answer not in the manual?
Questions and answers