Table of Contents
Advertisement
Quick Links
Please read these instructions carefully before installing and operating the oven.
技术要求: 符合欧盟 ROHS 最新标准要求。
标 记
处数 更改单号 签 字 日期
李胜海
设 计
标准化
校 对
审 定
审 核
黄 玲
工 艺
日 期 2021-03-15
USER GUIDE
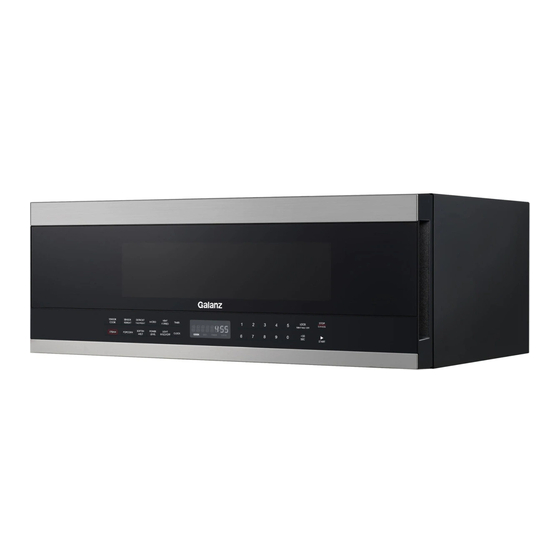
1.2Cu.Ft. Oven-the-Range Microwave
RED330JKH-PAHH0A
关业红
图样标记
李丰
S
说明书
RED330JKH-PAHH0A
(P100D33ALH-JK)
数量 重量 比例
A
共 22 页
第 /
JS1M0609-24380-004-(0)
1:1
广东格兰仕微波生活
电器制造有限公司
页
Advertisement
Table of Contents

Related Manuals for Galanz RED330JKH-PAHH0A


Summary of Contents for Galanz RED330JKH-PAHH0A
- Page 1 USER GUIDE 1.2Cu.Ft. Oven-the-Range Microwave RED330JKH-PAHH0A Please read these instructions carefully before installing and operating the oven. 技术要求: 符合欧盟 ROHS 最新标准要求。 JS1M0609-24380-004-(0) 说明书 RED330JKH-PAHH0A (P100D33ALH-JK) 标 记 处数 更改单号 签 字 日期 李胜海 关业红 设 计 标准化 图样标记 数量 重量 比例...
-
Page 2: Table Of Contents
CONTENTS CONTENTS ..............................1 IMPORTANT SAFETY INSTRUCTIONS ......................2 PRECAUTIONS TO AVOID POSSIBLE EXPOSURE TO EXCESSIVE MICROWAVE ENERGY ......... 4 UNPACKING INSTRUCTIONS ........................4 GROUNDING INSTRUCTIONS ........................5 INFORMATION YOU NEED TO KNOW ......................6 SPECIFICATIONS ............................10 PARTS FEATURES DIAGRAM ........................10 CONTROL PANEL FEATURES ........................ -
Page 3: Important Safety Instructions
IMPORTANT SAFETY INSTRUCTIONS When using electrical appliances, basic safety precautions should be followed, including the following: WARNING - To reduce the risk of burns, electric shock, fire, and injury to persons or exposure to excessive microwave energy: Read all instructions before using the appliance. ... - Page 4 Do not cover or block any openings on the appliance. Do not store or use this appliance outdoors. Do not use this product near water, for example, near a kitchen sink, in a wet basement, near a swimming pool, or similar locations. Do not operate this appliance if it has a damaged cord or a plug, if it is not working properly or if it ...
-
Page 5: Precautions To Avoid Possible Exposure To Excessive Microwave Energy
PRECAUTIONS TO AVOID POSSIBLE EXPOSURE TO EXCESSIVE MICROWAVE ENERGY (a) Do not attempt to operate this oven with the door open since open-door operation can result in harmful exposure to microwave energy. It is important not to defeat or tamper with the safety interlocks. -
Page 6: Grounding Instructions
If you have any questions about the grounding or electrical instructions, consult a qualified electrician or service person. Neither Galanz nor the dealer can accept any liability for damage to the oven or personal injury resulting from failure to observe the electrical connection procedures. -
Page 7: Information You Need To Know
INFORMATION YOU NEED TO KNOW ABOUT YOUR OVEN NEVER use the oven without the turntable and support nor turn the turntable over so that a large dish could be placed in the oven. The turntable will turn both clockwise and anticlockwise. ALWAYS have food in the oven when it is on to absorb the microwave energy. - Page 8 ABOUT FOOD FOOD DON’T Puncture egg yolks before cooking to Eggs, prevent “explosion”. sausages, Cook egg in shells. Pierce skins of potatoes, apples, squash, fruits & Reheat whole eggs. hot dogs and sausages so that steam vegetable escapes.
- Page 9 of a dish’s covering and carefully open popcorn and oven cooking bags away from the face. Stay near the oven while it’s in use and check cooking progress frequently so that there is no chance of overcooking food. NEVER use the cavity for storing cookbooks or other items. ...
- Page 10 A microwave-safe thermometer will assist you in determining correct doneness and assure you that foods have been cooked to safe temperatures. Galanz is not responsible for any damage to the oven when accessories are used ABOUT CHILDREN AND THE MICROWAVE Children below the age of 7 should use the microwave oven with a supervising person very near ...
-
Page 11: Specifications
SPECIFICATIONS Power Supply 120V 20AC 60Hz Single phase Power Consumption 1500W Output Power 1000W Microwave Frequency 2450MHz Outside Dimensions ”(H) ×29 ”(W) ×18 ”(D) Cavity Dimensions ”(H)× 18 ”(W) ×14 ”(D) Oven Capacity 1.2Cu.Ft. Cooking Uniformity Turntable Weight Approx. (net) 59.7lb PARTS FEATURES DIAGRAM 1. -
Page 12: Control Panel Features
CONTROL PANEL FEATURES Your microwave oven control panel lets you select the desires cooking function quickly and easily. All you have to do is touch the necessary Command pad. The following is a list of all the Command and Number pads located on the control panel. For more information on these features, see the operation section. -
Page 13: Basic Controls
BASIC CONTROLS Learn about your microwave oven. CAUTION To avoid risk of personal injury or property damage, do not operation the microwave oven empty. To avoid risk of personal injury or property damage, do not use stoneware, aluminum foil, metal utensils, or mental trimmed utensils in the microwave oven. -
Page 14: Setting Microwave Cooking Program
NOTE: ":0" will display and two beeps will sound to remind user to resume load the time, if you enter time is beyond the scope of clock when you set the clock. During cooking or pausing state, you can check the current clock time by pressing Clock pad. Setting Microwave cooking program For microwave cooking, cooking power and time should be set. -
Page 15: Light Control
Light Control This feature is designed for the convenience of doing things outside the oven. To adjust the light, Light Hi/Lo/Off touch pad: Light Hi/Lo/Off Touch pad. Working Mode Light Hi/Lo/Off Touch pad once when the oven lamp is off. HIGH Light Hi/Lo/Off Touch... -
Page 16: Special Features
SPECIAL FEATURES NOTE: For sensor menus (sensor cook menus, sensor reheat menus and potato): When the system senses the steam generated by the food, the display will display ":" (cooking time remaining). In order to ensure the induction effect, after starting, the oven should blow for 45 seconds ... -
Page 17: Potato
Sensor reheat menus: Press number Food type Weight/Serving 1 cup BEVERAGE 2 cups 3 cups FROZEN ENTREE 8 oz ~ 24 oz 1 ~3 slice PIZZA (6 oz/slice) DINNER PLATE 8 oz ~ 24 oz SOUP/SAUCE 8 oz ~ 24 oz CHILI 8 oz ~ 24 oz PASTA... -
Page 18: Time Defrost
Time Defrost If the food weight is exceed the maximum weight recommended, you need to use defrost by time. Defrost/Time/Weight 1. In standby mode, touch pad once. 2. Enter defrosting time by touching the number pads. The longest defrosting time you can set is 99 minutes and 99 seconds. -
Page 19: Child Lock
Child Lock The child lock prevents unsupervised operation by children and this program only works in standby mode. To set: In standby mode, touch and hold Lock Turntable/Off for 3 seconds, then a beep will sound and the display will show "LOCK ON". In the lock state, all pads are disabled. To cancel: Touch and hold Lock Turntable/Off for 3 seconds, then a beep will sound and the display will show "LOCK OFF". -
Page 20: Clear And Care
CLEAR AND CARE Exterior The outside surface is pre-coated steel and plastic. Clean the outside with mild soap and water; rinse and dry with a soft cloth. Do not use any type of household or abrasive cleaner. Door Wipe the window on both sides with a damp cloth to remove any spills or spatters. Metal parts will be easier to maintain if wiped frequently with a damp cloth. - Page 21 Agitate and scrub with a brush to remove embedded dirt. Rinse thoroughly and shake dry. Replace by fitting the filter back into the opening. Light To replace LED, first disconnect power to the oven at the circuit breaker panel or by unplugging. To release cover, remove the screw on the light cover.
- Page 22 Carefully insert the Grease Filter back into place in step 2. Oven Light To replace oven light first disconnect power to the oven at the circuit breaker panel or by unplugging. To release vent cover, remove the screw on the vent cover. (See illustration.) ...
Need help?
Do you have a question about the RED330JKH-PAHH0A and is the answer not in the manual?
Questions and answers