Advertisement
Quick Links
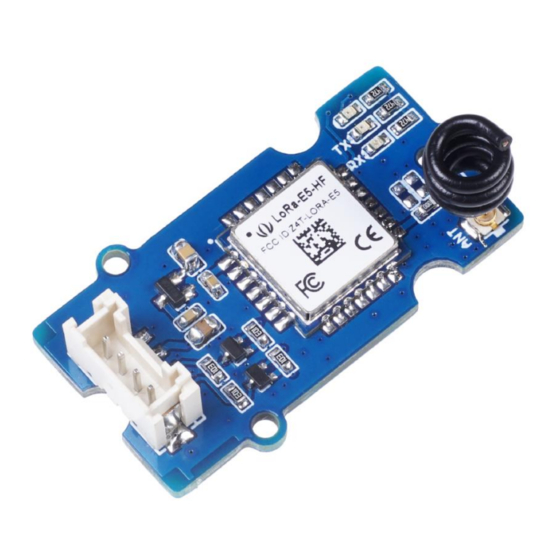
Grove - LoRa-E5
Grove LoRa-E5 embedded with LoRa-E5 STM32WLE5JC, powered by
ARM Cortex M4 ultra-low-power MCU core and LoRa SX126x, is a
wireless radio module supporting LoRa and LoRaWAN protocol on the
EU868 & US915 frequency and (G)FSK, BPSK, (G)MSK, LoRa
modulations. Grove - LoRa-E5 can endow your development boards'
strong features of ultra-long transmitting range by easily plug and play
with Grove connector on board.
As an upgrade of our old version -
Grove - LoRa Radio
- powered
by
RFM95 ultra-long-range Transceiver
Module, Grove LoRa-E5
embedded with
LoRa-E5 STM32WLE5JC Module
is a high-performance
and easy-to-use wireless radio LoRa module supporting LoRaWAN
protocol.
Advertisement

Related Manuals for Seeed Grove - LoRa-E5


Summary of Contents for Seeed Grove - LoRa-E5
- Page 1 LoRa and LoRaWAN protocol on the EU868 & US915 frequency and (G)FSK, BPSK, (G)MSK, LoRa modulations. Grove - LoRa-E5 can endow your development boards' strong features of ultra-long transmitting range by easily plug and play with Grove connector on board.
- Page 2 LoRa-E5 LoRaWAN STM32WLE5JC module is the major functional part integrated into Grove - LoRa-E5. It is a LoRaWAN module that embedded with ARM Cortex M4 ultra-low-power MCU core and LoRa SX126x, as the world-first combo of LoRa RF and MCU chip into one single tiny module, it supports (G)FSK, BPSK, (G)MSK, and LoRa modulations, and is FCC, CE certified.
-
Page 3: Harware Overview
Features • LoRa-E5 (STM32WLE5JC) embedded Support LoRaWAN protocol on EU868/US915 frequency band • Ultra-long transmitting range up to 10km (Ideal value in open space) • Easy control by AT command via UART connection • Rapid prototyping with plug-and-play Grove interfaces •... -
Page 4: Specification
Up to +20 dBm at 3.3V Working Frequency 868/915MHz Protocol LoRaWAN Sensitivity -116.5dBm ~ -136dBm Modulation LoRa, (G)FSK, (G)MSK and BPSK Current Only 60uA in sleep mode Size 20*40mm Working Temperature -40℃ ~ 85℃ Part List: Grove - LoRa-E5 PCBA *1 Grove Universal Cable *1... -
Page 5: Getting Started
Preparations Here is a demo showing you how to connect TTN (The Things Network) and Seeeduino XIAO module via Grove - LoRa-E5 module. These modules are able to collect temperature and humidity parameters from the environment and send them back to TTN. The flashing LED lights on the Seeeduino Xiao indicate the status of the temperature and humidity sensor as connecting to TTN cloud. - Page 6 Notes If this is your first time using Seeeduino XIAO, please refer to Seeeduino XIAO's wiki. If Arduino’s website this is your first time to use Arduino, is a great resource for you to start your Arduino journey. Hardware Connection Step 1.
- Page 7 Software Code Download the example; copy the code stick onto the Aruino IDE and then upload it. #include <Arduino.h> #include <U8x8lib.h> #include "DHT.h" #define DHTPIN 0 // what pin we're connected to // Uncomment whatever type you're using! #define DHTTYPE DHT11 // DHT 11 // #define DHTTYPE DHT22 // DHT 22 (AM2302) //#define DHTTYPE DHT21 // DHT 21 (AM2301)
- Page 8 delay(2); (strstr(recv_buf, p_ack) != NULL) return while (millis() - startMillis < timeout_ms); return static void recv_prase(char *p_msg) (p_msg == NULL) return; char *p_start = NULL; data = 0; rssi = 0; snr = 0; p_start = strstr(p_msg, "RX"); (p_start && == sscanf(p_start, "RX: \"%d\"\r\n", &data)))
- Page 9 (p_start && == sscanf(p_start, "SNR %d", &snr))) u8x8.setCursor(0, 7); u8x8.print(" "); u8x8.setCursor(2, 7); u8x8.print("snr :"); u8x8.print(snr); void setup(void) u8x8.begin(); u8x8.setFlipMode(1); u8x8.setFont(u8x8_font_chroma48medium8_r); Serial.begin(115200); pinMode(LED_BUILTIN, OUTPUT); digitalWrite(LED_BUILTIN, HIGH); Serial1.begin(9600); Serial.print("E5 LORAWAN TEST\r\n"); u8x8.setCursor(0, 0); (at_send_check_response("+AT: OK", 100, "AT\r\n")) is_exist = true; at_send_check_response("+ID: AppEui", 1000, "AT+ID\r\n");...
- Page 10 u8x8.print("temp:"); u8x8.setCursor(2, 3); u8x8.print("humi:"); u8x8.setCursor(2, 4); u8x8.print("led :"); u8x8.print(led); void loop(void) float temp = 0; float humi = 0; temp = dht.readTemperature(); humi = dht.readHumidity(); Serial.print("Humidity: "); Serial.print(humi); Serial.print(" %\t"); Serial.print("Temperature: "); Serial.print(temp); Serial.println(" *C"); u8x8.setCursor(0, 2); u8x8.print(" "); u8x8.setCursor(2, 2); u8x8.print("temp:");...
- Page 11 char cmd[128]; sprintf(cmd, "AT+CMSGHEX=\"%04X%04X\"\r\n", (int)temp, (int)humi); ret = at_send_check_response("Done", 5000, cmd); (ret) recv_prase(recv_buf); else Serial.print("Send failed!\r\n\r\n"); delay(5000); else delay(1000); TTN Console Configuration Setup Step 1: Load into TTN • website: https://www.thethingsnetwork.org and create your account, then access “Console” and first click on "APPLICATIONS". Step 2: Add an Application: •...
- Page 12 Description: Enter a description. • Handler registration: select the same handler as the gateway router. • Select Add Application to continue. • • Step 3: Add a decoding script to the application and save.
- Page 13 = bytes[2] <<8 | bytes[3]; return decoded; Step 4: Add Grove - LoRa-E5 device to the TTN Console • • Run the downloaded program module, view the DEVEUI and APP EUI of the LoRa-E5 module through the serial port.
- Page 14 Step 5: Register Device: enter the registered device page • 1. Device ID: Enter a unique name. 2. Device EUI: Select the E5 dev EUI. 3. APP KEY: Use this APPkey 2B7E151628AED2A6ABF7158809CF4F3C 4. App EUI: Select the E5 App EUI. •...
- Page 15 Please refer to the instruction shown in The Things Indoor Gateway wiki page: The Things Indoor Gateway Get Started with SenseCAP • Step 7: Review Result you can check the readings via the Serial Monitor.
- Page 16 Temperature and Humidity Parameters Step 1: Enter the APPLICATION created in TTN, click on the data • page to view the reported data...
- Page 17 Step 2: LED control • Enter the current device control page. Send the specified data in the “DOWNLINK” window. Send "01" to turn on LED light; Send "00" to turn off:...
-
Page 18: Tech Support
Resources Datasheet: • Grove LoRa-E5 v1.0.brd Grove LoRa-E5 v1.0.pdf • Grove LoRa-E5 v1.0.sch • LoRa-E5 datasheet and specifications • LoRa-E5 AT Command Specification • STM32WLE5JC Datasheet • Certifications: LoRa-E5-HF Certification CE-VOC-RED • LoRa-E5-HF FCC Certification -DSS • LoRa-E5-HF FCC Certification -DTS •...
Need help?
Do you have a question about the Grove - LoRa-E5 and is the answer not in the manual?
Questions and answers