Table of Contents
Advertisement
Quick Links
OWNER'S MANUAL & OPERATION INSTRUCTION
G3800 - G6800 - G8000 - G11000
Version 2.0 - 2021
SAVE THIS MANUAL: This manual contains important information regarding safety.operation,
maintnance and storage of this product. Before use, read carefully and understand all cautions,
w arnings, instructions and product labels. Failure to do so could result in serious personal injury
and/or property damage.
Advertisement
Table of Contents

Subscribe to Our Youtube Channel
Related Manuals for BE Deluxe Series


Summary of Contents for BE Deluxe Series
- Page 1 OWNER'S MANUAL & OPERATION INSTRUCTION G3800 - G6800 - G8000 - G11000 Version 2.0 - 2021 SAVE THIS MANUAL: This manual contains important information regarding safety.operation, maintnance and storage of this product. Before use, read carefully and understand all cautions, w arnings, instructions and product labels.
- Page 3 All information in this publication is based on the latest product information available at the time of printing. The contents in this manual may be different from the actual parts due to revision and other changes. Our company reserves the right to make changes at any time without notice and without incurring any obligation.
-
Page 4: Safety Messages
You WILL be KILLED or SERIOUSLY HURT if you don’t follow instructions. You CAN be KILLED or SERIOUSLY HURT if you don’t follow instructions. You CAN be HURT if you don’t follow instructions. Your generator or other property could be damaged if you don’t follow instructions. -
Page 5: Table Of Contents
CONTENTS CONTENTS SAFETY MESSAGES ……………………………………………… 2 CONTENTS ………………………………………………………… 3 1. SAFETY NOTICE ………………………………………………… 5 1. Safety Standard ……………………………………………… 5 2. Special Requirements ………………………………………… 6 2. COMPONENT IDENTIFICATION ……………………………… 8 1. Structure Feature ……………………………………………… 8 2. Engine Type & Serial Number …………………………… 12 3. - Page 6 CONTENTS 3. Battery …………………………………………………… 20 6. STARTING THE ENGINE …………………………………… 21 1. Recoil Starter ……………………………………………… 21 2. Electric starting …………………………………………… 21 7. STOPPING THE ENGINE …………………………………… 22 8. MAINTENANCE ……………………………………………… 23 1. Engine Oil Change ………………………………………… 24 2. Air Cleaner Service ……………………………………… 25 3.
-
Page 7: Safety Notice
SAFETY NOTICE 1. SAFETY NOTICE 1. Safety Standard Read and understand this owner’s manual before operating your generator. You can help prevent accidents by being familiar with your generator’s controls, and by observing safe operating procedures. Don’t operate indoors. Don’t operate in the wet condition Don’t directly connect to the household Don’t smoke when refueling power supply... -
Page 8: Special Requirements
· The circuit breakers should match with the generator equipment. If the circuit breakers require replacement, they must be replaced with a circuit breaker of the same ratings and performance characteristics. · Don’t operate the generator before grounding. - Page 9 SAFETY NOTICE If using extension cords, the requirement should be met as · following: for 1.5mm , the line should not be exceeded 60m; for 2.5mm , the line not exceeded 100m. North American Users: Do not switch between 110v and 220v while under a load.
-
Page 10: Component Identification
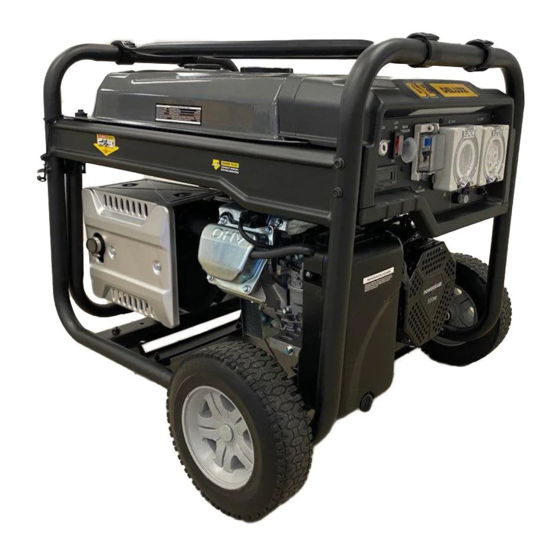
COMPONENT IDENTIFICATION 2. COMPONENT IDENTIFICATION 1. Basic Features Recoil Start AC OVERCURRENT OR RCD PROTECTOR AC RECEPTACLES GENERATOR SWITCH GROUND TERMINAL MUFFLER AIR FILTER FUEL METER FUEL TANK CAP RECOIL STARTER GRIP... - Page 11 COMPONENT IDENTIFICATION Recoil/Electric Start AC OVERCURRENT AC RECEPTACLES OR RCD PROTECTOR GENERATOR SWITCH GROUND TERMINAL MUFFLER AIR FILTER FUEL METER FUEL TANK CAP BATTERY RECOIL STARTER GRIP...
-
Page 12: Engine Type & Serial Number
COMPONENT IDENTIFICATION Recoil Starter(3 Phase) AC RECEPTACLES AC CIRCUIT BREAKER BINDING POSTS GROUND TERMINAL GENERATOR SWITCH 2. Engine Type & Serial Number FINISHED SER. NO. PRODUCT NO. MODEL NO. -
Page 13: Control
CONTROL 3. CONTROL 1. Generator Switch GENERATOR SWITCH Recoil Starter GENERATOR SWITCH START START Recoil/Electric Starter 2. Recoil Start To start the engine, pull the starter grip lightly until resistance is felt, then pull briskly. Do not allow the starter grip to snap back against the engine. Return it gently to prevent damage to the starter. -
Page 14: Fuel Valve
CONTROL 3. Fuel Valve sure to return the lever to “OFF” after stopping the engine. FUEL VALVE 4. Choke Lever The choke lever is used to provide an enriched fuel mixture when starting a cold engine. Slowly put the choke lever to “OPEN” position after the engine is started. -
Page 15: Ac Circuit Breaker
If the circuit breaker or RCD is switched OFF, switch the circuit breaker ON for power to the outlets. NOTE: generators fitted with RCD will be fitted with an M.E.N Link in the alternator or behind the control panel. -
Page 16: Generator Operation
1. Connection to the Household Power Supply When connecting the generator to a household power supply, connection must be made by a qualified electrician. After connecting, carefully check electric connection for their safety and reliability, if not, and house electrical system... -
Page 17: Generator Grounding
GENERATOR OPERATION 2. Generator Grounding To prevent electrical shock or misuse from faulty appliances, the generator should be grounded with an insulated lead. NOTE: This is not required for generators fitted GROUND TERMINAL with RCD and M.E.N Link 3. AC Current... -
Page 18: Dc Current
The terminals are colored as such:red to identify the positive (+) terminal and black to identify the negative (-) terminal. Load connection method: The load must be connected to DC terminals with the proper polarity (load's positive to positive of DC terminal and load's negative to negative... - Page 19 GENERATOR OPERATION DC OVERCURRENT PROTECTOR The overload current will automatically switch off overcurrent protector to avoid short circuit of the load or overload. If the indicator of overcurrent protector is raised, the overcurrent protector is now in the “OFF” position. Press the button of overcurrent protector to the “ON”...
-
Page 20: Pre-Operation Check
PRE-OPERATION CHECK 5. PRE-OPERATION CHECK 1. Engine Oil Engine oil is a major factor affecting engine performance and service life. Non-detergent and 2-stroke engine oils will damage the engine and are not recommended.Check the oil level before each use with the generator on a level surface with the engine stopped. -
Page 21: Fuel
PRE-OPERATION CHECK 2. Fuel 1) Check the fuel level gauge, 2) Replenish the tank if the fuel level is low. Do not let oil level rise above the shoulder of the fuel strainer. FULL EMPTY FUEL TANK CAP FUEL MAXIMUM UPPER LEVEL OPEN CLOSE FUEL LEVEL GAUGE... -
Page 22: Battery
3. Battery Don’t connect the battery positive and negative poles reversely(pay attention to leads mark), if not, serious damage may be caused to the generator set and battery. • If improper operation, the battery may be explosive and may potentially hurt persons nearby. -
Page 23: Starting The Engine
STARTING THE ENGINE 6. STARTING THE ENGINE 1. Recoil Starter (1) Remove all the loads from the output side. (2) Turn the fuel valve to the “ON” position. (3) Turn the AC circuit breaker to the“OFF” position. (4) Turn the choke lever to the“CLOSE” position. Don’t close the choke when starting the engine in warm state (5) Turn the generator switch to the “ON”... -
Page 24: Stopping The Engine
(6) Turn the choke lever to “OPEN” position after the engine is warm. Turn the GENERATOR switch to Start position and hold for no more than 5 seconds or damage may be caused to the starting motor. If starting fails, release the switch and wait for 10 seconds before operating it again. -
Page 25: Maintenance
MAINTENANCE 8. MAINTENANCE The engine must be properly maintained to ensure its operation be safe, economy and trouble-free, as well as eco-friendly. In order to keep your gasoline engine in good working condition, it must be periodically serviced. The following maintenance schedule and routine... -
Page 26: Engine Oil Change
Never run your engine in a poorly ventilated room or other enclosed area, be sure to keep good ventilation in working area. The exhaust from the engine may contain poisonous CO, inhalation can cause shock, unconsciousness and even death. -
Page 27: Air Cleaner Service
MAINTENANCE Used engine oil may cause skin cancer if repeatedly left in contact with the skin for prolonged periods. Although this is unlikely unless you handle used oil on a daily basis, it is still advisable to thoroughly wash your hands with soap and water as soon as possible after handling used oil. -
Page 28: Fuel Sediment Cup Cleaning
MAINTENANCE element in a solution of household detergent and warm water, then Drop a few points engine oil in, then, squeeze out. AIR CLEANER COVER AIR CLEANER ELEMENT CLIP ELEMENT (3) Reinstall the air cleaner element and the cover. 3. Fuel Sediment Cup Cleaning (1) Turn the fuel valve to the OFF position. -
Page 29: Spark Plug Service
(4) Measure the plug gap with a feeler gauge. Correct as necessary by carefully bending the side electrode. The gap should be: 0.70-0.80 mm. (5) Check the spark plug washer to see if it's good. (6) Reinstall the spark plug, tighten it with the plug wrench and impact the washer. -
Page 30: Storage
9. STORAGE generator,don't pack and store the generator before it is cooled. If it is going to be stored for a long time, be sure the storage area is clean and dry. (1) Drain the fuel in the fuel tank out, clean strainer, o-ring and sediment,... - Page 31 STORAGE (3) Remove the spark plug, and pour about a tablespoon of clean engine oil into the cylinder. Crank the engine several revolutions to distribute the oil, then reinstall the spark plug. (4) Slowly pull the starter grip until resistance is felt. Let the intake and exhaust valves in “close”...
-
Page 32: Troubleshooting
TROUBLESHOOTING 10. TROUBLESHOOTING Engine not to start: Is there fuel in the tank? Is there enough oil in the Add the recommended engine? oil. Still NO Take the generator Replace the Is there a spark from the spark to an authorized spark plug. -
Page 33: Wiring Diagram
SPECIFICATIONS 11. SPECIFICATIONS G3800 G6800 G8000 G11000 2.2kW Recoil/ Recoil/ Recoil/ Recoil/ Recoil/ Recoil/ Item Electric Electric Electric Electric Electric Electric Starter Starter Starter Starter Starter Starter 3 Phase Gasoline Engine Style R210-V R210-V R390-V R500-V Gasoline Engine Type Air -cooled,4-storke,OHV,single cylinder Displacement (ml) Igniting System Transistorized Magneto... -
Page 34: Wheel (Option)
WHEEL (OPTION) 12. WHEEL (OPTION) Put two wheel shafts through two wheels and gasket separately and then install them on the frame, and fix them with split pin. - Page 36 93004-YG20211...
Need help?
Do you have a question about the Deluxe Series and is the answer not in the manual?
Questions and answers