Advertisement
Item #TBD
Model #FC120-CARL
UL Model #TBD
®
USE AND CARE GUIDE
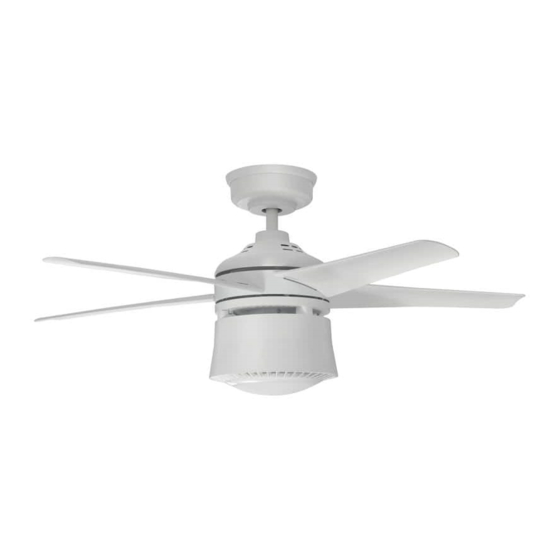
48 IN LED INDOOR AIR FILTERING CEILING FAN
Questions, problems, missing parts? Before returning to the store,
call Hampton Bay Customer Service
8 a.m. - 7 p.m., EST, Monday-Friday, 9 a.m. - 6 p.m., EST, Saturday
1-855-HD-HAMPTON
HAMPTONBAY.COM
T o view an instructional video on how to install this product:
1. Go to ww.homedepot.com and enter either the Item or Model number,found in
the top right corner of the cover of this instruction manual, in the search field.
2. Click on your product from the list of search results and click on the
video link in the "Product Over"view section.
THANK YOU
quality products designed to enhance your home. Visit us online to see our full line of products available for your home improvement needs.
Thank you for choosing Hampton Bay!
Advertisement

Subscribe to Our Youtube Channel
Related Manuals for HAMPTON BAY FC120-CARL


Summary of Contents for HAMPTON BAY FC120-CARL
- Page 1 2. Click on your product from the list of search results and click on the video link in the “Product Over”view section. THANK YOU quality products designed to enhance your home. Visit us online to see our full line of products available for your home improvement needs. Thank you for choosing Hampton Bay!
-
Page 2: Table Of Contents
Table of Contents Table of Contents ..............2 Assembly ................7 Safety Information ............... 2 Operation ................15 Warranty ................3 Care and Cleaning ............. 17 Pre-Installation ..............3 Troubleshooting ..............18 Installation ................6 Safety Information READ AND SAVE THESE INSTRUCTIONS To reduce the risk of electric shock, ensure the electricity has After making electrical connections, spliced conductors should been turned off at the circuit breaker or fuse box before you... -
Page 3: Warranty
A certain amount of “wobble” is normal and should not be considered a defect. Servicing performed by unauthorized persons shall render the warranty invalid. There is no other express warranty. Hampton Bay hereby disclaims any and all warranties, including but not limited to those ranty lasts, so the above limitation may not apply to you. - Page 4 Pre-Installation (continued) HARDWARE INCLUDED NOTE: Hardware not shown to actual size. Part Description Quantity Wiring cap Screw HAMPTONBAY.COM Please contact 1-855-HD-HAMPTON for further assistance.
- Page 5 Pre-Installation (continued) PACKAGE CONTENTS Part Description Quantity Mounting bracket Hanger rod assembly Canopy Canopy cover Lower canopy assembly Fan-motor assembly Puri cation assembly Lampshade Filter screen Blade Controller assembly includes 1 receiver, 1 remote control, 2 batteries and 2 wires IMPORTANT: This product and/or components are governed by one or more of the following U.S.
-
Page 6: Installation
Installation MOUNTING OPTIONS WARNING: NOTE: You may need a longer downrod to maintain or personal injury, mount to an outlet box marked proper blade clearance when installing on a steep, sloped “Acceptable for fan support of 35 lbs. (15.9 kg) or less,” ceiling. - Page 7 Assembly - Standard Ceiling Mount Preparation for assembly □ Remove the 15 preassembled screws (BB), 3 preassembled outer tooth washers (RR) and preassembled screws (QQ) from the motor housing (F) and place them in a safe secure place. Do not discard. HAMPTONBAY.COM Please contact 1-855-HD-HAMPTON for further assistance.
- Page 8 Assembly - Standard Ceiling Mount Install the hanger rod assembly □ Loosen the two screws (CC) on the motor assembly (F). Disassemble the parts on the hanger rod assembly (B) R pin (FF), cross pin (JJ), screw (DD), external washer (EE), hanger ball (HH), and cross pin (GG).
- Page 9 Assembly - Standard Ceiling Mount □ Pass the cross pin (GG) into the down rod (II), and adjust the position of the hanger ball (HH). □ Tighten the hanger ball (HH) on the hanger rod (B) with the screw (DD) and the external washer (EE). HAMPTONBAY.COM Please contact 1-855-HD-HAMPTON for further assistance.
- Page 10 Assembly - Standard Ceiling Mount Install the hanger bracket assembly WARNING: To reduce the risk of re, electric shock, or other personal injury, mount the fan to an outlet box or supporting system marked acceptable for fan support and use the mounting screws that come with the outlet box (not included). □...
- Page 11 Assembly - Standard Ceiling Mount Hang the motor assembly It is required to clamp the base of the hanger bracket assembly (A) into the groove of the hanger rod assembly (B). NOTE: WARNING: The tab (XX) is only to balance the WARNING:When hanging the fan on the tab (XX) it fan while may result in the tab (XX) breaking, is critical that you use one of the non-slotted (round)
- Page 12 Assembly - Standard Ceiling Mount Install the hanger bracket assembly □ Insert the receiver (MM) into the hanger bracket assembly (A). □ Insert the wire harness (NN) and wire harness (OO) into the receiver (MM). HAMPTONBAY.COM Please contact 1-855-HD-HAMPTON for further assistance.
- Page 13 Assembly - Standard Ceiling Mount Wiring the receiver Ground conductor Neutral Yellow Green Black White □ Connect the receiver as shown in the wiring diagram. □ Follow the steps below to connect the fan to your house supply wires. □ Connections between the motor assembly and the receiver: Yellow Green...
- Page 14 Assembly - Standard Ceiling Mount Install the canopy and the canopy cover □ Arrange the connected wiring harness and cover it with the canopy (C). □ Rotate the canopy (C) clockwise onto the screw heads (CC). Reinstall the previously-removed screws (CC) and washers (EE) in Step 2. Tighten all the screws (CC) to secure the canopy (C).
- Page 15 Assembly - Standard Ceiling Mount Install the fan blades □ Insert the fan blade (J) into the installation groove of the middle ring (PP), and attach the fan blade (J) with the previously-removed screws (BB) in Step 1. HAMPTONBAY.COM Please contact 1-855-HD-HAMPTON for further assistance.
- Page 16 Assembly - Standard Ceiling Mount Install the purification assembly □ Hold and press, the two bosses on the lter holder (SS) at the same time and pull out the lter holder. NOTE: Insert the lter (TT) before hanging the puri cation assembly (G). □...
- Page 17 Assembly - Standard Ceiling Mount □ Connect the wire harness with the wiring cap (AA). □ Use electrical tape to stick the connected wires on the receiver cover. NOTE: Connect the black wire harness to the black wire and the white wire harness to the white wire. Black White Black...
- Page 18 Assembly - Standard Ceiling Mount □ Rotate the puri cation assembly (G) clockwise to attach it to the motor assembly (F). □ Tightening the screws (QQ) and the external washers (RR). NOTE: 1. It is recommended to use magnetic screwdrivers when tightening the locking screws (QQ) and outer tooth washers (RR).
-
Page 19: Assembly
Assembly - Standard Ceiling Mount Install the lampshade □ Place the lampshade (H) into the puri cation assembly (G) aligning the four at areas on the ange top of the lampshade (H) with the four raised dimples in the puri cation assembly (G). □... -
Page 20: Operation
Operation Installing the batteries CAUTION: Do not use with a wall light dimmer switch. NOTE: The battery will weaken with age and should be replaced before leaking takes place as this will damage the remote control. Dispose of the used battery properly and keep the battery out of the reach of children. - Page 21 Operation 3. Description of the remote control functions NOTE : Press and hold the button for 3 seconds to reset the lter time. Ceiling fan level Button Function Description 1. Press the button in the standby state to enter the power-on state.
-
Page 22: Care And Cleaning
Care and Cleaning WARNING: Make sure the power is off before cleaning your fan. □ Because of the fan’s natural movement, some connections may become loose. Check the support connections, brackets, and blade attachments twice a year. Make sure they are secure. It is not necessary to remove the fan from the ceiling. □... -
Page 23: Troubleshooting
Troubleshooting Problem Solution The fan will not start. □ Check the main and branch circuit fuses or breakers. □ Check the line wire connections to the fan and switch wire connections in the switch housing. □ The fan is noisy. Ensure all motor housing screws are snug. - Page 24 ® Questions, problems, missing parts? Before returning to the store, call Hampton Bay Customer Service 8 a.m. - 7 p.m., EST, Monday - Friday, 9 a.m. - 6 p.m., EST, Saturday 1-855-HD-HAMPTON HAMPTONBAY.COM Retain this manual for future use.
Need help?
Do you have a question about the FC120-CARL and is the answer not in the manual?
Questions and answers