Table of Contents
Advertisement
Advertisement
Table of Contents

Related Manuals for Ecotric Fat26S900


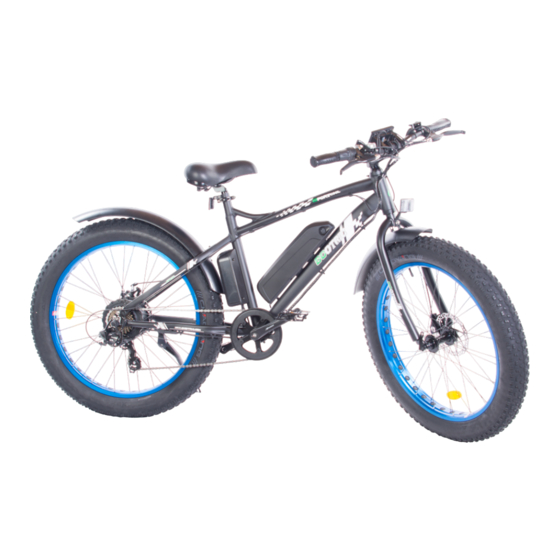
Summary of Contents for Ecotric Fat26S900
- Page 1 Fat26S900...
-
Page 2: Table Of Contents
Table of Contents Carton Contents ............................4 Ecotric Electric Bikes ............................. 4 Warning ................................. 5 Assembly Instructions ........................... 6 Front Wheel Installation ........................... 6 Handlebar, Display and Front Reflector Installation ................. 8 Seat Post Installation ..........................9 Pedals Installation ........................... 10 Torque Specification Table........................ - Page 3 Helmet ..............................25 Mechanical Safety Check ........................25 Your First Ride ............................25 Additional Passengers ..........................25 Weight Capacity ............................25 Tires and Wheels ............................. 25 General Warning ............................27 Universal Wiring Diagram ........................... 28 Recording Your Ecotric Bike Info ......................... 28...
-
Page 4: Carton Contents
1 manual Ecotric Electric Bikes First, we would like to thank you for choosing the Ecotric electric bike purchased from Ebikes- Canada.com. We believe this technology, with the benefits of electric power drive, will provide you with the perfect vehicle to increase your personal mobility. -
Page 5: Warning
Warning Electric bikes can be dangerous to use. The user or consumer assumes all risks of personal injuries, damage, or failure of the bicycle or system and all other losses or damages to themselves and others, and to any property arising as a result of using the bicycle. It is after all an electric vehicle. As with all mechanical components, the bicycle is subjected to wear and high stresses. -
Page 6: Assembly Instructions
Assembly Instructions Front Wheel Installation CAUTION: Your electric bike is equipped with a front disc brake. Be careful not to damage the disc, caliper or brake pads when reinserting the disc into the caliper. Never activate a disc brakes control lever unless the disc is correctly inserted into the caliper. - Page 7 6. With the steering fork facing forward, insert the front wheel between the fork blades so that the axle seats firmly at the top of the fork dropouts (Figure 1.4) 7. Push the wheel firmly to the top of the slots in the fork dropouts, and at the same time centring the wheel rim in the fork 8.
-
Page 8: Handlebar, Display And Front Reflector Installation
Handlebar, Display and Front Reflector Installation 1. Loosen the bolt on top of the stem, then rotate the stem through 90 degrees (Figure 2.1). 2. Unscrew the four screws in front of the stem with a 5 mm hexagonal spanner, place the handlebar on the stem, tighten the four screws slightly, and position the handlebar to your desired comfort level, then tighten the four bolts in turn until fully tightened (Figure 2.2). -
Page 9: Seat Post Installation
Seat Post Installation 1. Please pay attention to the vertical lines on the seat post, it is the minimum insert line or safety line, please make sure the post is installed into the frame deeper than the minimum insertion line. It is at the bottom of the seat post (Figure 3.1). 2. -
Page 10: Pedals Installation
Pedals Installation 1. Identify left versus right pedal There is a letter L or R stamped into the axle (threaded part that looks like a screw) as in Figure 4.1. There may also be labels on the pedals themselves. Please note they are not the same. -
Page 11: Battery Installation, Removal And Charging
Battery Installation, Removal and Charging 1. Battery installation Turn the key (normally the keys are tied on the clamp of the seat tube) to unlock position (Figure 5.1). Line up the grooves on the battery and battery holder (Figure 5.2), then slide the battery down, turn the key to lock position (Figure 5.3) and remove the key. -
Page 12: Testing The Ebike
Testing the Ebike 1. Powering up the display Turn the key to the lock position and make sure the battery is locked firmly on the frame. Press the M button on the handlebar and hold 3 seconds (Figure 6.1). The display unit will light up. 2. - Page 13 3. Testing the brake system Hold the two brake levers on both sides of the handlebar, then try to push the ebike forward to make sure the ebike is assembled firmly, and brakes can stop the ebike properly. You can adjust the tightness of the brakes cable lightly by adjusting the knobs on the caliper (Figure 6.6).
-
Page 14: Display Instrument Setting
Display Instrument Setting Presentation of screen • Speed: average speed / maximum speed • Speed unit: KMH / MPH • Battery level: 5 level bars. Try not using the battery when only one bar remains. Fully draining a battery is bad for the battery longevity and should be avoided •... -
Page 15: Display Advanced Settings
Display Advanced Settings A long press and hold of the up and down button for three seconds will enter the advanced setup interface, a short press on the up or down buttons will enable you to change the value, a short press on the M button will save the current value and switch to the next parameter. -
Page 16: Troubleshooting
Troubleshooting The following are some assistance tips for identifying and resolving electrical problems. The Display Does Not Power Up Make sure you fully charge the battery for six to eight hours before your first-time use. The LED's on the charger should be green when the battery is fully charged. If your display still does not turn on, please check the wires and the battery, please make sure the connections are not loose and that the battery is installed in place and fully engaged into the locking mechanism. -
Page 17: The Throttle Does Not Work
The Throttle Does Not Work This situation applies if the display powers up and there is no error code, and the PAS level is not set to 0 but the throttle does not work. If the number for the PAS system is 0, it means no throttle or no pedal assistance will be provided. -
Page 18: Error Codes
Error Codes When something goes wrong with the system, an error code will flash on the display unit. Check details from the attached list below. PLEASE NOTE: The motor will stop working in the event of an error. Only when the error has been released, will the motor start to work again. -
Page 19: Warranty Information
Warranty Information The warranty covers items that fail when used within their normal operating parameters. This warranty applies only to the original registered owner of the Ecotric ebike and is not transferable. Situations That Are Not Covered by Your Warranty Water damage (wading in water, parking in rain) •... -
Page 20: Return Policy
Return Policy If you purchase the ebike and then change your mind and simply want to return it for a refund, you can do so within 30 days of receiving it, but must make sure that the ebike is in new condition and well packaged. -
Page 21: Faq
How does after-sale customer service and warranty work? When you have problems with your bike, please message us at www.Ebikes-Canada.com/contact/, and we will reply to you within one business days. It is best if you can describe your problems in detail and make a video or show photos to show the problem you are having and any solution you may have tried to correct issue on your own. -
Page 22: Can I Ride My Ebike In The Rain
Can I ride my ebike in the rain? Yes, riding in light to moderate rain is not a problem. Please make sure that your bike is bone dry before your next ride, or the ebike may cut off randomly. Do not park your bike in rain and avoid running through large puddles of water. -
Page 23: Battery And Charger Care
Battery and Charger Care The charger will charge a fully depleted battery in six to eight hours. The indicator light on the charger will be red when the battery is being charged and will turn green once the battery has been fully charged. -
Page 24: Simple Maintenance Tips
Simple Maintenance Tips Having an electric bike that breaks down or isn't running smoothly can be troublesome. Here are a few simple things you can do to avoid problems and keep your ebike running smoother for longer. Electric bikes are bicycles that have additional technology to provide electric powered pedal assistance. Because they tend to get used so much more than a regular bicycle and at greater average speeds, maintenance is a critical factor in keeping your ebike running smoothly. -
Page 25: Safety
Safety Helmet Because of how quickly you can accelerate with your electric bike and the greater speeds of operation, you should always wear an approved helmet while riding your ebike and follow the helmet manufacturers instructions for the use and care of your helmet. It is your responsibility to familiarize yourself with the laws of where you ride your bike to comply with all applicable laws. - Page 26 Tires in good shape? Spin each wheel slowly and look for cuts in the threads and sidewalls. Replace damaged tires before riding the ebike. Are the wheels true? Spin each wheel and check for brake clearance and side-to-side wobble. If a wheel wobbles even slightly or rubs against or hits the brake pads, take the ebike to a qualified bike shop to have the wheel straightened.
-
Page 27: General Warning
General Warning Like any sport, bicycling involves risk of injury and damage. By choosing to ride a bicycle, you assume the responsibility for that risk, so you need to know and to practice the rules of safe and responsible riding and of proper use and maintenance of your bike. -
Page 28: Universal Wiring Diagram
Universal Wiring Diagram This generic wiring diagram is for reference only, if you have any questions, please contact us at www.Ebikes-Canada.com/contact for assistance. Recording Your Ecotric Bike Info Bicycle serial number: _______________________________________________________ Battery serial number: ______________________________________________________ Model: ___________________________________________________________________ Colour: ___________________________________________________________________...
Need help?
Do you have a question about the Fat26S900 and is the answer not in the manual?
Questions and answers