Advertisement
SL MCR DW
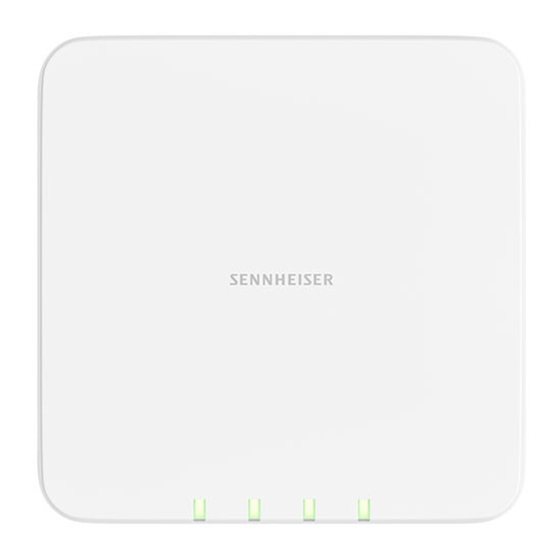
Product overview and operating elements
►
Front
1
1
Status LEDs
• See „Meaning of the status LEDs"
2
Analog Out 3-pin socket
• Analog audio output (see „Connecting the receiver")
• Suitable for Phoenix Contact MCVW 1.5-3-ST-3.81
3
Reset button
• To restore the factory settings
• Hold for 5 seconds
4
Dante I RJ-45 socket
• Digital audio output (see „Connecting the receiver")
5
Dante II / PoE / Ctrl RJ-45 socket
• Digital audio output (see „Connecting the receiver")
• PoE supply (Power over Ethernet) (see „Putting the receiver into op-
eration")
• Configuration via the software or a media control system (see „Con-
trolling and monitoring the receiver via the network")
Back
5
4
2 3
SL MCR DW
2
Advertisement
Table of Contents

Related Manuals for Sennheiser SL MCR DW


Summary of Contents for Sennheiser SL MCR DW
- Page 1 SL MCR DW SL MCR DW Product overview and operating elements ► Front Back Status LEDs • See „Meaning of the status LEDs“ Analog Out 3-pin socket • Analog audio output (see „Connecting the receiver“) • Suitable for Phoenix Contact MCVW 1.5-3-ST-3.81 Reset button •...
-
Page 2: Connecting The Receiver
SL MCR DW Connecting the receiver The receiver can output analog and digital audio signals. The analog audio signal is output via the 3-pin Analog Out terminal. Digital audio signals are output via the Dante interface with two RJ-45 sockets. This interface is also used for control and configuration via the network and for Power over Ethernet supply. - Page 3 Connecting to the network (power supply and configuration) The PoE/Ctrl RJ-45 socket (Dante I) is used to both power the receiver via Power over Ethernet and configure it using the Sennheiser Control Cock- pit software (see „Controlling and monitoring the receiver via the net- work“).
- Page 4 SL MCR DW Outputting digital audio signals The Dante™ interface with two RJ-45 sockets, Dante I and Dante II, is used for outputting digital audio signals. The interface supports redundant out- put. ► Application example: Dante™ DSP Outputting analog audio signals Use the Analog Out socket to output analog audio signals.
-
Page 5: Mounting The Receiver
SL MCR DW Mounting the receiver Safety instructions for installation Observe the following safety instructions when installing the product. ▷ The physical mounting and all electrical installations must be per- formed by a specialist. The specialist must have sufficient professional training, experience ▷... - Page 6 SL MCR DW ▷ Use the included drilling template to mark the drill holes for wall mounting. ▷ Maintain a minimum distance of 1.5 m from other walls and the ceiling. Screw the mounting frame to the wall using four suitable screws and ▷...
- Page 7 SL MCR DW Mounting the receiver on the ceiling To mount the receiver on the ceiling, you will need the mounting frame sup- plied. Screws and anchors for mounting the product to the ceiling are not included with delivery. Use screws and anchors that are appropri- ate for the particular characteristics of your ceiling.
- Page 8 SL MCR DW ► Insert the receiver into the mounting frame as shown until you hear it ▷ click into place.
- Page 9 SL MCR DW Mounting the receiver on a stand The thread in the middle of the mounting frame is suitable for mounting on a standard microphone stand with 3/8" thread. ▷ Screw the mounting frame onto the microphone stand as shown.
- Page 10 SL MCR DW Mounting the receiver on a VESA mount The holes in the mounting frame are positioned 100 mm apart so that the mounting frame can be mounted on any VESA 100 mount. ▷ Screw the mounting frame onto the VESA mount as shown using four suitable screws.
-
Page 11: Putting The Receiver Into Operation
The online help contains detailed information about the functions of the Sennheiser Control Cockpit and how to configure the SL MCR DW and the network. The online help can be found on the Sennheiser Control Cock- pit product page (www.sennheiser.com/control-cockpit-software) and in... -
Page 12: Meaning Of The Status Leds
SL MCR DW Meaning of the status LEDs The four LEDs display status information for the device as a whole or for one of the four microphone channels. ► Variant: SL MCR 4 DW (4 channels) Variant: SL MCR 2 DW (2 channels) - Page 13 SL MCR DW ► SL MCR 4 DW SL MCR 2 DW All LEDs are flashing yellow: • The device is performing a firmware update. ► SL MCR 4 DW SL MCR 2 DW All LEDs are flashing green: •...
- Page 14 SL MCR DW ► LED is red: • No radio link to a transmitter. ► LED is yellow: • The received transmitter has been muted with the MUTE switch. ► LED is flashing yellow: • A firmware update is in progress on the received transmitter.
-
Page 15: Updating The Firmware
Pairing mode is active for this channel. Updating the firmware The firmware of the receiver is updated using the Sennheiser Control Cockpit software. You can find more information about this procedure in the software in- struction manual in the Sennheiser Documentation app or in the down- load area of the Sennheiser website at www.sennheiser.com/download.
Need help?
Do you have a question about the SL MCR DW and is the answer not in the manual?
Questions and answers