Samsung HW-Q950T Full Manual
Hide thumbs
Also See for HW-Q950T:
- User manual (118 pages) ,
- Full manual (46 pages) ,
- Full manual (43 pages)

Related Manuals for Samsung HW-Q950T


Summary of Contents for Samsung HW-Q950T
- Page 1 FULL MANUAL HW-Q950T Imagine the possibilities Thank you for purchasing this Samsung product. To receive more complete service, please register your product at www.samsung.com/register...
- Page 2 • This apparatus shall always be connected to a Refer to the table below for an explanation of AC outlet with a protective grounding symbols which may be on your Samsung product. connection. • To disconnect the apparatus from the mains,...
- Page 3 PRECAUTIONS 5. The battery used with this product contains chemicals that are harmful to the environment. Do not dispose of the battery 1. Ensure that the AC power supply in your in the general household trash. Do not house complies with the power expose the battery to excess heat, direct requirements listed on the identification sunlight, or fire.
-
Page 4: Table Of Contents
CONTENTS Checking the Components Product Overview Top Panel of the Soundbar ------------------------- Bottom Panel of the Soundbar ------------------------- Using the Soundbar Remote Control Inserting Batteries before using the Remote Control (AA batteries X 2) ------------------------- How to Use the Remote Control ------------------------- Using the Hidden Buttons (Buttons with more than one function) -------------------------... - Page 5 Connecting an External Device Method 1. Connecting using an HDMI Cable (Capable of Dolby Atmos decoding and playback) ------------------------- Method 2. Connecting using an Optical Cable ------------------------- Connecting a Mobile Device Method 1. Connecting via Bluetooth ------------------------- Method 2. Connecting via Wi-Fi (Wireless Network) ------------------------- Configuring Amazon Alexa -------------------------...
-
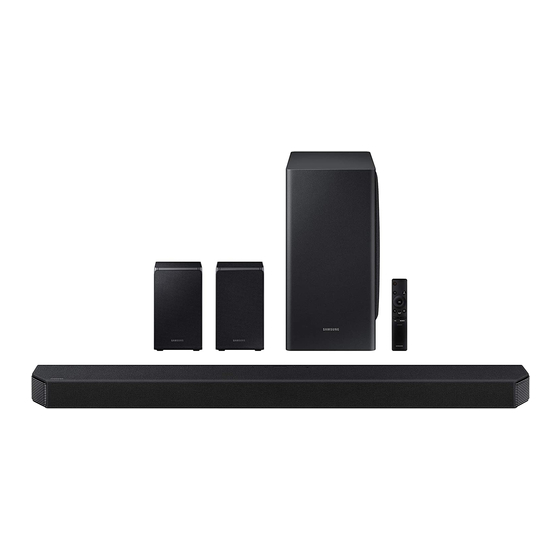
Page 6: Checking The Components
• For more information about the power supply and power consumption, refer to the label attached to the product. (Label: Bottom of the Soundbar Main Unit) • To purchase additional components or optional cables, contact a Samsung Service Centre or Samsung Customer Care. -
Page 7: Product Overview
02 PRODUCT OVERVIEW Top Panel of the Soundbar Position the product so that the SAMSUNG logo is located on the top. (Multi Function) Button • In standby mode, press the (Multi Function) button to turn on the Soundbar. • Press the (Multi Function) button to change the input source. -
Page 8: Bottom Panel Of The Soundbar
DIGITAL AUDIO IN (OPTICAL) ID SET SERVICE HDMI IN 1 HDMI 2 POWER ID SET (WOOFER/REAR) DIGITAL AUDIO IN (OPTICAL) ID SET NETWORK DIGITAL AUDIO IN SERVICE HDMI IN 2 (OPTICAL) HDMI 1 POWER ID SET ID SET HDMI IN 1 HDMI 2 (WOOFER/REAR) SERVICE... -
Page 9: Using The Soundbar Remote Control
03 USING THE SOUNDBAR REMOTE CONTROL Inserting Batteries before using the Remote Control (AA batteries X 2) Slide the back cover in the direction of the arrow until it is completely removed. Insert 2 AA batteries (1.5V) oriented so that their polarity is correct. Slide the back cover back into position. - Page 10 PAIR You can select the desired sound mode by choosing STANDARD, SURROUND, GAME SOUND PRO, or ADAPTIVE SOUND. MODE • STANDARD SOUND MODE Outputs the original sound. • SURROUND Provides a wider sound field than standard. • GAME PRO Provides stereoscopic sound to immerse you in the action while gaming. •...
- Page 11 When pressed, the setting items such as TREBLE, BASS, SYNC, CENTER LEVEL, SIDE LEVEL, FRONT TOP LEVEL, REAR LEVEL, REAR TOP LEVEL, and VIRTUAL ON/OFF are displayed in sequence. The desired item can be adjusted using the Up/Down buttons. – To control the volume of the treble or bass sound, select TREBLE or BASS in Sound Sound Control Settings, and then adjust the volume between -6~+6 by using the Up/Down buttons.
-
Page 12: Using The Hidden Buttons (Buttons With More Than One Function)
Using the Hidden Buttons (Buttons with more than one function) Hidden Button Reference page Remote Control Button Function WOOFER (Up) TV remote control On/Off (Standby) page 13 ID SET page 16 7 Band EQ page 11 (Sound Control) Output specifications for the different sound effect modes Output Effect Input With Subwoofer &... -
Page 13: Adjusting The Soundbar Volume With A Tv Remote Control
2. Push up and hold the WOOFER button for 5 seconds. Each time you push the WOOFER button up and hold it for 5 seconds, the mode switches in the following order: “SAMSUNG-TV REMOTE” (Default mode), “OFF-TV REMOTE”, “ALL-TV REMOTE”. Remote Control Button... -
Page 14: Connecting The Soundbar
04 CONNECTING THE SOUNDBAR Connecting the power and units Use the Power cord to connect the Subwoofer, Surround Speakers, and Soundbar to an electrical outlet in the following order: • For more information about the required electrical power and power consumption, refer to the label attached to the product. -
Page 15: Recommended Speaker Layout
4. Connect power to the Soundbar, Subwoofer and Surround Speakers. The Subwoofer and Surround Speakers are automatically connected when the Soundbar is turned on. LINK LED - Blue is On NOTES • Connect the Subwoofer and Surround Speakers power before connecting to the Soundbar. The Subwoofer and Surround Speakers will be automatically connected when turning on the Soundbar. -
Page 16: Manually Connecting The Subwoofer Or Surround Speakers
Manually connecting the Subwoofer or Surround Speakers Before performing the manual connection procedure below: • Check whether the power cables for the Soundbar and subwoofer or Surround Speakers are connected properly. • Make sure that the Soundbar is turned off. 1. -
Page 17: Led Indicator Lights On The Rear Of Subwoofer And Surround Speakers
Soundbar unit is turned off) connected properly. Connect again. See the Connection failed instructions for manual connection on page 16. Red and blue See the contact information for Blinking Malfunction the Samsung Service Centre in this manual. ENG - 17... -
Page 18: In Case The Audio Output Of The Subwoofer And Surround Speaker Is Unstable
NOTES • If the main unit is powered off, the wireless subwoofer will go into stand-by mode and the STANDBY LED on the rear of the sub-woofer will turn red after blinking in blue several times. • If you use a device that uses the same frequency (5.8GHz) as the Soundbar near the Soundbar, interference may cause some sound interruption. - Page 19 2. Press the Up/Down button on the remote controller to change the radio frequency channel, and then press the p button. • The display shows “OK” and then the frequency is set to the changed channel. • You can exit the setting mode by pressing any button other than Up/Down or p. NOTES •...
-
Page 20: Using A Wired Connection To The Tv
05 USING A WIRED CONNECTION TO THE TV Method 1. Connecting with HDMI CAUTION • When both the HDMI cable and optical cable are connected, the HDMI signal is received first. • To connect the HDMI cable between the TV and Soundbar, be sure to connect the terminals marked ARC. -
Page 21: Method 2. Connecting Using An Optical Cable
• To connect with eARC, the eARC function in the TV menu should be set to On. Refer to the TV user manual for details on setting. (e.g. Samsung TV : Home ( ) → Settings ( ) → Sound →... - Page 22 4. The TV sound is output from the Soundbar. Using the Q-Symphony Function For Q-Symphony, the Soundbar syncs with a Samsung TV to output sound through two devices for optimum surround effect. When the Soundbar is connected, the menu, “TV+Soundbar” appears under the Sound Output menu of the TV.
-
Page 23: Using A Wireless Connection To The Tv
• When the Samsung TV is connected, [TV Name] → “BT” appears on the Soundbar’s top display. 4. You can now hear Samsung TV sound from the Soundbar. • After you have connected the Soundbar to your Samsung TV the first time, use the “BT READY” mode to reconnect. - Page 24 (The time required may differ, depending on the Samsung TV model.) What is the difference between BT READY and BT PAIRING? • BT READY : In this mode, you can reconnect any Samsung TV or mobile device that was connected before.
-
Page 25: Method 2. Connecting Via Wi-Fi
2. Change the input source of the TV by using the Audio menu to Soundbar. • Samsung TVs released in 2017 or later Home ( ) Settings ( ) Sound Sound Output [AV] Samsung Soundbar Q950T (Wi-Fi) ENG - 25... -
Page 26: Connecting An External Device
07 CONNECTING AN EXTERNAL DEVICE Method 1. Connecting using an HDMI Cable (Capable of Dolby Atmos decoding and playback) Pre-connection Checklist • Dolby Atmos® and DTS:X are supported in HDMI mode only. • If the Audio Output options include Secondary Audio, make sure Secondary Audio is set to Off. •... -
Page 27: Method 2. Connecting Using An Optical Cable
Open the audio output options on the settings menu of your BD player or other device and make sure that “No Encoding” is selected for Bitstream. For example, on a Samsung BD Player, go to Home Menu → Sound → Digital Output and then select Bitstream (unprocessed). -
Page 28: Connecting A Mobile Device
• After you have connected the Soundbar to your mobile device the first time, use the “BT READY” mode to reconnect. If the device fails to connect • If you have an existing Soundbar (e.g., “[AV] Samsung Soundbar Q950T”) in the list of speakers on the Mobile device, delete it. • Repeat steps 1 and 2. - Page 29 What is the difference between BT READY and BT PAIRING? • BT READY : In this mode, you can reconnect any Samsung TV or mobile device that was connected before. • BT PAIRING : In this mode, you can connect a new device to the Soundbar.
- Page 30 • Note that your Soundbar cannot be paired with other Bluetooth devices while using the Bluetooth option. • This wireless device may cause electrical interference during operation. Disconnecting the Bluetooth device from a Soundbar You can disconnect a Bluetooth device from the Soundbar. For instructions, see the Bluetooth device’s user manual.
-
Page 31: Method 2. Connecting Via Wi-Fi (Wireless Network)
Method 2. Connecting via Wi-Fi (Wireless Network) To connect a Soundbar to a mobile device via a wireless network (Wi-Fi), the SmartThings app is required. The initial connection 1. Install and launch the SmartThings app from your mobile device (smartphone or tablet). 2. -
Page 32: Configuring Amazon Alexa
Configuring Amazon Alexa • Amazon Alexa is a service provided by Amazon. • This service is available only in some languages but not in other countries or regions. Using Alexa, you can play music, listen to news, see weather forecasts, and control home appliances. To use Amazon Alexa, an Amazon account is required to connect the Soundbar over the network. - Page 33 Use voice commands to control the Soundbar Trigger + Command Things to try Example of what to say "Alexa, turn up the volume." Volume control “Alexa, turn down the volume” Listening to streaming content from "Alexa, play some jazz music" Amazon Music "Alexa, play next song." Playback control “Alexa, stop the music.”...
-
Page 34: Using The Tap Sound
Tap the Soundbar with your mobile device to play the sound of content on the mobile device through the Soundbar. • This function may not be supported, depending on the mobile device. • This function is only compatible with Samsung mobile devices with Android 8.1 or later. SmartThings App Top of the Soundbar Mobile device 1. -
Page 35: Installing The Wall Mount
09 INSTALLING THE Wallmount Components WALL MOUNT Installation Precautions Wall Mount Guide • Install on a vertical wall only. • Do not install in a place with high (M4 x L10) temperature or humidity. • Verify whether the wall is strong enough to Holder-Screw Screw support the product’s weight. - Page 36 2. Align the Wall Mount Guide’s Centre Line 5. Push a screw (not supplied) through each with the centre of your TV (if you are Holder-Screw, and then screw each screw mounting the Soundbar below your TV), and firmly into a support screw hole. then fix the Wall Mount Guide to the wall using tape.
-
Page 37: Installing The Surround Speakers On A Wall
(bottom) part of the Bracket-Wall Brackets and the speakers on the wall. Mounts, and then slide the Bracket-Wall • Samsung Electronics is not liable for any Mounts down so that the Bracket-Wall damage to the product due to the product Mounts rest securely on the being installed inappropriately. -
Page 38: Installing The Soundbar Above A Tv Stand
10 INSTALLING THE Place the Soundbar on a TV stand. SOUNDBAR ABOVE A TV STAND Component Rubber-Foot Microphone To install, attach the Rubber-Feet to the bottom As illustrated in the image, align the centre of the of the Soundbar before placing it in position Soundbar with the centre of the TV, carefully above the TV stand. -
Page 39: Software Update
11 SOFTWARE 1. Go to the Samsung Electronics website (www.samsung.com) → search for the model UPDATE name from the customer support menu option. • For more information about update, refer to Upgrade Guide. 2. Download the upgrade file (USB type). -
Page 40: Troubleshooting
In case there is sound jitter, delays, or noise adjust the volume of the external device. from the Subwoofer and Surround Speaker ; For sound output of the TV, select Soundbar. (Samsung TV: Home ( ) → ; If there are any objects between the Settings ( ) →... - Page 41 READY”, press and hold the p button on ; HDMI-CEC may not be activated on the TV. the Soundbar remote control for 5 seconds Turn on the CEC on the TV menu. (Samsung to select ON-TV CONNECT. If you see TV: Home ( ) →...
- Page 42 In case Bluetooth sound breaking occurs In case Alexa does not respond ; Sounds may be breaking due to When the microphone is turned off or its interference by radio frequency or reception is poor electronic devices nearby. Keep such ;...
-
Page 43: Licence
13 LICENCE 14 OPEN SOURCE LICENCE NOTICE To send inquiries and requests for questions regarding open sources, contact Samsung Open Manufactured under license from Dolby Source (http://opensource.samsung.com) Laboratories. Dolby, Dolby Atmos, Dolby Audio, Dolby Digital Plus, Pro Logic, and the double-D 15 IMPORTANT symbol are trademarks of Dolby Laboratories. -
Page 44: Specifications And Guide
Rated Output power 35W x 4 NOTES • Samsung Electronics Co., Ltd reserves the right to change the specifications without notice. • Weight and dimensions are approximate. Precaution : The Soundbar will restart automatically if you turn on/turn off Wi-Fi. - Page 45 RỘNG CỦA GIẮC CẮM VÀO KHE CẮM RỘNG, cho các biểu tượng có thể xuất hiện trên sản CẮM HOÀN TOÀN. phẩm Samsung của bạn. • Dụng cụ này sẽ luôn được kết nối với ổ cắm AC bằng kết nối tiếp đất.
- Page 46 PHÒNG NGỪA 5. Pin được sử dụng cùng với sản phẩm này chứa các chất hoá học có hại cho môi trường. ́ Không vứ t bỏ pin cùng rác sinh hoạt chung. 1. Đảm bảo nguồn cấp điện AC trong nhà bạn Không ném pin vào lửa.
- Page 47 NỘI DUNG Kiểm tra thành phần Tổng quan về sản phẩm Bảng mặt của Soundbar ------------------------- Mặt dưới của Soundbar ------------------------- Sử dụng điều khiển từ xa Soundbar Lắp Pin trước khi dùng Điều khiển từ xa (pin AA X 2) ------------------------- Cách sử...
- Page 48 Kết nối thiết bị bên ngoài Phương pháp 1. Cách kết nối bằng Cáp HDMI (Hỗ trợ giải mã và phát lại Dolby Atmos) ------------------------- Phương pháp 2. Kết nối bằng Cáp quang ------------------------- Kết nối thiết bị di động Phương pháp 1.
-
Page 49: Kiểm Tra Thành Phần
• Để mua thêm thành phần hay cáp tùy chọn, hãy liên hệ với Trung tâm dịch vụ hoặc bộ phận Chăm sóc khách hàng của Samsung. • Để biết thêm thông tin về giá treo tường hoặc chân đế cao su, hãy xem trang 35~38. -
Page 50: Tổng Quan Về Sản Phẩm
02 TỔNG QUAN VỀ SẢN PHẨM Bảng mặt của Soundbar Đặt sản phẩm sao cho logo SAMSUNG nằm ở trên đầu. Nút (Đa chức năng) • Ở chế độ chờ, nhấn nút (Đa chức năng) để bật Soundbar. • Nhấn nút (Đa chức năng) để... -
Page 51: Mặt Dưới Của Soundbar
DIGITAL AUDIO IN (OPTICAL) ID SET SERVICE HDMI IN 1 HDMI 2 POWER ID SET (WOOFER/REAR) DIGITAL AUDIO IN (OPTICAL) ID SET NETWORK DIGITAL AUDIO IN SERVICE HDMI IN 2 (OPTICAL) HDMI 1 POWER ID SET ID SET HDMI IN 1 HDMI 2 (WOOFER/REAR) SERVICE... -
Page 52: Sử Dụng Điều Khiển Từ Xa Soundbar
03 SỬ DỤNG ĐIỀU KHIỂN TỪ XA SOUNDBAR Lắp Pin trước khi dùng Điều khiển từ xa (pin AA X 2) Trượt nắp lưng theo hướng mũi tên cho đến khi tháo nắp ra hoàn toàn. Lắp 2 pin AA (1,5 V) theo đúng hướng đầu cực. - Page 53 PAIR Bạn có thể chọn chế độ âm thanh mong muốn bằng cách chọn STANDARD, SURROUND, SOUND GAME PRO hoặc ADAPTIVE SOUND. MODE • STANDARD SOUND MODE Phát ra âm thanh gốc. • SURROUND Cung cấp trường âm thanh rộng hơn tiêu chuẩn. •...
- Page 54 Khi được nhấn, các mục cài đặt như TREBLE, BASS, SYNC, CENTER LEVEL, SIDE LEVEL, FRONT TOP LEVEL, REAR LEVEL, REAR TOP LEVEL và VIRTUAL ON/OFF sẽ hiển thị theo trình tự. Bạn có thể điều chỉnh mục mong muốn bằng nút Lên/Xuống. –...
-
Page 55: Sử Dụng Các Nút Ẩn (Các Nút Có Nhiều Chức Năng)
Sử dụng các Nút Ẩn (Các nút có nhiều chức năng) Nút Ẩn Trang tham khảo Nút trên Điều khiển Từ xa Chức năng WOOFER (Lên) Bật/Tắt Điều khiển từ xa tivi (Chờ) Trang 13 Lên ID SET Trang 16 EQ 7 Dải Trang 11 (Điều khiển âm thanh) -
Page 56: Điều Chỉnh Âm Lượng Soundbar Bằng Điều Khiển Từ Xa Tv
2. Nhấn và giữ nút WOOFER trong 5 giây. Mỗi khi bạn nhấn và giữ nút WOOFER trong 5 giây, chế độ sẽ thay đổi theo thứ tự sau: “SAMSUNG- TV REMOTE” (Chế độ mặc định), “OFF-TV REMOTE”, “ALL-TV REMOTE”. -
Page 57: Kết Nối Soundbar
04 KẾT NỐI SOUNDBAR Kết nối nguồn và thiết bị Sử dụng Dây nguồn để kết nối Loa siêu trầm, Loa vòm và Soundbar với ổ cắm điện theo tứ tự sau: • Để biết thêm thông tin về nguồn điện cũng như mức tiêu thụ điện năng yêu cầu, hãy tham khảo nhãn đính kèm sản phẩm. -
Page 58: Đề Xuất Bố Trí Loa
4. Kết nối nguồn với Soundbar, Loa siêu trầm và Loa vòm. Loa siêu trầm và Loa vòm được kết nối tự động khi bật Soundbar. Đèn LED LINK - Màu xanh lam là Bật GHI CHÚ • Kết nối nguồn Loa siêu trầm và Loa vòm trước khi kết nối với Soundbar. Loa siêu trầm và... -
Page 59: Kết Nối Thủ Công Loa Siêu Trầm Hoặc Loa Vòm
Kết nối thủ công Loa siêu trầm hoặc Loa vòm Trước khi thực hiện quy trình kết nối thủ công bên dưới: • Kiểm tra xem cáp nguồn cho Soundbar và loa siêu trầm hoặc Loa vòm có được kết nối đúng không. -
Page 60: Đèn Chỉ Báo Led Ở Phía Sau Loa Siêu Trầm Và Loa Vòm
Kết nối lại. Xem hướng dẫn kết nối Không kết nối được thủ công trên trang 16. Màu đỏ và màu lam Xem thông tin liên hệ của Trung Nhấp nháy Lỗi tâm dịch vụ Samsung trong hướng dẫn sử dụng này. VIE - 17... -
Page 61: Trong Trường Hợp Loa Siêu Trầm Và Loa Vòm Phát Âm Thanh Đầu Ra Không Ổn Định
GHI CHÚ • Nếu thiết bị chính bị tắt nguồn, thì loa trầm không dây sẽ chuyển sang chế độ chờ và đèn LED STANDBY ở mặt sau sẽ sáng Đỏ sau khi nhấp nháy màu Xanh lam vài lần. •... - Page 62 2. Nhấn nút Lên/Xuống trên điều khiển từ xa để thay đổi kênh tần số radio rồi nhấn nút p. • Màn hình hiển thị “OK” và sau đó tần số này được đặt thành kênh đã thay đổi. • Bạn có thể thoát chế độ cài đặt này bằng cách nhấn bất kỳ nút nào ngoài Lên/Xuống hoặc p. GHI CHÚ...
-
Page 63: Dùng Kết Nối Có Dây Với Tv
05 DÙNG KẾT NỐI CÓ DÂY VỚI TV Phương pháp 1. Kết nối với HDMI CHÚ Y • Khi kết nối cả cáp HDMI và cáp quang, thiết bị sẽ nhận được tín hiệu HDMI trước. • Để kết nối cáp HDMI giữa TV và Soundbar, hãy nhớ kết nối các thiết bị đầu cuối được đánh dấu ARC. -
Page 64: Phương Pháp 2. Kết Nối Bằng Cáp Quang
• Để kết nối với eARC, cần đặt chức năng eARC ở menu TV là Bật. Tham khảo hướng dẫn sử dụng TV để biết chi tiết về cài đặt. (Ví dụ: TV Samsung: Trang chủ ( ) Cài đặt ( ) ... - Page 65 Sử dụng chức năng Q-Symphony Với Q-Symphony, Soundbar sẽ đồng bộ hóa với Samsung TV để phát âm thanh ra hai thiết bị cho hiệu ứng vòm tối ưu. Khi kết nối Soundbar, menu “TV+Soundbar” sẽ xuất hiện bên dưới menu Đầu ra âm thanh của TV.
-
Page 66: Dùng Kết Nối Không Dây Với Tv
06 DÙNG KẾT NỐI KHÔNG DÂY VỚI TV Phương pháp 1. Kết nối qua Bluetooth Khi TV Samsung kết nối qua Bluetooth, bạn có thể nghe thấy âm thanh nổi mà không cần kết nối cáp rườm rà. • Bạn chỉ kết nối được một TV Samsung mỗi lần. - Page 67 (Thời gian cần thiết để ngắt kết nối có thể khác nhau tùy theo kiểu TV Samsung). Sự khác nhau giữa BT READY và BT PAIRING? • BT READY: Ở chế độ này, bạn có thể kết nối lại bất kỳ TV Samsung hay thiết bị di động nào đã được kết nối trước đó.
-
Page 68: Phương Pháp 2. Kết Nối Qua Wi-Fi
2. Thay đổi nguồn đầu vào của TV bằng cách sử dụng menu Âm thanh đối với Soundbar. • TV Samsung được phát hành năm 2017 hoặc muộn hơn Trang chủ ( ) Cài đặt ( ) Âm thanh Đầu ra âm thanh [AV] Samsung Soundbar Q950T (Wi-Fi) VIE - 25... -
Page 69: Kết Nối Thiết Bị Bên Ngoài
07 KẾT NỐI THIẾT BỊ BÊN NGOÀI Phương pháp 1. Cách kết nối bằng Cáp HDMI (Hỗ trợ giải mã và phát lại Dolby Atmos) Danh sách kiểm tra trước khi kết nối • Dolby Atmos® và DTS:X chỉ được hỗ trợ ở chế độ HDMI. •... -
Page 70: Phương Pháp 2. Kết Nối Bằng Cáp Quang
Mở tùy chọn đầu ra âm thanh trên menu cài đặt của trình phát BD hoặc thiết bị khác và đảm bảo chọn “Không mã hóa” cho Bitstream. Ví dụ: trên Trình phát BD của Samsung, hãy chuyển tới Menu Màn hình chính → Âm thanh → Đầu ra kỹ thuật số rồi chọn Bitstream (Chưa xử lý). -
Page 71: Kết Nối Thiết Bị Di Động
“BT READY” để kết nối lại. Nếu thiết bị không kết nối được • Nếu bạn hiện đã có Soundbar (ví dụ: “[AV] Samsung Soundbar Q950T”) trong danh sách loa trên thiết bị di động, hãy xóa đi. • Lặp lại bước 1 và 2. - Page 72 Sự khác nhau giữa BT READY và BT PAIRING? • BT READY: Ở chế độ này, bạn có thể kết nối lại bất kỳ TV Samsung hay thiết bị di động nào đã được kết nối trước đó. • BT PAIRING: Ở chế độ này, bạn có thể kết nối thiết bị mới với Soundbar.
- Page 73 • Lưu ý rằng Soundbar của bạn không thể ghép đôi với các thiết bị Bluetooth khác trong khi sử dụng tùy chọn Bluetooth. • Thiết bị không dây này có thể gây nhiễu điện trong quá trình hoạt động. Ngắt kết nối giữa thiết bị...
-
Page 74: Phương Pháp 2. Kết Nối Qua Wi-Fi (Mạng Không Dây)
Phương pháp 2. Kết nối qua Wi-Fi (Mạng không dây) Để kết nối Soundbar với thiết bị di động qua mạng không dây (Wi-Fi), bạn cần có ứng dụng SmartThings. Kết nối ban đầu 1. Cài đặt và khởi chạy ứng dụng SmartThings trên thiết bị di động (điện thoại thông minh hoặc máy tính bảng) của bạn. -
Page 75: Định Cấu Hình Amazon Alexa
Định cấu hình Amazon Alexa • Amazon Alexa là dịch vụ do Amazon cung cấp. • Dịch vụ này chỉ được cung cấp ở một số ngôn ngữ, không được cung cấp ở các quốc gia hoặc khu vực khác. Với Alexa, bạn có... - Page 76 Sử dụng lệnh thoại để điều khiển Soundbar Từ kích hoạt + Lệnh Việc cần làm Ví dụ lệnh cần nói “Alexa, tăng âm lượng.” Điều khiển âm lượng “Alexa, giảm âm lượng.” Nghe nội dung phát trực tuyến từ “Alexa, phát nhạc jazz”...
-
Page 77: Sử Dụng Tap Sound
Chạm thiết bị di động vào Soundbar để phát âm thanh của nội dung trên thiết bị di động qua Soundbar. • Chức năng này có thể không được hỗ trợ, tùy thuộc vào thiết bị di động. • Chức năng này chỉ tương thích với các thiết bị di động Samsung chạy hệ điều hành Android 8.1 trở lên. -
Page 78: Lắp Giá Treo Tường
09 LẮP GIÁ TREO Chi tiết treo tường TƯỜNG Những điểm cần cân nhắc khi Thanh dẫn giá treo tường lắp đặt • Chỉ lắp đặt trên tường thẳng đứng. (M4 x L10) • Không lắp đặt ở vị trí có nhiệt độ hoặc độ ẩm cao. - Page 79 2. Căn chỉnh Trục trung tâm của Thanh dẫn giá 5. Đẩy vít (không đi kèm) qua từng Vít đỡ, sau treo tường theo phần chính giữa TV (nếu bạn đó vặn chặt từng vít vào lỗ vít đỡ. lắp Soundbar ở dưới TV), sau đó cố định Thanh dẫn giá...
-
Page 80: Lắp Loa Vòm Trên Tường
Bạn có thể mua giá treo tường riêng để lắp loa đỡ ở trên tường. vòm trên tường. Samsung Electronics không bán giá treo tường. Lưu ý khi lắp Loa vòm trên tường • Giá treo tường Loa vòm phải đỡ được hơn 8,0 kg. -
Page 81: Lắp Soundbar Ở Trên Kệ Tv
10 LẮP SOUNDBAR Đặt Soundbar trên kệ TV. Ở TRÊN KỆ TV Chi tiết Chân đế cao su Để lắp đặt, hãy gắn Chân đế cao su vào mặt đáy của Soundbar trước khi đặt vào vị trí trên kệ TV. Bạn phải gắn Chân đế... -
Page 82: Cập Nhật Phần Mềm
(Âm lượng) trên thân thiết bị trong ít nhất 5 giây. “INIT” sẽ xuất hiện trên màn Samsung có thể cung cấp bản cập nhật cho vi hình, sau đó Soundbar sẽ được khởi tạo. chương trình hệ thống của Soundbar trong tương lai. -
Page 83: Khắc Phục Sự Cố
đề. Hay ; Với đầu ra âm thanh của TV, chọn Soundbar. chuyển vị trí những loa này tới nơi không có (TV Samsung: Trang chủ ( ) → vật như vậy. - Page 84 đúng cách với thiết bị đầu cuối ARC hay ; Kết nối lại thiết bị sau khi xóa danh sách loa không. (Xem trang 20.) Bluetooth trên đó để kết nối. (TV Samsung: ; Kết nối có thể không khả thi do thiết bị bên Trang chủ ( ) →...
- Page 85 Trong trường hợp âm thanh Bluetooth bị ngắt Trong trường hợp Alexa không phản hồi quãng Khi micrô tắt hoặc khả năng thu sóng của ; Âm thanh có thể bị ngắt quãng do nhiễu bởi micrô kém tần số vô tuyến hoặc các thiết bị điện tử ;...
-
Page 86: Giấy Phép
14 THÔNG BÁO GIẤY PHÉP NGUỒN MỞ Để gửi truy vấn và yêu cầu đối với các câu hỏi liên quan đến nguồn mở, hãy liên hệ với Samsung Manufactured under license from Dolby Open Source (http://opensource.samsung.com) Laboratories. Dolby, Dolby Atmos, Dolby Audio, Dolby Digital Plus, Pro Logic, and the double-D 15 LƯU Ý... -
Page 87: Thông Số Kỹ Thuật Và Hướng Dẫn
Công suất đâ ̀u ra danh đị n h GHI CHÚ • Samsung Electronics Co., Ltd bảo lưu quyền thay đổi thông số kỹ thuật mà không thông báo. • Trọng lượng và kích thước chỉ mang tí n h gần đúng. - Page 88 ** Sản phẩm được bảo hành trong các trường hợp sau: 5. Các sản phẩm do SAMSUNG sản xuất và phân phối chính 1. Sản phẩm còn trong thời hạn Bảo hành dựa vào tin nhắn thức tại thị trường Việt Nam sẽ được bảo hành tại các từ...
- Page 89 © 2020 Samsung Electronics Co., Ltd. All rights reserved. Contact SAMSUNG WORLD WIDE If you have any questions or comments relating to Samsung products, please contact the SAMSUNG customer care Centre. Country /Area Contact Centre Web Site ` Asia Pacifi c...
Need help?
Do you have a question about the HW-Q950T and is the answer not in the manual?
Questions and answers