Table of Contents
Advertisement
Available languages
Available languages
Quick Links
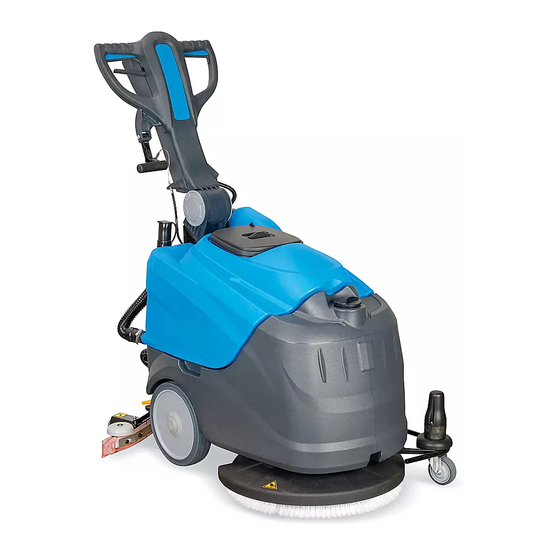
H-9424
20" AUTO FLOOR SCRUBBER
NOTE: This guide is intended for quick reference
only and does not replace the instruction manual.
Before using this machine, read full instruction
manual included with machine packaging.
NOTE: Battery must be fully charged before first
use.
(See Instructions)
FILL TANK
1. Add water and/or detergent into the tank.
(See Figure 1)
Figure 1
NOTE: Use a non-foaming detergent with a pH
range between 7 and 11 (Uline model #S-18933).
Be sure to follow the detergent instructions for
proper dilution.
2. Open flow from detergent tank by pushing lever up
to horizontal position. Leave open. (See Figure 2)
Figure 2
BEGIN WORK
1.
Lower squeegee by pushing handle down.
(See Figure 3)
Figure 3
PAGE 1 OF 9
1-800-295-5510
uline.com
OPERATION
2. Turn on unit and press brush button. All lights will light
up and unit is fully functional. (See Figures 4 and 5)
Figure 4
3. Pull drive levers to begin work.
4. After use, empty the recovery tank by using the
attached drain hose. (See Figure 6)
Figure 6
5. Once finished, charge the battery.
NOTE: The battery should be charged after
every use. For optimal battery life, leave
plugged in when not in use.
WHEN FINISHED CLEANING
1. Turn machine off by pressing the On/Off button for at
least four seconds.
2. Empty the recovery tank (see Maintenance).
3. Raise squeegee and wipe down blade with a soft
cloth.
4. Close the detergent tap.
5. Spin off brush (see Maintenance). Rinse.
6. Charge the battery (see Maintenance).
Para Español, vea páginas 4-6.
Pour le français, consulter les pages 7-9.
Figure 5
0521 RH-9424
Advertisement
Table of Contents

Related Manuals for U-Line H-9424


Summary of Contents for U-Line H-9424
- Page 1 Para Español, vea páginas 4-6. Pour le français, consulter les pages 7-9. H-9424 1-800-295-5510 20" AUTO FLOOR SCRUBBER uline.com OPERATION NOTE: This guide is intended for quick reference 2. Turn on unit and press brush button. All lights will light only and does not replace the instruction manual.
-
Page 2: Daily Maintenance
MAINTENANCE DAILY MAINTENANCE 5. Tilt the scrubber back. It may still rest on the support caster but be slightly lifted. Activate the scrubber by Use the attached drain hose to empty the dirty pulling the drive levers to spin off the brush. Rinse the water from the recovery tank. -
Page 3: Brush Replacement
MAINTENANCE CONTINUED REPLACING THE SQUEEGEE BLADE 3. Reuse the same blade by reversing the edge in contact with the floor. The blades should be reused Remove the squeegee blade by releasing the until all four edges are worn out and can be middle clip. - Page 4 π H-9424 800-295-5510 uline.mx FREGADORA DE PISOS AUTOMÁTICA DE 20" FUNCIONAMIENTO NOTA: Esta guía solo sirve como referencia 2. Encienda la unidad y presione el botón del cepillo. rápida y no sustituye al manual de instrucciones. Todas las luces encenderán y la unidad estará...
-
Page 5: Mantenimiento Diario
MANTENIMIENTO MANTENIMIENTO DIARIO 5. Incline la fregadora hacia atrás. Puede que aún descanse sobre la rueda de soporte, pero que esté Utilice la manguera de desagüe anexa para vaciar ligeramente levantada. Active la fregadora tirando el agua sucia del tanque de recuperación. de las palancas de manejo para hacer girar el (Vea Diagrama 7) cepillo. - Page 6 CONTINUACIÓN DE MANTENIMIENTO REEMPLAZAR LA HOJA DEL JALADOR 3. Utilice la misma hoja de nuevo invirtiendo el borde de contacto con el piso. Las hojas se deben utilizar Retire la hoja del jalador soltando el clip de en hasta que los cuatro bordes estén desgastados y medio.
-
Page 7: Remplissage Du Réservoir
π H-9424 1-800-295-5510 uline.ca AUTOLAVEUSE À PLANCHER – 20 PO FONCTIONNEMENT REMARQUE : Ce guide est uniquement pour une 2. Allumez l'appareil et appuyez sur le bouton de la référence rapide et ne peut remplacer le manuel brosse. Tous les voyants s'allument et l'appareil est d'instructions. -
Page 8: Entretien Quotidien
ENTRETIEN ENTRETIEN QUOTIDIEN 5. Inclinez l'autolaveuse vers l'arrière. Elle peut être légèrement soulevée tout en reposant sur la roulette Utilisez le tuyau de vidange attaché pour vider l'eau de support. Activez l'autolaveuse en tirant sur les sale du réservoir de récupération. (Voir Figure 7) leviers de conduite pour faire tourner la brosse et l'enlever. -
Page 9: Dépannage
ENTRETIEN (SUITE) REMPLACEMENT DE LA LAMELLE SUR LA RACLETTE 3. Réutilisez la même lamelle en inversant le bord en contact avec le plancher. Les lamelles doivent être Retirez la lamelle de la raclette en relâchant réutilisées jusqu'à ce que les quatre bords soient l'attache du milieu.
Need help?
Do you have a question about the H-9424 and is the answer not in the manual?
Questions and answers