Table of Contents
Advertisement
Quick Links
Bedienungsanleitung / Operating Instructions / Mode d'emploi
Gebruiksaanwijzing / Istruzioni per l'uso / Manual de instrucciones
Betjeningsvejledning / Bruksanvisning / Bruksanvisning / Käyttöohje
Руководство по эксплуатации / Instrukcja obsługi / Kullanma kılavuzu
Naudojimo instrukcija / Kasutusjuhend / Lietošanas instrukcija
Návod k obsluze / 操作手册 / 사용 설명서
Advertisement
Table of Contents

Related Manuals for Melitta PASSIONE


Summary of Contents for Melitta PASSIONE
- Page 1 Bedienungsanleitung / Operating Instructions / Mode d'emploi Gebruiksaanwijzing / Istruzioni per l’uso / Manual de instrucciones Betjeningsvejledning / Bruksanvisning / Bruksanvisning / Käyttöohje Руководство по эксплуатации / Instrukcja obsługi / Kullanma kılavuzu Naudojimo instrukcija / Kasutusjuhend / Lietošanas instrukcija Návod k obsluze / 操作手册 / 사용 설명서...
-
Page 3: Table Of Contents
Table of contents Table of contents For your safety ........................53 Proper use .........................53 Danger from electric current ................54 Risk of burns and scalds..................54 General safety......................55 Overview of the appliance ....................56 Appliance at a glance ...................56 Overview of the control panel ................58 The Cappuccinatore at a glance ...............60 First steps ..........................61 Unpacking the appliance ..................61... - Page 4 Table of contents Care and maintenance ....................82 General cleaning ....................82 Cleaning the brewing unit ..................82 Cleaning the Cappuccinatore ................84 Running the cleaning programme ..............85 Running the descaling programme ..............88 Using a water lter ....................91 Troubleshooting ........................94 Transport, storage and disposal .................95 Venting the appliance ..................95 Transporting the appliance ................96 Disposing of the appliance .................97...
-
Page 5: For Your Safety
For your safety Dear Customer, Thank you for purchasing the Melitta® Passione® fully automatic co ee maker. The operating instructions will help you discover the diverse options o ered by the appliance and enjoy your co ee to the full. -
Page 6: Danger From Electric Current
For your safety Danger from electric current If the appliance or the power cable is damaged, there is a risk of fatal electric shock. Observe the following safety instructions to avoid dan- ger from electric current: Do not use a damaged power cable. A damaged power cable may only be replaced by the manufacturer or its customer service or service part- ner. -
Page 7: General Safety
For your safety General safety Observe the following safety instructions to avoid per- sonal injury and material damage: Do not operate the appliance in a cabinet or similar. Do not reach into the interior of the appliance during operation. Keep the appliance and its power cable out of the reach of children under 8 years of age. -
Page 8: Overview Of The Appliance
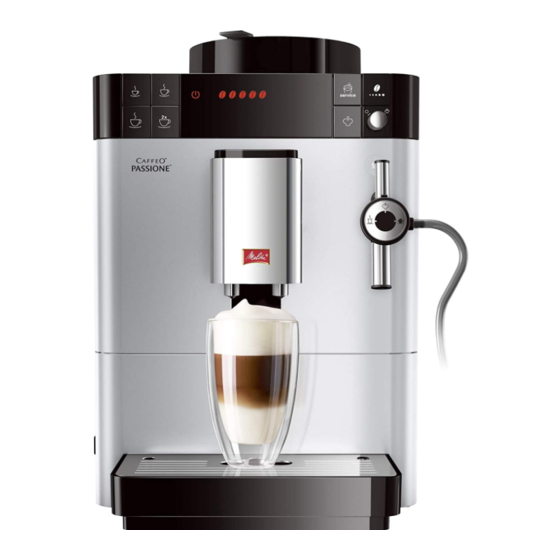
Overview of the appliance Overview of the appliance Appliance at a glance Fig. 1: Front left of the appliance 1 Water tank with lid 6 Drip tray 2 Bean container with lid 7 ON/OFF button 3 Cup rest 8 Height-adjustable outlet for co ee beverages with 2 co ee nozzles 4 Control panel... - Page 9 Overview of the appliance Fig. 2: Front right of the appliance 10 Cover 13 Cappuccinatore 11 Brewing unit (inner) 14 Cup plate 12 Steam pipe 15 Float...
-
Page 10: Overview Of The Control Panel
Overview of the appliance Overview of the control panel Fig. 3: Control panel 16 Direct keys 17 Displays 18 Control buttons and rotary regulator Button/ Designation Function Regulator Small cup Prepare small portion of co ee Medium cup Prepare medium portion of co ee Large cup Prepare large portion of co ee Two cups... - Page 11 Overview of the appliance Display Meaning Lights up Appliance is ready for operation Flashing Appliance heating up or preparing a co ee bev- erage Flashing Programme for setting co ee amount running quickly Lights up Number of co ee beans: Currently set co ee strength Flashing Fill bean container or...
-
Page 12: The Cappuccinatore At A Glance
Overview of the appliance The Cappuccinatore at a glance Fig. 4: Cappuccinatore 19 Air suction pipe 20 Holder for the milk hose 21 Connection of the milk hose 22 Milk hose 23 Outlet for hot water, milk or milk foam 24 Selector switch Symbol on Function... -
Page 13: First Steps
First steps First steps This chapter describes how to prepare your appliance for use. Unpacking the appliance In addition to the appliance, there are further accessories in the packaging such as cleaning aids and agents. CAUTION Contact with cleaning agents can lead to eye and skin irritation. Keep the supplied cleaning agents out of the reach of children. -
Page 14: Installing The Appliance
First steps Installing the appliance Observe the following instructions: Do not install the appliance in damp rooms. Install the appliance on a stable, at and dry surface. Do not install the appliance in the vicinity of sinks or the like. Do not install the appliance on hot surfaces. - Page 15 First steps Fig. 5: ON/OFF button Requirement: The appliance has been installed and connected. 1. Place a vessel beneath the Cappuccinatore. 2. Press the ON/OFF button (7). » The appliance indicates that the water tank needs to be lled. 3. Remove the water tank. Rinse out the water tank with clean water. Fill the water tank with fresh water and insert it.
-
Page 16: Basic Operation
Basic operation Basic operation This chapter describes basic operating steps for using the appliance on a daily basis. Switching the appliance on and o Before switching on after starting up the appliance for the rst time, read section 3.5 Switching on and venting the appliance for the rst time on page 62. -
Page 17: Using The Control Panel
Basic operation Using the control panel The essential programmes can be accessed using the control panel. Press the required button. Use the following actions to operate the buttons: Brief press Brie y press a button to select a programme. Long press Press a button for longer than 2 seconds to select a second programme that may be available. - Page 18 Basic operation Fig. 6: Opening the lid of the bean container. 1. Open the lid (25) of the bean container (2). 2. Fill co ee beans into the bean container. 3. Close the lid of the bean container. Information The ashing display requests you to re ll co ee beans. The next time a co ee is dispensed, the display no longer ashes.
-
Page 19: Filling With Water
Basic operation Filling with water Only use fresh, cold water without carbon dioxide for optimum co ee enjoyment. Change the water daily. Information The quality of the water largely determines the avour of the co ee. Therefore, use a water lter (see section 6.4 Setting the water hardness on page 78 and section 7.6 Using a water lter on page 91). -
Page 20: Adjusting The Outlet For Co Ee Beverages
Basic operation Adjusting the outlet for co ee beverages The outlet for co ee beverages (8) is height-adjustable. Set the greatest possible distance between the outlet and the vessel. Depending on the vessel, push the outlet up or down. Fig. 8: Adjusting the outlet for co ee beverages Connecting the Cappuccinatore You can prepare hot water, warm milk or milk foam with the Cappucci-... -
Page 21: Using Milk
Basic operation 1. Connect the Cappuccinatore to the steam pipe (12). Slide the connec- tion of the Cappuccinatore to the stop (27) of the steam pipe. 2. Connect the milk hose (22) to the Cappuccinatore. 3. If you do not want to use milk, clamp the milk hose in the holder (20). Using milk Use cooled milk for optimum co ee enjoyment. -
Page 22: Preparing Beverages
Preparing beverages Fig. 11: Emptying the drip tray and co ee grounds container 1. Pull the drip tray (6) forwards out of the appliance. 2. Remove the co ee grounds container (5) and empty it. 3. Empty the drip tray. 4. -
Page 23: Setting The Co Ee Strength
Preparing beverages The appliance does not indicate a lack of milk. The vessels for the beverages should be su ciently large (see table Factory settings on page 98). Setting the co ee strength As soon as the appliance is ready for operation, it displays the current setting of the co ee strength. -
Page 24: Setting The Co Ee Quantity
Preparing beverages Setting the co ee quantity The co ee quantity can be speci ed by selecting a direct key. Direct key Co ee quantity (factory setting) 40 ml 120 ml 200 ml The preset co ee quantity can be changed from 25 ml to 220 ml: Requirement: The appliance is ready for operation. -
Page 25: Preparing Two Co Ee Beverages Simultaneously
Preparing beverages Preparing two co ee beverages simultaneously The "Two cups" button is used to prepare two co ee beverages simulta- neously. For two-cup dispensing, the appliance carries out two grinding processes. Fig. 12: Two-cup dispensing 1. Place two vessels beneath the outlet (8). 2. -
Page 26: Preparing Milk Froth Or Warm Milk
Preparing beverages Preparing milk froth or warm milk Prepare milk foam and warm milk on the Cappuccinatore. The preparation of milk froth and warm milk is similar. Steam is required for the preparation. CAUTION Hot water and hot steam owing out of the pipe Do not reach into the steam that is owing out. -
Page 27: Preparing Hot Water
(see section 7.3 Cleaning the Cappuccinatore on page 84). Rinsing the Cappuccinatore each week with the Melitta® PERFECT CLEAN milk system cleaning agent for fully automatic co ee makers. Use the milk system cleaning solution instead of fresh water. -
Page 28: Changing Basic Settings
Changing basic settings 4. Turn the rotary regulator anti-clockwise up to the stop. » Beverage dispensing stops. 5. Remove the vessel. Changing basic settings The following chapter describes how to change the appliance's basic settings. Calling up service mode Some of the basic settings can only be changed in the service mode of the appliance. -
Page 29: Setting Auto Off
Changing basic settings The following times can be set: Display Time 3 min 30 min 60 min 120 min 240 min Information Finish the energy save programme by pressing any button. Requirement: The service mode is called up. 1. Press the "Service" button repeatedly until the display for the energy save programme appears. -
Page 30: Setting The Water Hardness
Changing basic settings Requirement: The service mode is called up. 1. Press the "Service" button repeatedly until the display for the Auto OFF service mode appears. 2. Press the "Co ee strength" button repeatedly until the desired time is set. 3. -
Page 31: Setting The Brewing Temperature
Changing basic settings Requirement: The service mode is called up. 1. Press the "Service" button repeatedly until the display for the water hardness service mode appears. 2. Press the "Co ee strength" button repeatedly until the desired water hardness is set . 3. -
Page 32: Resetting The Appliance To The Factory Settings
Changing basic settings Resetting the appliance to the factory settings The appliance can be reset to the factory settings. Information If the appliance is reset to the factory settings, all personal basic settings in service mode are lost (see section 6.1 Calling up service mode on page 76). Requirement: The appliance is ready for operation. - Page 33 Changing basic settings Fig. 13: Lever for setting the grinding neness 1. Remove the water tank. » The "Grinding neness adjustment" lever (9) is visible on the hous- ing. 2. Move the lever to the left or right, as shown on Fig. 13. To the left = grinding neness ner To the right = grinding neness coarser 3.
-
Page 34: Care And Maintenance
Care and maintenance Care and maintenance Regular care and maintenance of the appliance ensure the consistent high quality of your beverages. General cleaning Clean the appliance regularly. Immediately remove external soiling caused by milk and co ee. ATTENTION The use of unsuitable cleaning agents may lead to scratched surfaces. Do not use any abrasive cloths, sponges or cleaning agents. - Page 35 Care and maintenance Fig. 14: Removing the brewing unit 1. Open the cover (10). To do this, reach into the recess on the right of the appliance and push the cover o backwards. Take o the cover. 2. Press and hold the red lever (30) on the handle of the brewing unit (11) and turn the handle clockwise until it engages at the stop.
-
Page 36: Cleaning The Cappuccinatore
Care and maintenance Cleaning the Cappuccinatore In addition, we recommend cleaning the Cappuccinatore and the milk hose regularly. Fig. 16: Dismantling the Cappuccinatore Proceed as follows to dismantle the Cappuccinatore: 1. Detach the Cappuccinatore from the steam pipe (12). 2. Detach the following individual parts from the Cappuccinatore: Milk hose (22) Air suction pipe (19) Outlet (23) -
Page 37: Running The Cleaning Programme
ATTENTION The use of unsuitable fully automatic co ee maker cleaning agent can damage the appliance. Only use Melitta® PERFECT CLEAN cleaning tabs for fully automatic ƒ co ee makers. Requirements: The appliance is switched o . - Page 38 Care and maintenance the drip tray and the co ee grounds container must be emptied. 5. Empty the drip tray and the co ee grounds container (see section 4.8 on page 69). 6. Insert the drip tray without the co ee grounds container.
- Page 39 Care and maintenance Buttons Displays Steps » After several minutes, the appli- ance indicates that: the fourth programme stage is reached the drip tray and the co ee grounds container must be emptied. 10. Empty the drip tray and the co ee grounds container.
-
Page 40: Running The Descaling Programme
ATTENTION Use of unsuitable descaling agents and failure to observe the processing instructions may damage the appliance. Only use Melitta® ANTI CALC liquid descaling agent for fully automatic ƒ co ee makers. Observe the processing instructions on the packaging of the descaling ƒ... - Page 41 Care and maintenance Symbol on the Displays Steps selector switch or buttons 1. Press the "Service" button and also the "Steam dispensing" button for longer than 2 seconds. » The appliance indicates that: the descaling program is run- ning the rst programme stage is reached the drip tray and the co ee grounds container must be...
- Page 42 Care and maintenance Symbol on the Displays Steps selector switch or buttons 8. Insert the water tank again. » The descaling process starts. » After several minutes, the appli- ance indicates that: the third programme stage is reached the rotary regulator must be actuated.
-
Page 43: Using A Water Lter
Care and maintenance Symbol on the Displays Steps selector switch or buttons 15. Fill the water tank with fresh water and re-insert it. » Hot water ows into the co ee grounds container. 16. As soon as hot water no longer ows, turn the rotary regulator anti-clock- wise until it stops. - Page 44 Care and maintenance Fig. 18: Screwing/Unscrewing the water lter The water lter (33) is screwed in and unscrewed from the thread (34) on the base of the water tank (1) using the screwing aid (32). Information The water lter should not be left standing dry for a long period of time. When it is not used for a long time, we recommend storing the water lter in a vessel lled with tap water in the refrigerator.
- Page 45 Care and maintenance Requirement: The appliance is ready for operation. The new water lter is at hand. 1. Press the "Service" button and also the "Two cups" button for longer than 2 seconds. » The appliance indicates that: the lter programme is running the drip tray and the co ee grounds container must be emptied.
-
Page 46: Troubleshooting
Troubleshooting Permanently de-registering the water lter If you have removed an inserted water lter and want to continue operating the appliance without a water lter, de-register the water lter from the appliance: 1. Remove the water tank. 2. Remove the water lter (see Fig. 18). 3. -
Page 47: Transport, Storage And Disposal
Transport, storage and disposal Problem Cause Action Although the bean Co ee beans do not Press a direct key. ƒ container is full, the drop into the grinder. Tap lightly on the bean con- ƒ appliance indicates tainer. that co ee beans must Clean the bean container. -
Page 48: Transporting The Appliance
Transport, storage and disposal CAUTION Hot water and hot steam owing out of the pipe Do not reach into the steam that is owing out. ƒ Do not touch the steam pipe during and immediately after use. Wait ƒ until the steam pipe has cooled down. Requirement: The appliance is ready for operation. -
Page 49: Disposing Of The Appliance
Technical data Before transporting the appliance, carry out the following activities: 1. Vent the appliance (see section 9.1 Venting the appliance on page 95). 2. Empty the drip tray and the co ee grounds container. 3. Empty the water tank. 4. - Page 50 Technical data Factory settings Small cup Beverage amount 40 ml Co ee strength Normal Brewing temperature Normal Medium cup Beverage amount 120 ml Co ee strength Normal Brewing temperature Normal Large cup Beverage amount 200 ml Co ee strength Normal Brewing temperature Normal...
- Page 52 Melitta Europa GmbH & Co. KG Division Household Products Ringstr. 99 D-32427 Minden Germany www.melitta.de Editorial department: ZINDEL AG www.zindel.de 1831-0618...
Need help?
Do you have a question about the PASSIONE and is the answer not in the manual?
Questions and answers