Advertisement
Quick Links
Keypad Buttons Installation Guide
Supported lighting models
• C4-KD120 (-C)
Keypad Dimmer, 120V
• C4-KD240 (-C)
Keypad Dimmer, 240V
• C4-KD277 (-C)
Keypad Dimmer, 277V
• C4-KC120277 (-C) Configurable Keypad, 120V/277V
• C4-KC240 (-C)
Configurable Keypad, 240V
• C4-KCB (-C)
Configurable Wired Keypad
• C4-SKCB (-C)
Square Wired Keypad
Introduction
The Control4® Keypad Buttons let you and your customer decide
how to lay out the buttons on Keypad Dimmers, Configurable
Keypads, or Configurable Decora or Square Wired Keypads by
providing multiple ways to attach the keycaps to the devices.
These buttons come in Contemporary flat or rounded design, and
single, double, or triple heights, as well as a split up/down button.
Use any combination to snap the buttons into place easily.
Important! The button configuration defined for the
Keypad or Keypad Dimmer in Control4 Composer Pro
must match the physical button configuration for proper
operation.
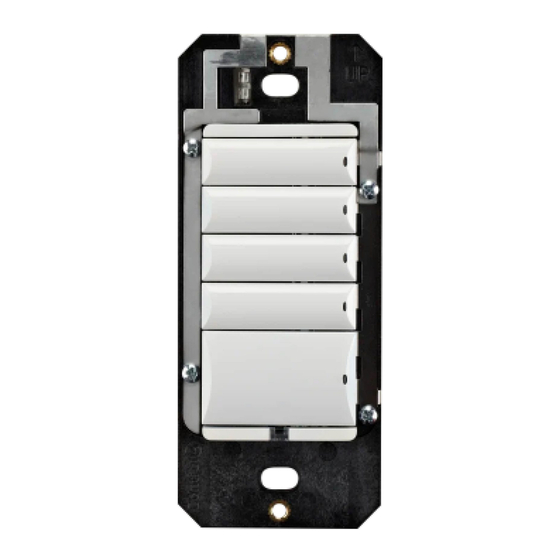
Keypad button installation
To attach the buttons onto a keypad:
1
Remove the keypad button tray and the keypad buttons
from the packaging.
2 Identify all of the pieces in the keypad tray.
Figure 1: Keypad Button Kit
Sensor bar
Actuator
bar
Split
up/down
buttons
Triple-height
buttons
3 Determine the desired button layout. Buttons can be mixed
and matched as desired, using the split up/down, single-,
double-, or triple-height buttons in the kit.
4 If you are using the split up/down
button assembly, attach the assembly
(Figure 2), and then attach the sensor
bar (Figure 3). These must be placed
first in the bottom position (Figure 4).
Orient the button assembly so that
the up button is on the right, and then
slide the mounting holes at the bottom
of the button assembly over the small
black prongs that protrude from the
bottom of the keypad button area.
Figure 2: Split up/down buttons
Split up/down
1
1
Single-
height
buttons
Double-height
buttons
buttons
Supported keypad button models
Traditional rounded keypad buttons and Contemporary flat
keypad buttons (with a -C suffix in the part number) are
supported by this guide.
• C4-CKSK (-C) Color Kit Square Keypad Buttons
• C4-CKKD (-C) Color Kit Keypad Dimmer Buttons
• C4-CKKC (-C) Color Kit Configurable Keypad Buttons
5 Snap the sensor bar onto the bottom of the button
area of the keypad where the small black prongs
protrude (Figure 3). The sensor bar is the small clear bar
(Contemporary) or the small bar with a clear window.
Note: Orient the sensor bar so that the curved edge
faces toward the bottom of the keypad and protruding
sensor edge faces toward the top of the keypad.
Figure 3: Attach sensor bar (shown without split up/down buttons)
Protruding tab faces
top of keypad
Curved edge faces
bottom of keypad
Figure 4: Sensor bar with split up/down buttons
1. Install split up/down buttons 2. Install sensor bar
Advertisement

Related Manuals for Control 4 C4-KD120


Summary of Contents for Control 4 C4-KD120
- Page 1 Keypad Buttons Installation Guide Supported lighting models Supported keypad button models • C4-KD120 (-C) Keypad Dimmer, 120V Traditional rounded keypad buttons and Contemporary flat keypad buttons (with a -C suffix in the part number) are • C4-KD240 (-C) Keypad Dimmer, 240V supported by this guide.
- Page 2 6 Starting at the bottom, snap the buttons onto the keypad To remove the keypad buttons: in the desired button layout (Figure 5). Buttons should be If the faceplate is already installed, remove the faceplate and oriented so that the status LED light pipe is on the right side subplate.