
Related Manuals for Data I/O PSV7000


Summary of Contents for Data I/O PSV7000
- Page 1 PSV7000 Ionizer Kit Data I/O © 2018 | Data I/O Corporation Part Number: 123-4567-001A...
-
Page 2: Table Of Contents
PSV7000 Ionizer Kit Contents Chapter 1: Introduction ........................1 Safety Warnings ............................2 Package Contents ............................3 Specifications ............................3 Requirements ............................4 Chapter 2: Mounting the Hardware ..................... 5 Mount the Ionizer ............................. 5 Connect the Air Tubing ..........................6 Mount the Air Pressure Regulator ...................... -
Page 3: Chapter 1: Introduction
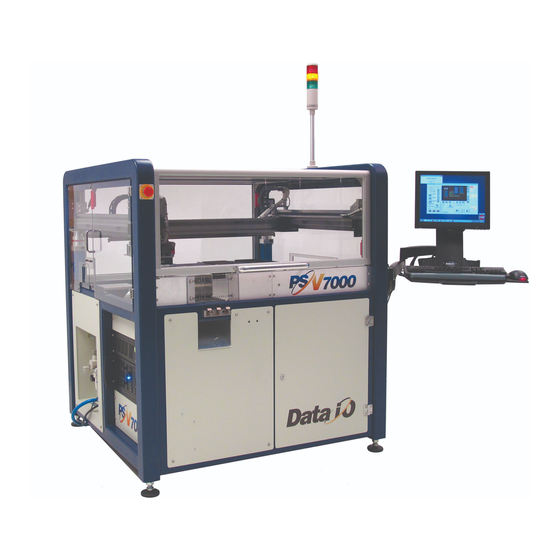
PSV7000 Ionizer Kit Chapter 1: Introduction The PSV7000 Ionizer Kit from Data I/O is a hardware ionizer designed to neutralize static electricity within the system. The ionizer is implemented in compliance with the requirements of International Standards IEC 61340-5-1 and IEC 61340-4-7. This kit includes all mounting hardware, system ionizer(s), air pressure regulator, and Power and Air cables. -
Page 4: Safety Warnings
For information about ozone condensation, refer to the documentation from the ionizer manufacturer: http://content2.smcetech.com/pdf/IZN10.pdf. Data I/O is not responsible for any defects or failures in the equipment caused by user negligence, including but not limited to abuse, accident, improper maintenance, inattention, or unauthorized repair, alteration, or installation. -
Page 5: Package Contents
PSV7000 Ionizer Kit Package Contents A. Ionizer (with mounting brackets) B. Air hose/tubing (3 meters) C. Air pressure regulator D. Electrical wiring Specifications Length: ………………..25.329 cm / 9.972 in. Width: …………………... 5.890 cm / 2.319 in. Height 11.227 cm / 4.420 in. -
Page 6: Requirements
Adapter boards and sockets Air tubing/hoses/lines • • PnP probe vacuum chamber The PSV7000 Ionizer Kit helps to address potential ESD within the interior workspace of the PSV7000, including but not limited to the insulated materials above. P a g e... -
Page 7: Chapter 2: Mounting The Hardware
(air/electricity). Mount the Ionizer 1. Position the ionizer above the left-side gantry (when facing the front of PSV7000), then use a 3 mm hex key to secure it to the chassis with 2 screws (M8x1.25x20mm)—one at each end of ionizer. -
Page 8: Connect The Air Tubing
PSV7000 Ionizer Kit Connect the Air Tubing 1. Stick 4 adhesive cable tie mounts vertically to the upper beam of the system chassis. Stick cable tie mounts to upper beam. 2. Cut the included air tubing into 3 pieces: 240 cm, 30 cm, and 30 cm. - Page 9 PSV7000 Ionizer Kit 5. Connect the 2 loose ends of the air tubing (one from each end/side of the ionizer) with a Y-fitting. Connect air tubing with Y-fitting/adapter. 6. Now take the remaining 240-cm length of air tubing and insert one end into the Y-fitting. (the other...
- Page 10 PSV7000 Ionizer Kit 7. Connect the Power adapter to the back of the ionizer. Plug-in the Power adapter. 8. Route the Power and Air cables along the top of the blue chassis and towards the rear of the system, and then secure using 4 zip ties (looped through each adhesive cable mount from Step 1).
- Page 11 9. From the top rear corner, now route the cables down and through the opening in the chassis. Route cables down through chassis opening/access cut-out. 10. From the rear of the PSV7000, access the bottom corner/opening of the blue chassis to pull the cables through (from top to bottom).
- Page 12 PSV7000 Ionizer Kit 11. Route the electrical cable(s) along the bottom towards ePlate #2 as depicted below. Route cables toward ePlate #2. 12. Connect the electrical wiring as follows: BROWN wire to +24 VDC BLUE wire to -24 VDC GREEN wire to GND Ionizer connections to ePlate #2.
-
Page 13: Mount The Air Pressure Regulator
PSV7000 Ionizer Kit Mount the Air Pressure Regulator The air pressure regulator mounts with 2 screws to the PSV7000 Utility Panel. 1. On the outside of the utility panel, prepare the area for drilling. Note: Many systems have these two holes pre-drilled. - Page 14 Two holes drilled in Utility Panel. 4. On the inside of the PSV7000, use 2 screws (PN: 220-0025-001) and 2 lock nuts (PN: 210-0039-001) to mount the regulator (the 2 holes in the regulator bracket align with the 2 holes drilled).
- Page 15 PSV7000 Ionizer Kit 5. To connect air to the newly installed air pressure regulator, first disconnect the incoming air hose from the distributor block, and re-route it to the air pressure regulator as depicted below. 1: Disconnect 2: Re-Route/Connect Disconnect incoming air from distributor and re-route to air pressure regulator.
- Page 16 PSV7000 Ionizer Kit 6. Add/cut approximately 15 cm of air tubing to connect the air regulator to the distributor block. Connect air tubing from distributor block to air pressure regulator. 7. Connect the air tubing from the ionizer to the remaining valve on the air pressure regulator.
-
Page 17: Chapter 3: Testing The Ionizer
PSV7000 Ionizer Kit Chapter 3: Testing the Ionizer With the ionizer installed and ready to go, now Power-Up the system and verify functionality. Verify Air and Power 1. With the air supply ON, ensure the air pressure regulator shows a reading between the green markers of 0.10 and 0.14 MPa (15 - 20 PSI). -
Page 18: Verify Esd Elimination
Each nozzle blows air (polarized ions). Verify ESD Elimination 5. Use an ESD field meter to measure the amount of ESD voltage present in the PSV7000 workspace without (and with) the ionizer running. ESD readings with ionizer running should be near zero. -
Page 19: Chapter 4: Optimizing And Maintenance
PSV7000 Ionizer Kit Chapter 4: Optimizing and Maintenance On the ionizer itself, you can directly adjust the following: Direction in which the emitter nozzles blow (loosen screws on ionizer hinge mount, rotate the • ionizer nozzle bar to desired angle/direction, then re-tighten screws) Power and force in which the ions blow (adjust pressure on air regulator to desired level/MPa) •... -
Page 20: Maintenance Schedule
On a monthly basis, check the electrode needle to ensure there is no corrosion or condensation (the • needle should be clean and clear of contaminants). Obtain Parts and Supplies To order consumable ionizer parts from Data I/O, please refer to the following part numbers. Part Name Description Data I/O...
Need help?
Do you have a question about the PSV7000 and is the answer not in the manual?
Questions and answers