Table of Contents
Advertisement
Advertisement
Table of Contents

Subscribe to Our Youtube Channel
Related Manuals for WOPET F07


Summary of Contents for WOPET F07
- Page 1 INSTRUCTIONS WOpet Patrol WiFi Feeder...
-
Page 2: Table Of Contents
【CONTENTS】 Product Specification ..…………………………………………………1 Hardware installation and introduction ..………………………………2 Software Installation ..…………………………………………………5 ……………………5 Add pet feeder via normal mode (EZ mode) ..……………………………………10 Add pet feeder via AP mode .……………………………13 Add pet feeder via Auto Scan mode Feeding ......…………………………………………………15 ..…………………………………………………15 Manual feeding ..…………………………………………………16 Scheduled feedin ..…………………………………………………18... -
Page 3: Product Specification
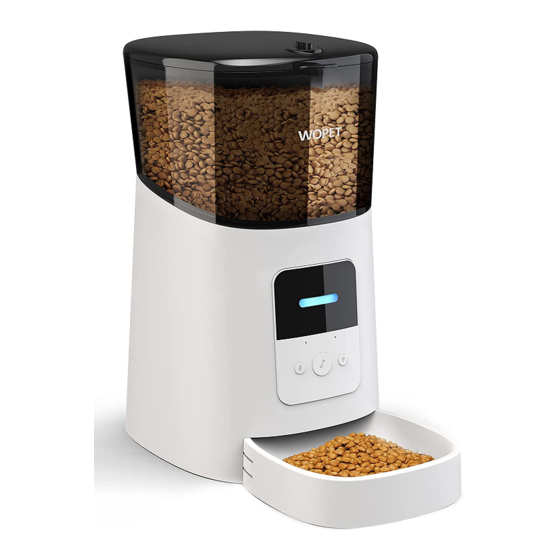
Product Specification Product Name: WOPET Smart Pet Feeder Capacity: 6L Model: F07 Food size: Between 5-15mm Auto feeder meals: 15 meals Material: ABS Color: White Feeding type: Manual & Automatic Wi-Fi: IEEE 2.4GHz Food type: Dry food only Voice message limit: 10s Power: DC 5V1 .OA... -
Page 4: Hardware Installation And Introduction
Hardware installation and introduction Open the battery compartment at the bottom of the feeder, insert the Micro USB power cord into the connector and extend it out along the designed wire guide. Plug in the feeder and turn on the power switch. Power switch... - Page 5 Note: You can also use 3 D cell batteries, which enables the feeder to work automatically according to your scheduled feeding plan even without an external power supply. Rotate the knob on the top cover and take out the feeding tray.
- Page 6 For your pet's health, please wash the grain bucket and feeding tray regularly. The feeder body should not be filled with water. Please wipe it with a wrung-out wet cloth. Operation panel introduction Indicator LED Microphone Buzzer Recording Fi Settings Manual Feed...
-
Page 7: Software Installation
Software Installation Add pet feeder via normal mode (EZ mode) Search the App Store or scan the QR code below to download and install Pet Zero. Run the App, read and agree to the privacy policy, and register a new account or log in to a registered account (please choose the correct country or area). - Page 8 Click Add Device or to add a new pet feeder. Choose the Add manually tab and select Wi-Fi Pet Feeder.
- Page 9 Check whether the indicator LED is flashing RED 2 times per second.If yes, then click Indicator to go to the next step.If not, please long press the Wi-Fi Settings button for 3 seconds until you hear a “beep” sound. Then the feeder's indicator LED will flash rapidly.
- Page 10 Indicator LED status Feeder is waiting for Wi-Fi network Flashing rapidly in RED configuration; it is in normal and auto scan mode. Feeder is waiting for Wi-Fi network Flashing slowly in RED configuration; it is in AP mode. Feeder is configured for the Wi-Fi network Always on in RED and trying to connect.
-
Page 12: Add Pet Feeder Via Ap Mode
The feeder will then try to connect to the Wi-Fi network. When connected, click “Done” to complete adding process. If the feeder fails to connect, please check the important notice above first. If the feeder still fails to connect, please add the feeder via AP mode by the following instructions below. - Page 13 Choose Switch Pairing Mode or choose AP mode manually in the adding process.Then click Indicator is flashing slowly. Check that the indicator LED is flashing RED once every 3 seconds. Then click Indicator is flashing slowly. If the indicator is in another status, please long press the Wi-Fi button for 3 seconds until you hear a “beep”...
- Page 14 Please check the name of the 2.4Ghz Wi-Fi network and enter the password in the same way as in normal mode. Click Confirm and the App will ask you to switch your mobile phone's network to a new network broadcast by the feeder. Please go to Wi-Fi settings on the mobile phone and connect to the Wi-Fi that starts with “SmartLife-”.
-
Page 15: Add Pet Feeder Via Auto Scan Mode
Add pet feeder via Auto Scan mode Please note that in auto scan mode, 100% success rate for connecting the feeder to the Wi-Fi network cannot be guaranteed. - Page 16 Choose Auto Scan Mode on the Wi-Fi pet feeder page and enter the correct name and password of the 2.4GHz Wi-Fi network. Make sure the feeder's indicator LED is flashing RED rapidly. Wait for the feeder to connect to the Wi-Fi network and appear in the App.
-
Page 17: Feeding
Feeding Manual feeding Enter feeder's main interface. Click Manual feed, choose the feeding portions and click “OK”. The feeder will feed immediately. You can also double click the Manual feed button to feed manually. The feeding amount can be adjusted in the App: Click and set up Feed portions using the button. -
Page 18: Scheduled Feedin
Scheduled feeding The pet feeder supports the scheduled feeding of exact portions at exact times. Click the button in App, choose feeding time, repeat rules for each day of the week, and feed portions, then click Save. - Page 19 The feeder supports up to 15 feeding schedules. If you need to disable a schedule, you can do so by disabling its switch.You can also delete it by swiping the feeding schedule to the left access the delete option.
-
Page 20: Voices Recording
Voice recording To develop good feeding habits for pets, the feeder supports pre-recording a maximum of 10 seconds of audio, which is played during feeding. Press and hold the record button for 3 seconds until the feeder makes a “Drip” sound, then you can start talking at the microphone position. - Page 21 Note: When the pet feeder is connected to the regular power adapter, the pet feeder recording will be played during feeding. It will play the number of set times until the feeder has finished feeding. If pet food blocks the food tray, the pet feeder will stop feeding and wait for 10 minutes.
-
Page 22: Feeding Records And Alarm
Feeding records and alarm After feeding, there will be feeding records in the App. Click to check the feeding records. The feeding records of the last 7 days will be shown. When the food level is insufficient or zero, “lack of food” message will appear on the page. -
Page 23: Other
When a malfunction occurs, a message will appear in the App. You can check error messages in the message center. Make sure that prompt message (notification) is enabled. Other Basic settings Battery Status: Shows the status of the battery. Indicator lights: Turns the indicator on/off when the feeder is connected to the Wi-Fi network. -
Page 24: Advanced Settings
Advanced settings Click to access the advanced settings page. Device information: Check feeder information. Please make sure that the time zone of the feeder is correct. It should be the same as the mobile phone's time zone when adding the feeder. If it is incorrect, the feeder may feed at incorrect times, so please remove the feeder and add it again. - Page 25 Offline notification: When the feeder is offline, a notification will sent to your mobile phone. Share device: If you want to add the feeder to another mobile phone, register a new account on the new mobile phone, then share the device with the new account. Please make sure that both accounts are in the same country or area when registering them.
-
Page 26: Battery
Remove device: There are 2 options that will both remove the device from the App but not delete the settings in the feeder. You could re-configure the feeder's Wi-Fi network using these 2 options. If you wish to remove all the settings in the feeder, please long press the Wi-Fi button on the feeder until you hear a “beep”... - Page 27 These measures are designed to save battery energy to ensure that the pet feeder can keep working for a long time.
-
Page 28: Faqs
FAQs Why did the feeder fail to connect to my Wi-Fi network? Please check the important notice on Page 6 for help. You can try to add the feeder via AP mode instead of normal mode and auto scan mode. Why is the feeding recording only played once or never when I set the recording multiple times? Please press and hold the record button to record your voice... - Page 29 Why does the feeder feed at the wrong time? Please check that the time zone of the feeder is correct. You can find help about time zone information on page 15. Why does it always prompt that food is blocking the feeding tray when this is not the case? Once food falls into the tray, the feeder will wait for 10 minutes for the pet to eat the food.
- Page 30 Why is the indicator LED still flashing after I disabled it? When it is feeding, the indicator LED cannot be disabled. How can I restore the feeder to factory default settings? Please long press the Wi-Fi settings button for 3 seconds until you hear a beep sound.
-
Page 31: Fcc Warnings
WARNING: Changes or modifications to this unit not expressly approved. Non-compliance could void the user's authority to operate the equipment. NOTE: This equipment has been tested and found to comply with the limits for a Class B digital device, pursuant to Part 15 of the FCC Rules. - Page 32 This equipment generates, uses and can radiate radio frequency energy and, if not installed and used in accordance with the instructions, may cause harmful interference to radio communications. However, there is no guarantee that interference will not occur in a particular installation.If this equipment does cause harmful interference to radio or television reception, which can be determined by turning the equipment...
- Page 33 Reorient or relocate the receiving antenna. Increase the distance between the equipment and receiver. Connect the equipment into an outlet on a different circuit from that to which the receiver is connected. Consult the dealer or an experienced radio/TV technician for help. Shielded interface cables must be used with the equipment in order to comply with the limits for a digital device pursuant to Subpart B of Part 15 of...
- Page 34 https://www.facebook.com/wopetworld...
Need help?
Do you have a question about the F07 and is the answer not in the manual?
Questions and answers