Table of Contents
Advertisement
Quick Links
Advertisement
Table of Contents

Subscribe to Our Youtube Channel
Related Manuals for WOPET FV01 Plus


Summary of Contents for WOPET FV01 Plus
- Page 1 Pioneer WIFI Pet Feeder Model: FV01 Plus USER MANUAL...
-
Page 3: Table Of Contents
[CONTENTS] .…...…...…………..……………………………………………… Feeder Specifications ..…...…...…………..……………………………………………… Assembly Guidelines ……………………………………… Assemble Bowl as Shown in the Picture ...………………………………………………………… Plug in the Power Adapter ..……………………………… Install Batteries in the Battery Compartment ..…..…..…...…...…………..……………………………………………… App Installation ......…...…...…………..……………………………………………… App Usage ...…...…...…………..………………………………………… Add the Feeder ………………………………………………………… Access the WLAN Network ..…...…………..………………………………... - Page 4 ....…...…...…………..……………………………………………… Feeder Cleaning ......…..….…...…...…………..……………………………………………… FAQs ..…..….…...…...…………..……………………………………………… Important Notes ..….…...….…...…...…………..……………………………………………… FCC Warnings ..…...…………..……………………………………………… Warranty Information ..…...…...…………..……………………………………………… Have a Question?
-
Page 5: Feeder Specifications
Product Specification Model FV01 Plus WLAN 2.4HZ / 5HZ Capacity Meals 6 Meal Per Day One Portion 10 grams ( 20 portions at most per meal) Food Size 2-15mm(dry food only) Product Size 9.8*13.7*15.3in Product Weight 5.5lbs Product Materials DC-powered Supply... -
Page 6: Assembly Guidelines
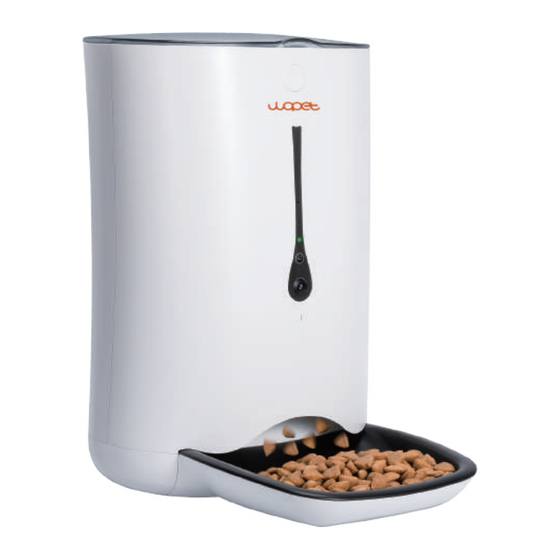
Assembly Guidelines Assemble Bowl as Shown in the Picture 7L Large capacity Lid lock Set button Camera Food outlet Food tray... -
Page 7: Plug In The Power Adapter
Plug in the Power Adaptor The indicator light on the feeder shows green when you plug it in Green indicator light Plug in the power adapter Note: It is hugely important to plug in the power adaptor for the device so that it can connect to WIFI successfully. -
Page 8: Install Batteries In The Battery Compartment
Install Batteries in the Battery Compartment (3 new D cell, alkaline batteries.Battery NOT included) Battery compartment Note: Battery power supply is only in case of power outage or WIFI failure, the schedule you set will continue to work. -
Page 9: App Installation
App Installation Note: The feeder cannot work without WIFI Download the app by scanning the below QR code below Android:Search“WOpet Smart”in Google Play IOS: Search“WOpet”in the App Store Scan the QR code to download WOPET APP... -
Page 10: App Usage
App Usage Step 1 Add the Feeder Install and open the “WOpet” App, then register an account and log Note: Enter your email Each device can be attached to only Enter your password one account at a time, but each... -
Page 11: Access The Wlan Network
STEP 2 Access the WLAN Network Click "next" until you reach this page Hold the button, then release it until the device makes a "Ding" sound, which means the machine has already been reset Note: Watch and wait for the indicator to slowly blink green before selecting the connection mode in the next step (Wait at least 5S)... -
Page 12: Wlan Connection Modes
STEP 3 WLAN Connection Modes Step 3.1 Bluetooth Mode-Recommended Choose the “Bluetooth Mode”Enter the next step and there will be a pop-up a prompt. Then turn on Bluetooth as described. - Page 13 The app will automatically access WIFI on your phone; just enter the correct password. Finally, click the “confirm” option, and it will establish the connection Note: If the Bluetooth mode fails, read the another mode guides on page 13 and page 14.
-
Page 14: App Interface Function Introduction
App Interface Function Introduction Edit feeding schedule Scheduled meal 12:00 18:00 Feeding history Basic settings (includes pet’s profile picture, age, weight, and remove the blinding etc) Automatic feeding Camera interface... -
Page 15: App Setting Guideline
APP Setting Guideline Step 1 Camera Function Click the option. On this page, you can take a photo or video of your cute pet These pictures and videos are saved in the option. And doing voice interaction with your pet on option... -
Page 16: Setting Meals
STEP 2 Setting Meals Click the "feeding setting", you can set up to 6 meals a day. When clicking one of these six to the next step, you can set the feeding time, portion, and voice options Leave the button on before clicking the "back" option, and the schedule you set will show on this page :... -
Page 17: Switching Different Mode
Switching Different Mode Follow the instructions until you arrive at this page Hold the button, then release it until the device makes a "Ding" sound, waiting for the indicator to slowly blink green, and then select a “ mode” STEP 1 Scan Mode Enter the next step and type the corresponding password to reveal the QR code. -
Page 18: Ap Mode
STEP 2 Ap Mode Enter the next step and type the corresponding password, then open your phone’s“WLAN”setting page; find and connect to the WIFI with the name starting with "Wopet". Finally, go back to the app Note: The app function guides on page 10 to 12. -
Page 19: Feeder Cleaning
Feeder Cleaning Unplug feeder and remove the batteries Disassemble the food bucket and tray Clean with a soft cloth Warning: The base unit should not be submerged in water at any time, as this will damage the electronic components and void the warranty For indoor-use only... -
Page 20: Faqs
FAQs Red Light Green Light Feeder State Solution Always on Normal √ Flashes Always on Abnormal Plug in power (Once a second) 1. Plug in power Flashes quickly Device Offline 2. When plugging in, click the (Twice a second) “Refresh” button on the app. When plugging in, check to Bettery Always on... - Page 21 Q: How do I re-connect the device to the network quickly after it is disconnected? A: Exit the APP, run it again, and click the“refresh”button on machine. Q: What if the cellphone didn't send the feeding record notification? A: The feeder is offline. B: The feeder is only powered by batteries.
- Page 22 Q: Why is there a 5-minute error between the time setting and time dispensing? A: It takes about 5 minutes for the data to be uploaded to the server and identified. Q: APP updating A: For better user experience, please update regularly. In addition, this ensures the stability of the device.
-
Page 23: Important Notes
Important Notes Require THREE D size batteries, alkaline batteries only (Batteries NOT included) The estimated life of one set of batteries is one year Keep fingers and hands away from food wheel Always turn the feeder off before cleaning Check the low battery light frequently to ensure the feeder has power Check the level of food frequently to be sure the feeder is dispensing properly... -
Page 24: Fcc Warnings
FCC Warnings Changes or modifications to this unit is not expressly approved. Non-compliance could void the user's authority to operate the equipment. Notes: This equipment has been tested and found to comply with the limits for a Class B digital device, pursuant to Part 15 of the FCC Rules. - Page 25 This equipment generates, uses, and can radiate radio frequency energy and, if not installed and used in accordance with the instructions, may cause harmful interference to radio communi- cations. There is no guarantee that interference will not occur with any particular installation. If this equipment does cause harmful interference to radio or television reception, which can be determined by turning the equipment off and on, the user is encouraged to try to correct the interference by one or more of...
-
Page 26: Warranty Information
④ The warranty is not transferable. We only provide warranty services to buyers who purchased from our Amazon store and WOpet official website store and possess proof of purchase - not to any other purchaser or subsequent owner. - Page 27 Receiving defective or used (proof needed) products; Receiving with missing parts; Item is defective under proper use. WHAT IS NOT COVERED Purchase from non-amazon channels /non-WOpet official website store/other physical stores; Gift without proof of purchase; Tampering/abnormal use/accidental damage; Replacements and parts;...
- Page 28 MAKING A CLAIM If you have any problems when using our products, please send an email to the mailbox: support@wopet.com 30 days free Return & Replacement Standard Warranty: 1-Year product Warranty 2-Year Warranty Application: Please scan the QR code below to finish the registration form on our official website to get 2-Year in total warranty.
-
Page 29: Have A Question
Have a Question? 1.Find your order 2.Click "View order details" Your Orders Home Your Order Product link Buy Again Buy it again Your Wish List Write a product review Your Account View order details Shop by Department 3.Click the Seller name 4.Click “Ask a question”... - Page 30 Gifted parts, replacements, and consumable products are not covered by the 2-year warranty Manufactures' warranties may not apply in all cases, depending on factors such as use of the product, where the product was purchased,or who you purchase the product from. Please review the warranty carefully, and contact the manufacture if you have any questions.
- Page 32 Boundless Love for Pets...
Need help?
Do you have a question about the FV01 Plus and is the answer not in the manual?
Questions and answers