Table of Contents
Advertisement
Quick Links
Advertisement
Table of Contents

Related Manuals for Asus J501


Summary of Contents for Asus J501
- Page 1 ASUS J501 User Manual...
-
Page 2: Table Of Contents
Package contents Overview Adding contacts Specifications Searching for a contact Getting started Shortcut to contact entries Copying contacts Getting to know your J501 Deleting Contacts Components description Caller Groups Inserting the SIM card, the Extra Number microSD card, and the battery ™... - Page 3 Multimedia File Manager Camera Phone Videos Memory Card Photo Artist DRM Rights Audio Player Using the File Manager Sound Recorder Skype FM Radio Before Using Skype Schedule FM Record Setting a Bluetooth connection Melody Compose Configuring connection between Organizer your device and PC using Skyddle Calendar Using Skype on your device To Do List...
-
Page 4: Package Contents
Package contents Check your J501 package for these items. If any item is missing or damaged, contact your retailer. J501 handset 750 mAh Li-ion Travel charger USB cable Stereo headset battery User manual Quick start guide Handset Manager Warranty card... -
Page 5: Overview
Overview The J501 comes with a built-in camera, MMS/SMS messaging capability, organizer, Java games, audio player, Bluetooth capability, WAP, GPRS, and a microSD™ card slot. In addition to the internal 5 MB phone memory, the microSD™ card* provides additional memory where you can store your contact information, messages, text, graphics, and audio files. -
Page 6: Specifications
Specifications System supported GSM900/1800/1900; GPRS class 12 Dimensions 103 × 48 × 16.6 mm Battery 750 mAh Li-ion Standby time 200 hrs Talk time 2.5~5 hrs Main display 2.2’’TFT, 262K colors, 240x320 Phonebook 500 sets Messaging SMS/EMS/MMS/Email Camera 2.0 Mega-pixel with auto focus Video recording Unlimited video recording* Ringtone... -
Page 7: Getting Started
Getting started Getting to know your J501 Side features Front features Back features... -
Page 8: Components Description
Components description FEAtURES 1. Earpiece receiver Allows you to listen to an active call. 2. LCD screen Displays menu, battery status, and signal strength. 3. Left and right soft keys The left and the right soft keys perform the command displayed above the button. 4. - Page 9 Components description FEAtURES 5. Power/End key • Press and hold to turn your phone ON/OFF. • Press to end a call. 6. Call key In idle mode: Press to show call list. Use left key to show missed calls or right key to show received calls In normal mode: Press to call or dial a number.
-
Page 10: Inserting The Sim Card, The Microsd™ Card, And The Battery
Inserting the SIM card, the to insert the microSD™ card microSD™ card, and the battery 1. Insert the microSD™ card in The service provider provides you with a the microSD™ card Subscriber Identity Module (SIM) card that slot. stores your phone number, phonebook information, and service provider information. -
Page 11: Charging The Battery
Charging the battery Locking/unlocking the keypad/slide 1. Connect the AC adapter to a power to lock the keypad source. 2. Connect the charger to the socket at the 1. From the main menu, launch side of the phone. The connector can select Security Setup >... -
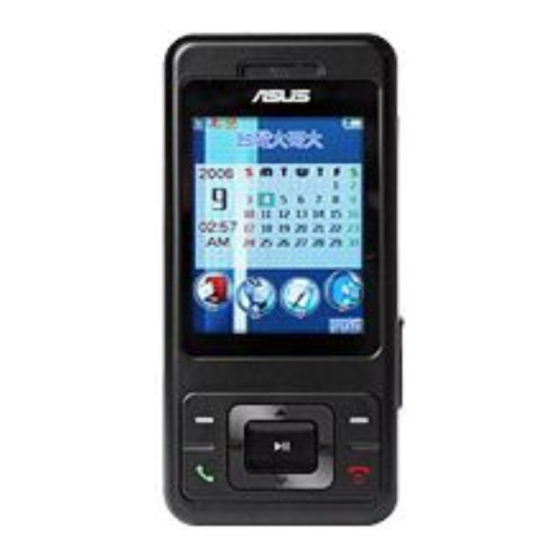
Page 12: The Main Screen
the Main Screen When your phone is on or idle, the display screen shows various items such as icons, date/time, Menu, and Phonebook. To open Menu, press the left soft key . To view your Phonebook, press the right soft key Status indicators Signal strength Message... - Page 13 Menu icons Phone book Messages Call History Settings Multimedia File Manager Fun & Game User Profile Organizer Services Extra Skype...
-
Page 14: Usb Config
USB Config The USB Config enables you to insert a USB device (such as a charger, or a USB cable) to charge the battery, read data from your microSD™ card or from your phone, and to use the USB connector as a COM port. Using the USB Config 1. Insert the USB device, such as a charger or a USB cable, to the USB connector. The USB Config list is displayed. -
Page 15: Using Call Features
Using Call features Making a call to create a speed dial for a contact 1. From the Speed Dial screen, select 2 Set Calling from the main screen Number, then press OK or 2. Press Option > Edit. Your phone book to call from the main screen list is displayed. -
Page 16: Answering A Call
Answering a call 5. Select your Divert option from the list. Press OK or When you receive a call, the phone rings or vibrates based on your ringtone or vibration 6. Select Activate. Press OK or settings. to answer a call Redialing a number Press or press Option >... -
Page 17: Call History
Call history • Save to Phonebook: Adds the number to the phonebook. Call logs are information about missed, dialed, • Dial: Calls the selected number. and received calls. To view lists of missed, dialed calls or received calls, select Call •... -
Page 18: Sms Counter
the Last Call Cost, total Cost, Reset • End: Ends a call. Cost, Max Cost, or Price Per Unit. • New Call: Places a new call. • Phonebook: Displays the phonebook You can also set Call Costs’ Limit and the menu. -
Page 19: Phonebook
Phonebook Adding contacts NOtE: You can control which fields are available for contact entries in Phone Book > Setting > Fields. See Settings on page 19 for more information. This section guides you in adding contacts to your Phonebook. Searching for a contact to launch Phone Book 1. From the main screen, press Menu. Quick Search 2. -
Page 20: Shortcut To Contact Entries
Deleting Contacts 2. Enter a search term. You do not need to type a whole name or word. For instance, You can delete contacts using the Delete if you are looking for the entry “office,” function. you may want to type simply “off.” to delete a contact 3. -
Page 21: Caller Groups
Caller Groups 3. Select Associate Picture. This option determines which picture is displayed You can classify contacts into groups to identify when someone from the chosen caller them. There are five caller groups: Friends, group calls. Family, VIP, Business, and Others. You can change the name of any caller group. You can NOtE: The picture you select must be smaller than 20K in size. -
Page 22: Settings
2. Select Owner Number to store your own Preferred Storage number. to set the preferred storage Select Service Dial Number to store a 1. Launch Phone Book. From the Phone service number. Book menu list, select Settings > Select SOS Number to store an SOS Preferred Storage. -
Page 23: My Vcard
My vCard A vCard is a virtual calling card that you can send to people. It can contain your name, cell phone number, home number, office number, fax number, company name, and e-mail address. to edit and send your vCard 1. Launch Phone Book. From the Phone Book menu list, select Settings >... -
Page 24: Messages
Messages Entering texts and numbers 4. Press to enter p, then press twice to enter h. Continue in this fashion until Use the alphanumeric keypad to enter text the word “phone” is entered. and numbers. Your phone supports four input modes: Multitap input, Smart ABC, Numeric Smart ABC text entry, and Symbols text entry. - Page 25 3. Press again quickly to display three-letter combinations of the letters a, b, and c. 4. Press . The word “baby” is complete. 5. Press Option > Done when finished. NOtE: For smart text entry to work properly, ensure the language settings in your phone match the language you want to type in.
-
Page 26: Sms
• Send Only: To send a text message to only one recipient. An SMS message is a simple text message. • Save and Send: To save and send a You can send and receive SMS messages with text message to only one recipient. your phone. - Page 27 3. Select the phrase you would like to add, Common Setting. 2. Select Delivery Report or Reply Path then press Ok or to confirm. options then select On to enable or Off The text from the template appears in disable the feature. the message.
-
Page 28: Mms
SMS Counter 3. Select Add Number or Add E-mail then There is an SMS counter which can keep a press Ok or to confirm. log of the number of SMS messages sent and You can either add an e-mail address received. or number manually, or press Search to search from the Phone Book. -
Page 29: Chat
Viewing an MMS Message Message Settings Some MMS messages are longer than the MMS message settings can be used to set screen. To move up or down a page, press and the validity period, delivery report, read report, hold the up or down navigation key. priority, slide timing, and delivery time. -
Page 30: Email
7. From the Chat options screen, select 2. Select a profile from the list. 3. Press Option >Activate. Start New and press Ok or 8. Enter your message to start the chat 3. Press Ok or to activate the session. Send the message as you would selected profile. -
Page 31: Broadcast Message
Broadcast Message Use the Cell Broadcast option to set cell broadcast parameters. to set broadcast message parameters 1. From the main menu, launch select Broadcast Message. 2. Select the Receive Mode option, then press the left soft key to toggle the setting on or off. -
Page 32: User Profiles
User Profiles The phone can be set to behave in a number 4. Select a feature to customize from the list of manners. Each manner is saved as a profile and press Ok or and is designed to be used in a particular The feature submenu is displayed. environment. -
Page 33: Settings
Settings Phone Setup 2. Select the city from the list and press Ok The Phone Setup menu enables you to configure your phone’s features including Set time/Date time and date, scheduling power on and off, 1. Launch the Phone Setup menu and language, preferred input method, default select time and Date >... - Page 34 Preferred Input Methods 4. Choose a city and press Ok or The Preferred Input Method enables you In idle mode the wallpaper will display two time to set the default input method for entering zones. The first time zone will be your Home numbers, or Roman Alphabet, or Chinese City, and the second will be your Second time characters.
- Page 35 Screen Saver Show Date and time, Show Owner Number, Show Operator Name, Show Dedicated Keys to set the screen saver 1. Launch the Phone Setup menu and Use left navigation key to show or hide these select Display Characteristic > Screen items.
- Page 36 2. Select a key from the list and press Edit. your phone to Medium or Large. 3. Select a phone function from the list. Greeting text 4, Press Ok or to set the shortcut The Greeting text option enables you to set a key.
-
Page 37: Call Setup
To copy firmware from PC to phone number when making calls, control the time of 1. Search and download the latest firmware calls, redial numbers, filter calls, or select a line. for your phone in the ASUS web site at to launch the Call Setup http://www.asus.com. 2. Connect your phone to a PC using 1. - Page 38 to set Caller ID Call Divert. 1. Launch the Call Setup menu and select The Call Divert option list is displayed. This list include: Divert All Voice Calls, Caller ID. Press Ok or to display Divert if Unreachable, Divert if No the Caller ID option list.
- Page 39 to use Line Switching NOtE: Select Calls > Call time to see records of call times. For more information about call times and costs, refer to the 1. Launch the Call Setup menu and select section Call time/Cost on page 12 for more details. Line Switching.
-
Page 40: Network Setup
Call Filter to enter a privileged number This feature enables you to set up call filters You can set up a privileged list of numbers that such as blocking/unblocking, or setting up you do not want to block. privilege numbers. 1. Launch the Call Setup menu and select Call Filter >Privileged List. The to block a phone number Privileged List is displayed. -
Page 41: Security Setup
Network menu features include Network to set GPRS Connection Selection, Preferred Networks, and GPRS 1. From the main menu, launch Connection. and select Network Setup > GPRS Connection. Network Selection 2. Press Change to toggle between these With the Network Selection option, you can options: Always and When Needed. - Page 42 Slide Keypad Lock NOtE: The SIM Lock option requires a default password from your service provider. Consult your service provider if needed. The Slide Keypad Lock option locks the slide to prevent unauthorized use. Phone Lock to lock the slide The Phone Lock option enables you to lock your device.
-
Page 43: Restore Factory Settings
Barred Dial Data Protection The Barred Dial function enables you to block The Data Protection feature protects the data dialing of certain numbers. Barred dialing on your phone from unauthorized access. This is a service available through some service feature enables you to password-protect your providers. -
Page 44: Equalizer
2. Press Ok or to restore factory default settings. NOtE: This option requires a password. Use the default password, 1122, to access this setting. Equalizer The Equalizer feature enables you to choose the MP3 Equalizer mode. There are nine (9) modes: Normal, Bass, Dance, Classical, treble, Party, Pop, Rock, and Restore Factory Default. -
Page 45: Multimedia
Multimedia Camera Use the down navigation key to browse through the options list. Use the left and right navigation keys to taking Photos adjust the values of settings in each field. to capture photos with your phone NOtE: Refer to Photo Capture Settings on page 42 for more 1. - Page 46 Photo Capture Settings White Balance Select from the six modes: Auto, Daylight, The Camera can be configured to capture tungsten, Fluorescent, Cloud, and images of different size and quality. You can Incandescence. also capture photos with frames or special effects, take multi-capture photos, use a timer, Scene Mode set the default storage location, or apply Select Auto, Close-up or Night as the scene...
-
Page 47: Videos
Videos Image size Selects the image size. Configuration options: Recording Videos 240x320, 320x240, 640x480, 800x600, 1024x768, 1280x1024, or 1600x1200. to shoot a video Shutter Sound 1. From the main menu, launch Select the shutter shound to either level 1, 2, or select Video Recorder. 3. This option is located in Advanced Setting. 2. Point the camera lens at the subject and AF Sound use the LCD screen to frame your video. - Page 48 2. Select a video, then press Option > Play navigation key. to display video mode. Video Playback Speed Press to play. Press again You can select from five different video to pause. Press the right navigation key playback speeds: x 1/2, x 1, x 2, x 4, and x 8. to stop playing the video.
-
Page 49: Photo Artist
The Option menu contains icons for captured videos are stored. You can store these settings: Effect Setting, White captured videos either in the handset (internal) Balance, Night Mode, EV, Banding, memory, or on a microSD™ card if installed. Video Quality, File Size Limit, Rec to set the storage option time Limit, Record Audio, Encode 1. - Page 50 the folders list. Use the navigation keys to move the icon, and press Done when you are 3. Select an image from one of the phone’s finished. Press Cancel to disregard the folders and edit it. changes. You can choose to automatically resize •...
-
Page 51: Audio Player
to create an LCD clip • Previous song 1. Select the picture and then choose MainLCD Clip > OK > Option. • Next song A list of options is displayed. • Press once to play Refer to the previous section on Press twice to pause automatically resizing the picture for Long press to stop... - Page 52 Lists 2. Select the playlist where you want to add songs to. The Audio Player menu contains music files 3. Press Option > Open > Ok. The list grouped by Artist List, Album List, and Rate of songs in your chosen playlist is List. displayed. The Artist List contains music files based on 4.
-
Page 53: Sound Recorder
Explorer as two removable disk drives. or outward appearances for the Audio One drive is the internal phone memory Player. and the other is the microSD™ card if • Repeat. Select One to loop, or All to installed. repeat all the songs in the playlist. Select 3. Drag and drop your digital music files Off to turn off this setting. -
Page 54: Fm Radio
FM Radio You can save your favorite channels in Channel List. The phone is equipped with FM Radio function. 1. Select Option > Channel List. to activate FM Radio function 2. Press Option to edit the channel name 1. Plug the earphone to the earphone and the frequency, then press Ok or socket. -
Page 55: Schedule Fm Record
Record • Use the keys 1-7 to enter notes C-B. • Each note can be pushed up or down Select Option > Record and the phone starts an octave. To do this, highlight the note recording the radio. Press Pause to pause, and and use the up and down navigation press Stop to stop recording. -
Page 56: Organizer
Organizer to view details, OR The organizer menu gives you access to a Select Option to view the Option menu. number of features including calendar, alarm The Option menu enables you to view, task list, world clock add, edit, delete, or send a task. Calendar to Do List The calendar function helps you keep track of... -
Page 57: Alarm
(Monday through Friday), Weekly, or can set up to three alarm events. Monthly. to program an alarm 3. To edit a task, highlight a task from the 1. From the main menu, launch From the main menu, launch list then select Option > Edit task. and select Alarm. -
Page 58: Services
Services Browsing WAP pages The Network menu gives you access to wireless services, such as WAP web browsing Browsing WAP pages is much like browsing or WAP push. web pages with your computer. However, rather than using a mouse, you navigate with the Service Provider Settings joystick keys and with the OK key. -
Page 59: Data Account
Data Account You can also highlight a profile then select Option. You can then either select Activate The Services > Data Account option displays Profile or Edit Profile. If you select Edit a list of available network services. Profile, you can view and edit the profile to view data account information settings. 1. Select a network type, GSM Data or to edit proxy IP address GPRS, to view a list of available data 1.select the field Connection type >... -
Page 60: Fun & Game
Fun & Game Java Game to start a game A selection of games created with Java technology comes pre-loaded on your phone. 1. From the main menu, launch From the main menu, launch to start a Java game select Games. 2. -
Page 61: Extra
Extra The Extra menu gives you access to a number to launch Bluetooth of useful pre-installed applications including 1. From the main menu, launch From the main menu, launch the Intervision, Bluetooth, Calculator, Unit select Bluetooth. The Bluetooth options Converter, Currency Converter, Health, and menu is displayed. -
Page 62: Calculator
Presenter • Select the Audio Path; and Select the Presenter option to make • Change the FTP Setting PowerPoint presentations on your PC. About About displays about your phone’s supported My Device service. My Device enables you to search and connect Calculator with available Bluetooth devices. -
Page 63: Unit Converter
most of the functions are selected with the 4. In the Rate entry field, use the left/right navigation keys alone, with no need to press navigation keys to select ratio. OK or the Enter key. 5. In the Local entry field, input the value you want to convert then press the Ok Numbers are cleared from memory once you or play button. -
Page 64: Shortcuts
Shortcuts item. 4. Press Ok or Shortcuts allows you to assign shortcut keys to easily access your phone’s applications or to delete/delete all shortcut key(s) features. 1. From the main menu, launch From the main menu, launch With Shortcuts, you may Add, Edit, Delete, select Shortcuts. -
Page 65: File Manager
File Manager Using the File Manager The File Manager can be used to view and manage files stored on your phone, and in the microSD™ card, if you have installed it. Open to launch the File Manager The Open option enables you to open a file in your phone or in the microSD™ card. 1. From the main menu, launch To open a file You can select You can select Phone, DRM Rights,... - Page 66 Format The Format option formats and erases all the data in your phone or in the microSD™ card. ™ card. card. to format your phone or the microSD™ card 1. From the main menu, launch . Select whether you want to format the Phone or the Memory Card.
-
Page 67: Skype
Bluetooth on device. • Skyddle installed on your PC When Bluetooth is enabled, select “My An ASUS-provided middleware. To install Device” from the menu. this on your PC, follow the Skyddle Press the left soft key to launch Option Wizard. -
Page 68: Configuring Connection Between Your Device And Pc Using Skyddle
Select a device from the list of available press Enable Skype. Bluetooth devices and click Next. 2. Select a contact from the Skype menu Click ASUS-J501 from the device name and press Call button to make a Skype list then click Next. call. - Page 69 to edit you Skype account using your phone You can edit your Skype account data in the Skype menu of your device. Select contact and press left soft key. Use up/down navigation key to select an item and press enter key to enter the item.
-
Page 70: Handset Manager
Ensure that the following system requirements • To uninstall software, click the Add/Remove Programs are met: icon in the control panel. Select J501 USB-Handset Software: Manager from the list. Click the Remove button and follow the instructions on screen. •... -
Page 71: Main Panel
3. Select J501 USB-Handset Manager > on the icons at the bottom of the screen. Each J501 USB-Handset Manager from the tool has its own interface, which opens when computer’s program list, OR you click on the icon. Right click the... -
Page 72: Navigating The Handset Manager Tools
manually here. pop-up window tells you the name of the button. • Select Handset Information to see the NOtE: You must exit one tool before launching another. model name and firmware version of the phone, when the phone is connected. Navigating Media Files Select About Handset Manager to see The interfaces for media tools—MMS, Sound, the version of Handset Manager installed in your computer. - Page 73 computer files only. in the Handset Manager. • Thumbnail views of computer files in the NOtE: To locate handset files using the handset screen, go to Organizer > File Manager. selected location are shown in the lower right pane. Handset Manager Icon transferring Files to A Handset Manager icon appears in the system tray, even when the Handset Manager and from the Handset is minimized.
-
Page 74: Music Manager
Control panel columns The Music Manager allows you to transfer and organize media files conveniently. You can create playlists, upload, maintain, and playback Add playlist digital music through an easy-to-use interface. Add smart playlist Browse by Genre/ Delete playlist To launch the Music Manager, simply launch Artist/Album the Handset Manager from your desktop and on the main panel, click the Music Manager icon. -
Page 75: Important Notes
Important notes Album • Pictures saved as main wallpaper will be re-sized to 176 x 220 pixels Phonebook automatically. If you are using Microsoft Outlook or Outlook ® • Select a phone file location from the Express, and you do not need to edit contact drop-down menu. The picture file will be entries or manage contact fields, you may transferred to a folder called Images. - Page 76 • When dragging and dropping, the icon to save the file in the desired folder. • Click the refresh icon to update the status means files can be dropped to a of the folder destination. • The files saved in the phone will be • Large files may take a few minutes to converted to .3gp format automatically. move. To reduce the transfer time, you • The picture file will be transferred to a may use the handset as a mass storage folder called Video.
-
Page 78: Appendix
Appendix Additional Information which may alter the conformity of the product with the mark. This device may be subject to local rules and regulations. The following rules and regulations Certification Information may be relevant in some or all areas where (SAR) your device will be in operation. this model phone meets EU requirements European Notice for exposure to radio waves. -
Page 79: Proper Disposal
Proper Disposal bands. Although the SAR is determined at the highest certified power level, the actual SAR of The symbol of the crossed out bin indicates that the device while operating may be below the the product (electrical and electronic equip- maximum value. This is because the device is ment) should not be placed in municipal waste. -
Page 80: Safety Warnings
Safety Warnings • When driving, find a safe place to stop the vehicle before using the phone. Read the following safety warnings carefully • Do not speak into a hands-free before using your cell phone. microphone if it will distract you from • This device is intended for use with driving.
Need help?
Do you have a question about the J501 and is the answer not in the manual?
Questions and answers