Table of Contents
Advertisement
Quick Links
OPD-1086C/1126A/1156A
Open Frame Design Industrial Display
User Manual
Release Date
Revision
July. 2021
V1.0
®2021 Aplex Technology, Inc.
All Rights Reserved.
Published in Taiwan
Aplex Technology, Inc.
15F-1, No.186, Jian Yi Road, Zhonghe District, New Taipei City 235, Taiwan
Tel: 886-2-82262881 Fax: 886-2-82262883
URL:
http://www.aplextec.com/zh/home.php
OPD-1XX6A User Manual
1
Advertisement
Table of Contents

Subscribe to Our Youtube Channel
Related Manuals for Aplex OPD-1086C


Summary of Contents for Aplex OPD-1086C
- Page 1 Open Frame Design Industrial Display User Manual Release Date Revision July. 2021 V1.0 ®2021 Aplex Technology, Inc. All Rights Reserved. Published in Taiwan Aplex Technology, Inc. 15F-1, No.186, Jian Yi Road, Zhonghe District, New Taipei City 235, Taiwan Tel: 886-2-82262881 Fax: 886-2-82262883 URL: http://www.aplextec.com/zh/home.php...
- Page 2 Revision History Reversion Date Description 2021/07/21 Official Dimensions OPD-1XX6A User Manual...
-
Page 3: Warning
Warning!___________________________________ This equipment generates, uses and can radiate radio frequency energy and if not installed and used in accordance with the instructions manual may cause interference to radio communications. It has been tested and found to comply with the limits for a Class A computing device pursuant to FCC Rules, which are designed to provide reasonable protection against such interference when operated in a commercial environment. -
Page 4: Table Of Contents
3.2 Software Functions…………………………………..…………………………………………...………..22 Appendix A: Board Dimensions Specifications…………………………..…………………….……………………………… ..38 Board D imensions………………… .……………………… .…….…………………………… 39 Figures Figure 1.1: Dimensions of OPD-1086C………………………………………..…..……………………………..……6 Figure 1.2: Dimensions of OPD-1126A…….………………………………………………………………………………7 Figure 1.3: Dimensions of OPD-1156A…….………………………………………………………………………………7 Figure 1.4: Overview of OPD-1xx6A……………………………………….…….…………………………………………8 Figure 1.5: Rear View of OPD-1xx6A……………………………………..…….…………………………………………8 Figure A: Dimensions of TB-6802(TOP)…………………………………………………….………………………..39... -
Page 5: Chapter 1 Getting Started
OSD at rear side VESA mount 75 x 75 Optional Resistive Touch Panel, RS-232 or USB interface Default DC 9~36V input VGA, DVI, HDMI, and DP input 1.2 Specifications OPD-1086C OPD-1126A OPD-1156A IO Port DVI-D HDMI... - Page 6 500: 1 1500: 1 1000:1 2000: 1 Contrast Ratio 40,000 hrs 50,000 hrs 30,000 hrs 50,000 hrs Backlight Lifetime Power Default DC 9~36V input, optional AC 100~240V input Power Input Power MAX: 5.2W MAX: 13.1W MAX: 13.2W Consumption Mechanical Steel chassis Construction Panel mount / VESA Mount 75 x 75 Mounting...
-
Page 7: Dimensions
1.3 Dimensions Figure 1.1: Dimensions of OPD-1086C OPD-1XX6A User Manual... -
Page 8: Figure 1.2: Dimensions Of Opd-1126A
Figure 1.2: Dimensions of OPD-1126A Figure 1.3: Dimensions of OPD-1156A OPD-1XX6A User Manual... -
Page 9: Brief Description
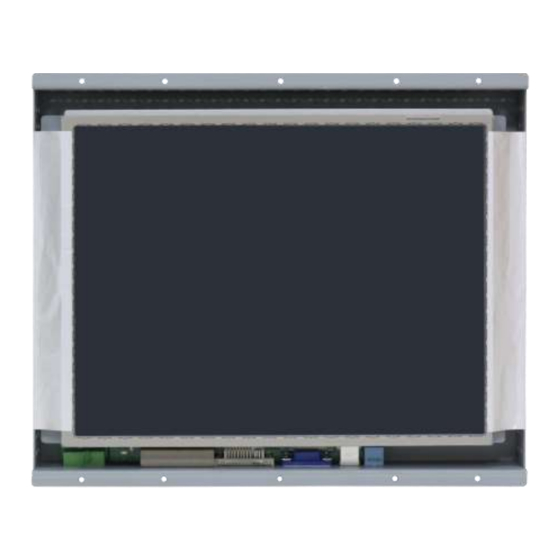
1.4 Brief Description of the OPD-11x6A The OPD-11x6A offers 8”/12.1/15” LCD open frame display the feature an excellent viewing ability for special monitoring and control applications, especially in Industrial area. It is available with resistive touch screen that is easy to use and maintain. Figure 1.4: Overall View of OPD-11x6A Figure 1.5: Rear View of OPD-11x6A OPD-1XX6A User Manual... -
Page 10: Chapter 2 Osd
Chapter 2 2.1 AD Board OSD Functions Auto Adjust Up/Left Down/Right Power Menu/Entry Power Indicator Power switch: To turn ON or OFF the power Shift the icon to the right side or shift it up Shift the icon to the left side or shift it down Menu: To enter OSD menu for related icon and item. - Page 11 If the “RGB” is not found, disconnect the AC power cord first. Then press the buttons (don’t let them go) until the AC power cord is connected, and wait for 2 to 3 seconds. When “RGB” appears, repeat the above steps. 2.2 OSD Controls To make any adjustment, select the following: 1.
-
Page 12: Main Menu
2.3 Main Menu In the PICTURE, there are the following items: AutoBacklight Backlight Brightness: Contrast Sharpness Exit In the DISPLAY, there are the following items: AutoAdjust H Position V Position Disp Rotate ... - Page 13 In the INPUT, there are the following items: A0:VGA D1:DP D3:HDMI Exit In the AUDIO, there are the following items: Volume Mute Audio Source Exit In the OTHER, there are the following items: ...
- Page 14 Information part. OPD-1XX6A User Manual...
-
Page 15: Chapter 3 Installation
Chapter 3 Installation This chapter describes how to install drivers and other software that will allow your touch screen work with different operating systems. 3.1 Windows 7 Universal Driver Installation for PenMount 6000 Series Before installing the Windows 7 driver software, you must have the Windows 7 system installed and running on your computer. - Page 16 Step 3. Choose the folder in which to install PenMount Windows Universal Driver. Click Install to start the installation. Step 4. Click Yes to continue. OPD-1XX6A User Manual...
- Page 17 Step 5. Click Finish to complete installation. OPD-1XX6A User Manual...
- Page 18 3.1.2 Installing Software (Projected Capacitive) Step 1. Click Next to continue. Step 2. Select I accept the terms of the license agreement. Click Next. OPD-1XX6A User Manual...
- Page 19 Step.3. Click Next to continue. Step 4. Click Install RS232 interface driver. OPD-1XX6A User Manual...
- Page 20 Step 5. Select None. Click Next. Step 6. Click OK. Step 7. Click Support Muti-Monitor System. Click Next. OPD-1XX6A User Manual...
- Page 21 Step 8. Go to C:\Program Files\eGalaxTouch. Click Next. Step 9. Click Next. OPD-1XX6A User Manual...
- Page 22 Step 10. Click Create a eGalaxTouch Utility shortcut on desktop. Click Next. Step 11. Wait for installation. Step 12. Click Yes to do 4 point calibration. OPD-1XX6A User Manual...
-
Page 23: Software Functions
3.2 Software Functions 3.2.1 Software Functions(Resistive Touch) Upon rebooting, the computer automatically finds the new 6000 controller board. The touch screen is connected but not calibrated. Follow the procedures below to carry out calibration. 1. After installation, click the PenMount Monitor icon “PM” in the menu bar. 2. - Page 24 Advanced Calibration Advanced Calibration uses 4, 9, 16 or 25 points to effectively calibrate touch panel linearity of aged touch screens. Click this button and touch the red squares in sequence with a stylus. To skip, press ESC’. Step 1. Please select a device then click “Configure”. You can also double click the device too. ...
- Page 25 NOTE: The older the touch screen, the more Advanced Mode calibration points you need for an accurate calibration. Use a stylus during Advanced Calibration for greater accuracy. Please follow the step as below: Step 3. Select Device to calibrate, then you can start to do Advanced Calibration. NOTE: Recommend to use a stylus during Advanced Calibration for greater accuracy.
- Page 26 Plot Calibration Data Check this function and a touch panel linearity comparison graph appears when you have finished Advanced Calibration. The blue lines show linearity before calibration and black lines show linearity after calibration. Turn off EEPROM The function disable for calibration data to write in storage Controller.
- Page 27 Touch Mode This mode enables and disables the mouse’s ability to drag on-screen icons – useful for configuring POS terminals. Mouse Emulation – Select this mode and the mouse functions as normal and allows dragging of icons. Click on Touch – Select this mode and mouse only provides a click function, and dragging is disables.
- Page 28 About This panel displays information about the PenMount controller and driver version. Multiple Monitors Multiple Monitors support from two to six touch screen displays for one system. The PenMount drivers for Windows 7 support Multiple Monitors. This function supports from two to six touch screen displays for one system.
- Page 29 2. When the mapping screen message appears, click OK. 3. Touch each screen as it displays “Please touch this monitor”. Following this sequence and touching each screen is called mapping the touch screens. 4. Touching all screens completes the mapping and the desktop reappears on the monitors. 5.
- Page 30 1. If you use a single VGA output for multiple monitors, please do not use the Multiple Monitor function. Just follow the regular procedure for calibration on each of your desktop monitors. 2. The Rotating function is disabled if you use the Multiple Monitor function. 3.
- Page 31 Click this icon to switch between Right and Left Button functions. Exit Exits the PenMount Monitor function. Configuring the Rotate Function 1. Install the rotation software package. 2. Choose the rotate function (0°, 90°, 180°, 270°) in the 3rd party software. The calibration screen appears automatically.
- Page 32 Monitor Mapping to adjust touch panel to search for device Setting Beep Beep On Touch Beep On Release Beep From System Beep Beep From Sound Card Linearization Style 9 points 25 points Double Click Time Shorter Longer Double Click Area Smaller Bigger OPD-1XX6A User Manual...
- Page 33 Normal mode Simulate the mouse mode Option Function Enable Constant Touch Enable Auto Right Click Enable Touch Enable Cursor Stabilization Constant Touch Area Auto Right Click Time OPD-1XX6A User Manual...
- Page 34 Tools Click OK to continue the settings. 4 Points Calibration Do 4 points alignment to match display. Clear and Calibrate Clear linearization parameter and do 4 points alignment. Linearization Do 9 points linearization for better touchscreen linearity. Draw Test Do draw test to verify the touch accuracy. OPD-1XX6A User Manual...
- Page 35 Display In this window, it shows the mode of display. Enable Multiple Monitors. Map to main display if system has only one display monitor Full Screen Lower Screen Left Screen Upper Screen Right Screen OPD-1XX6A User Manual...
- Page 36 Other Other mode of display. Quarter1~4 and Customized area. Active Area Drag active area to enable Active Area Function. OPD-1XX6A User Manual...
- Page 37 Hardware Saturn Hardware Configuration OPD-1XX6A User Manual...
- Page 38 About To display information about eGalaxTouch and its version. OPD-1XX6A User Manual...
-
Page 39: Appendix A: Board Dimensions
Appendix A: Board Dimensions Specifications Specifications Board Size 170 x 113 mm Chipset Realtek RTD2556T-CG Input 1 x VGA Port 1 x HDMI (Share with DVD-D) 1 x DVI-D (Share with HDMI) 1 x DP Port 1 x USB 2.0 (Type B) Output 1 x 24bit LVDS Full HD interface 1 x eDP... -
Page 40: Board Dimensions
Board Dimensions (units: mm) Figure A: Dimensions of TB-6802 (Top) Figure B: Dimensions of TB-6802 (Bottom) OPD-1XX6A User Manual...
Need help?
Do you have a question about the OPD-1086C and is the answer not in the manual?
Questions and answers