Table of Contents
Advertisement
Quick Links
These instructions apply only to the destination countries listed on the appliance's data
plate. This is a class 3 built-in oven.
TRANSLATION OF THE ORIGINAL INSTRUCTIONS
We recommend that you read this manual carefully. It includes all the instructions on
maintaining the esthetic qualities and functionality of the appliance you have purchased.
For more information about the product: www.smeg.com
4
4
8
8
8
8
8
9
10
10
12
14
14
16
16
16
17
18
20
24
24
24
24
26
27
29
29
34
35
3
Advertisement
Table of Contents

Subscribe to Our Youtube Channel
Related Manuals for Smeg Classica SF6302GVK


Summary of Contents for Smeg Classica SF6302GVK
-
Page 1: Table Of Contents
This is a class 3 built-in oven. TRANSLATION OF THE ORIGINAL INSTRUCTIONS We recommend that you read this manual carefully. It includes all the instructions on maintaining the esthetic qualities and functionality of the appliance you have purchased. For more information about the product: www.smeg.com... -
Page 2: Warnings
Warnings 1 Warnings • Do not allow children of less than 8 years of age approach the 1.1 General safety warnings appliance during operation. • Cleaning and maintenance should Injury to persons not be performed by children • This appliance and its accessible without supervision. - Page 3 Warnings • Turn off the appliance after use. • Do not use rough or abrasive materials or sharp metal scrapers. • DO NOT USE OR STORE FLAMMABLE MATERIALS NEAR • Do not use cleaning products THE APPLIANCE. containing chlorine, ammonia or bleach on the steel parts or those •...
- Page 4 Warnings • Do not use plastic dishes or Installation and maintenance containers for cooking or baking • THIS APPLIANCE MUST NOT BE food. INSTALLED IN A BOAT OR • Do not place sealed tins or CARAVAN. containers in the oven cavity. •...
- Page 5 Warnings • After carrying out any operation, • Before any operation on the check that the tightening torque of appliance (installation, gas connections is between maintenance, positioning or 10 Nm and 15 Nm. movement) always wear PPE. • After installation is complete, •...
-
Page 6: Purpose Of The Appliance
Warnings 1.2 Purpose of the appliance 1.4 This User Manual • This appliance is designed for This User Manual is an integral part of the appliance and must be kept intact and cooking or baking food in the available for users throughout the life cycle home. -
Page 7: How To Read The User Manual
Warnings To dispose of the appliance: 1.7 How to read the User Manual • Cut the power supply cable and remove This User Manual uses the following the cable together with the plug. definitions of terms: Electric voltage Warnings Danger of shock General information about the User Manual, about safety and for final •... -
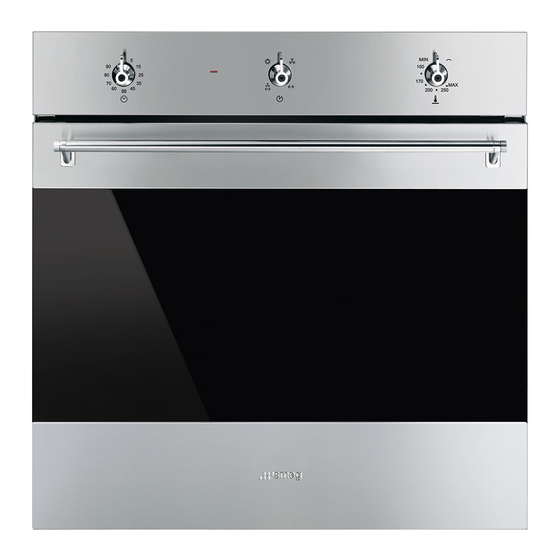
Page 8: Description
Description 2 Description 2.1 General description Gas / Electric fan grill oven models... - Page 9 Description Gas / Gas grill oven models 1 Control panel 6 Gas oven 2 Light 7 Gas grill (on some models only) 3 Gasket 8 Electric grill (on some models only) 4 Door Frame rack 5 Fan (on some models only)
-
Page 10: Control Panel
Description 2.2 Control panel Gas / Electric fan grill oven models Gas / Gas grill oven models... - Page 11 Description 1 Electromechanical minute minder timer 2 Electric grill heating element bulb (gas knob grill models excluded) In order to use the minute minder timer, the This turns on to indicate that the electric grill buzzer must be set by turning the knob is on.
-
Page 12: Other Parts
Description 2.3 Other parts 2.4 Available accessories Positioning shelves Rack The appliance has shelves for positioning trays and racks at various heights. The position heights go from the bottom upwards (see 2.1 General description). Cooling fan Used to hold containers containing food to be cooked. - Page 13 Description Tray (on some models only) Not all accessories are provided on all models. Oven accessories that may come into contact with food are made of materials that comply with the provisions of current laws. Used for collecting grease from foods on Original accessories supplied or the rack above.
-
Page 14: Use
Description 3 Use High temperature inside the oven during use 3.1 Warnings Danger of fire or explosion Improper use • Do not spray any spray products near Risk of damage to surfaces the appliance. • Do not use or leave flammable materials •... -
Page 15: Use Of Accessories
3.3 Use of accessories Tray rack (on some models only) The tray rack must be inserted into the tray. Racks and trays This way, the grease can be collected Racks and trays must be inserted into the separately from the food being cooked or side guides until they stop. -
Page 16: Using The Oven
3.4 Using the oven Using the gas grill (on some models only) If the electrical power is off, the High temperature inside the oven cooling fan will not work. Do not while in use light the oven manually. Danger of fire or explosion •... - Page 17 Using the electric grill (on some models List of features only) Gas burner High temperature inside the oven The heat radiating only from the while in use bottom allows you to complete the Danger of fire or explosion cooking/baking of foods that require a higher base temperature, •...
-
Page 18: Cooking Tips
3.5 Cooking tips Fan-assisted grill The air produced by the fan softens General tips the strong heatwave generated by • Use a fan function to achieve uniform the grill element, grilling perfectly cooking at several levels. even very thick foods. Perfect for •... - Page 19 Tips for baking cakes and cookies To save energy • It is preferable to use dark metal pans, • Turn off the oven a few minutes before the time required. Cooking will continue which help to absorb the heat better. for the remaining minutes with the heat •...
- Page 20 Cooking information table Static oven Convection oven Rack Weight Dishes position from Temperature Time Temperature Time (Kg) the bottom (°C) (minutes) (°C) (minutes) Lasagna 230 - 240 50 - 60 230 - 240 45 - 50 Cannelloni 220 - 230 25 - 30 220 - 230 25 - 30...
- Page 21 Table of conversions Weight Measurement Volume Metric Imperial Metric Imperial Metric Imperial 15 g 1/2 oz 5 mm 1/4 in 25 ml 1 fl oz 25 g 1 oz 1 cm 1/2 in 50 ml 2 fl oz 40 g 1 1/2 oz 2.5 cm 1 in...
-
Page 22: Cleaning And Maintenance
4 Cleaning and maintenance Ordinary daily cleaning Always use specific products only that do 4.1 Warnings not contain abrasives or chlorine-based acids. Improper use Pour the product onto a damp cloth and Risk of damage to surfaces wipe the surface, rinse thoroughly and dry with a soft cloth or a microfiber cloth. - Page 23 1. Open the door completely and insert two Cleaning the door glazing pins into the holes in the hinges, as We recommend always keeping the glass shown in the image. doors thoroughly clean. Use paper towels. If there are tough to clean spots, use a damp sponge and regular detergent.
-
Page 24: Cleaning The Oven Cavity
Cleaning and maintenance 3. Some models have an intermediate glass 6. Reposition the inner glass panel. Make panel. Remove the intermediate panel by sure you center and insert the four pins lifting it upwards. into their grooves in the door, using a little pressure. -
Page 25: Extraordinary Maintenance
Cleaning and maintenance Removal of the frame supports for racks/ 4.5 Extraordinary maintenance trays Removing and installing the oven gasket Removing the guide frames makes it easier To remove the oven gasket: to clean the sides of the oven. This must be •... - Page 26 Cleaning and maintenance Replacing the oven light 4. Loosen and remove the light bulb. Live parts Danger of shock • Unplug the appliance. 1. Remove all accessories inside the oven. 2. Remove the frame supports for racks/ trays. 3. Remove the light cover using a tool (e.g. Do not touch the halogen bulb with a screwdriver).
-
Page 27: Installation
Cleaning and maintenance 5 Installation Connection with a rubber hose Verify that all following conditions are met: 5.1 Gas connection • the hose is fixed to the hose connection with safety clamps; Gas leakage • no part of the hose is in contact with hot Danger of explosion walls (max. - Page 28 Cleaning and maintenance After having tightened the hose Carefully tighten the connector 3 to the gas connector(s), push the gas hose 6 onto the connector 1 of the appliance, inserting the hose connector and secure it with the clamp seal 2 supplied. 5 that is compliant with the standard in force.
- Page 29 Installation Connection to liquid gas Discharge of combustion products Use a pressure regulator and make the The combustion products may be extracted connection to the tank according to the by means of hoods connected to a natural provisions of current regulations. draft chimney whose efficiency is certain or via forced extraction.
- Page 30 Installation A Single natural draft chimney 4. Loosen the screws A and B. B Single chimney with extractor fan 5. Remove the lock that connects the thermocouple and glow plug attached C Directly outdoors with wall- or window- to the burner with the screw A. mounted extractor fan D Directly outdoors through wall Combustion products...
- Page 31 Installation Adjusting the minimum 4. Remove the knob and use a screwdriver to adjust the hole. The oven thermostat is equipped with a 5. In case liquid gas will be used, the screw to adjust the minimum. When adjustment screw must be screwed changing the type of gas supply, the clockwise as far as it will go.
-
Page 32: Electrical Connection
Installation 5.2 Electrical connection Fixed connection On the power line pole, install an Electric voltage omnipolar circuit breaker in compliance Danger of shock with the regulations on installation. The circuit breaker must be located in an • A qualified technician must complete the easily accessible place near the appliance. -
Page 33: Positioning
Installation 5.3 Positioning Location of the power cord Heavy appliance Risk of crush injuries • Move the appliance into the desired position with the help of a second person. Pressure on the open door Risk of damage to the appliance •... - Page 34 Installation Fitting bushes Overall dimensions of the appliance (mm) 1. Remove the bushing caps inserted into the front of the appliance. 2. Insert the appliance into the opening. 3. Secure the appliance to the cabinetry with the screws. 4. Cover the bushings with the caps that were removed.
- Page 35 Installation Positioning under the countertop (mm) Make sure that the rear/bottom of the appliance has an opening of approximately 60 mm.
- Page 36 Installation Recessed position (mm) Make sure that the top/rear of the appliance has an opening of approximately 35-40 mm depth.
Need help?
Do you have a question about the Classica SF6302GVK and is the answer not in the manual?
Questions and answers