Advertisement
Quick Links
NOTE: Due to advancements in related
industry technologies and future product
development, the information in this guide is
subject to change without notice.
For more information about product set up, use, testing procedures
and troubleshooting methods, please contact the Technical Support
Division of Customer Service via the email addresses listed below:
Europe, Middle East, Africa, Russia & UK
A JCM Product
Quick Reference Guide
GEN2U
Americas
support@jcmglobal.com
support@jcmglobal.eu
Asia & Oceania
asiasupport@jcmglobal.com
© 2016, JCM Global Corporation
Part No. 960-000177R_Rev. A
™
Printer
Advertisement

Related Manuals for JCM GEN2U


Summary of Contents for JCM GEN2U
- Page 1 Technical Support Division of Customer Service via the email addresses listed below: Americas support@jcmglobal.com Europe, Middle East, Africa, Russia & UK support@jcmglobal.eu Asia & Oceania asiasupport@jcmglobal.com © 2016, JCM Global Corporation Part No. 960-000177R_Rev. A...
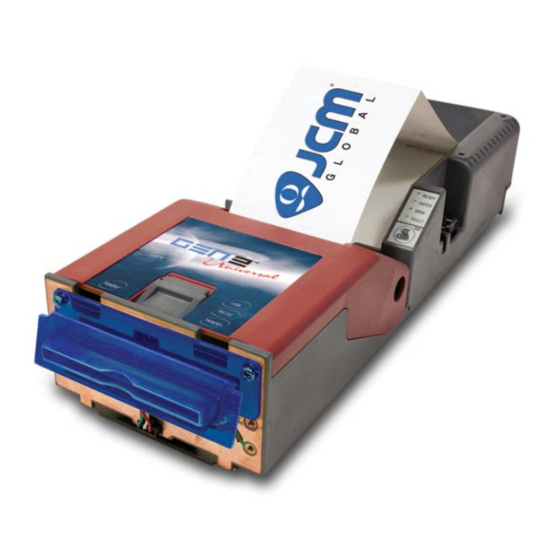
- Page 2 GEN2U™ Printer QUICK REFERENCE TROUBLESHOOTING GUIDE Introduction This Quick Reference Guide is designed for use with the GEN2U line of Printers (Figure 1). Figure 1 Typical GEN2U Printer This Guide covers the set-up and use of the following Printers: PSA-66-ST2.
- Page 3 GEN2U™ Printer Operator Indicators (LED) And Controls The GEN2U™ Printer features a Keypad with LED Status Indicators and a FEED Button (Figure 2). Printer Status indicators include a Front Bezel Light and the four (4) Keypad LEDs. Refer to Table 1 below for GEN2U Keypad LED Status Codes.
-
Page 4: Self-Test Procedures
Self-Test Procedures The Self-Test Procedures can be used to print a “Configuration Ticket” and verify that the GEN2U Print function operates normally. The “Configuration Ticket” can be used to check print quality. To run a Self-Test, press and hold down the FEED button during... -
Page 5: Printer Sensor Functions
GEN2U™ Printer PRINTER SENSOR FUNCTIONS There are six (6) primary Sensor functions on the GEN2U Printer. Bezel light and Keypad LEDs may indicate a Sensor-related error condition (refer to Table 3). Table 3 GEN2U Printer Sensor Status Sensor Location/Description Located in the Print Head, Paper Out indicates that paper is Paper Out not loaded in the GEN2U Printer. - Page 6 Most Printer Errors occur due to paper running out or user interven- tion. See Table 4 below for Error Descriptions and recommended solutions. Refer to Figure 2 and Table 1 (Page 3) for Error Indicators. Table 4 GEN2U Printer Errors Error Description Remedy Paper Out Paper is not detected.
- Page 7 Firmware Upgrade Application (FLDFU) (Figure 4). Figure 4 FutureLogic Device Firmware Upgrade Application UI Window 2. Make sure the GEN2U Printer is powered ON. 3. Connect a USB cable from the PC to the Printer’s USB port (right side). NOTE: A USB Hub is recommended. Connect the USB Hub between the PC and the GEN2U Printer.
- Page 8 GEN2U™ Printer 4. To verify communication between the GEN2U Printer and the Device Firmware Upgrade Application, look for the Printer Detected indicator (Figure 5 ) in the window. Figure 5 “Printer Detected” Indicator 5. Click the button to select the desired...
- Page 9 Printer. Click the button (Figure 7 ) to continue. Open Figure 7 Select the Firmware File to Download 7. Click the button (Figure 8 Full Upgrade Figure 8 Select the Full Upgrade Button © 2016, JCM Global Corporation Part No. 960-000177R_Rev. A...
- Page 10 2. Insert the Upgrade Key into the 4-Pin Connector (Figure 10 a). 3. Click Yes in the Upgrading Boot/BSP-Alert! dialog box (Figure 9 a). Upgrade Key 4-pin Connector Figure 10 Inserting Upgrade Key in 4-pin Connector (Right side) © 2016, JCM Global Corporation Part No. 960-000177R_Rev. A...
- Page 11 Printer. Continue to hold the FEED button until the Configuration Ticket starts to print. 10. Verify that the Firmware version printed on the Configura- tion Ticket matches the version downloaded to the Printer. © 2016, JCM Global Corporation Part No. 960-000177R_Rev. A...
- Page 12 Printer. JCM P ONNECTING TO THE RINTER ASIC RIVER To connect to the JCM Printer Basic Driver: 1. Click the Start Button on the PC Desktop, then click on Programs 2. Scroll down to , then click the icon. JCM Printer Basic Driver Opening Screen appears (Figure 11).
- Page 13 GEN2U™ Printer JCM P RINTER ASIC RIVER CREEN The JCM Printer Basic Driver Main Screen (Figure 12) displays three main sections: 1. PRINTER CONFIGURATION (Figure 12 a) 2. COMMANDS Figure 12 3. PRINTER STATUS Figure 12 Figure 12 JCM Printer Basic Driver Main Screen NOTE: Descriptions of these features appear on Page 14.
- Page 14 • Get Value - Retrieves the Printer CRC information PRINTER STATUS (Figure 12 c) This section displays the current status of the Printer. NOTE: Any active condition appears highlighted in RED (Figure 12 d) © 2016, JCM Global Corporation Part No. 960-000177R_Rev. A...
-
Page 15: Preventive Maintenance
GEN2U™ Printer PREVENTIVE MAINTENANCE To ensure high performance printing quality, the GEN2U Printer must be cleaned periodically using the following methods: – Perform the Cleaning Card Method every three (3) months. – Manual Cleaning should be performed every six (6) months. -
Page 16: Manual Cleaning
Ticket-In Slot approximately 1 inch from the right edge of the Slot. – Presenter Assembly (refer to Figure 14 on page 17) – Print Head (refer to Figure 15 on page 17) – Paper Tray (Figure 13 a) © 2016, JCM Global Corporation Part No. 960-000177R_Rev. A... - Page 17 6. Open the Print Head Release Lever (Figure 15 a). 7. Clean the Print Head (Figure 15 b) using a Cleaning Swab (Figure 15 c). Clean Print Head (b) with Cleaning Swab (c) Figure 15 Print Head Release Lever/Print Head © 2016, JCM Global Corporation Part No. 960-000177R_Rev. A...
- Page 18 Cleaning Paper Low Sensor (a) with Cleaning Swab Paper Low (Ticket Low) Sensor Printer Tray (Drawer Open) Sensor Printer (Lid) Open Sensor Ticket Taken (Paper Taken) Sensor Figure 16 Sensor Locations © 2016, JCM Global Corporation Part No. 960-000177R_Rev. A...
- Page 19 Figure 17 Platen Roller/Pinch Roller 10. Close the Print Head Release Lever (refer to Figure 15 on page 17). 11. Use a Cleaning Wipe to wipe and clean the Upper Pinch Roller (Figure 17 b). © 2016, JCM Global Corporation Part No. 960-000177R_Rev. A...
- Page 20 GEN2U™ Printer Figure 18 GEN2U Printer Presenter Rollers 12. Wipe and clean the Presenter Rollers (Figure 18 a) with a Cleaning Wipe. 13. Use a clean, dry Micro-fiber cloth to wipe excess liquid from all surfaces. 14. Reload the Tickets.
- Page 21 JCM Europe (UK Office) Unit B, Third Avenue Denbigh West Business Park Bletchley, Milton Keynes Buckinghamshire MK1 1DH UK Phone: +44 (0) 190-837-7331 Fax: +44 (0) 190-837-7834 E-mail: info@jcmglobal.eu GEN2U™ Printer Quick Reference Guide © 2016, JCM Global Corporation Part No. 960-000177R_Rev. A...
- Page 22 N.T. Hong Kong Phone: +852-2429-7187 Fax: +852-2929-7003 E-mail: asiasupport@jcmglobal.com JAPAN CASH MACHINE CO., LTD. (HQ) 2-3-15, Nishiwaki, Hirano-ku Osaka 547-0035 JAPAN Office: +81-6-6703-8400 Fax: +81-6-6707-0348 E-mail: Shohin@jcm-hq.co.jp GEN2U™ Printer Quick Reference Guide © 2016, JCM Global Corporation Part No. 960-000177R_Rev. A...
Need help?
Do you have a question about the GEN2U and is the answer not in the manual?
Questions and answers