Table of Contents
Advertisement
Quick Links
TO REDUCE THE RISK OF FIRE OR ELECTRIC SHOCK,
SECTION « A » DESCRIPTION
Introduction. . . . . . . . . . . . . . . . . . . . . . . . . . . . . . . . . . . . . . . . . . . . . . . . .
Construction . . . . . . . . . . . . . . . . . . . . . . . . . . . . . . . . . . . . . . . . . . . . . . . .
Shipping . . . . . . . . . . . . . . . . . . . . . . . . . . . . . . . . . . . . . . . . . . . . . . . . . . . .
Installation warnings . . . . . . . . . . . . . . . . . . . . . . . . . . . . . . . . . . . . . . . . . .
Distances to respect . . . . . . . . . . . . . . . . . . . . . . . . . . . . . . . . . . . . . . . . . . .
Installation . . . . . . . . . . . . . . . . . . . . . . . . . . . . . . . . . . . . . . . . . . . . . . . . . .
Operation / instruction for oven and proofer. . . . . . . . . . . . . . . . . . . . . . . . A6
Operation for proofer. . . . . . . . . . . . . . . . . . . . . . . . . . . . . . . . . . . . . . . . . .
Troubleshooting . . . . . . . . . . . . . . . . . . . . . . . . . . . . . . . . . . . . . . . . . . . . .
Oven maintenance and cleaning . . . . . . . . . . . . . . . . . . . . . . . . . . . . . . . . .
For more information, please contact our office: . . . . . . . . . . . . . . . . . . . .
Optional auto steam injection. . . . . . . . . . . . . . . . . . . . . . . . . . . . . . . . . . .
Optional watlow control operation. . . . . . . . . . . . . . . . . . . . . . . . . . . . . . .
CA6 . . . . . . . . . . . . . . . . . . . . . . . . . . . . . . . . . . . . . . . . . . . . . . . . . . . . . .
CA12 . . . . . . . . . . . . . . . . . . . . . . . . . . . . . . . . . . . . . . . . . . . . . . . . . . . . .
CAOP6 . . . . . . . . . . . . . . . . . . . . . . . . . . . . . . . . . . . . . . . . . . . . . . . . . . .
CAOP12 . . . . . . . . . . . . . . . . . . . . . . . . . . . . . . . . . . . . . . . . . . . . . . . . . .
SECTION « E » COMPONENT PARTS
Component parts. . . . . . . . . . . . . . . . . . . . . . . . . . . . . . . . . . . . . . . . . . . .
SECTION « F » CONTROL PANELS
CAOP6 120V/208V/1PH & 120V/240V/1PH . . . . . . . . . . . . . . . . . . . . . F1
CAOP6 120V/208V/3PH & 120V/240V/3PH . . . . . . . . . . . . . . . . . . . . . F3
CAOP6 220V/1PH/60 Hz & 220V/1PH/50 Hz . . . . . . . . . . . . . . . . . . . . F5
CAOP6 120V/208V/1PH & 120V/240V/1PH (WATLOW) . . . . . . . . .
CA6, CA12, CAOP6 & CAOP12
IMPORTANT SAFETY INSTRUCTIONS
SAVE THESE INSTRUCTIONS
CAREFULLY FOLLOW THESE INSTRUCTIONS
TABLE OF CONTENTS
DANGER
PAGE
A3
A4
A8
E1
F7
Advertisement
Table of Contents
Troubleshooting

Subscribe to Our Youtube Channel
Related Manuals for Doyon CA12


Summary of Contents for Doyon CA12
-
Page 1: Table Of Contents
Troubleshooting ..........Oven maintenance and cleaning ....... . . - Page 2 CA6 220V/1PH/50 Hz ........CA12 120V/208V/1PH & 120V/240V/1PH ..... G5 CA12 120V/208V/3PH &...
-
Page 3: Introduction
This Circle Air oven is manufactured with first quality material by experienced technicians. Proper installation and maintenance will guarantee a reliable service for years to come. A nameplate fixed to the front or right side of the oven specifies the model number, serial number, voltage and amperage. -
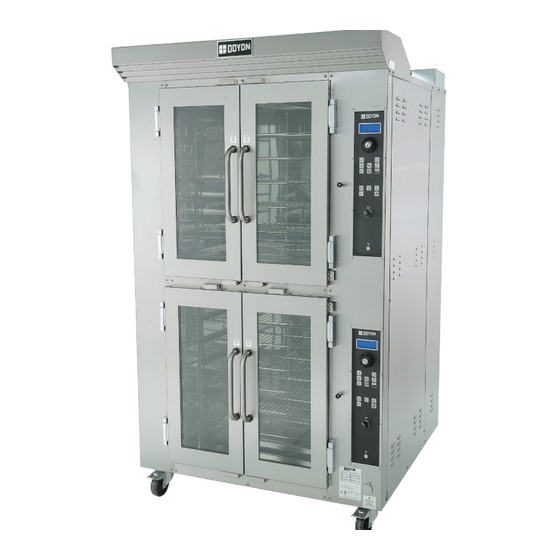
Page 4: Construction
CONSTRUCTION You just bought the most advanced oven in the world, "DOYON" technology at its best. This oven is manufactured using the highest quality components and material. The oven gives a perfect uniform baking with its unique Circle Air convection system. The DOYON oven is designed with parts that are easy to find. -
Page 5: Installation Warnings
Installation and service must be done by specialised technicians. Contact a certified electrician and plumber for set up. The oven must be connected to the utility and electrically grounded in conformity to the effective local regulations. If these are not established, the oven must be connected according to the Canadian Electrical Code (CSA-C22.1-XX) or National Electrical Code (NFPA 70-XX). -
Page 6: Distances To Respect
DISTANCES TO RESPECT Back and sides of the oven: 1 inch. Top of the oven: a clearance of 12 inches to the ceiling must exist to permit adequate venting. Floor: 4 inches minimum. Sides of the oven: do not install other than easily removable equipment for service and maintenance (not closer than 1 inch). -
Page 7: Installation
Connect the steam system (1/4 NPT) to the cold water distribution network. We highly recommend to use a water filter to eliminate minerals in the water. We suggest you to use CUNO # CFS6135 (Doyon part number PLF240). Do not adjust the needle valves, it has been done at the factory. -
Page 8: Troubleshooting
5. Set the timer to the desired value and start it. (See "TIMER" adjustment on next page.) NOTE: The timer does not shut the oven off at the end of its cycle. It simply activates the buzzer. 6. Wait until the product is ready. Do not open the doors until the product is done. -
Page 9: Instructions For Oven
(Ex: 25 seconds = set 2500 on green display). To inject steam in the oven, press and release the START steam timer button (while the fan is running) to have your setting time steam injection. -
Page 10: Operation Of The Proofer
OPERATION OF THE PROOFER 1. Switch "ON". 2. Set the thermostat control at 100 3. Set the humidity control at approximately : 4 or 5 for CAOP6 and CAOP12 4. If there is too much fog and water drips from the glass doors, adjust humidity control to a lower number. -
Page 11: Troubleshooting
• Make sure: the thermostat is adjusted to a temperature high enough to turn on the pilot light. 2- If the oven blowers are not on, check the overload relays located in the control compartment. If anyone of these is disengaged, call for a qualified technician. - Page 12 If the oven is baking too much on the sides, it is possible that the fan is not cycling properly. Verify if the motor turns 2.5 minutes in a direction, stops 30 seconds and starts for 2.5...
- Page 13 If the OVERHEAT WARNING light is on, and you hear the warning buzzer. OPTIONAL Manual fill water pan. The warning red light in the front control panel stays on when the water pan is full. If there is no light in the proofer. If there is no heat in the proofer.
-
Page 14: Oven Maintenance And Cleaning
• Once a year or as needed, clean the reservoir of the proofer. (See parts description for localization.) Step by step Clean the inside of the oven and the proofer with water and soap. Take out the grills. (The grills of the oven could be cleaned with "Easy-Off".) -
Page 15: For More Information, Please Contact Our Office
FOR MORE INFORMATION, PLEASE CONTACT OUR OFFICE: DOYON EQUIPMENT INC. 1255, rue Principale Linière, Qc, Canada G0M 1J0 Tel. : 1 (418) 685-3431 Canada : 1 (800) 463-1636 U.S. : 1 (800) 463-4273 FAX : 1 (418) 685-3948 Internet: http://www.doyon.qc.ca E-Mail : doyon@doyon.qc.ca... -
Page 16: A14
AUTOMATIC STEAM OPTION INTERVALS TIMES SETTING (GREEN) INJECTION TIMES SETTING (RED) SCALE ADJUSTMENT By pushing the GREEN button, the button will light up and the automatic system injection will start. The injection will be done as per the pre-adjustment time on the automatic steam timer. The standard steam timer (white light) will light up during the steam injection. -
Page 17: A15
Digital display must light up, if not, verify the breaker on the front panel. 3. Let the oven heat until the set temperature is reached, the LOAD1 red light on the watlow control will go off when the temperature is stabilized. - Page 18 The Watlow temperature control can record 12 different menus. It must be programmed before use. It will save its programs in case of power failure. Each menu includes 3 "STEPS" and each step includes : • temperature • time • "EVENT" To access the programming mode : •...
- Page 19 CLOCK). The screen will show 00:00. Note: You should always use menu #1 for preheating because the controls starts automatically with this menu. Never use program #1 for a steam cycle because it will start automatically when the oven is Suggested values Suggested values WARNING turned on.
- Page 20 EXAMPLE 2 (Cooking program with steam cycle) -For menu #2, we will program it so that we have a steam injection of 20 seconds, a cooking time of 20 minutes at 375°F followed by a 15 seconds buzzer. To access the programming mode: •...
- Page 21 After fulfillment of this program: • The oven will continue to heat because there was a temperature included in step 3. If the temperature at that step would have been of 0°F, the oven would have stopped at the end of the program.
-
Page 22: Section « B » Dimensions
SECTION DIMENSIONS... -
Page 23: Ca6
44 1/4 LUBRIFICATION ROUL. À BILLES (MENSUELLEMENT) BEARING LUBRICATION (MONTLY) OVEN INTERIOR DIMENSIONS HEIGHT 28 1/2" WIDTH 27" TO 35" DEPTH 33 1/2" CA6 & STAND TIMER OMRON H5CL OMRON E5CS TIMER OMRON H5CL... - Page 24 CA6 & STAND 41 1/4...
- Page 25 CA6 & STAND ENTRÉE D’EAU Ø1/4" WATER INLET %%1/4" ENTRÉE ÉLECTRIQUE ELECTRICAL INLET 43 1/2...
- Page 26 CA6 & STAND LUBRIFICATION DU ROULEMENT À BILLE (ANNUELLEMENT BEARING LUBRICATION (YEARLY)
-
Page 27: Ca12
76 1/4 LUBRIFICATION ROUL. À BILLES BEARING LUBRICATION (MONTLY) NOTE: GENERAL DIMENSIONS SHOULD BE RESPECTED. CA12 44 1/4 TIMER OMRON H5CL OMRON E5CS TIMER OMRON H5CL OMRON H5CL OMRON E5CS TIMER OMRON H5CL (MENSUELLEMENT) CA12 OVEN INTERIOR DIMENSIONS HEIGHT 28 1/2"... - Page 28 CA12 76 1/4 NOTE: GENERAL DIMENSIONS SHOULD BE RESPECTED. CA12...
- Page 29 CA12 ENTRÉE D’EAU Ø1/4" WATER INLET Ø1/4" ENTRÉE ÉLECTRIQUE ELECTRICAL INLET NOTE: GENERAL DIMENSIONS SHOULD BE RESPECTED. CA12...
- Page 30 CA12 LUBRIFICATION ROUL. À BILLES (ANNUELLEMENT) BEARING LUBRICATION (YEARLY) NOTE: GENERAL DIMENSIONS SHOULD BE RESPECTED. CA12...
-
Page 31: Caop6
CAOP6 44 1/4 TIMER OMRON H5CL OMRON E5CS TIMER OMRON H5CL CAOP6 LUBRIFICATION ROUL. À BILLES (MENSUELLEMENT) BEARING LUBRICATION (MONTLY) OVEN INTERIOR DIMENSIONS HEIGHT 28 1/2" WIDTH 27" TO 35" DEPTH 33 1/2" PROOFER INTERIOR DIMENSIONS HEIGHT 26 1/2" WIDTH 27 1/4"... - Page 32 76 1/4 NOTE: GENERAL DIMENSIONS SHOULD BE RESPECTED. CAOP6W 46 1/4 CAOP6 WATLOW LUBRIFICATION ROUL. À BILLES (MENSUELLEMENT) BEARING LUBRICATION (MONTLY) OVEN INTERIOR DIMENSIONS HEIGHT 28 1/2" WIDTH 27" TO 35" DEPTH 33 1/2" PROOFER INTERIOR DIMENSIONS HEIGHT 26 1/2"...
- Page 33 CAOP6 76 1/4 NOTE: GENERAL DIMENSIONS SHOULD BE RESPECTED. CAOP6...
- Page 34 CAOP6 ENTRÉE D’EAU Ø1/4" WATER INLET Ø1/4" ENTRÉE ÉLECTRIQUE ELECTRICAL INLET NOTE: GENERAL DIMENSIONS SHOULD BE RESPECTED. CAOP6...
- Page 35 CAOP6 LUBRIFICATION ROUL. À BILLES (ANNUELLEMENT) BEARING LUBRICATION (YEARLY) NOTE: GENERAL DIMENSIONS SHOULD BE RESPECTED. CAOP6...
-
Page 36: Caop12
CAOP12 CAOP12... - Page 37 CAOP12 76 1/4 NOTE: GENERAL DIMENSIONS SHOULD BE RESPECTED. CAOP12...
- Page 38 CAOP12 CAOP12...
- Page 39 CAOP12 CAOP12...
-
Page 40: Component Parts
SECTION COMPONENT PARTS... - Page 41 CAOP12 CAOP12...
- Page 42 INFINITY SWITCH KNOB THERMOSTAT 110F THERMOSTAT KNOB 110F THERMOSTAT BEZEL RED PILOT LIGHT LEFT DOOR FOR OVEN 14 1/4" X 30 1/4" DOOR GASKET(10`) DOOR HANDLE STAINLESS TUBING DOOR HANDLE (BLACK) RIGHT DOOR FOR OVEN 14 1/4" X 30 1/4"...
- Page 43 CAOP12 CAOP12...
- Page 44 Item Part Number ELD050 ELA350 ELS950 ELM570 ELT506 ELT503 ELT507 ELT507 Model : CAOP12E Description INCANDESCENT LIGHT SOCKET HALOGEN BULB 100 WATTS 120V BUZZER 120V DOOR SWITCH HIGH LIMIT TEMPERATURE HIGH LIMIT SWITCH 140°F HIGH TEMPERATURE LIMIT SWITCH 110°F HIGH LIMIT TEMPERATURE 110°F View : RIGHT SIDE Quantity...
- Page 45 CAOP12 CAOP12...
- Page 46 Item Part Number QUF350 ELD050 ELA275 ELC860 ELC615 ELC617 ELM730 ELE130 ELE132 ELS880 ELE165 ELE167 ELT712 ELC630 ELC640 Model : CAOP12E Description ELECTRIC FLOAT INCANDESCENT LIGHT SOCKET BULB 60W 130V CONTACTOR 2P 30A 110V RELAY 10A 2P COIL 110V BASE PROOFER FAN BLOWER COIL ELEMENT 120V 1500W COIL ELEMENT 240V 1500W(50Hz)
- Page 47 CAOP12 CAOP12...
- Page 48 Item Part Number ELP830 ELP840 ELM800M MOTOR .75HP 1PH 115/208-230V 60Hz/50Hz A.O. SMITH ELM820M MOTOR 3/4HP 3PH 208/230/460V 60Hz/50Hz A.O. SMITH ELM765 ELV590 ELS880 PLF100 Model : CAOP12E Description CONTROL PANEL 240V 1PH DOUBLE CONTROL PANEL 208V 3PH DOUBLE GEARBOX MOTOR 1/8HP 1PH 115V NEEDLE VALVE SOLENOID VALVE 110/120V 50/60Hz WATER FILTER...
- Page 49 CAOP12 CAOP12...
- Page 50 Item Part Number QUC610 QURB100 QURB20 QURB40 ELM400 Model : CAOP12E Description #4L78 78" BELT FLANGE BEARING BEARING #KL44610 BEARING #KL44643 ROLLER LEVER SWITCH View : TOP Quantity...
- Page 51 CAOP6W CAOP6 WATLOW...
- Page 52 SWIVEL CASTER WITH BRAKE LEFT DOOR FOR PROOFER 14 1/4"X28 3/4" DOOR GASKET ((10`) DOOR HANDLE STAINLESS TUBING DOOR MAGNET LEFT DOOR FOR OVEN 14 1/4" X 30 1/4" DOOR GASKET ((10`) DOOR HINGE MOTOR BLOWER BAKING CONTROL WATLOW RIGHT DOOR FOR OVEN 14 1/4" X 30 1/4"...
- Page 53 CAOP6W CAOP6 WATLOW...
- Page 54 Item Part Number ELE165 ELE167 ELE130 ELE132 ELM730 ELM570 ELS950 ELF960 ELF855 ELC800 GAT100 ELD050 ELA275 ELA290 ELC615 ELC617 ELS880 QUF350 ELT503 ELT507 ELC630 ELC640 Model : CAOP6 ELECT. WATLOW Description IMMERSION ELEMENT 120V 1500W IMMERSION ELEMENT 240V 1500W COIL ELEMENT 120V 1500W COIL ELEMENT 240V 1500W PROOFER FAN BLOWER DOOR SWITCH...
-
Page 56: Control Panels
SECTION CONTROL PANELS... - Page 57 240 VOLTS 1 PHASE SIMPLE CAOP6 X4 X2 H1 H3 P240S−C6...
- Page 58 OVERLOAD 2.5 - 4 Amps. (2 FOR CA-12 & CAOP-12) TRANSFORMER 120/240 A 12/24, 100VA TERMINAL BLOCK 30A BRIDGE RECTIFIER 1000V, 35A FUSE HOLDER 30A 250V 2P FUSE 8A 250V LITTLE-FUSE HOLDER 30A 300V LITTLE-FUSE 3A Quantity View : INSIDE (See OVEN BACK)
- Page 59 208 VOLTS 3 PHASES SIMPLE CAOP6 X4 X2 H1 H3 P208S−C6...
- Page 60 OVERLOAD 2.5 - 4 Amps.(2 FOR CA-12 & CAOP-12) TRANSFORMER 120/240 A 12/24, 100VA BRIDGE RECTIFIER 1000V, 35A TERMINAL BLOCK 30A FUSEHOLDER 30A 250V 3P FUSE 8A 250V LITTLE-FUSE HOLDER 30A 300V LITTLE-FUSE 3A Quantity View : INSIDE (See OVEN BACK)
- Page 61 220 VOLTS 1 PHASE SIMPLE CA6 X4 X2 H1 H3 P240S−C7...
- Page 62 TRANSFORMER 120/240 A 12/24, 100VA TERMINAL BLOCK 30A BRIDGE RECTIFIER 1000V, 35A FUSE HOLDER 30A 250V 2P FUSE 8A 250V LITTLE-FUSE HOLDER 30A 300V LITTLE-FUSE 3A TRANSFORMER 120/240 TO 120/240, 350VA 50 Hz Quantity View : INSIDE (See OVEN BACK)
- Page 63 240 VOLTS 1 PHASE SIMPLE CAOP6 P240SC6W...
- Page 64 OMRON CONTROL TIMER (11 PIN) H3CR 11 PIN BASE CONTROL RELAY 12A COIL 120V CONTROL RELAY BASE TERMINAL BLOCK 30A FUSE HOLDER 30A 250V 2P FUSE 8A 250V LITTLE-FUSE HOLDER 30A 300V LITTLE-FUSE 3A Quantity View : INSIDE (See OVEN BACK)
-
Page 65: Electric Schematics
SECTION ELECTRIC SCHEMATICS... - Page 66 OVEN 5 A. SWITCH HIGH LIMIT 140° HIGH LIMIT 110° COOLING BULB P.L. R1−7 R1−4 RACK SWITCH ELECTRONIC TIMER 1 THERMOSTAT COOKING TIMER H5CX (MODE A−1) COOKING SWITCH BUZZER 2.5KW EACH ELEMENT 120 / 208 120 / 240 3/4HP MOTOR TOTAL POWER: 13 Kw 3 A.
- Page 67 MOTOR SECONDARY TRANSFORMER, MAKE SURE THAT THE PHASE FEEDER WITH THE HIGHEST VOLTAGE (HIGH LEG) IS CONNECTED TO L3 IN THE SUPPLY BOX OF THIS OVEN (120 / 240V. 3 PH. SYSTEMS). 3 A. M2−44 120 / 208 35A 33.5A 43A 120 / 240 31A 30.5A 38A...
- Page 68 120−240V> 12−24V 3 A. 0.125HP MOTOR M2−44 TOTAL POWER: 11.5 Kw 60 Hz STEAM TIMER H5CX (MODE D) STEAM SWITCH OVEN VALVE HIGH LIMIT 350VA 240−480V> 120−240V ALTERNATE TRANSFORMER − ROTATING RACK (GEAR BOX) CA6 1 PHASE 60 Hz 07/06/04 M.
- Page 69 12−24V 3 A. 0.125HP MOTOR M2−44 TOTAL POWER: 11.5 Kw 50 Hz OL1−95 STEAM TIMER H5CX (MODE D) STEAM SWITCH OVEN VALVE HIGH LIMIT 350VA 240−480V> 120−240V ALTERNATE TRANSFORMER − ROTATING RACK (GEAR BOX) CA6 1 PHASE 50 Hz 07/06/04 M.
- Page 70 (OVEN 1) 5 A. SW 1.1 COOKING TIMER H5CX (MODE A−1) HIGH LIMIT COOKING BULB 110°F SWITCH BUZZER (OVEN 2) 5 A. SW 2.1 COOKING TIMER H5CX (MODE A−1) COOKING SWITCH BULB BUZZER 2.5KW EACH ELEMENT L1 T1 L1 T1 M−1...
- Page 71 OVEN VALVE HIGH LIMIT OL2−95 STEAM TIMER H5CX (MODE D) OVEN VALVE HIGH LIMIT 100 VA 120−240V> 12−24V − M−3 0.125HP GEAR BOX M3−44 ROTATING RACK CA12 3 PHASES 60 Hz 08/06/04 M. FAUCHER STANDARD CA12_3 NONE 1 / 1...
- Page 72 OVEN 5 A. SWITCH HIGH LIMIT HIGH 110° LIMIT 140° COOLING P.L. PROOFER SWITCH 20 A. 20 A. LIQUID 40 W LEVEL BULB PROOFER VALVE R1−7 R1−4 RACK SWITCH ELECTRONIC DOOR TIMER 1 SWITCH 95 96 COOKING TIMER THERMOSTAT H5CX (MODE A−1)
- Page 73 3/4HP SECONDARY TRANSFORMER, MAKE SURE THAT MOTOR THE PHASE FEEDER WITH THE HIGHEST VOLTAGE (HIGH LEG) IS CONNECTED TO L3 IN THE SUPPLY BOX OF THIS OVEN (120 / 240V. 3 PH. SYSTEMS). 3 A. 0.125HP MOTOR M2−44 120 / 208 120 / 240 TOTAL POWER: 16.5 Kw 60 Hz...
- Page 74 (OVEN 1) 5 A. SW 1.1 COOKING TIMER H5CX (MODE A−1) HIGH LIMIT BULB 110°F BUZZER (OVEN 2) 5 A. SW 2.1 COOKING TIMER H5CX (MODE A−1) PROOFER 5 A. SWITCH BULB BUZZER 20 A. 20 A. LIQUID LEVEL (PROOFER)
- Page 75 BLUE DELTA SECONDARY TRANSFORMER, MAKE SURE THAT THE PHASE FEEDER WITH THE HIGHEST VOLTAGE (HIGH LEG) IS CONNECTED TO L3 IN THE SUPPLY BOX OF THIS OVEN (120 / 240V. 3 PH. SYSTEMS). 100 VA 120−240V> 12−24V 3 A. 0.125HP GEAR BOX M3−44...
- Page 76 OVEN 5 A. SWITCH START STOP HIGH LIMIT HIGH 110° LIMIT 140° COOLING P.L. PROOFER SWITCH 20 A. 20 A. LIQUID 40 W LEVEL BULB PROOFER VALVE R1−7 R1−4 RACK SWITCH ELECTRONIC DOOR TIMER 1 SWITCH 95 96 COOKING TIMER THERMOSTAT H5CX (MODE A−1)
- Page 77 3/4HP SECONDARY TRANSFORMER, MAKE SURE THAT MOTOR THE PHASE FEEDER WITH THE HIGHEST VOLTAGE (HIGH LEG) IS CONNECTED TO L3 IN THE SUPPLY BOX OF THIS OVEN (120 / 240V. 3 PH. SYSTEMS). 3 A. 0.125HP MOTOR M2−44 120 / 208 120 / 240 TOTAL POWER: 16.5 Kw 60 Hz...
- Page 78 OVEN 5 A. SWITCH HIGH LIMIT 140° 120/24V HIGH LIMIT 110° HALO. COOLING P.L. PROOFER SWITCH 20 A 20 A LIQUID LEVEL PROOFER BULB VALVE L1 T1 L2 T2 L3 T3 ELECTRONIC TIMER R2−4 RACK SWITCH DOOR SWITCH 3−32V DC STEAM 3−32V DC...
- Page 79 FOR SUPPLY SYSTEMS CONSISTING OF A DELTA MOTOR SECONDARY TRANSFORMER, MAKE SURE THAT THE PHASE FEEDER WITH THE HIGHEST VOLTAGE (HIGH LEG) IS CONNECTED TO L3 IN THE SUPPLY BOX OF THIS OVEN (120 / 240V. 3 PH. SYSTEMS). 100 VA 120−240V> 12−24V 3 A.
-
Page 80: Limited Warranty
Doyon Equipment Inc. does hereby exclude and shall not be liable to purchaser for any consequential or incidental damages including, but not limited to, damages to property, damages for loss of use, loss of time, loss of profits or income, resulting from any breach or warranty.
Need help?
Do you have a question about the CA12 and is the answer not in the manual?
Questions and answers