Table of Contents
Advertisement
Available languages
Available languages
Quick Links
Item #1000 284 936
Model #FSS60428RST
USE AND CARE GUIDE
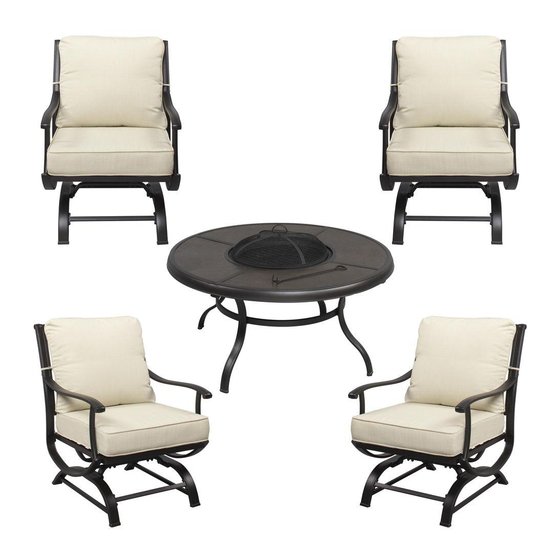
REDWOOD VALLEY 5PC FIRE PIT SET
Questions, problems, missing parts? Before returning to the store call
Hampton Bay Customer Service
8 a.m. - 6 p.m., EST, Monday-Friday
1-855-HD-HAMPTON
HAMPTONBAY.COM
THANK YOU
e pit set. We strive to continually create
quality products designed to enhance your home. Visit us online to see our full line of products available for your home improvement needs.
Thank you for choosing Hampton Bay!
Advertisement
Chapters
Table of Contents

Subscribe to Our Youtube Channel
Related Manuals for HAMPTON BAY FSS60428RST


Summary of Contents for HAMPTON BAY FSS60428RST
- Page 1 HAMPTONBAY.COM THANK YOU e pit set. We strive to continually create quality products designed to enhance your home. Visit us online to see our full line of products available for your home improvement needs. Thank you for choosing Hampton Bay!
-
Page 2: Table Of Contents
Table of Contents Pre-Assembly................3 Table of Contents ............2 Planning Assembly..............3 Safety Information ..............2 Product Caution ..............2 Hardware Included..............3 Safety Warnings ..............2 Chair Package Contents............4 Warranty ..............2 Table Package Contents............5 What is Covered.............. -
Page 3: Pre-Assembly
Pre-Assembly PLANNING ASSEMBLY Read all instructions before assembly. To avoid damaging this product, assemble it on a soft, non -abrasive surface such as carpet or cardboard. NOTE: More than one person may be required to complete the assembly of this product. HARDWARE INCLUDED NOTE: Hardware not shown to actual size. -
Page 4: Chair Package Contents
Pre-Assembly (continued) CHAIR PACKAGE CONTENTS Part Description Quantity Right arm Left arm Chair back Chair seat Support tube... - Page 5 Pre-Assembly (continued) TABLE PACKAGE CONTENTS Part Description Quantity Table rim Table leg Leg connector Cover Barbecue grate Log grate Poker Fire bowl HAMPTONBAY.COM Please contact 1-855-HD-HAMPTON for further assistance.
-
Page 6: Chair Assembly
Chair Assembly Attaching the right arm to the chair seat Place the right arm (A) on a soft surface. Attach the front end of the right arm (A) to the front end of the chair seat (D) using M6x30 bolts (DD) and M6 washers (FF). Attach the back end of the right arm (A) to the back end of the chair seat (D) using M6x20 bolts (CC) and M6 washers (FF). - Page 7 Chair Assembly (continued) Attaching the right arm to the chair back Attach the right arm (A) to the chair back (C) using M6x20 bolts (CC) and M6 washers (FF). NOTE: Loosely tighten all bolts using the hex wrench (MM). HAMPTONBAY.COM Please contact 1-855-HD-HAMPTON for further assistance.
- Page 8 Chair Assembly (continued) Attaching the left arm to the chair seat and back Repeat step 1 and step 2 to attach the left arm (B) to the chair seat (D) and the chair back (C). NOTE: Loosely tighten all bolts using the hex wrench (MM).
- Page 9 Chair Assembly (continued) Attaching the support tube and the connector bars to the right leg Please fully tighten the two bolts on both the connecting plates on the support tube (E), please see Figure 1. Attach the support tube (E) to the right leg (G) using M8x28 hex bolts (BB), M8 spring washers (HH), and M8 washers (GG). Attach the connection bars (F) to the right leg (G) using M6x20 bolts (CC) and M6 washers (FF).
- Page 10 Chair Assembly (continued) Connecting the chair seat to the support tube Attach the bottom of the chair seat (D) to the support tube (E) by inserting M8x40 hex bolts (AA) through the metal sheets (EE), the chair seat (D), the support tube (E), M8 washers (GG), M8 spring washers (HH), and into the M8 nuts (II), as shown below. NOTE: Loosely tighten all bolts using the wrench (LL).
- Page 11 Chair Assembly (continued) Tightening the bolts Turn the chair right side up. Tighten all the bolts. Check and ensure the chair is tightly assembled and stable before use. Place the seat cushion (I) and the back cushion (J) to finish the assembly of the chairs. ò...
- Page 12 Table Assembly Attaching the leg connector to the table legs Attach the table connector (M) to the table legs (L) using M6x25 bolts (KK) and M6 washers (FF). NOTE: Loosely tighten all bolts using the hex wrench (MM).
- Page 13 Table Assembly (continued) Attaching the table legs to the table top Attach the assembled table legs (L) to the table rim (K) using M6x25 bolts (KK), M6 washers (FF), and plastic washers (JJ), as shown below. NOTE: Loosely tighten all bolts using the hex wrench (MM). HAMPTONBAY.COM Please contact 1-855-HD-HAMPTON for further assistance.
-
Page 14: Care And Cleaning
Table Assembly (continued) Tightening all bolts and adding the fire pits Once all bolts are in place, fully tighten all bolts. Turn the table right side up. Carefully place the fire bowl (S) in the table rim (K). Then place the following in order, from bottom to top: the log grate (Q), the barbecue grate (P) and the lid (O) or the cover (N). When not in use, store the poker (R) under the log grate (Q). - Page 15 Questions, problems, missing parts? Before returning to the store, call Hampton Bay Customer Service. 8 a.m. - 6 p.m., EST Monday - Friday 1-855-HD-HAMPTON HAMPTONBAY.COM Retain this manual for future use.
- Page 16 GRACIAS Apreciamos la confianza que has depositado en Hampton Bay al comprar este juego de fogón. Nos esforzamos para continuamente crear productos de calidad diseñados para mejorar tu hogar. Visítanos por Internet para ver nuestra línea completa de productos disponibles para las necesidades de mejoras en tu hogar.
- Page 17 Tabla de contenido Preensamblaje................. 3 Tabla de contenido ............2 Información de Seguridad Planificación del ensamblaje ........... 3 ..........2 ......... 2 Precauciónes para el Uso del Producto Herrajes incluidos ..............3 Advertencia de Seguridad ............. 2 Contenido del paquete de la silla ..........4 Garantía ..............
-
Page 18: Preensamblaje
Preensamblaje Planificación del ensamblaje Lee todas las instrucciones antes de ensamblar. Para evitar dañar este producto, ensámblalo sobre una superficie no abrasiva, como una alfombra o cartón. NOTA: Es posible que se necesite más de una persona para ensamblar completamente este producto HERRAJES INCLUIDOS NOTA: No se muestra el tamaño real de los herrajes Pieza... -
Page 19: Contenido Del Paquete De La Silla
Preensamblaje (continuación) CONTENIDO DEL PAQUETE DE LA SILLA Pieza Descripción Cantidad Brazo derecho Brazo izquierdo Respaldo de la silla Asiento de la silla Tubo de soporte... -
Page 20: Contenido Del Paquete De La Mesa
Preensamblaje (continuación) CONTENIDO DEL PAQUETE DE LA MESA Pieza Descripción Cantidad Borde de la mesa Pata de la mesa Conector de las patas Cubierta Tapa Parrilla del asador Rejilla para leños Atizador Brasero HAMPTONBAY.COM Para obtener asistencia, llama al 1-855-HD-HAMPTON. -
Page 21: Ensamblaje De La Silla
Ensamblaje de la silla Cómo fijar el brazo derecho al asiento de la silla Coloca el brazo derecho (A) sobre una superficie suave. Fija el extremo frontal del brazo derecho (A) al extremo frontal del asiento de la silla (D) usando pernos M6x30 (DD) y arandelas M6 (FF). Fija el extremo trasero del brazo derecho (A) al extremo trasero del asiento de la silla (D) usando pernos M6x20 (CC) y arandelas M6 (FF). - Page 22 Ensamblaje de la silla (continuación) Cómo fijar el brazo derecho al respaldo de la silla Fija el brazo derecho (A) al respaldo de la silla (C) usando pernos M6x20 (CC) y arandelas M6 (FF). NOTA: Aprieta ligeramente todos los pernos con la llave hexagonal (MM). HAMPTONBAY.COM Para obtener asistencia, llama al 1-855-HD-HAMPTON.
- Page 23 Ensamblaje de la silla (continuación) Cómo conectar el brazo izquierdo al asiento y el respaldo de la silla Repite los pasos 1 y 2 para fijar el brazo izquierdo (B) al asiento de la silla (D) y el respaldo de esta (C). NOTA: Aprieta ligeramente todos los pernos con la llave hexagonal (MM).
- Page 24 Ensamblaje de la silla (continuación) Cómo sujetar el tubo de soporte y las barras conectoras a la pata derecha Por favor, apriete los dos tornillos en ambas placas de conexión en el tubo de soporte (E), por favor mire la gura uno. Fija el tubo de soporte (E) al brazo derecho (G) con los pernos hexagonales M8x28 (BB), las arandelas de resorte M8 (HH) y las arandelas M8 (GG).
- Page 25 Ensamblaje de la silla (continuación) Cómo conectar el asiento de la silla al tubo de soporte Fija la parte inferior del asiento de la silla (D) al tubo de soporte (E) insertando pernos hexagonales M8x40 (AA) a través de la arandelas M8 (GG), las láminas de metal (EE), el asiento de la silla (D), el tubo de soporte (E), las lámina de metal (EE), las arandelas M8 (GG), las arandelas de resorte M8 (HH) y en las tuercas M8 (II), como se muestra a continuación.
- Page 26 Ensamblaje de la silla (continuación) Cómo ajustar los pernos Voltea la silla a su posición normal. Aprieta todos los pernos. Veri ca y asegúrate de que la silla esté rmemente ensamblada y estable antes de usar. Coloca el cojín del asiento (I) y el cojín del respaldo (J) para terminar el ensamblaje de las sillas. ò...
-
Page 27: Ensamblaje De La Mesa
Ensamblaje de la mesa Cómo ensamblar el conector de las patas a las patas de la mesa Fija el conector de la mesa (M) a las patas de la mesa (L) con los pernos M6x25 (KK) y las arandelas M6 (FF). NOTA: Aprieta ligeramente todos los pernos con la llave hexagonal (MM). - Page 28 Ensamblaje de la mesa (continuación) Cómo fijar las patas de la mesa a la borde de la mesa Sujete las patas ensambladas de la mesa (L) al borde de esta (K) con pernos M6x25 (KK), arandelas M6 (FF) y arandelas de plástico (JJ), como se muestra a continuación.
-
Page 29: Mantenimiento Y Limpieza
Ensamblaje de la mesa (continuación) Cómo ajustar los pernos y colocar los fogones Una vez colocados todos los pernos, ajústalos bien. Voltea la mesa a su posición normal. Con cuidado, coloca el brasero (S) sobre el borde de la mesa (K). Después, coloca las siguientes piezas en orden, de la parte inferior a la superior: la parrilla para leños (Q), la parrilla para asar (P) y la tapa (O) o la cubierta (N). - Page 30 ¿Preguntas, problemas o piezas faltantes? Antes de regresar a la tienda, llama al servicio al cliente de Hampton Bay. de lunes a viernes entre 8 a.m. y 6 p.m., (hora estándar del Este) 1-855-HD-HAMPTON HAMPTONBAY.COM Conserva este manual para uso en el futuro.
Need help?
Do you have a question about the FSS60428RST and is the answer not in the manual?
Questions and answers