Advertisement
Quick Links
Item#
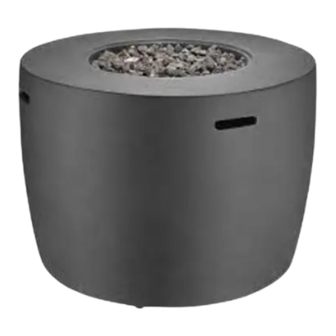
Model# FP21525
USE AND CARE GUIDE
Questions, problems, missing parts? Before returning to the store,
call Hampton Bay Customer Service
8 a.m. - 7 p.m., EST, Monday – Friday, 9 a.m. – 6 p.m., EST, Saturday
1-855-HD-HAMPTON
HAMPTONBAY.COM
THANK YOU
We appreciate the trust and confidence you have placed in Hampton Bay through the purchase of this fire pit. We strive to continually create
quality products designed to enhance your home. Visit us online to see our full line of products available for your home improvement needs.
Thank you for choosing Hampton Bay!
Advertisement

Summary of Contents for HAMPTON BAY FP21525
- Page 1 THANK YOU We appreciate the trust and confidence you have placed in Hampton Bay through the purchase of this fire pit. We strive to continually create quality products designed to enhance your home. Visit us online to see our full line of products available for your home improvement needs.
-
Page 2: Table Of Contents
Table of Contents Table of Contents ........2 Operation . -
Page 3: Safety Information
Safety Information (continued) Read and follow all the instructions and warnings in this Owner’s Manual thoroughly before installing, operating, or servicing this re pit. lmproper installation, use, maintenance, adjustment or storage can cause WARNING re or explosion, resulting in serious injury or property damage. Prepare for use: Keep away from combustible/flammable items Do not put any other fireplace cover or anything flammable on or beneath the fire pit. - Page 4 Safety Information (continued) Observe the flame color and the flame height in the fire pit after being lit: 1.) The flame color should be yellow. 2.) The flame height burns at 2 - 10 inches high. THIS PRODUCT USES PROPANE ONLY Use propane cylinders with the following required measurements only: 30.5 cm/12 in (diameter) x 45.7 cm/18 in (tall) with a capacity of 9 kg/19.84 lbs.
-
Page 5: Pre-Assembly
Pre-Assembly Before beginning assembly of the fire pit, make sure all the parts are present. Compare the parts with the package contents list. If any part is missing or damaged, do not attempt to assemble the fire pit. NOTE: You must follow all the steps to properly assemble the fire pit. Make sure the gas valve is turned OFF before assembling. Do not attempt to assemble without the proper tools. -
Page 6: Assembly
Assembly Connecting the Propane Tank WARNING This re pit requires air ow under the unit. Do not place on an uneven surface or on grass, turf, or carpet. Make sure the control knob (J) is turned to “OFF”. Turn door knob (N), and remove door (C). Place the propane tank (not included) in the metal stand inside the body (B) and make sure the propane tank sits on the metal stand completely. - Page 7 Assembly (continued) Turn the cylinder valve on the top of tank clockwise to close off the gas supply. See Figure a. Screw the regulator coupling clockwise by hand only. Make sure it is fastened. See Figure b. Replace the door (C) onto the body (B) and turn the door knob (N) to secure. Installing the Battery To install the battery (G), unscrew the rubber cap of the electric igniter (K) and place the battery (G) into the battery case.
-
Page 8: Leakage Test
Assembly (continued) Installing the Fire Glass WARNING Keep the fire glass (F) and other objects off of the gas screen (E). Holes in the screen must be exposed in order to allow gas to escape. A blocked screen can cause gas to build inside the fire pit and ultimately cause an explosion Note that the burner... -
Page 9: Operation
Operation Before each use, be sure to inspect the hose. Replace the hose if there are any signs of cutting, wear or abrasion. WARNING! During the initial lighting of the re pit, stay away from the re pit for 30 minutes as the re glass may pop and cause injury to the face or eyes. -
Page 10: Troubleshooting
Troubleshooting Solution Cause Problem There is no igniter battery or the igniter Replace with a new igniter battery. battery is short of power. There is no There is no power to the igniter. The igniter battery is incorrectly inserted. Reinsert the battery properly. spark between the ignition wire The igniter is broken or cracked. - Page 12 Questions, problems, missing parts? Before returning to the store, call Hampton Bay Customer Service 8 a.m. – 7 p.m., EST, Monday – Friday, 9 a.m. – 6 p.m., EST, Saturday 1-855-HD-HAMPTON HAMPTONBAY.COM Retain this manual for future use.


Need help?
Do you have a question about the FP21525 and is the answer not in the manual?
Questions and answers