
Subscribe to Our Youtube Channel
Related Manuals for SatLab SLC


Summary of Contents for SatLab SLC
- Page 1 Satlab SLC Sensor The Ultimate Expandable Handheld User Manual V1.1 2 0 1 8 info@satlabgps.com | www.satlabgps.com...
- Page 2 User Manual Revision satlab slc gnss receıver Revision Date Revision Number Description October 2016 SLC User Manual (Release V1.0) December 2017 SLC User Manual (Release V1.1)
-
Page 3: Table Of Contents
...................................... Bottom View Rear View Single Button Operation ....................................Led Status Meaning ......................................Chapter 3 Slc Toolbox Software - Introduction and Installation ......................Inserting Sim Card Into The Receiver ..............................Connection Tab ........................................About Tab ..........................................Registering the SLC Reveiver Internet Tab ........................................... - Page 4 SLC GNSS RECEIVER w w w . s a t l a b g p s . c o m...
- Page 5 SLC GNSS RECEIVER Chapter Foreword What is Satlab SLC Sensor? Use and Precautions w w w . s a t l a b g p s . c o m w w w . s a t l a b g p s . c o m...
-
Page 6: Foreword
This manual will explain how to install and operate the receiver. Recommendation For you to make better use of the SatLab SLC receiver, SatLab recommends that you read this manual carefully. If you still need further information please visit SatLab’s official website: www.satlabgps.com... -
Page 7: What Is Satlab Slc Sensor
UHF radio connection or wired connection to a display. SLC utilizes a Novatel GNSS OEM board with all options enabled. The GNSS board can be controlled through the RS232 Serial Port or Bluetooth for custom applications. The SLC tracks multi constellation satellites as well as SBAS satellites. -
Page 8: Use And Precautions
Charging time is around 6 hours. Use and Precautions Although SatLab SLC GNSS receiver is built according to high standards for outside use in harsh environmental conditions, it is a sophisticated instrument and needs careful use and maintenance. - Page 9 SLC GNSS RECEIVER Avoid the GNSS antenna being placed near sources of electricity or strong interference signals: 1- Television and computer monitors 2- Generator’s 3- Electric motors 4- DC - AC power conversion equipment and power switches Figure 1-1 When selecting the GNSS receiver’s antenna position for Base operations, pay attention to the following matters: The site should be chosen for easy access and should be clear of obstructions.
- Page 10 SLC GNSS RECEIVER w w w . s a t l a b g p s . c o m...
- Page 11 SLC GNSS RECEIVER Chapter Content of Delivery Mounting your Tablet on the SLC Receiver Appearance Single Button Operation LED Status w w w . s a t l a b g p s . c o m...
-
Page 12: Content Of Delivery
SLC GNSS RECEIVER Content of Delivery This chapter describes the content of SLC delivery. The unit is delivered in a compact black soft case, practical for carrying the receiver, even with an added tablet or smartphone. Note: Satlab Geosolutions does not deliver any tablets or smartphones to work with SLC unit. -
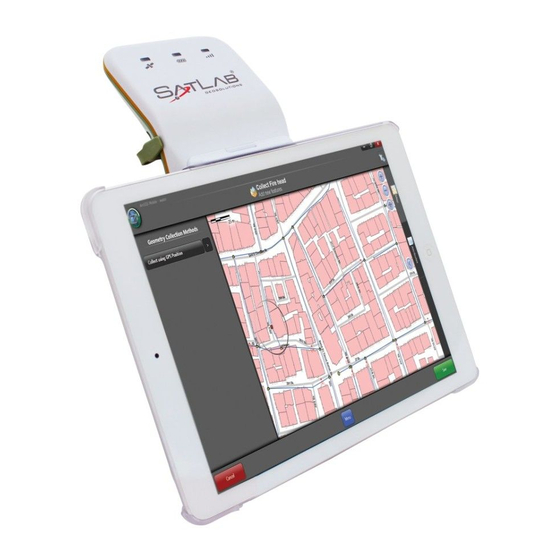
Page 13: Mounting Your Tablet On The Slc
Attaching the tablet to the SLC is then performed by aligning the mounting plate with the four notches on the top of the SLC unit then pressing and sliding downwards to click into place. -
Page 14: Receiver Appearance
SLC GNSS RECEIVER Receiver Appearance The receiver forms a compact body. All electronics - GNSS board, internal GNSS antenna, battery, GSM modem, BlueTooth – are integrated inside a waterproof casing. Switch-on button 3 LED indicators Connector for external antenna „Click-on notches... -
Page 15: Single Button Operation
SLC GNSS RECEIVER Power LED Key Features Satellite LED Signal LED Receiver control panel contains three LED control lights: Single Button Operation Most settings and operations of the receiver are completed using the only button on the left side of the unit. - Page 16 SLC GNSS RECEIVER w w w . s a t l a b g p s . c o m...
- Page 17 SLC GNSS RECEIVER Chapter Slc Toolbox Software Inserting Your Sim Card Connection Tab About Tab Internet Tab Mode Tab Terminal Tab Exiting Slc Toolbox Saving Configuration File Loading Configuration File w w w . s a t l a b g p s . c o m...
-
Page 18: Slc Toolbox Software - Introduction And Installation
(this can be done using your mobile phone). Unscrew the SIM card protective plug and insert the SIM card into the SIM card slot on the bottom of the SLC. Make sure your SIM card is inserted correctly according to the small icon on the protective plug. -
Page 19: Connection Tab
Bluetooth connection, you can also connect using the serial communication cable delivered by SatLab. Start the SLC Toolbox software and by default you will be in the ‘Connection’ page. Switch on the Bluetooth handle on your screen and click on “Search device” to search for all Bluetooth devices in range of your tablet. Look for the serial number corresponding to the number of your SLC and select it with your finger or stylus. - Page 20 SLC GNSS RECEIVER After selecting your SLC unit by clicking on its serial number you will see a green status bar informing about the status of the connection: Figure 3-4 After a successful connection you will see the connected serial number and battery status on the bottom of your screen.
-
Page 21: About Tab
Receivers are usually shipped with ‘Temporary’ codes are valid only for a limited time and after expiration of this period the SLC will not be capable to work in RTK mode. Before use of your equipment make sure that your SLC is ‘permanently’... -
Page 22: Internet Tab
SLC GNSS RECEIVER Internet Tab The SLC Toolbox software is controlled by tabs on the top of the screen. The second tab ‘INTERNET ‘ enables input of GSM settings. Tapping on the line for APN will enable virtual keyboard with which you enter the parameters relevant to your service provider. -
Page 23: Base Settings
SLC GNSS RECEIVER Base Settings When Base is selected the Base setting page appears. Tap on Operation box and the options of Cable and Internal GSM intRTK are available. Case Cable enables connection to a third party transmitter connected via the USB/Serial port using the supplied Serial cable. -
Page 24: Internal Gsm Intrtk
Set Successful acknowledgement. Internal GSM intRTK This option for Base communication uses the Internal GSM modem with the Satlab proprietary internetRTK sevice. Selecting Internal GSM intRTK will display the following page. InternetRTK (intRTK) is a proprietary service offered by Satlab free of charge to its users. -
Page 25: Rover Settings
Data Collector Internet. Figure 3-14 Note: When using Internal GSM for either intRTK or NTRIP, once the SLC is configured you can exit SLC Toolbox and the receiver will remain connected to your Network and output NMEA messages per your settings. If the receiver is power cycled the settings are still retained and the receiver will automatically reconnect to the Network and resume operations. -
Page 26: Internal Gsm Intrtk
The settings will be confirmed with the message Set Successful. Watch the status on the bottom of the setting page, and the signal LED on the top right of SLC. If your connection to NTRIP network is successful, the signal LED will change to solid GREEN and when data is received it will flash YELLOW. -
Page 27: Internal Gsm Ntrip
Set Successful. Watch the status on the bottom of the setting page, and the signal LED on the top right of SLC. If your connection to NTRIP network is successful, the signal LED will change to solid GREEN Figure 3-16 and when data is received it will flash YELLOW. -
Page 28: Static Settings
SLC GNSS RECEIVER Static Settings The SLC has 32GB internal memory for logging RAW Static GNSS data. Selecting ‘Static’ Mode opens the page Figure 3-18 below. Logging screens are also accessible from both Base and Rover mode setting pages and will allow post-processing of the Base position or processing of the Kinematic file collected while used in Rover mode. -
Page 29: Static File Manager
Downloading Static GNSS Files To download the RAW data files connect the SLC to your PC using a standard USB cable. The internal memory will be logged as an external drive titled ‘Static’ under which there Figure 3-19 is a ‘GNSS’... -
Page 30: Nmea Tab
NMEA Tab Setting NMEA Message output Your surveying, mapping or GIS application is most probably interfacing with the SatLab SLC using the NMEA message protocol. In addition to GGA message that contains a GNSS coordinate, several additional NMEA messages offer quality and satellite constellation information. Check your application software regards which NMEA messages it processes and at what frequency rate, then select accordingly. -
Page 31: Terminal Tab
Note: In addition to ASCII characters you might see some binary format messages; this is not incorrect. These are for internal use in the Toolbox software and after a correct exit from the SLC Toolbox software all Binary messages will be deleted. -
Page 32: Exiting Slc Toolbox
When using Cable or Internal GSM settings, once the receiver is configured you should exit SLC Toolbox before connecting to your Survey or GIS Application. The settings in the SLC are saved and there is no need to connect to SLC Toolbox again until you need to change any of the previous settings. -
Page 33: Loading Configuration File
SLC GNSS RECEIVER Loading Configuration File After connecting to the SLC click on Configure button on the CONNECTION page. And the following page Figure 3-24 will appear. Click on the required configuration file and it will be highlighted and the Load and Delete buttons will appear. - Page 34 SLC GNSS RECEIVER w w w . s a t l a b g p s . c o m...
- Page 35 SLC GNSS RECEIVER Chapter Loading Firmware Technical Specifications w w w . s a t l a b g p s . c o m...
-
Page 36: Firmware Upgrade
SLC. Firmware is stored in a file with extension .htb which will be available either on Satlab Gesolutions´ website or provided to you by email. The upgrade is easily done by connecting SLC with the grey USB cable to your PC. Your PC will recognize SLC as an external drive and you will see new folders created: Figure 4-1 Copy and paste the firmware file in the folder UPDATE. - Page 37 SLC GNSS RECEIVER...
- Page 38 Headquarters: Datavägen 21B SE-436 32 Askim,SWEDEN info@satlabgps.com | www.satlabgps.com Regional Offices: Jičín, CZECH REPUBLIC Ankara, TURKEY Scottsdale, USA Singapore, SINGAPORE Warsaw, POLAND...
Need help?
Do you have a question about the SLC and is the answer not in the manual?
Questions and answers