LSC Mantra Lite User Manual
Lighting control for leds, moving lights & dimmers
Hide thumbs
Also See for Mantra Lite:
- Operator's manual (55 pages) ,
- Quick start manual (24 pages) ,
- Quick start manual (27 pages)

Related Manuals for LSC Mantra Lite


Summary of Contents for LSC Mantra Lite
- Page 1 Lighting Control for LEDs, Moving Lights & Dimmers User Manual LSC Control Systems © +61 3 9702 8000 info@lsccontrol.com.au Version 3.0 www.lsccontrol.com.au September 2021...
- Page 2 LSC Control Systems Pty Ltd. All Trademarks referred to in this manual are the registered names of their respective owners. The operating software of the Mantra Lite and the contents of this manual are copyright of LSC Control Systems Pty Ltd © 2021.
-
Page 3: Table Of Contents
Mantra Lite User Manual Contents Introduction ....................10 Conventions Used in this Manual ................10 Mantra Lite Overview ....................10 Latest Features......................11 Expansion Wings ...................... 11 USB to DMX Node ....................12 Quick Start Guide ..................... 12 Sample Show ......................12 Visualiser ........................ - Page 4 Mantra Lite User Manual 4.12 Universes ......................... 25 4.12.1 sACN and ArtNet Output Rules ................. 25 4.12.2 ArtNet Output ....................26 4.12.3 sACN Output ..................... 26 4.12.4 Override (Art-Net or sACN Input) ............... 27 4.12.5 ArtNet Input ....................... 28 4.12.6 sACN Input ......................
- Page 5 Mantra Lite User Manual Controlling Beam and Other Attributes ..............42 Clearing Fixtures ...................... 42 8.9.1 Clear All ......................42 8.9.2 Selective Clear ....................43 Animate Apps ................... 44 Overview ........................44 Creating an Animation ....................44 Animation Controls ....................45 Animation Examples ....................
- Page 6 Mantra Lite User Manual 12.4 Page Freeze ......................56 12.5 Latest Takes Precedence ..................57 12.6 ICPB Attributes (Filters) .................... 57 Edit Memory................... 58 13.1 Overview ........................58 13.2 Fade Times ......................58 13.3 Link Time ........................59 13.4 Memory Name ......................59 13.5 Cue Name ........................
- Page 7 Import a show into the Mantra Lite ..............83 18.4 On Line Edit a Mantra Lite Show ................83 18.4.1 Connecting the Editor to the Mantra Lite via Ethernet ........84 18.4.2 Connecting the Editor to the Mantra Lite via Wi-Fi ..........85 18.4.3...
- Page 8 Visualiser ..................... 103 Troubleshooting .................. 104 23.1 FAQ ........................104 23.2 Rescue File ......................104 Caring for your Mantra Lite ..............106 Compliance Statements ..............107 25.1 CE & C Tick Compliance Statement ............... 107 Specifications ..................108 Terminology ..................109 27.1 Overview ........................
- Page 9 Mantra Lite User Manual 27.11 DMX Cables ......................110 27.12 DMX Universes ....................110 27.13 ArtNet........................110 27.14 sACN ........................110 Page 9...
-
Page 10: Introduction
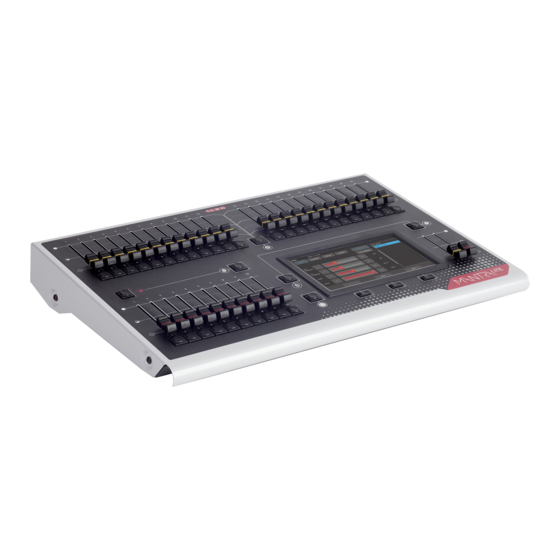
Notes or Hints are displayed in italic font 1.2 Mantra Lite Overview Mantra Lite combines the ease of use of a fader-based console, with the power of a touch screen graphical user interface to make control of LED fixtures easy and intuitive while still allowing control of moving lights and conventional dimmers. -
Page 11: Latest Features
See section 20 for a full list of the features that were added in each software release. 1.4 Expansion Wings The Mantra Wing is an accessory for the Mantra Lite lighting console. Up to 2 wings can be connected to a Mantra Lite console. -
Page 12: Usb To Dmx Node
1.6 Quick Start Guide A summary of the information in this “User Manual” can be found in the Mantra Lite “Quick Start Guide” supplied with your Mantra Lite and also available for download at the LSC website. 1.7 Sample Show Mantra comes with a “Sample”... -
Page 13: Visualiser
3D visualiser lighting program called “Mantra Lite Visualisation show”. See section 22 for details. 1.9 Training Videos An extensive set of training videos are available on the LSC website. The current video titles are: •... -
Page 14: Models
Mantra Lite control console with built-in power supply 90-265V 50- 60Hz. MANTRA/LT/E Mantra Lite control console with external power supply - UL Model for the North American market. Also suitable for 12-volt DC operation. External plug pack supplied suitable for use on 90-265V 50-60Hz mains supply. -
Page 15: Getting Connected
90 volts and 260 volts with a frequency range from 47 to 63 Hz. 2.3 Switching On Switch on the “POWER” switch on the rear of the Mantra Lite (LT model only). After briefly displaying the opening message, the Mantra Lite will commence operating in exactly the same state that it was in with all of the cues, animations and patches etcetera as they were when the Mantra Lite was last switched off. -
Page 16: Ethernet Network Connector
DMX lighting data over a network. See section 19.6.1 for more details. It can also be used for “Remote Triggers”. See section 16 2.8 Kensington Lock Slot The Kensington Lock slot allows you to secure your Mantra Lite using a commercially available tethering device. 2.9 Fuse A 0.5 Amp slow blow fuse is located near the mains input socket (LT model only). -
Page 17: Help And Undo
Tools, Setup, System Settings, Language then touch the language of your choice. 3.2 Undo To quickly undo your last action double tap All of your actions are tracked on the Mantra Lite. Press once to see the list of your actions. Undo Redo •... -
Page 18: Patching Fixtures
4 DMX channels. Fixture 2 must be set to address 5 (or higher). The DMX signal is output on the 5 pin XLR connector on the rear of the Mantra Lite. Each optional wing also has a DMX output. The optional QX1 node (USB to DMX adaptor) provides an additional DMX output. - Page 19 Set the universe to which the fixture is connected by touching the “U” box and using the +10, +1, -10 and -1 buttons. • If you are only using the 5 pin DMX connector on the rear of the Mantra Lite then the Universe (U) should be set to 1. •...
-
Page 20: Patching Multiple Fixtures In One Operation
Mantra Lite User Manual Select a fixture number for the fixture to be patched by tapping one of the flashing buttons below the yellow faders. When a button is selected it stops flashing and remains lit. The button/fader that you choose will be used to control this fixture. -
Page 21: Patching Compound Fixtures
Mantra Lite User Manual done when multiple fixtures have a common purpose (such as a colour wash on the stage or all of the audience fixtures) and you want to control them all from the same fader. Note: You could set each fixture to the same DMX address and only make one patch to achieve... -
Page 22: View Patch
24 channel mode splits the fixture into 8 sub-fixtures with RGB for each sub-fixture. In this case LSC recommends patching the fixture in 7 channel mode and utilising the in-built effects of the fixture. This will allow you to create complex effects in a fraction of the time than when operating in the other modes. -
Page 23: Un-Patch A Multi-Patched Fixture
Mantra Lite User Manual All buttons below the yellow faders will flash to show that they are available fixture number choices. Press a fixture number button to select it. Multiple fixture numbers can be selected. Selected fixture numbers are lit. -
Page 24: Save Patch
4.11 Fixture Editor If you have a new fixture and it is not listed in the Mantra Lite fixture library you can create a template for it. You can also use the Fixture editor to edit an existing fixture template. -
Page 25: Universes
ArtNet Output Rules Mantra Lite can transmit its DMX output as DMX512, sACN and ArtNet. The patch screen (see section 4.1) allows you to patch each fixture to U1 (Universe 1). If an optional wing or QX1 node (USB to DMX adaptor) is connected you can also patch fixtures to U2 (Universe 2). -
Page 26: Artnet Output
ArtNet Output (Two Wings or One Wing and a QX1 Node connected) Note: The U2 box only appears if a wing or a QX1 node is connected to the Mantra Lite. The U3 box only appears if two wings or one wing and a QX1 node are connected. -
Page 27: Override (Art-Net Or Sacn Input)
Output (Two Wings or One Wing and a QX1 Node connected) Note: The U2 box only appears if a wing or a QX1 node is connected to the Mantra Lite. The U3 box only appears if two wings or one wing and a QX1 node are connected. -
Page 28: Artnet Input
ArtNet Input (Two Wings or One Wing and a QX1 Node connected) Note: The U2 box only appears if a wing or a QX1 node is connected to the Mantra Lite. The U3 box only appears if two wings or one wing and a QX1 node are connected. -
Page 29: View Dmx Output
Mantra Lite User Manual • In the Input “U1” box, enter the number of the incoming sACN universe that is to be mapped to the fixtures patched to Mantra Lites U1 output • In the Input “U2” box, enter the number of the incoming sACN universe that is to be mapped to the fixtures patched to Mantra Lites U2 output •... -
Page 30: Front Panel
(Red) 5.2 Basic Operation Mantra Lite can control up to 24 lighting fixtures (up to 48 fixtures with optional wings). The 24 Yellow fixture faders control fixture intensity. Moving a fixture fader automatically selects that fixture allowing its other attributes such as colour or position to be controlled by Apps on the touch screen (see section 6). -
Page 31: Touch Screen
Mantra Lite User Manual Touch Screen 6.1 Overview Red Playback Page Number Fixtures section Fixture Icons Playback section Contents of the Current function of red playbacks button below (if any) The top of the screen shows the current page number for the Red Playbacks. If one wing is connected its current page number is also shown in green text. -
Page 32: Fixture Icons
Mantra Lite User Manual From the “Home” screen, press Apps to open the “Apps” screen. Apps are used to control the attributes of selected fixtures. Move a yellow fader to automatically select that fixture. Use an App to adjust the attribute. - Page 33 Mantra Lite User Manual A black background on the page/memory number at the top of the icon indicates that a ”Page Freeze” has occurred. This means that this playback was active (faded up above zero) when the page number was changed and hence its memory is not from the “current” page. See section 11.2 for more information on “Memories”...
-
Page 34: Rig View
Mantra Lite User Manual Rig View 7.1 Overview The fixture icons on the “Home” screen can be arranged geographically so that they are positioned on the screen in a similar fashion to their position in your rig or stage. This can assist you in quickly identifying fixtures. -
Page 35: Controlling Fixtures
See also “Flash”, section 15. 8.2 Fixture Attributes Mantra Lite uses “Apps” on the touch screen to control the attributes (colour, pan/tilt, shutter etcetera) of selected fixtures. From the “Home” screen, open the “Apps” screen by touching Apps or pressing the hard button below it. -
Page 36: Intensity Column
Note: When you select multiple fixtures, the order in which you select the fixtures is used by Mantra Lite when you fan colours or positions and in animations and shapes. You can change the look of a fan, animation or shape by changing the selection order. - Page 37 Hint: When you select multiple fixtures, the order in which you select the fixtures is used by Mantra Lite when you fan colours or positions and in animations and shapes. You can change the look of a fan, animation or shape by changing the selection order.
-
Page 38: Automatic Fixture De-Select
Mantra Lite User Manual 8.4 Automatic Fixture De-select When you open an App, fixtures that have attributes that can be controlled by that App flash their buttons indicating that they are available for selection. When you select fixtures, their buttons are lit. After you have used the App to change any attribute of the selected fixtures, selecting another fixture will cancel the previous selection and start a new selection process. -
Page 39: Gels
Mantra Lite User Manual • Touching Fan again turns fanning off. Dots show fanned colours of selected fixtures Directional Fanning Your fixture selection order is used by the Fan App. Experiment with different orders of selection to get different colour effects. Previous selections can be re-used by tapping the [Select] button. -
Page 40: Controlling Position
Mantra Lite User Manual Sliding your finger vertically in the bottom half will allow access to more sliders. RGB values in Hexadecimal Colour Sliders • + and – buttons are provided for small increments. • The decimal values of each slider are shown on the right. -
Page 41: Flip Pan/Flip Tilt
Mantra Lite User Manual 8.7.1 Flip Pan/Flip Tilt Touching Flip Pan inverts the pan as you drag. Touching Flip Tilt inverts the tilt as you drag. A blue border on the icon indicates “Flipped”. These settings are useful if the fixture movement is opposite to the movement on the touch screen. -
Page 42: Controlling Beam And Other Attributes
Mantra Lite User Manual 8.8 Controlling Beam and Other Attributes This app provides slider controls for all attributes not controlled by the Intensity, Colour or Position Apps. From the “Home” screen, open the “Apps” page (described above) then touch the “Attributes” app then select the fixture(s) to be controlled. The controls will vary depending upon the selected fixture. -
Page 43: Selective Clear
Mantra Lite User Manual 8.9.2 Selective Clear Clear Clear All Apps Screen From the “Apps” screen, touch Clear. The “Clear Fixture Faders” screen appears: Selected Fixtures Shapes Animations Clear Fixture Faders Selected Fixtures can be set to their “Default” values of White, Centre and “Home” values. -
Page 44: Animate Apps
Animate Apps 9.1 Overview Animate Apps take the static output of Mantra Lite and bring it to life by providing a simple and intuitive way of creating moving patterns and colour or intensity chases. Animations work with 2 or more selected fixtures and they shift the attribute values (such as intensity or colour or position) from one fixture to the next and loop the values of the last selected fixture back to the first. -
Page 45: Animation Controls
Mantra Lite User Manual 9.3 Animation Controls Fixture selection order Modes Speed Cross Fade Delete Create Stop/Start All animation Apps have Slider controls for: • Speed in BPM (Beats Per Minute) • Crossfade between steps (as a percentage of the speed). -
Page 46: Intensity Animation
Mantra Lite User Manual Hint: It is a good idea to clear all fixtures before you start to create your first animation. From the “Home” screen touch Apps, Clear All. If you already have an animation running that you want to retain, then only clear the type of attribute in the new animation. -
Page 47: Pan/Tilt Animations
Mantra Lite User Manual • Fade up fixtures 7, 8 and 9 then use the “Colour” Picker App (section 8.5) to set the fixtures to red. • Fade up fixture 10 then use the “Colour Picker” App to set the fixture to blue. -
Page 48: Multiple Animations
9.6 Recording Animations When you record the output of the Mantra Lite as a cue it includes any animations that are running. Recording an animation will automatically clear that animation from the yellow faders where you created it. If you want to keep the animation running on the output, fade up the red... -
Page 49: Deleting Animations
Mantra Lite User Manual playback fader on which you make the recording and ensure that the Red Master is also up before you record the cue. See section 11 for details on how to record cues. 9.7 Deleting Animations To delete a single animation from the “Live Memory” of the yellow fixture faders, open the... -
Page 50: Shapes App
Mantra Lite User Manual 10 Shapes App 10.1 Overview The Shapes App provides a quick and simple way of creating continuously moving positions on fixtures that have Pan and Tilt attributes by constantly varying those attributes. 10.2 Creating a Shape Hint: You might find it easier to position your fixture(s) before you apply a shape movement to them, however you can still position them after applying the shape. -
Page 51: Recording Shapes
Mantra Lite User Manual “New Shape” “Rotate” Shapes can be created on other fixtures by selecting New Shape, selecting the fixtures and repeating the procedure above. 10.3 Recording Shapes When you record the output of the Mantra as a cue it includes any shapes that are running. -
Page 52: Recording Cues
When you have adjusted the intensity and colour of your fixtures and possibly created an animation(s) or shapes, the current output of the Mantra Lite can be recorded into a red fader for later playback. This recording is known as a “Cue” and it contains the intensity and all other attributes such as colour, position etcetera plus any animations that are currently running. -
Page 53: Record A Cue-List (Or Chase)
Mantra Lite User Manual The recording is made into the current page. You can select a different page (see section 11.2) prior to or after tapping the “Record” button but before selecting the playback number. The default fade time is applied to both the “Fade In” and “Fade Out” times. To change the default fade time, see section 19.2 To set individual “Fade In”... -
Page 54: Record Fixtures With No Intensity
Mantra Lite User Manual 11.5 Record Fixtures with No Intensity You can choose to include selected fixtures that have an intensity of 0% when you record a cue. (Normally only fixtures with an intensity level greater than 0% will be recorded in a cue). -
Page 55: Playback
Mantra Lite User Manual 12 Playback 12.1 Overview Different looks can be recorded on different Red Playback faders so that you can easily change the entire look on stage by using the Red Playback faders. There are 10 red playback faders and 10 pages of memory giving a total of 100 memories. -
Page 56: Playback A Cue-List
Mantra Lite User Manual 12.3 Playback a Cue-List If a Red Playback contains a cue-list you can crossfade to the next cue in the list by tapping its playback button (below its fader). Cue-lists automatically loop back to the beginning after the last cue. -
Page 57: Latest Takes Precedence
When the fader reaches full it fully overrides previously active faders. Mantra Lite keeps a LTP list and remembers the order in which faders have been raised above zero. The latest fader (at the top of the list) will have total control whilst it is at full level. When a fader is faded down to zero it drops off the LTP list and has no influence on the output. -
Page 58: Edit Memory
Mantra Lite User Manual 13 Edit Memory 13.1 Overview Touch a playback displayer to edit the memory Touching any playback displayer opens the “Edit Memory” screen. Touch to edit Touch to edit the Jump to the cue name memory name selected cue Touch + or –... -
Page 59: Link Time
Mantra Lite User Manual To change a Fade time, in the “Edit Memory” screen (see above), touch the + or – buttons to set the “Fade In” and “Fade Out” times. If you hold a button, it will auto-repeat. See section 12.2 for more details on fade times. -
Page 60: Copy Cue
Mantra Lite User Manual Only Colour All attribute included groups included (Default) This is a powerful function because it allows you to independently playback groups of attributes of your fixtures. For example, you have some fixtures that have intensity, colour and position attributes and you want to randomly playback different combinations of colour, position and intensity. -
Page 61: Chase
Mantra Lite User Manual 13.13 Chase If a memory contains a cue-list you can choose to use it as either a “List” where you manually playback the cues or use it as a “Chase” where it automatically steps through the list at a rate that you set. -
Page 62: Edit A Cue
Mantra Lite User Manual For example, if the chase speed is set at 60 BPM (which is one step per second), then with crossfade set at 0% (that is, no fade), the chase will wait for one second, then snap to the next step. -
Page 63: Live Speed
Mantra Lite User Manual 14 Live Speed 14.1 Overview “Live Speed” allows you to override the fade times and speeds of cues, chases, animations and shapes. The changes are only a temporary offset applied to the settings saved in the cue or on the yellow faders. -
Page 64: Select
Speed. Tap the Tap to Beat button at least 4 times at the desired rate. Mantra Lite averages all of your taps to set the speed. If you have tapped a speed and then want to change it, pause for 2 seconds then start tapping again (at least 4 taps). -
Page 65: Override Indicators
Mantra Lite User Manual 14.5 Override Indicators The playback section of the home screen shows the following symbols when a playback has been overridden by the “Live Speed” controls: • “>” indicates that the fade, speed and or crossfade has been overridden. -
Page 66: Flash
Mantra Lite User Manual 15 Flash You may Flash any fixture or multiple fixtures, any Playbacks (containing a single cue) or any multiple combination of the above at the one time. The only limit is your ability to hold down multiple buttons. -
Page 67: Remote Triggers
16 Remote Triggers 16.1 Overview The Mantra Lite can be controlled by “Remote Trigger Inputs” and it can also send messages to other devices by “Remote Trigger Outputs” via the RJ45 Ethernet network connector. There are 3 “message types” of remote trigger inputs available, •... -
Page 68: Add A Remote Trigger
Mantra Lite User Manual 16.3 Add a Remote Trigger To open the Remote Triggers screen, touch Tools, Setup, Remote Triggers. Remote Triggers To create a new remote trigger touch, Add. Message Trigger Action Type Name Remote Trigger Editor Enter a descriptive name for the trigger in the “Trigger Name” pane at the top. -
Page 69: Osc Remote Triggers
“Trigger Name” pane at the top. To use OSC, Mantra Lite needs to know the “Port Number” that is used by the the device sending the OSC message. If the sending device uses a specific port number, then enter the same port number in the Mantra Lite. -
Page 70: Udp And Tcp Remote Triggers
“Trigger Name” pane at the top. Mantra Lite needs to know the “Port Number” used by the the device sending the message. If the sending device uses a specific port number, then enter the same port number in the Mantra Lite. -
Page 71: Play Memory
Insert <CR> Message A CR or LF are also used to separate consecutive messages. This allows the Mantra Lite to recognise each separate message and it can then use them in separate triggers. Hint: Adding a <CR> or <LF> to end of each message is not mandatory but it is good practise. - Page 72 Mantra Lite User Manual • OSC messages will play a memory/cue using the parameters in the OSC message. See section 16.3.1 • Contact, UDP and TCP messages will play the selected memory/cue using the parameters in the remote trigger screen. See section 16.3.2 •...
-
Page 73: Other Cues Off
Mantra Lite User Manual 16.3.4 Other Cues Off “Other Cues Off” is a tick box option that is available when a “Play Memory” action is selected. If “Other Cues Off” is ticked, playing the selected memory will also fade out all other active cues. -
Page 74: Override Disable
Mantra Lite has responded to a remote trigger input. Mantra Lite needs to know the “Port Number” used by the the device receiving the message. If the receiving device uses a specific port number, then enter the same port number in the Mantra Lite. - Page 75 Memory 1, Cue 1 has the foyer lights at a level of 100%. If you define the “Cue Change” message as: “Foyer/Memory=$m/Cue=$c/Level=$l”. When M1-C1 changes level to 100%, Mantra Lite will send the message: “Foyer/Memory=1/Cue=2/Level=100” “OSC” Cue Change Message. The message pane shows the message that will be sent.
-
Page 76: Activate A Remote Trigger
The Companion software is run on a computer that is connected to the same network as the Mantra Lite. The StreamDeck plugs into a USB port of the same computer. The buttons on the StreamDeck are fully programable and each button can be configured to send an OSC message to the Mantra Lite. - Page 77 Click the “Config” tab. In the “Target Port” pane, enter a port number”. Choose any random number in the range 1 to 65535. In the “Target IP” pane, enter the IP address of the Mantra Lite to be controlled. The IP address can be found in the Mantra Lites “System Settings”, “Available Networks”...
-
Page 78: Touch Osc
Wi-Fi to compatible devices such as the Mantra Lite. The OSC messages can be used to control the Mantra Lite via “Remote Triggers” and can play any cue at any level with any fade time or play the “next cue” in a specified memory (cue-list) or enable/disable “override”... - Page 79 In the “Touch OSC App” select “Layout”, then select the layout name that you created in the “Touch OSC Editor”. Select “Done”. The layout appears on the screen of the phone or tablet. Touch the button that you created to send the OSC remote trigger via Wi-Fi to the Mantra Lite. Page 79...
-
Page 80: Show Files
17.5 Load Show When you “Load” a show you replace the entire contents of the Mantra Lite memory with the show data that you load. This includes all Cues and the Patch. -
Page 81: Import Show From Usb
Mantra Lite User Manual Export Show. The screen offers the current show name but you can choose a different show if you desire. Touch Save to complete the export. 17.7 Import Show from USB You can import a previously exported show from a USB stick. Insert a USB stick containing the show file in one of the USB sockets on the rear panel. -
Page 82: Mantra Editor Software
Export a Show from Mantra Lite To export a show from the Mantra Lite to a USB memory stick (formatted as FAT32) insert the USB stick in one of the USB sockets on the rear panel of the Mantra Lite. -
Page 83: Export A Show From Mantra Editor
18.3.4 Import a show into the Mantra Lite To import a show into the Mantra Lite from a USB memory stick, insert the USB stick in one of the USB sockets on the rear panel of the Mantra Lite. From the Mantra Lite “Home” screen tap Tools, Import Show. -
Page 84: Connecting The Editor To The Mantra Lite Via Ethernet
IP address to the Mantra Lite. Connect the Mantra Lite and the computer running the Mantra Editor to the same DHCP router. If a DHCP router is not available you can set a static IP address in the Mantra Lite and in the computer then make a direct network connection. -
Page 85: Connecting The Editor To The Mantra Lite Via Wi-Fi
Connecting the Editor to the Mantra Lite via Wi-Fi The Mantra Lite does not have inbuilt Wi-Fi so you must connect its ethernet to a Wi-Fi router. The computer running the Mantra Editor is then connected to that same router via Wi-Fi. - Page 86 Back/Home. 3. To load, control and edit a show that exists on the Mantra Lite, in the Mantra Editor click Tools, Load Show, View Remote. Click the Mantra Lite icon then click on the show file name then click Load. The editor now controls the output of the Mantra Mini.
-
Page 87: Output Priority
Mantra Lite User Manual Hint: When the Mantra Editor is connected to the Mantra Lite, the top of the home screen on the Mantra Editor shows the Network Name of the Mantra Lite followed by the show name. Mantra Editor is connected to the Mantra Lite In this example, the Mantra Lites “Network Name”... -
Page 88: Mantra Editor Controls
User Manual 18.5 Mantra Editor Controls Unlike the Mantra Lite, the Mantra Editor does not have any faders or buttons so it uses slightly different techniques to control fixture intensity and to control cue playback. This section describes the different methods used by the Mantra Editor and assumes that you have a working knowledge of the Mantra Lite console as described elsewhere in this manual. -
Page 89: Selecting Fixtures
Hint: All events are triggered when you release the mouse button (or lift your finger from a touch screen). Just like the touch screen of the Mantra Lite, the top section of the “Home” screen has an icon for each of patched fixture. - Page 90 Mantra Lite. Double click to undo the last action. Select button on the Mantra Lite. This opens the “Select” screen which The same as the provides another means of selecting fixtures including a list of previous selections, selecting a range of fixtures and reversing the selected order.
-
Page 91: Apps
All Cues Off 18.5.6 Apps Mantra Editor uses the same “Apps” as the Mantra Lite to control the attributes (colour, pan/tilt, shutter etcetera) of the selected fixtures. From the “Home” screen clicking Apps (or keyboard shortcut A) opens the “Apps” screen. -
Page 92: Mantra Mini Overview
It takes the Mantra Lite console and packages it as DIN rail mount DMX playback controller that can replay any show from a Mantra Lite console or something new recorded via the Mantra Editor programming software. -
Page 93: Setup
If a default show does not exist, selecting a “New Show” will delete the patch and all memories. If your Mantra Lite is to be used in a permanent installation or in a touring setup where you regularly use the same patch then LSC recommends that you create and save a “default show”. -
Page 94: Default Show Emergency Pin
Mantra Lite User Manual When you save a default show you can choose to “PIN Protect” it so that it cannot be easily changed or deleted. To save a “Default” show, ensure that your patch is correct then from the “Home” screen touch Tools, Setup, Save Default Show. -
Page 95: Language
System Settings then use the “Screen Backlight” slider. 19.6.6 About LSC has a policy of continuous improvement of its products. As the Mantra Lite is a computerised lighting desk, its software is subject to this policy as new features are added and existing features improved. - Page 96 6. If your current show has unsaved changes, you will be prompted to save 7. The update process takes about 20 seconds 8. Once complete you will be prompted to restart Mantra Lite 9. Switch off, wait for 15 seconds then switch on...
-
Page 97: Feature History
The new features added to Mantra Lite in each software release are listed below: Release: v 3.0 Remote Triggers. You can now control the output of the Mantra Lite from other devices such as touch phones or third-party button panels. - Page 98 5,500 fixtures, most with multiple operating modes, all included as standard with the console. A fixture request service is available via the LSC web page, to enable end users to request new fixtures for addition to the database. This process takes at least one month from the date of request.
- Page 99 Mantra Lite User Manual The Fixture Editor can create fixtures of up to 48 DMX channels with or without Wings connected. There are now [-1] & [+1] buttons to increment/decrement the selected DMX slot to add the parameter to, as well the old method of moving a fader.
-
Page 100: Fixture Editor
21.1 Overview If you have a new fixture and it is not listed in the Mantra Lite fixture library you can create a template for it, even if you don’t know the functions of its DMX channels. The Mantra Lite Fixture Editor allows you to use the yellow faders to directly control the DMX channels of the fixture and hence discover the function of each channel. -
Page 101: Home Positions
Mantra Lite User Manual fader controlling? Select the appropriate Attribute name for this channel from the list in the “Pre- defined Attributes” box. Swipe to scroll the list for more names. If no suitable name exists either choose “Unknown” or touch the “Name” box and enter a descriptive name. To create the attribute for this channel, tap Add. -
Page 102: Edit A Fixture Template
Mantra Lite User Manual Note: The Intensity, RGB/CMY colours and Pan/Tilt attribute faders are ignored when setting the Home position. These attributes are always set to the same Home values: • Intensity = zero. This is because intensity is always controlled by the yellow fader. -
Page 103: Visualiser
It is perfect for training and demonstration of the console. If you would like to see a simulation of the fixtures in the Mantra Lite sample show working on a virtual stage on your computer you can download a 3D visualiser lighting program called “Mantra Lite Visualisation show”... -
Page 104: Troubleshooting
You can restore normal operation by following these instructions: On a computer with internet access go to the LSC website then navigate to the Mantra Lite software and download the “Rescue File”. - Page 105 User Manual Turn off the Mantra Lite console. Plug the memory stick into the Mantra Lite then turn the console back on. The default show will be deleted, allowing the console to start normally. Ensure that the USB stick is then removed.
-
Page 106: Caring For Your Mantra Lite
When connecting any devices to the Mantra Lite, make sure that all connections are correct before switching on the power. If any doubt exists, obtain the assistance of qualified personnel. If the surface of your Mantra Lite becomes soiled, clean it with a damp cloth. Do not use any powerful solvents. Page 106... -
Page 107: Compliance Statements
User Manual 25 Compliance Statements 25.1 CE & C Tick Compliance Statement The Mantra Lite range of lighting control desks from LSC Control Systems Pty Ltd meets all required CE (European) and RCM (Australian) standards. European Committee for Electrotechnical Standardization (CENELEC). -
Page 108: Specifications
Full brownout protection via on-board mini-UPS providing five seconds of power for automatic show save Expansion Main console expandable with up to two wings via USB connection Second DMX universe on main console possible by attaching an LSC QX1 node to USB output Memory 16GB flash memory... -
Page 109: Terminology
27.8 Look A lighting “look” is the current output of the Mantra Lite. A “look” may be made up of a collection of fixtures or one or many cues or a combination of cues plus fixtures. It may even be a single fixture. -
Page 110: Dmx512A
27.11 DMX Cables Only use specific DMX cable (available from your lighting supply company). Never use audio cable. If you want to make your own cables LSC recommends using Beldon 9842 (or equivalent). Pin Number Function Ground...
Need help?
Do you have a question about the Mantra Lite and is the answer not in the manual?
Questions and answers