Table of Contents
Advertisement
Quick Links
Advertisement
Table of Contents

Related Manuals for Foscam F41/FLC


Summary of Contents for Foscam F41/FLC
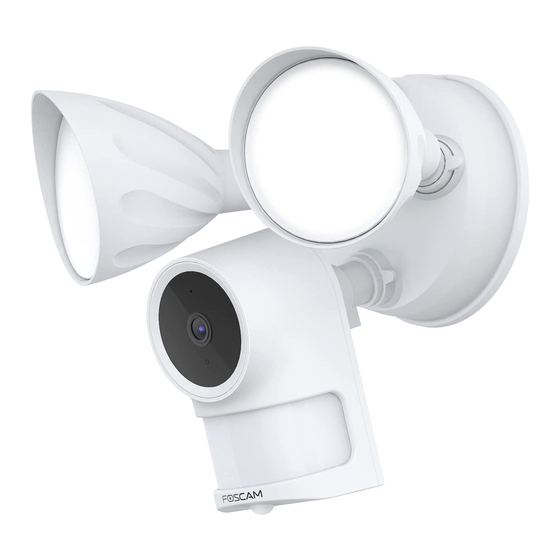
- Page 1 User Manual User Manual Wi-Fi Floodlight Security Camera Model: F41/FLC V1.0...
-
Page 2: Table Of Contents
1.2 Read before Use..............................3 1.3 Packing Contents..............................3 1.4 Physical Description.............................. 3 1.5 SD Card Management............................4 1.6 Add Device: Connection via the Foscam App....................5 1.7 Installation................................8 2 Access the IP Camera in Foscam App.......................... 9 2.1 Foscam APP Surveillance Window........................9 2. -
Page 3: Security Warning
Security Warning Please change the password of your floodlight camera regularly, using a combination of numbers, letters and special characters. We recommend that you regularly update your floodlight camera to the latest available software and firmware versions to help ensure the best experience for your floodlight camera. ... -
Page 4: Overview
1 Overview Welcome to use our product, Floodlight Camera. Foscam Floodlight Camera is an integrated IP Camera with a color CMOS sensor enabling viewing in High Definition resolution.It combines a high quality digital video camera, with a powerful free Foscam Video Management Software,to bring clear video to your desktop from anywhere on your network or over the APP. -
Page 5: Read Before Use
1.2 Read before Use Please first verify that all contents received are complete according to the Package Contents listed below. Before the Network Camera is installed, please carefully read and follow the instructions in the Quick Setup Guide to avoid damage due to faulty assembly and installation. This also ensures the product is used properly as intended. -
Page 6: Sd Card Management
NOTE: There are up to two labels located at the bottom of the camera, this is an important feature of original Foscam cameras. If your camera does not have labels, it may be a clone. Cloned Foscam cameras can not use original firmware and are not eligible for warranty or technical services. -
Page 7: Add Device: Connection Via The Foscam App
1.6 Add Device: Connection via the Foscam App Scan the QR code below to download and install the Foscam APP. To ensure a smoother video experience on your smart phone, it is recommended that your smart phone meet the following specifications: iOS: version 11 or higher. - Page 8 4. Open the foscam APP and please sign up for a Foscam account, or sign in if you have one already. 5. After logging into Foscam APP, select “Tap to add a camera” or "+" icon on the upper right corner, then select "Scan the QR code"...
- Page 9 1. Note: It is strongly recommended that you choose to configure WiFi at this step. Method B: Please wait for a few seconds, you can tap "Configure WiFi" in "Configure WiFi" interface, then you tap "Skip" in the "WiFi Settings" interface. After, you can set the camera name and tap “Save” in the "Set name"...
-
Page 10: Installation
1.7 Installation Please refer to the Quick Setup Guide. Note: Make sure you have installed the Foscam App, and have scanned the camera QR code and completed the "add device" process in the app before beginning the hardware installation process. -
Page 11: Access The Ip Camera In Foscam App
2.1 Foscam APP Surveillance Window Please refer to the section 1.6 if you install the camera for the first time. You can start to learn about software operation after finish quick installation.When you launch the Foscam App, the devices page displays. Split Screen... -
Page 12: Watch Live
Share: You can share the camera with your family or other users to watch, tap Live > Camera Settings > Share Camera > Family or Invite. Cloud Service: Foscam Clound can save every alarm detection videos in ht cloud, and you can review every event anywhere, any time. More: Click the button to enter the more options page of the camera, Album, Alarm Settings, Playback, Notification, Settings, Siren and floodlight. - Page 13 Back Camera Setting Floodlight IR LED Schedule Mirror Wired connection/ Wireless connection Resolution Bit Rate Speaker / Mute the audio Full screen Video Snapsho More Function Two-way audio Date Timeline Back: To stop viewing and listening to the live feed, tap the Back. Resolution: There are three types to identify different streams you have set.
- Page 14 Date:Show date, Display the date, you can select the date through “<” or “>”button. Timeline: If you have purchased cloud service, you can click the timeline to watch the storage video at the corresponding time on the cloud. Camera Setting: Click this button to set more. IR LED Schedule: On this page, you can enable/disable the IR LED, and set the IR auto switch or you can schedule it.
- Page 15 1 Enable Activity Detection button 2 Click Alarm when a movement is detected or Alarm only when a human is detected. Alarm when a movement is detected: Alarm when a movement activity is detected. Alarm only when a human is detected: Alarm only when a human is detected. 3 Sensitivity---- It supports three modes: Low, Middle and High.
- Page 16 NOTE: You must set the detection area and detection schedule, or else there is no alarm anywhere and anytime. Siren Linkage: When an alarm is triggered, the camera makes a sound.You can turn it on as needed. Floodlight Linkage:When an alarm is triggered, and at night, the floodlight lights up, you can turn it on as needed.
-
Page 17: Camera Setting
2.3 Camera Setting the button, goes to Device Settings to make advanced camera settings. 2.3.1 My Plan Here you can choose a 7-day free cloud service experience, and you can also purchase related cloud packages according to your needs. After successful activation, you can enjoy storing videos on the cloud anytime, anywhere. - Page 18 2.3.3 SD Card If you have an SD card on your device, click this button to enter the SD-Card Video Playback.You can filter the corresponding videos according to the time and type. Settings Click the button enter to SD Card settings, you can set SD card info and Recording Schedule.
- Page 19 SD card info Click the button enter to SD Card settings, you can view the SD card storage information from this page, and you can also format the SD card. Recording Schedule Click the button enter to Recording Schedule setting, you can setting Loop Coverage, Voice Recording and Recording Schedule.
- Page 20 2.3.5 Camera Info You can see the basic information of the camera through this, such as Camera name, UID, MAC ID and firmware version information. 2.3.6 Share Camera If you set up family members in my family, you can share the camera with your family here.Or you can invite other users to watch the live broadcast in the form of username and account information.
- Page 21 2.3.7 Motion Zones For Light Customize the area where you want motion to turn on your light.
- Page 22 2.3.8 Privacy mask This can be used to set certain masks as private areas on the video. Click + draw a mask area on the video , the mask area will be black on the video .Click the back button, the save page appears, click save, click Save to take effect.
- Page 23 2.3.9 WiFi Settings If you selected Wired Connection via the Foscam, Tap the “WiFi Settings” button > select your WiFi network and enter your WiFi’s password. After setting up successfully, you can view live video without the Ethernet cable. 2.3.10 Advanced Settings...
- Page 24 Note: Please select the corresponding to the area where you third-party smart speaker account is registered. If the connection is abnormal, you can try to change the area or contact Foscam customer service or contact third-party customer service to change the area registered by Alexa app.
- Page 25 Reset Device You can reset your camera from here. Video Settings On this page you can set show time Overlay, Show Camera Name Overlay, Network Auto-Adaptability and HDR Settings. Prompt Settings On this page you can set Status LED and Voice Prompt Screen Flip On this page you can set Screen Flip.
- Page 26 2.3.13 Delete camera You can click the delete Camera button to delete the camera from the app, or delete and keep history files from the app.
-
Page 27: Surveillance Software Foscam Vms
3.1 Hardware Connection & Software Installation 1. Connect the camera to the network, make sure it is on the same network as the computer 2. You can download the “Foscam VMS” Windows version from foscam.com/vms , and can download the "Foscam VMS"... -
Page 28: Add Device
you haven't created a local administrator account, please click Create Account to create. After creating a local administrator account, you can: 1. Use the account to log in to the client to ensure information security. 2. Create sub-accounts and assign different permissions for management. 3.3 Add Device 3.3.1 LAN Add If your floodlight camera is wired connect, you can choose the following method to add to FoscamVMS. - Page 29 Step1 Select “ALL” from the device types. Step2 Click the IP address of the camera on the list, then the name of the camera and the IP information will be entered automatically. Step 3 Click Add. Step 4 Enter the username and password of the camera. Please Note: Make sure the camera and PC are both in the same Local Area Network (LAN).
- Page 30 Step 1 Select the IP address from Connection Mode Step 2 Enter the IP and Port of the camera. Step 3 Select “IPC” or “NVR” from the Device types. Step 4 Click Add Step 6 Enter the username and password of the camera.
- Page 31 3.3.3 Manual add via UID You can add the camera use manual add via UID also. Click the Manual add first, then follow below steps: Step 1 Select the UID from Connection mode Step 2 Enter the UID of the device. Step 3 Click Add...
- Page 32 Step 4 Enter the user name and password of the camera. 3.3.4 Connect the camera to WiFi You can add the camera via Connect the camera to WiFi also. Click Connect the camera to Wi-Fi or the button first, then follow below steps:...
- Page 33 Step 1 Enter the WiFi Name and WiFi Password, then click Next Note: Please reset your camera. Step 2 Please scan the QR code above with the camera you want to add. After the scan is successful, click confirm.
- Page 34 Step 3 Return to the device list to connect the device, refer to the LAN add steps 3.3.5 Manually Add via DDNS You can add the camera use manual add via DDNS also. Click the Manual add first, then follow below steps: Step 1 Select the DDNS from the Connection Mode Step 2 Enter the DDNS and Port of the camera.
- Page 35 Step 5 Enter the username and password of the camera.
-
Page 36: Surveillance Software Gui
3.4 Surveillance Software GUI First time you login the software, the whole video window is gray, you need to connect the cameras and add cameras to it. Section1 Menu Bar Path to surveillance window. Click this button enter to Device List and back to the surveillance window. - Page 37 Left Bar of Live: You can view the list of connected cameras 1----- Reconnect Click the settings button and the device will reconnect. 2----- Move To Click this button, you can move the device to your group list. 3-----SD Card If you have an SD card on your device, click this button to enter the SD directory.
- Page 38 1-----Close Click the icon to close this channel live window 2-----Device Name Show view channel and camera name. 3-----Recording and Alarm status This icon will turn to red, it indicates that the camera is recording This icon will turn to yellow, the motion is detected during the detection time in the detection area, the camera alarm and adopt the corresponding alarm indicators 4----- Record / Snap Shot / Sound / Talk button Talk...
- Page 39 need to plug in earphones or enable the computer speakers to hear from the camera's microphone. Make sure the camera supports audio. Click again and stop audio. Talk ----- Click the button, then talk to the microphone that connected with PC, people around the camera can here you voice.
-
Page 40: Advanced Camera Settings
Night Vision: You can set Night Vision. 3.5 Advanced Camera Settings Click the button, goes to Device Settings to make advanced camera settings. 3.5.1 Status Status contains two columns: Device Information and Logs, it will show you various information about your camera. - Page 41 3.5.1.1 Device Information Device Name: The Device Name is a unique name that you can give to your device to help you identify it. Click Basic Settings and go to Camera Name panel where you can change your camera name. The default device name is Foscam_camera.
- Page 42 3.5.1.3 User Access Status Session status will display who and which IP is visiting the camera now...
- Page 43 3.5.1.4 Logs The log record shows who and which IP address accessed or log out the camera. Click the page number and go to the corresponding page to see more logs Full in one page number, click go GO button and go to the corresponding page.
- Page 44 3.5.2.2 Device Time This section allows you to configure the settings of the internal system clock for your camera. Time Zone: Select the time zone for your region from the drop down menu. Sync with NTP server: Network Time Protocol will synchronize your camera with an Internet time server. Choose the one that is closest to your camera.
- Page 45 How to change the password? Firstly, select the account which you want to change the password, then select Change password, enter the old password and the new password, lastly click modify to take effect. How to change the username? Select the account which you want to change the username, then select Change username, enter the new username and the password, lastly click modify to take effect.
- Page 46 3.5.2.5 Voice Prompt You can set the voice prompt on the camera to turn on and off if you connect an external audio device. 3.5.3 Network This section will allow you to configure your camera's information. 3.5.3.1 IP If you want to set a static IP for the camera, please go to IP page. Keep the camera in the same subnet of your...
- Page 47 router or computer. It is recommended that you use the subnet mask, gateway and DNS server from your locally attached PC. If you don't know the subnet mask, gateway and DNS server, you can check your computer's local area connection as follows: Control Panel--Network Connections--Local Area Connections --Choose Support--Details.
- Page 48 If you don't know the DNS server, you can use the same settings as the Default Gateway. 3.5.3.2 WiFi Step 1: Click the Scan button and the camera will detect all wireless networks around the area. It should also display your router in the list. Click the Scan button to search for wireless networks.
- Page 49 Congratulations! You have set up the wireless connection of the camera successfully. NOTE: If you fail to make a wireless connection, please refer to your seller or contact us directly for assistance. 3.5.3.3 DDNS FOSCAM cameras can use third-party domain names.You can choose the corresponding third-party domain name.
- Page 50 3.5.3.4 Port This camera supports HTTP Port / HTTPS Port/ ONVIF Port. HTTP Port is used to access the camera remotely. HTTP port: By default, the HTTP is set to 88. Also, they can be assigned with another port number between 1 and 65535.
- Page 51 3.5.3.6 FTP If you want to upload record images to your FTP server, you can set FTP. FTP server: If your FTP server is located on the LAN, you can set as Figure a. If you have an FTP server which you can access on the internet, you can set as Figure b. Port: Default is port 21.
- Page 52 1----- SMTP Server/ Port /Transport Layer Security Enter SMTP server for sender. SMTP port is usually set as 25. Some SMTP servers have their own port, such as 587 or 465, and Transport Layer Security usually is None. If you use Gmail, Transport Layer Security must be set to TLS or STARTTLS and SMTP Port must be set to 465 or 25 or 587, which port you choose should be decided by which Transport Layer Security you select.
- Page 53 If the test success, you can see the Success behind the Test, at the same time the receivers will receive a test mail. If the test fails with one of the following errors after clicking Test, verify that the information you entered is correct and again select Test .
- Page 54 Stream type: There are four types to identify different streams you have set. Resolution: The camera supports multiple types, For example: 2K,3M,1080P, 720P, VGA. The higher the resolution is, the clearer video will become. But the code flux will become larger too, and it will take up more bandwidth.
- Page 55 3.5.4.3 Privacy This page is used to set some mask as privacy zone on the video. Privacy Zone: Allow On Screen Display Mask, there are two options, Yes or NO. Select Yes and draw a mask area on the video, the mask area will be black on the video. The mask area...
- Page 56 Click Save button and return to the Privacy Zone page, click Save to take effect. Back to the surveillance window, you can see the mask area as the following picture. 3.5.4.4 Snapshot On this page you can set the snapshot pictures' image quality and the storage path. Manual Snap Quality: Low, Middle and High.
- Page 57 Enable Timing to Capture To enable capture interval, follow the steps below: 1 Select Enable timing to capture 2 Capture interval: The interval time between two captures. 3 Select the capture time Capture anytime Click the black button up the MON, you will see all time range turn red. When something moving in the detection area at anytime, the camera will capture.
- Page 58 3.5.4.6 Color Adjustment You can adjust the settings to your liking. 3.5.4.7 NAA Enabling NAA(Network Auto-Adaptability) can make IP Camera changing the real-time rate to adapt different network conditions, which can supply better preview experience.
- Page 59 3.5.4.8 HDR You can choose to turn it on or off according to your own scene. 3.5.5 Detector 3.5.5.1 Motion Detection IP Camera supports Motion Detection Alarm, when the motion has been detected, it will send emails or upload images to FTP.
- Page 60 To enable motion detection, follow the steps below: 1 Enable Detection Switch 2 Set detection area You can set the alarm area. 3 Sensitivity---- It supports three modes: Low, Middle and High. The higher the sensitivity, the camera will be more easily alarmed.
- Page 61 If you want to receive alarm emails when motion is detected, you must select Send E-mail and set Mail Settings first. D Recording If you select this checkbox, when the motion has been detected, the camera will recording and load it to the FTP server.
- Page 62 Press the left mouse and drag it on the time boxes, you can select the serial area, 8 Click Save button to take effect. When the motion is detected during the detection time in the detection area, the camera will alarm and adopt the corresponding alarm indicators. NOTE: You must set the detection area and detection schedule, or else there is no alarm anywhere and anytime.
- Page 63 To enable motion detection, follow the steps below: 1 Enable Detection Switch 2 Sensitivity---- It supports three modes: Low, Middle and High. The higher the sensitivity, the camera will be more easily alarmed. Select one motion sensitivity. 3 Trigger Interval----The interval time between two motion detections. Here supports 5s/6s/7s/8s/9s/10s/11s/12s/13s/14s/15s.
- Page 64 If you want to receive alarm emails when motion is detected, you must select Send E-mail and set Mail Settings first. D Recording If you select this checkbox, when the sound has been detected, the camera will recording and load it to the FTP server.
- Page 65 Press the left mouse and drag it on the time boxes, you can select the serial area, 7 Click Save button to take effect. When the sound is detected during the detection time in the detection area, the camera will alarm and adopt the corresponding alarm indicators. NOTE: You must set the detection area and detection schedule, or else there is no alarm anywhere and anytime.
- Page 66 5.3.5.4 Alarm Linkage After setting an URL, when camera triggers a detection, will call the URL. step: 1. You can fill in the alarm linkage address in the Full URL and click the Generate button, or modify it in the saved information, then click Save.
- Page 67 3.5.6 Record 3.5.6.1 Storage Management On this page you can choose Record Storage Path. The record storage path default is SD card. 3.5.6.2 Alarm Recording On this page you can configure the Alarm-recording Time, Enable pre-record time and Alarm-Recording time.
- Page 68 3.5.6.3 Schedule Recording On the page you can configure the schedule record. Note: Schedule Recording only supports SD Card. Schedule Recording can only be enabled after the recording path is set Please set the path in the storage management. Click Save button to take effect. 3.5.7 System In this panel, you can back up/restore your camera settings, upgrade the firmware to the latest version, restore...
- Page 69 the camera to default settings and reboot the device. 3.5.7.1 Back-up & Restore Click Backup to save all the parameters you have set. These parameters will be stored in a bin file for future use. Click Browse and select the parameters file you have stored, then click Submit to restore the restore the parameters.
- Page 70 Don't shut down the power during upgrade. After upgrading, you can see the upgrade result. 3.5.7.3 Patch Installation Click "Browse" to select the correct patch file, and then click "Install Patch" to install the patch. Do not turn off the power during it installing. After installing is complete, you will receive a system prompt. 3.5.7.4 Factory Reset Click Factory Reset button and all parameters will return to factory settings if selected.
-
Page 72: Appendix
After setup wireless configuration, and input the wireless password correctly, save the settings. Normally, after you disconnect the Ethernet cable, wait for few minutes camera will show up again in Foscam VMS LAN list with a new IP address. That indicates your camera’s connected wireless. - Page 73 and set a new user name and password. 4.1.3 How to setup alarm recording to Micro SD card For the cameras that support Micro SD card, we can save alarm recording on SD card and below are the steps to set it up: Step 1: Setup the Motion Detection Settings Please go to Device Settings >...
- Page 74 Note: 1) Please DO NOT forget to set the alarm schedule, the alarm schedule is red. 2) Please make sure your camera time is correct. 3) Please DO NOT forget to set the alarm area, the detected area is covered by the red grids. Or for some models you can setup 3 detection zones in total.
- Page 75 4.1.5 Camera is added by others When use Foscam app, one camera can only be added to one account at the same time. To solve error “This camera has already been added by another account” when add camera to Foscam app , please reset the camera.
-
Page 76: Default Parameters
4.2 Default Parameters Default network parameters IP address: obtain dynamically Subnet mask: obtain dynamically Gateway: obtain dynamically 4.3 Specification ITEMS Security Floodlight Camera Security Light 2600lum(Two Floodlights),Adjustable brightness Power Consumption 25W(Two Floodlights) Floodlight Color temperature 5000K Lamp body material Aluminum alloy Sensor High Definition Color CMOS Sensor Image Sensor... -
Page 77: Ce & Fcc
Alarm via E-Mail, upload alarm snapshot to FTP , push Motion Detection message to mobile phone and push stream to Cloud Alarm via E-Mail, upload alarm snapshot to FTP , push Sound Detection message to mobile phone and push stream to Cloud Alarm via E-Mail, upload alarm snapshot to FTP , push Human Detection message to mobile phone and push stream to Cloud... -
Page 78: Warranty
No warranty service is provided unless the product is returned to an authorized return center in the region where the product was first shipped by FOSCAM or to the point-of-purchase, which may have regional specific warranty implications. - Page 79 Return Procedures Please read FOSCAM warranty policy & policy of your reseller first before sending items back to point-of-purchase. Customer must first contact point-of-purchase to obtain a Return Merchandise Authorization (RMA) number before returning the product. If the product you received is suspected to be defective and the product warranty has not expired, The RMA number will allow your reseller to track your return much easier and help them expedite processing your request.
-
Page 80: Statement
FOSCAM, shall be the repair or replacement of defective parts. If FOSCAM lists a product on its website specification in error or that is no longer available for any reason, FOSCAM reserves the right to explain it without incurring any liability. - Page 81 Internet network, computer viruses, malicious attacks of hackers, information damage or loss, and faults of computer system. Foscam company does not need to take any responsibility of the special, incidental or corresponding loss by the products of our company or any software provide by our company, including but not limited to operating loss, profit or purpose.
-
Page 82: Obtaining Technical Support
User's Guide has not answered. If you have problem with FOSCAM IP camera, please first contact FOSCAM reseller for solving the problems. If our reseller cannot provide service, please contact our service department: support@foscam.com...
Need help?
Do you have a question about the F41/FLC and is the answer not in the manual?
Questions and answers