
Subscribe to Our Youtube Channel
Related Manuals for Sharp K-60DX19BM0-EU


Summary of Contents for Sharp K-60DX19BM0-EU
- Page 1 Home Appliances K-60DX19BM0-EU K-60DX19IM0-EU K-60DX19AM0-EU Cooking Bedienungsanleitung User Manua Guide D’utilisatio Istruzioni per l’uso...
- Page 2 Vielen Dank, dass Sie sich für dieses Produkt entschieden haben. Diese Gebrauchsanweisung enthält wichtige Sicherheitshinweise sowie Hinweise zum Gebrauch und der Wartung Ihres Gerätes. Lesen Sie diese Gebrauchsanweisung vor der ersten Benutzung des Geräts aufmerksam durch, und bewahren Sie sie sorgfältig auf. Symbol Bedeutung WARNUNG...
-
Page 3: Table Of Contents
INHALT 1. SICHERHEITSHINWEISE ....................4 1.1 Allgemeine Sicherheitshinweise ...................4 1.2 Hinweise zum Aufstellen und Anschließen ..............7 1.3 Während des Betriebs ....................8 1.4 Warnhinweise zur Reinigung und Wartung ..............9 2.Installation und Vorbereitung für den Gebrauch .............. 11 2.1 Hinweise für den Installateur ..................11 2.2 Einbauen des Backofens .................... -
Page 4: Sicherheitshinweise
1. SICHERHEITSHINWEISE • Lesen Sie diese Gebrauchsanweisung aufmerksam durch, bevor Sie das Gerät verwenden, und bewahren Sie sie an einem zugänglichen Ort auf, um bei Bedarf wichtige Informationen nachschlagen zu können. • Diese Gebrauchsanweisung wurde für mehrere Modelle erstellt. Daher verfügt Ihr Gerät möglicherweise nicht über einige der Eigenschaften, die in diesem Dokument beschrieben werden. - Page 5 WARNUNG: Hat die Oberfläche Sprünge, müssen Sie das Gerät sofort ausschalten. Es besteht Stromschlaggefahr. • Schalten Sie das Gerät nicht über eine externe Zeitschaltuhr oder eine separate Fernsteuerung ein. • Das Gerät wird beim Betrieb heiß. Seien Sie vorsichtig und berühren Sie niemals die Heizelemente im Ofeninneren.
- Page 6 • Wartungs- und Reparaturarbeiten dürfen nur von autorisierten Servicetechnikern durchgeführt werden. Installations- oder Reparaturarbeiten, die von nicht autorisierten Technikern ausgeführt werden, können Sie gefährden. Nehmen Sie keine Änderungen an den Eigenschaften des Herdes vor. Es besteht Unfallgefahr durch Verwendung ungeeigneter Schutzabdeckungen für das Kochfeld. •...
-
Page 7: Hinweise Zum Aufstellen Und Anschließen
• Stellen Sie sicher, dass das Netzkabel bei der Installation nicht eingeklemmt oder beschädigt wird. Wenn das Netzkabel beschädigt ist, muss es vom Hersteller, einem autorisierten Kundendienst oder einer gleichermaßen qualifizierten Person ersetzt werden, um Gefahren zu vermeiden. • Lassen Sie Kinder nicht auf die Backofentür klettern oder darauf sitzen, während sie geöffnet ist. -
Page 8: Während Des Betriebs
• Das Gerät darf zur Vermeidung von Überhitzungen nicht hinter einer dekorativen Tür installiert werden. 1.3 während deS BetrieBS • Wenn Sie den Backofen das erste Mal einschalten, nehmen Sie möglicherweise einen leichten Geruch wahr. Das ist vollkommen normal. Der Geruch rührt von den Isoliermaterialien und den Heizelementen her. -
Page 9: Warnhinweise Zur Reinigung Und Wartung
Fett oder Öl. Schalten Sie stattdessen den Herd aus, und decken Sie die Pfanne mit ihrem Deckel oder einer Feuerdecke zu. • Wenn das Gerät längere Zeit nicht benutzt wird, schalten Sie den Netzhauptschalter aus. • Achten Sie stets darauf, dass die Einstellknöpfe in der Stellung „0“... - Page 10 CE-Konformitätserklärung Unsere Produkte entsprechen den geltenden EG-Verordnungen, -Beschlüssen und -Richtlinien sowie den Anforderungen der Normen, auf die verwiesen wird. Dieses Gerät wurde ausschließlich für das Kochen zu Hause ausgelegt.Jegliche andere Verwendung, wie das Beheizen eines Raumes, ist unsachgemäß und gefährlich. Die Gebrauchsanweisungen gelten für mehrere Modelle.Möglicherweise gibt es Abweichungen zwischen der Gebrauchsanweisung und Ihrem Modell.
-
Page 11: Installation Und Vorbereitung Für Den Gebrauch
2. Installation und Vorbereitung • Die Arbeitsplatte und Möbel, die das Gerät umgeben, müssen für den Gebrauch aus Materialien gefertigt sein, die WARNUNG:Das Gerät muss von Temperaturen von über 100°C einem autorisierten Servicemitarbeiter standhalten können. oder einem qualifizierten Techniker gemäß •... - Page 12 Einbau unter einer Arbeitsplatte Einbau in einen Hochschrank Nachdem alle elektrischen Anschlüsse ausgeführt wurden, den Backofen in den Einbauschrank einschieben.Die Backofentür öffnen, und die 2 Schrauben in die Löcher im Rahmen des Backofens einschrauben.Bei an der Schrankoberfläche anliegendem Geräterahmen die Schrauben festziehen.
-
Page 13: Elektrischer Anschluss Und Sicherheitshinweise
2.3 elektriScher AnSchluSS • Das Netzkabel (H05VV-F) muss lang und SicherheitShinweiSe genug sein, damit es auch bei vor dem Einbauschrank stehendem Gerät WARNUNG:Der elektrische Anschluss angeschlossen werden kann. des Gerätes muss von einem autorisierten Servicemitarbeiter oder • Sicherstellen, dass alle Anschlüsse einer qualifizierten Elektrofachkraft gemäß... -
Page 14: Produktmerkmale
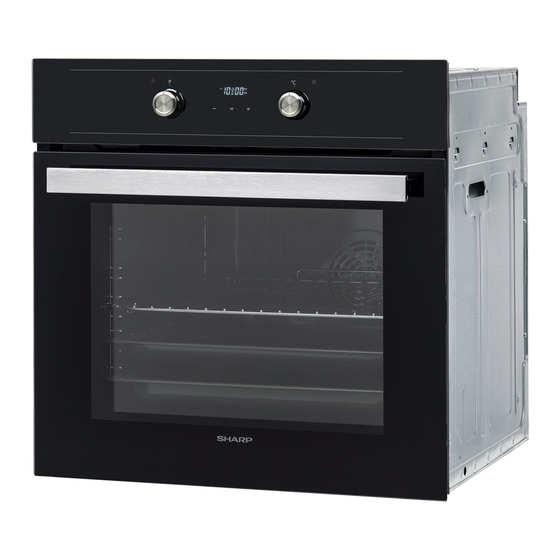
3. PRODUKTMERKMALE Wichtig:Die Merkmale der einzelnen Produkte können sich unterscheiden und Ihr Gerät sieht möglicherweise anders aus als auf den Abbildungen. Liste der Komponenten 1.Bedienfeld 2.Backofentürgriff 3.Backofentür Bedienfeld 4.Timer 5.Einstellknopf für Backofenfunktion 6.Temperatur-Einstellknopf für Backofen DE – 14... -
Page 15: Verwenden Des Produkts
4. Verwenden des Produkts Es wird empfohlen, den Backofen ca. 10 Minuten lang vorzuheizen. Ober- und 4.1 BAckofen-einStellknöpfe Unterhitze:Das Einstellknopf für Backofenfunktion Backofenthermostat Drehen Sie den Einstellknopf auf das und die Warnleuchten entsprechende Symbol für die gewünschte werden eingeschaltet, Garfunktion.Mehr Informationen zu und die Heizelemente den Funktionen finden Sie im Abschnitt für Ober- und... -
Page 16: Gartabelle
Pinseln Sie den Rost leicht mit Öl ein, damit Schieben Sie stets eine Fettpfanne unter das Gargut nicht daran haften bleibt, und dem Gargut ein, um heruntertropfendes Öl legen Sie das Gargut auf die Mitte des oder Fett aufzufangen. Es wird empfohlen, Rosts. - Page 17 Verwendung des digitalen Touch-Timers 3. Nach einigen Sekunden hört der Punkt auf zu blinken und wird dauerhaft angezeigt. Tastensperre Die Tastensperre aktiviert sich automatisch, nachdem der Timer 7 Funktionsbeschreibung Sekunden lang nicht verwendet wurde. Das Symbol „ “ erscheint und leuchtet Automatisches Garen dauerhaft.
- Page 18 1. Wählen Sie die gewünschte das Symbol " " und die Uhr wird angezeigt. Garfunktion und die Temperatur mit den Halbautomatische Zeiteinstellung Bedienungsknöpfen. (Garzeit) 2. Drücken Sie Diese Funktion ermöglicht das Garen über „MODE“, bis Sie das eine bestimmte Zeitdauer. Es kann ein Symbol „end“...
-
Page 19: Zubehör
verschwindet das Symbol "A" und der Timer 2. Drücken Sie schaltet wieder auf die manuelle Funktion „MODE“, bis Sie das Symbol „dur“ am Display sehen. Das Signaleinstellung Symbol „A“ blinkt. Passen Sie während der Anzeige der aktuellen Tageszeit die Lautstärke der akustischen Erinnerung an, indem Sie die Tasten „+“... - Page 20 Der Gittereinsatz mit halb ausziehbarer • Teleskopschienen können auf den Ebenen T1, T2, 3, 4 und 5 eingesetzt Easyfix-Teleskopschiene werden. Die halb ausziehbare Teleskopschiene lässt sich bis zur Hälfte ausziehen und • Ebene 3 wird für das Kochen auf einer bietet einen leichten Zugang zu Ihren Ebene empfohlen.
-
Page 21: Reinigung Und Wartung
auf die unteren Befestigungselemente, bis Sie deutlich hören, dass die Befestigungselemente in den Befestigungsdraht der seitlichen Einsatzebene einrasten. • Beim Entfernen halten Sie die Vorderseite der Schiene fest und wiederholen Sie die vorherigen Anweisungsschritte in umgekehrter Reihenfolge. Kombirost Der Kombirost eignet sich hervorragend 5. - Page 22 Verantwortung für Schäden durch die Verwendung von ungeeigneten Reinigungsprodukten oder -methoden. Ausbauen der Innenscheibe Sie müssen die Innenscheibe des Backofens vor der Reinigung wie unten dargestellt herausnehmen. 1.Die Scheibe in Pfeilrichtung B drücken, und aus der Halteklammer x lösen.Die Scheibe in Pfeilrichtung A herausheben. Reinigen der Glasteile •...
-
Page 23: Wartung
Ausbauen der Backofentür Sie müssen vor dem Reinigen der Innenscheibe des Backofens die Backofentür wie unten dargestellt herausnehmen. 1.Die Backofentür öffnen. 5.2 wArtung WARNUNG:Das Gerät sollte ausschließlich von einem autorisierten Servicemitarbeiter oder einem qualifizierten Techniker gewartet werden. Auswechseln der Backofenlampe 2.Den Sicherheitsbügel a mit einem WARNUNG:Schalten Sie das Gerät Schraubendreher bis zum Anschlag öffnen. -
Page 24: Fehlerbehebung Und Transport
6. FEHLERBEHEBUNG UND TRANSPORT 6.1 fehlerBeheBung Wenn an Ihrem Gerät weiterhin ein Fehler vorliegt, nachdem Sie die unten aufgeführten grundlegenden Schritte zur Fehlerbehebung befolgt haben, wenden Sie sich an einen autorisierten Servicemitarbeiter oder einen qualifizierten Techniker. Fehler Mögliche Ursache Lösung Stellen Sie sicher, dass die Spannungsversorgung vorhanden ist. -
Page 25: Technische Daten
7. TECHNISCHE DATEN 7.1 energieBlAtt Marke Modell K-60DX19BM0-EU K-60DX19IM0-EU K-60DX19AM0-EU Ofentyp Elektro Gewicht 31,2 Energieeffizienzindex – konventionell 103,6 Energieeffizienzindex – Umluft 94,1 Energieklasse Energieverbrauch (Elektrizität) – konventionell kWh/Zyklus 0,87 Energieverbrauch (Elektrizität) – Umluft kWh/Zyklus 0,79 Anzahl Kavitäten Heizquelle Elektro Volumen Dieser Ofen stimmt mit EN 60350-1 überein... - Page 26 Thank you for choosing this product. This User Manual contains important safety information and instructions on the operation and maintenance of your appliance. Please take the time to read this User Manual before using your appliance and keep this book for future reference. Icon Type Meaning...
- Page 27 CONTENTS 1.SAFETY INSTRUCTIONS ....................4 1.1 General Safety Warnings ....................4 1.2 Installation Warnings ......................6 1.3 During Use ........................7 1.4 During Cleaning and Maintenance .................8 2.INSTALLATION AND PREPARATION FOR USE ..............9 2.1 Instructions for the Installer ....................9 2.2 Installation of the Oven ....................9 2.3 Electrical Connection and Safety..................10 3.PRODUCT FEATURES ....................12 4.USE OF PRODUCT ......................13...
-
Page 28: Safety Instructions
1. SAFETY INSTRUCTIONS • Carefully read all instructions before using your appliance and keep them in a convenient place for reference when necessary. • This manual has been prepared for more than one model therefore your appliance may not have some of the features described within. - Page 29 the oven. • Handles may get hot after a short period during use. • Do not use harsh abrasive cleaners or scourers to clean the oven door glass and other surface. They can scratch the surfaces which may result in shattering of the door glass or damage to surfaces.
-
Page 30: Installation Warnings
heating a room. • Do not use the oven door handles to lift or move the appliance. • All possible measures have been taken to ensure your safety. Since the glass may break, care should be taken while cleaning to avoid scratching. Avoid hitting or knocking the glass with accessories. -
Page 31: During Use
• Any materials (i.e. cabinets) around the appliance must be able to withstand a minimum temperature of 100°C. • The appliance must not be installed behind a decorative door, in order to avoid overheating. 1.3 DurinG uSe • When you first use your oven you may notice a slight smell. -
Page 32: During Cleaning And Maintenance
• Make sure the appliance control knobs are always in the “0” (stop) position when it is not in use. • The trays incline when pulled out. Take care not to spill or drop hot food while removing it from the ovens. -
Page 33: Installation And Preparation For Use
2. INSTALLATION AND do not use it and contact an authorised service person or qualified technician PREPARATION FOR USE immediately. WARNING : This appliance must be • Make sure that there are no flammable installed by an authorised service or combustible materials in the close person or qualified technician, according to vicinity, such as curtains, oil, cloth etc. -
Page 34: Electrical Connection And Safety
Installation in a wall unit WARNING: THE APPLIANCE MUST After making the electrical connections, insert the oven into the cabinet by pushing BE EARTHED. it forward. Open the oven door and insert • Before connecting the appliance to the 2 screws in the holes located on the oven power supply, the voltage rating of the frame. - Page 35 • The appliance is designed for a power supply of 220-240V ~ and 380-415V 3N~. If your supply is different, contact the authorised service person or a qualified electrician. • The power cable (H05VV-F) must be long enough to be connected to the appliance, even if the appliance stands on the front of its cabinet.
-
Page 36: Product Features
3. PRODUCT FEATURES Important: Specifications for the product vary and the appearance of your appliance may differ from that shown in the figures below. List of Components 1. Control Panel 2. Oven Door Handle 3. Oven Door Control Panel 4. Timer 5. -
Page 37: Use Of Product
4. USE OF PRODUCT heating elements will start operating. The static cooking function emits heat, ensuring even cooking of food. This is ideal for 4.1 oven ControlS making pastries, cakes, baked pasta, Oven function control knob lasagne and pizza. Preheating the oven for 10 minutes is recommended and it is best Turn the knob to the corresponding symbol to use only one shelf at a time in this... -
Page 38: Cooking Table
elements will start operating. This function Puff Pastry 2-3-4 170-190 25-35 is used for faster grilling and for grilling food with a larger surface area, such as meat. Cake 2-3-4 150-170 25-35 Use the upper shelves of the oven. Lightly Cookie 150-170 25-35... - Page 39 Time adjustment 2. Select the desired time period using the The time must be set before you start using “+” and “-” keys while the oven. Following the power connection, “ ” is flashing. the symbol “A” and “00:00” or “12:00” will flash on the display.
- Page 40 sound. The symbols “A” will flash. Turn both 1. Select the desired cooking function and control knobs to the “0” position and press the temperature using the control knobs. any key on the timer to stop the warning 2. Press “MODE” until sound.
-
Page 41: Accessories
Sound Adjustment ****Accessories may vary depending on the model purchased. To adjust the volume of the audible warning The Deep Tray sound, while the current time of day is displayed, press “+” and “-” keys and the The deep tray is best used for cooking dot in the middle of the screen will start stews. -
Page 42: Cleaning And Maintenance
Fastening tab Fastener • On each telescopic rail there are fasteners that allow you to remove them The Water Collector for cleaning and repositioning. In some cases of cooking, condensation • Remove the side runner. See section may appear on the inner glass of the oven “Removal of the wire shelf”. - Page 43 of your appliance. not cleaned and allowed to dry on the surfaces they are on, they should NOT • Should any liquids overflow, clean them be rubbed with hard objects (pointed immediately to avoid parts becoming objects, steel and plastic scouring wires, damaged.
-
Page 44: Maintenance
Removal of the Wire Shelf removed the same way as the second glass layer. To remove the wire rack, pull the wire rack Removal of the Oven Door as shown in the figure. After releasing it from the clips (a), lift it up. Before cleaning the oven door glass, you must remove the oven door, as shown below. -
Page 45: Troubleshooting&Transport
illumination. 6. TROUBLESHOOTING&TRANSPORT 6.1 troubleShootinG If you still have a problem with your appliance after checking these basic troubleshooting steps, please contact an authorised service person or qualified technician. Problem Possible Cause Solution Check whether there is power supplied. Oven does not switch Power is switched off. -
Page 46: Technical Specifications
7. TECHNICAL SPECIFICATIONS 7.1 enerGy fiChe Brand Model K-60DX19BM0-EU K-60DX19IM0-EU K-60DX19AM0-EU Type of Oven ELECTRIC Mass 31,2 Energy Efficiency Index - conventional 103,6 Energy Efficiency Index - fan forced 94,1 Energy Class Energy consumption (electricity) - conventional kWh/cycle 0,87 Energy consumption (electricity) - fan forced... - Page 47 Merci d’avoir choisi ce produit. Cette notice d’utilisation contient des informations et des consignes de sécurité importantes concernant l’utilisation et l’entretien de votre appareil. Lire attentivement cette notice d’utilisation avant d’utiliser votre appareil et la conserver pour consultation ultérieure. Icône Type Signification AVERTISSEMENT...
- Page 48 TABLE DES MATIÈRES 1.CONSIGNES DE SÉCURITÉ ....................4 1.1. Avertissements de sécurité généraux ................4 1.2. Avertissements relatifs à l’installation ................6 1.3. Au cours de l’utilisation ....................7 1.4. Nettoyage et entretien ....................9 2.INSTALLATION ET PRÉPARATION À L’UTILISATION ...........10 2.1. Instructions destinées à l’installateur ................10 2.2.
-
Page 49: Consignes De Sécurité
1. CONSIGNES DE SÉCURITÉ • Lire attentivement cette notice d’utilisation dans son intégralité avant d’utiliser votre appareil et la conserver dans un endroit accessible pour consultation ultérieure. • Ce manuel a été préparé pour plusieurs modèles, votre appareil peut donc ne pas disposer de certaines fonctions décrites dans ce manuel. - Page 50 avec de l'eau, mais arrêter l'appareil puis couvrir les flammes par exemple avec un couvercle ou une couverture anti-feu. MISE EN GARDE : Risque d'incendie: ne pas entreposer d'objets sur les surfaces de cuisson. • L’appareil n’est pas destiné à être mis en fonctionnement au moyen d’une minuterie externe ou d’un système de commande à...
-
Page 51: Avertissements Relatifs À L'installation
dispositifs de protections non adaptés à l'appareil de cuisson peuvent provoquer des accidents. • Avant l'installation s'assurer que les conditions de distribution locale (tension et fréquence électrique) et le réglage de l'appareil sont compatibles. Les conditions de réglage de cet appareil sont inscrites sur la plaque signalétique de l’appareil. -
Page 52: Au Cours De L'utilisation
Le fabricant ne peut être tenu responsable de tout dommage causé en cas d’installation incorrecte par un techncien non qualifié. • Un moyen de déconnexion du réseau d’alimentation ayant une distance d’ouverture des contacts de tous les pôles doit être prévu dans la canalisation fixe conformément aux règles d’installation. - Page 53 • Rester prudent lors de l’ouverture de la porte du four pendant ou après la cuisson. La vapeur s’échappant du four peut provoquer des brûlures. • Ne pas placer de matériaux combustibles ou inflammables dans l’appareil ou près de l’appareil lorsqu’il est en fonctionnement.
-
Page 54: Nettoyage Et Entretien
• La lèchefrite s’incline lorsqu’on la sort du four. Attention à ne pas renverser ni à faire tomber de nourriture en la sortant du four. • Ne rien placer sur la porte du four lorsqu’elle est ouverte. Ceci pourrait déséquilibrer le four ou endommager la porte. -
Page 55: Installation Et Préparation À L'utilisation
2. INSTALLATION ET est peut-être endommagé, ne pas l’utiliser et contacter immédiatement un PRÉPARATION À L’UTILISATION professionnel agréé ou un technicien AVERTISSEMENT : Cet appareil doit qualifié. être installé par un professionnel • Vérifier qu’aucun élément ou matériau agréé ou par un technicien qualifié, combustible ou inflammable, par conformément aux instructions de cette exemple un rideau, de l’huile, un... -
Page 56: Branchement Électrique Et Sécurité
Installation murale Une fois les branchements électriques AVERTISSEMENT : L’APPAREIL effectués, insérer le four dans son DOIT ÊTRE BRANCHÉ À LA TERRE. emplacement en la poussant vers l’avant. • Avant le branchement sur le secteur, Ouvrir la porte du four et insérer 2 vis dans vérifier si la tension nominale de les trous du châssis du four. - Page 57 • Cet appareil est conçu pour utiliser une alimentation 220-240 V ~ et 380- 415 V 3 N~. Si votre alimentation est différente, contacter un professionnel agréé ou un électricien qualifié. • Le câble d’alimentation (H05VV-F) doit être assez long pour pouvoir être branché...
-
Page 58: Caractéristiques Du Produit
3. CARACTÉRISTIQUES DU PRODUIT Important : Les caractéristiques du produit varient et l’apparence de votre appareil peut être différente de celle présentée sur les figures ci-dessous. Liste des composants 1. Bandeau de commande 2. Poignée de la porte du four 3. -
Page 59: Utilisation De L'appareil
4. UTILISATION DE L’APPAREIL Fonction Convection naturelle : Le voyant du thermostat et les 4.1. commAndes du four voyants Manette de fonction d’avertissement du Faire tourner le bouton sur le symbole four s’allument, et les correspondant à la fonction souhaitée. Pour résistances inférieure les détails des différentes fonctions, se et supérieure... - Page 60 pinceau pour empêcher les aliments recommandé de préchauffer le four pendant d’accrocher, puis placez les aliments au environ 10 minutes. centre de la grille. Placez toujours une Avertissement : Pendant la cuisson lèchefrite sous la grille pour recueillir l’huile au gril, la porte du four doit être ou les graisses.
- Page 61 Utilisation de la minuterie numérique à écran tactile 3. Au bout de quelques secondes, le point cesse de clignoter et reste en surbrillance. Verrouillage Le verrouillage est activé automatiquement après que la minuterie n'a pas été utilisée pour 7 secondes. Le Description des fonctions symbole «...
- Page 62 « MODE » pendant 2 secondes et l’icône « boutons de contrôle. » disparaît et l'horloge s'affiche. Réglage semi-automatique du temps 2. Appuyez (durée de cuisson) sur le bouton « MODE »jusqu’à Cette fonction vous permet de cuire vos ce que vous voyiez aliments pendant une période déterminée.
-
Page 63: Accessoires
3. Sélectionnez la chaque fois que vous appuyez sur le bouton « - », un bip différent est émis. période souhaitée à l'aide des touches Il existe trois types de bips différents. « + » et « - ». Sélectionnez le bip souhaité et n’appuyez sur aucun autre bouton. - Page 64 modèle acheté. Lèchefrite La lèchefrite convient particulièrement à la cuisson de pot-au-feu. Placer la lèchefrite à n’importe quelle Onglet de fixation hauteur et veiller à la placer correctement en la poussant jusqu’au fond. Attache • Sur chaque rail télescopique, il y a des attaches qui vous permettent de les retirer pour le nettoyage et le repositionnement.
-
Page 65: Nettoyage Et Entretien
Ne pas utiliser de produits nettoyants contenant des particules, car ils risquent de rayer le verre et les parties émaillées et peintes de votre appareil. • Nettoyer immédiatement tout débordement de liquide afin d’éviter que les différentes pièces soient endommagées. Ne pas utiliser de nettoyeur à... - Page 66 Ne pas nettoyer les parties en acier inoxydable lorsqu’elles sont encore chaudes après la cuisson. Ne pas laisser trop longtemps de vinaigre, de café, de lait, de sel, d’eau, de jus de citron ou de jus de tomate sur les surfaces en acier inoxydable. Nettoyage des surfaces peintes (le cas échéant) •...
-
Page 67: Entretien
Retrait de la grille Pour retirer la grille, la tirer comme illustré sur la figure. Après l’avoir libérée des attaches (a), la lever. 5.2. entretien AVERTISSEMENT : Les opérations d’entretien de cet appareil doivent être effectuées uniquement par un professionnel agréé ou un technicien qualifié. -
Page 68: Dépannage Et Transport
6. DÉPANNAGE ET TRANSPORT 6.1. dépAnnAge Si le problème persiste sur votre appareil après avoir suivi ces étapes de dépannage de base, contacter un professionnel agréé ou un technicien qualifié. Problème Cause possible Solution Vérifier que l’alimentation électrique est branchée. Le four ne s’allume pas. -
Page 69: Spécifications Techniques
7. SPÉCIFICATIONS TECHNIQUES 7.1. fiche énergie Marque Modèle K-60DX19BM0-EU K-60DX19IM0-EU K-60DX19AM0-EU Type de four ÉLECTRIQUE Masse de I’appareil 31,2 Indice d’efficacité énergétique - conventionnel 103,6 Indice d’efficacité énergétique - ventilation forcée 94,1 Classe énergétique Consommation énergétique (électricité) - conventionnelle kWh/cycle 0,87 Consommation énergétique (électricité) - ventilation forcée... - Page 70 Grazie per aver scelto questo prodotto. Questo manuale utente contiene importanti informazioni sulla sicurezza e istruzioni sul funzionamento e la manutenzione del vostro apparecchio. Prima di utilizzare quest’ultimo, si prega di leggere attentamente questo manuale utente e di conservarlo per future consultazioni.
- Page 71 SOMMARIO 1.ISTRUZIONI DI SICUREZZA ....................4 1.1. Avvertenze generali di sicurezza ...................4 1.2. Avvertenze per l'installazione ..................7 1.3. Precauzioni durante l'uso ....................8 1.4. Precauzioni per la pulizia e la manutenzione ..............9 2.INSTALLAZIONE E PREPARAZIONE PER L'USO ............11 2.1. Istruzioni per l'installatore .................... 11 2.2.
-
Page 72: Istruzioni Di Sicurezza
1. ISTRUZIONI DI SICUREZZA • Leggere attentamente tutte le istruzioni prima di utilizzare l'apparecchio e tenerle in un luogo adatto per riferimento quando necessario. • Questo manuale è stato preparato per più di un modello, quindi il vostro apparecchio potrebbe non avere alcune delle funzioni descritte all'interno. - Page 73 • Durante l'uso l'apparecchio si riscalda. Prestare attenzione per evitare di toccare gli elementi riscaldanti all'interno del forno. • Durante il normale utilizzo, anche per brevi periodi, le maniglie potrebbero riscaldarsi. • Non utilizzare detergenti abrasivi o spugne abrasive per pulire le superfici del forno. Questi possono graffiare le superfici e provocare la rottura del vetro dello sportello o danni alle superfici stesse.
- Page 74 ATTENZIONE: Questo apparecchio è progettato esclusivamente per la cottura di alimenti ed è destinato esclusivamente all'uso domestico. Non deve essere utilizzato per altri scopi o in qualsiasi altra applicazione, ad esempio per uso non domestico, in un ambiente commerciale o per riscaldare una stanza. Utilizzi differenti o l’uso commerciale invalideranno la garanzia.
-
Page 75: Avvertenze Per L'installazione
presente manuale. • Nel caso il significato di una o più informazioni di questo manuale non fosse comprensibile, l’utente deve contattare il rivenditore o il produttore per i chiarimenti necessari prima di effettuare qualsiasi operazione. 1.2. Avvertenze per l'instAllAzione • Non utilizzare l'apparecchio prima che sia completamente installato. -
Page 76: Precauzioni Durante L'uso
dietro a una porta decorativa, per impedire il surriscaldamento. 1.3. precAuzioni durAnte l'uso • Quando si usa il forno per la prima volta, si potrebbe notare un leggero odore. Questo è perfettamente normale ed è causato dai materiali isolanti sugli elementi riscaldanti. Prima di utilizzare il forno per la prima volta, suggeriamo di lasciarlo vuoto e impostarlo alla massima temperatura per 45 minuti. -
Page 77: Precauzioni Per La Pulizia E La Manutenzione
• Assicurarsi che le manopole di controllo dell'apparecchio siano sempre nella posizione "0" (arresto) quando l'apparecchio non è in uso. • I vassoi si inclinano quando vengono estratti. Fare attenzione a non versare o lasciare cadere cibi caldi quando vengono rimossi dal forno. •... - Page 78 Dichiarazione di conformità CE Dichiariamo che i nostri prodotti soddisfano le Direttive, le Decisioni e i Regolamenti Europei applicabili nonché i requisiti elencati nelle norme alle quali si fa riferimento. Questo apparecchio è stato progettato per essere utilizzato solo per utilizzo come cucina domestica. Qualsiasi altro uso (come il riscaldamento di una stanza) è...
-
Page 79: Installazione Epreparazione Per L'uso
2. INSTALLAZIONE E contattare immediatamente il servizio di assistenza tecnica autorizzato o un PREPARAZIONE PER L'USO tecnico qualificato. PERICOLO: questo apparecchio deve • Assicurarsi che non vi siano materiali essere installato dal servizio di infiammabili o combustibili nelle assistenza tecnica autorizzato o da un immediate vicinanze, come tende, olio, tecnico qualificato, secondo le istruzioni panni ecc. -
Page 80: Collegamento Elettrico E Sicurezza
Installazione in un pensile a muro • Dopo aver effettuato i collegamenti PERICOLO: L'APPARECCHIO DEVE elettrici, inserire il forno nel mobile ESSERE COLLEGATO A TERRA. spingendolo in avanti. Aprire lo sportello • Prima di collegare l'apparecchio del forno e inserire 2 viti nei fori posti alla rete elettrica, è... - Page 81 • Se l'apparecchio non è collegato alla rete tramite una spina, è necessario utilizzare un morsetto connettore (con una distanza dei contatti di almeno 3 mm) per soddisfare le norme di sicurezza. • L'apparecchio è progettato per una tensione di rete di 220-240 V ~ e 380- 415 V 3N ~.
-
Page 82: Caratteristiche Del Prodotto
3. CARATTERISTICHE DEL PRODOTTO Importante: le specifiche del prodotto variano e l'aspetto dell'apparecchio potrebbe essere diverso da quello mostrato nelle figure seguenti. Elenco delle parti 1. Pannello dei comandi 2. Maniglia dello sportello forno 3. Sportello forno Pannello dei comandi 4. -
Page 83: Uso Del Prodotto
4. USO DEL PRODOTTO Funzione cottura statica: il termostato del forno e le spie si 4.1. controlli del forno accendono, ed entrano Manopola di controllo della funzione in funzione gli elementi forno riscaldanti inferiore e Ruotare la manopola sul corrispondente superiore. La funzione simbolo della funzione di cottura desiderata. - Page 84 Pericolo: durante la grigliatura, lo Sfoglia 2-3-4 170-190 35-45 sportello del forno deve essere chiuso e la temperatura del forno deve essere Torte 2-3-4 170-190 30-40 regolata su 190° C. Biscotti 2-3-4 170-190 30-40 Funzione grill rapido: Stufato 175-200 40-50 il termostato del forno e le spie si accendono Pollo...
- Page 85 i pulsanti timer, tenere premuto il pulsante “MODE” per 2 secondi. L’operazione Descrizione delle funzioni desiderata può quindi essere eseguita. Regolazione orario con avviso acustico Cottura automatica L’orario con avviso acustico può essere impostato su qualsiasi orario tra le “00:00” Cottura manuale e le “23:59”.
- Page 86 3. Usare i pulsanti “+” 2. Premere “MODE” e “-” per impostare finché non compare l’orario di fine il simbolo “dur” sullo schermo del display. Il desiderato. simbolo “A” lampeggia. 4. L’orario attuale 3. Selezionare la riappare sullo schermo, fascia oraria di cottura i simboli “A”...
-
Page 87: Accessori
4. Premere “MODE” 4.2. Accessori finché non compare Griglia Easyfix il simbolo “end” Pulire gli accessori con cura usando acqua sullo schermo. Il calda, detergente e un panno morbido tempo e i simboli “A” pulito al primo utilizzo. lampeggiano. 5. Selezionare l’orario di fine desiderato a usando i pulsanti “+”... - Page 88 • Su ogni guida telescopica ci sono i supporti di fissaggio che permettono di rimuoverla per la pulizia e lo spostamento. • Rimuovere il carrello laterale. Consultare la sezione “Rimozione della griglia." Teglia piatta La teglia piatta è l'ideale per la pasticceria. Inserire la teglia in qualsiasi guida e spingerla fino in fondo per assicurarsi che sia posizionata correttamente.
-
Page 89: Pulizia E Manutenzione
Raccoglitore dell'acqua Pulizia dell'interno del forno In alcuni casi, durante la cottura potrebbe • Si consiglia di pulire l'interno dei forni apparire della condensa sul vetro interno smaltati mentre il forno è caldo. dello sportello del forno. Questo non è un • Dopo ogni utilizzo pulire il forno con malfunzionamento del prodotto. - Page 90 sfregate con oggetti rigidi (oggetti a Se lo sportello del forno è a triplo punta, pagliette di plastica e acciaio, vetro, il terzo strato di vetro può essere spugne per piatti che potrebbero rimosso allo stesso modo del secondo danneggiare la superficie) oppure agenti strato di vetro.
-
Page 91: Manutenzione
Rimozione della griglia metallica Per rimuovere la griglia, tirarla come mostrato in figura. Dopo averla sganciata dalle clip (a), sollevarla. 5.2. mAnutenzione AVVERTENZA: la manutenzione di questo apparecchio deve essere eseguita esclusivamente dal servizio di assistenza tecnica autorizzato o da un tecnico qualificato. -
Page 92: Risoluzione Dei Problemi E Trasporto
6. RISOLUZIONE DEI PROBLEMI E TRASPORTO 6.1. risoluzione dei problemi Se dopo aver verificato i seguenti passaggi di base per la risoluzione dei problemi si verificano ancora problemi con l’apparecchio, contattare il servizio di assistenza tecnica autorizzata o un tecnico qualificato. Problema Possibile causa Soluzione Controllare se l'alimentazione è... -
Page 93: Specifiche Tecniche
7. SPECIFICHE TECNICHE 7.1. schedA prodotto Marchio Modello K-60DX19BM0-EU K-60DX19IM0-EU K-60DX19AM0-EU Tipo di forno ELETTRICO Massa 31,2 Indice di efficienza energetica - convenzionale 103,6 Indice di efficienza energetica - ventilazione forzata 94,1 Classe energetica Consumo energetico (elettricità) - convenzionale kWh/ciclo 0,87 Consumo energetico (elettricità) - ventilazione forzata... - Page 94 Service & Support Visit Our Website sharphomeappliances.com...
Need help?
Do you have a question about the K-60DX19BM0-EU and is the answer not in the manual?
Questions and answers