
Related Manuals for Sharp KF-66FVDD22WM-CH


Summary of Contents for Sharp KF-66FVDD22WM-CH
- Page 1 Home Appliances KF-66FVDD22WM-CH KF-66FVDD22IM-CH Cooking User Manual Bedienungsanleitung Guide D'utilisation Istruzioni per I'uso AИнструкции за Употреба...
- Page 2 IT-Dichiarazione di conformità Dichiariamo che i nostri prodotti sono conformi a Direttive, Decisioni e Regolamenti europei e ai requisiti elencati negli standard di riferimento. GR-Δήλωση συμμόρφωσης Δηλώνουμε ότι τα προϊόντα μας πληρούν τις GB-Declaration of conformity εφαρμόσιμες Ευρωπαϊκές Οδηγίες, Αποφάσεις We declare that our products meet the και...
- Page 3 HR-Izjava o sukladnosti Izjavljujemo da su naši proizvodu u skladu s HU-Megfelelőségi nyilatkozat primjenjivim Direktivama, Odlukama i Uredbama Ezúton igazoljuk, hogy termékeink megfelelnek Europske unije te zahtjevima navedenima u az EU direktíváknak, jogszabályoknak, spomenutim standardima. előírásoknak. Az előírások felsorolása a referencia tartalmaknál.
- Page 4 être traité comme des déchets ménagers. Il doit plutôt être remis au point de ramassage concerné, se chargeant du recyclage du maté- riel électrique et électronique. En vous confor- mant à une procédure d’enlèvement correcte du produit, vous aiderez à prévenir tout effet nuisible à...
- Page 5 παραδίδεται στο αρμόδιο σημείο συλλογής για de resíduos deste produto. Para informações mais detalhadas sobre a reciclagem deste ανακύκλωση ηλεκτρικού και ηλεκτρονικού εξο- produto, contacte as suas autoridades locais, πλισμού. Διασφαλίζοντας τη σωστή απόρριψη του προϊόντος αυτού, συντελείτε στην πρόληψη centro de reciclagem ou a loja onde comprou o produto.
- Page 6 který by jinak mohl vzniknout při nesprávné kasseras korrekt, hjälper du till att förhindra po- likvidaci tohoto výrobku. Pro bližší informace tentiella negativa konsekvenser för miljön och ohledně recyklace tohoto výrobku kontaktujte människors hälsa, som annars kunde orsakas prosím místní úřady, službu likvidace domov- av olämplig avfallshantering av denna produkt.
- Page 7 za preuzimanje zarad recikliranja električne i elektronske opreme. Starajući se da ovaj UK: Цей символ, нанесений на виріб або proizvod bude pravilno uklonjen, pomoćićete його упаковку, означає, що виріб не можна da se spreče potencijalne negativne posledice викидати разом із побутовим сміттям. На- za okruženje i ljudsko zdravlje, što može da u томість...
- Page 8 AL: Simboli mbi produkt ose mbi paketimin e predat centrelor de colectare adecvate de reci- clare a echipamentelor electrice şi electronice. tij tregon se ky produkt nuk mund të trajtohet Asigurând eliminarea corectă a acestui produs, si mbeturinë shtëpiake. Në vend të kësaj ajutaţi la prevenirea posibilelor consecinţe ne- ai do të...
- Page 9 Lai saņemtu papildinformāciju par izstrādāju- ma pārstrādi, sazinieties ar vietējo pārvaldi, pārstrādes centru vai tirdzniecības vietu, kurā iegādājāties izstrādājumu. PL: Ten symbol umieszczony na produkcie lub opakowaniu oznacza, że produktu nie wolno usuwać razem ze zwykłymi odpadkami z gospodarstw domowych. Zamiast tego należy go przekazać...
- Page 10 Dear Customer, We take offering quality products more than your expecta- tion as a goal, offers you the products produced in modern facilities carefully and particularly tested for quality. This manual is prepared in order to help you to use your ap- pliance that is manufactured by the most recent technology, with confidence and maximum efficiency.
- Page 11 CONTENTS : 1. PRESENTATION AND SIZES OF PRODUCT 2. SAFETY WARNINGS 3. INSTALLATION AND PREPARATIONS FOR USE 4. USE OF YOUR OVEN 5. CLEANING AND MAINTENANCE 6. SERVICE AND TRANSPORT EN - 3...
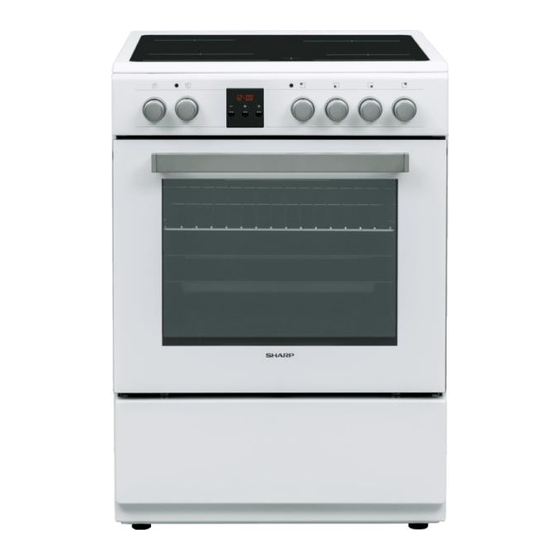
- Page 12 Control Panel for4 heater : PRODUCT DIMENSIONS MODEL DEPTH WIDTH HEIGHT (cm) (cm) (cm) KF-66FVDD22WM-CH KF-66FVDD22IM-CH 1- Lid 8- Oven Lamp 2- Cooktop 9- Wire Grid 3- Control Panel 10- Shallow Tray 4- Oven Door Handle 11- Ø 180 Hotplate 5- Oven Door 12- Ø...
-
Page 13: Safety Warnings
Children shall not play SAFETY WARNINGS with the appliance. READ THESE INSTRUCTIONS CAREFULLY AND COMPLETELY Cleaning user BEFORE USING YOUR APPLIAN- maintenance shall not CE, AND KEEP IT IN A CONVENI- ENT PLACE FOR REFERENCE be made by children WHEN NECESSARY. without supervision. - Page 14 • Do not use harsh ab- from the lid before rasive cleaners opening. And also the sharp metal scrapers hob surface should be to clean the oven door allowed to cool before glass and other sur- closing the lid.
- Page 15 le parts may be hot you should be careful while cle- aning to avoid scratching. Avoid when the cooking or hitting or knocking on the glass with grilling is in use. Yo- accessories. ung children should • Ensure that the supply cord is not wedged during the installation.
- Page 16 etc. • If you will not use the appliance for a long time, plug it off. Keep the • The surrounding materials of the main control switch off. Also when appliance (cabinet) must be able you do not use the appliance, keep to withstand a temperature of min the gas valve off.
- Page 17 TO MAINTAIN THE EFFICIENCY AND SAFETY OF YOUR APPLI- ANCE, WE RECOMMEND YOU ALWAYS USE ORIGINAL SPARE PARTS AND TO CALL ONLY OUR AUTHORIZED SERVICE AGENTS IN CASE OF NEED. EN - 9...
- Page 18 Contact to Authorized Service are on, for mounting of your oven. it must be at least 11 cm away from the INSTALLATION OF OVEN oven’s side. There are some factors that must be paid attention to while installing your The minimum heights from the oven.
-
Page 19: Electric Connection And Security
ELECTRIC CONNECTION AND is different than this informed value, SECURITY immediately contact to our authorized service. During the electric connection, surely follow the instructions below. The electric cable must not touch to The earthing cable must be connec- the hot parts of appliance. The electric ted to the terminal. -
Page 20: General Warnings And Measures
GENERAL WARNINGS AND MEASURES Some appliances can be equipped with special plug (Perilex or Norplug). If Your appliance is produced in it is necessary, change it with the same accordance with the related security specified spare part. instructions connected with electrical appliance. The maintenance and repair works Use 16A/400V 5 pin for perilex plug must be... - Page 21 clock must be programmed for cooking in your oven. Otherwise the oven does not operate. Do not leave anything on it when the door or drawer of oven is open. You unbalance your appliance or break the cover. Do not put heavy things or flammable, burnable goods (nylon, plastic bag, paper, cloth etc.) into the lower drawer.
- Page 22 the control switch is at "0" location after GENERAL APPEARENCE AND cooking. TECHNICAL FEATURES OF Also never touch it as the cooker will YE66 be hot for a speific time after it was 1100 WATT turned off. LOWER HEATER Do not let children to come close to it. 1200 WATT UPPER HEATER Clean the electrical cooker with a wet...
- Page 23 PRESENTATION AND FEATURES OF THE CONTROLPANEL Use of digital minute minder selected signal type. Use of digital timer MODE Simultaneously press (+) and (-) buttons of digital minute minder. The Time Adjustment: display will start flashing, and then you can set the time setting by using (+) The time must be adjusted before and (-) buttons.
- Page 24 adjustment, the symbol will appear When the symbol begins to light on the screen. When this symbol continuously, the audible warning time appears on the screen, you can adjustment is done. manually operate the oven part. As the adjusted time will be reset in the event The audible warning time can be set to of a power failure, time adjustment a time between the time range of 0 and...
- Page 25 for the food you wish to cook, by. depending on the dish to be cooked. Keep pressing on the MODE button until you see “end” on the timer screen, the symbol (A) and the day’s time will using the (+) and (-) buttons while the respectively begin to flash.
- Page 26 certain period of time, within a certain the day’s time will appear on the duration. The food to be cooked is put screen and the symbol (A) will begin to into the oven. The oven is adjusted to continuously light on the screen. the desired cooking function.
-
Page 27: Defrost Function
Oven Functions Fan Function: The functions of your oven may be different due to the model of your product. The oven’s thermostat and warning lights will be turned on, the upper and lower heating elements and fan will Oven Lamp start operating. -
Page 28: Energy Saving
or fat. It is recommended to pre-heat elements and grill will be energised along the oven about 10 with the fan to ensure even cooking. minutes. Use the upper shelves of oven. Lightly Warning: When grilling, the oven brush the wire grid with oil to stop foods door must be closed and the oven sticking and place foods in the center of the temperature should be... -
Page 29: Oven Accessories
information related to the subject that oven. If you will use the big wire grill; were given by the manufacturer firm. put a tray onto In case small size dishes are used, one of the lower shelves for oils not to place the dish onto the grill wire, as it be collected. - Page 30 The inside of enameled oven is cleaned in the best way when the oven is warm. Wipe the oven with a soft cloth that had been hemmed in soapy water after each use. Later wipe it with a wet cloth once more and then dry it.
- Page 31 carry it with its original case when Requirements Before needed to Contacting to Service be carried. Follow the transport signs on case. If the oven does not operate; Tape the cooker on upper parts, hats The oven may be plugged off, there and heads and saucepan carriers to has been a blow-out.
- Page 32 Sehr verehrte/r Kunde/in, Unser Ziel ist es Qualitätsprodukte herzustellen, die ihre Erwartungen übertreffen. Wir bieten Ihnen in hochmodernen Fabriken produzierte und sorgfältig auf ihre Qualität geprüf- te Produkte. Dieses Handbuch wurde erstellt, um Sie bei der Verwen- dung Ihres Haushaltsgeräts zu unterstützen, das mit mo- dernster Technik, Sorgfalt und höchster Qualität hergestellt wurde.
- Page 33 INHALTSVERZEICHNIS: 1. VORSTELLUNG UND ABMESSUNGEN DES PRODUKTS 2. SICHERHEITSHINWEISE 3. INSTALLATION AND PREPARATIONS FOR USE 4. VERWENDUNG IHRES PRODUKTS 5. 6 Reinigung und Wartung 6. KUNDENDIENST UND TRANSPORT DE - 2...
- Page 34 Steuertafel für 4-Zonen-Kochfeld ABMESSUNGEN MODELL TIEFE WEITE HÖHE (cm) (cm) (cm) KF-66FVDD22IM-CH KF-66FVDD22WM-CH 1- Deckel 8- Backofenlampe: 2- Kochfeld 9- Drahtgitter 3- Schalttafel 10- Flaches Blech 4- Türgriff 11- Ø 180 Heiße Platte 5- Ofentür 12- Ø 145 Heiße Platte 6- Schubladenabdeckung 13- Ø...
- Page 35 SICHERHEITSHINWEISE verbundenen Gefah- ren kennen. Kinder LESEN SIE SICH DIESE AN- LEITUNG VOLLSTÄNDIG UND dürfen nicht mit dem SORGFÄLTIG VOR DER VER- Gerät spielen. WENDUNG IHRES GERÄTS DURCH UND BEWAHREN SIE Reinigung und An- SIE FÜR SPÄTERES NACH- wenderwartung soll- SCHLAGEN AN EINEM LEICHT te nicht ohne Aufsicht ERREICHBAREN ORT AUF.
- Page 36 Gerät aus und ersti- nung vorgesehen. cken die Flamme z. B. • ACHTUNG! mit einem Deckel oder verhindern, dass das einer Feuerdecke. Gerät umkippt, müs- • WARNUNG: Brand- sen die Stabilisierungs- gefahr: Legen Sie kei- klammern angebracht ne Gegenstände auf sein.
- Page 37 zum Splittern des Gla- Weise zu modifizieren oder umzu- bauen. ses oder Schäden an • Vor dem Einbau müssen Sie die der Oberfläche führen örtlichen Energieversorgungsbe- kann. dingungen prüfen (Art des Gases, Gasdruck oder elektrische Span- • Verwenden Sie zur nung und Frequenz) und das die Reinigung des Geräts Voraussetzungen mit dem Gerät...
- Page 38 Einbauhinweise Verwendung im leeren Zustand bei Höchsttemperatur 45 Minuten lang betreiben. Gleichzeitig müssen Sie • Benutzen Sie den Backofen erst, für eine ausreichende Entlüftung wenn er vollständig eingebaut ist. des Raumes sorgen, in dem das • Das Gerät muss von einem autori- Produkt aufgestellt ist.
- Page 39 Wenn Sie das Gerät nicht verwen- WIR EMPFEHLEN, DASS SIE STETS ORIGINALERSATZTTEILE den, drehen Sie das Gasventil zu. FÜR DEN FALL EINER REPA- • Achten Sie darauf, dass die Bedi- RATUR VERWENDEN UND NUR enknöpfe des Backofens immer auf IHREN AUTORISIERTEN KUN- „0"...
- Page 40 Setzen sie sicht mit dem zu- Wenn die Küchenmöbel höher als die gelassenen Kundendienst für Kochfläche ist, müssen sie mindestens den Einbau ihres Backofens in 11 cm von der Ofenseite sein. Verbindung. EINBAU DES OFENS Die Mindesthöhe der Kochfläche, Es gibt einige Faktoren, auf die Sie der Wandschränke und der paddle beim Einbau des Ofens achten müs- Boxen mit der Abzugshaube sind unten...
- Page 41 ELEKTRISCHER ANSCHLUSS ßen Teile des Geräts berühren. Das UND SICHERHEIT Stromkabel darf nicht die Rückseite des Geräts berühren. Sonst kann das Stromkabel des Geräts beschädigt Folgen sie den unten angegebenen werden und diese Situation kann zu Anleitungen genau während des elekt- einem Kurzschluss führen.
- Page 42 HINWEISE UND MASSNAHMEN mit dem entsprechen Ersatzteil. Ihr Gerät wurde gemäß den entspre- chenden Sicherheitsvorschriften bzgl. Verwenden Sie den 16A/400V 5-Pin Elektrogeräten hergestellt. Wartungs- für einen Perilex-Stecker und einen und Reparaturarbeiten dürfen nur von 25A/250V-Pin für einen Norplug. einem von der Herstellerfirma ausge- bildeten Servicetechniker ausgeführt Diese Stecker können nur in einigen werden.
- Page 43 sind. Sie können Ihr Gerät aus dem Gleichgewicht bringen oder den Deckel abbrechen. Stellen Sie keine schweren Ge- genstände bzw. entflammbare oder entzündliche Materialien (Nylon, Plastiktüten, Papier, Stoff usw.) in die Schublade. Stecken Sie es aus, wenn Sie das Gerät nicht benutzen. Schützen Sie Ihr Gerät vor Umwelt- einflüssen.
- Page 44 Stellen Sie genau sicher, dass Ihr Herd AUSSEHEN UND TECHNISCHE abgeschaltet ist und dass der Bedienk- MERKMALE DER nopf nach dem Kochen auf “0” steht. YE66) Berühren Sie ebenfalls nie die Koch- 1100 WATT platten, da er eine bestimmte nach UNTER HEIZER dem Abschalten noch heiß...
- Page 45 VORSTELLUNG UND EIGENSCHAFTEN DES BEDIENFELDS Verwendung von mechanischen sich. Wenn Sie andere Schaltfläche Herduhren. nicht mehr berühren, wird der letzte abgespielte Signalton gespeichert. Verwendung der digitalen Zeitschaltuhr Drücken Sie gleichzeitig (+) und (-) MODE Tasten der digitalen Kurzzeitwecker. Das Display wird zu blinken beginnen und dann können Sie die Zeit einstel- Zeit-Einstellung: len, in dem Sie die (+)- und (-)-Tasten...
- Page 46 Drücken von (+) und (-) für die Zeitein- Symbol durchgehend leuchtet, ist die stellung, beginnt das Symbol auf der Einstellung der Alarmfunktion abge- Anzeige zu blinken. Wenn das Symbol schlossen. erscheint, können Sie das Ofenteil manuell bedienen. Im Falle eines Der Signalton-Timer kann auf einen Stromausfalls muss die Uhrzeit erneut Wert zwischen 0 und 23:59 Stunden...
- Page 47 Anzeige sehen, beginnt das (A) Sym- Zielzeit. Die zuzubereitende Nahrung bol an zu blinken. Stellen Sie während wird in den Ofen gegeben. Der Ofen die gewünschte Garzeitperiode wird auf das gewünschte Kochpro- gramm eingestellt. Abhängig vom Essen, das zubereitet werden soll, wird die Ofentemperatur auf die gewünsch- unter Nutzung der (+) und (-) Tasten te Gradzahl eingestellt.
- Page 48 Vollautomatische Programmierung: Eine Kochzeit zwischen 0 bis 10 Stun- den kann eingestellt werden. d u r Drücken Sie die MODE-Taste, bis Sie „End“ auf der Timeranzeige sehen. Wenn Sie „End“ auf der Timeranzeige sehen, werden das (A) Symbol und die MODE Tageszeit anfangen zu blinken, unter Angabe der Kochdauer.
- Page 49 Backofenfunktionen Die Funktionen Ihres Backofens Umluft-Funktion: können je nach Modell Ihres Produkts unterschiedlich sein. Der Thermostat und die Warnlampe des Backofens schaltet sich ein, das Backofenlampe: obere und untere Heizelement heizen Nur die Backofenlampe wird sich auf und der Lüfter schaltet sich ein. eingeschaltet und bleibt bei allen Diese Funktion erzielt gute Ergebnisse Backfunktionen an.
-
Page 50: Energie Sparen
Gitters. Stellen Sie immer ein Blech oberen Heiz- und Grillelemente werden darunter, um tropfendes Öl oder Fett zusammen mit dem Lüfter verwendet, aufzufangen. Es wird empfohlen, den um ein gleichmäßiges Backergebnis zu Backofen für 10 Minuten vorzuheizen. ermöglichen. Warnung: Beim Grillen muss die Nutzen Sie die oberen Schienen des Backofentür geschlossen und die Backofens. - Page 51 Im Ofen verwendetes Zubehör (Wenn ihr Produkt dieses Material enthält). Auf diese Weise kann das fließende und spritzende Öl nicht die Neben den mitgelieferten Ofenblechen Ofeninnenseite verschmutzen. Wenn und Hähnchengrilldrahteinrichtung Sie den großen Drahtgrill verwenden können Sie handelsübliches möchten, legen Sie ein Blech auf Glassgeschirr, handelsübliche eine der niedrigen Schienen, um Kuchenformen und spezielle...
- Page 52 schieben Sie ihn nach hinten. Sie sicher, dass der Ofen ausgesteckt ist. Die Emailauskleidung des Ofens lässt sich am besten reinigen, wenn der Ofen warm ist. Wischen Sie den Ofen mit einem weichen Tuch, das in Seifenlauge getaucht wurde, nach jeder Flaches Blech Verwendung aus.
- Page 53 Informationen zum Transport heiß sind. Wenn Sie dies nicht tun, können diese Glasscheiben springen. Kontaktieren Sie den Kundendienst, Wenn Sie Ihren Backofen wenn ein Problem jeglicher Art auftritt. transportieren möchten: Heben Sie den Originalverpackungskarton des Backofens auf und transportieren Anforderungen, bevor Sie den Sieden Ofen darin, wenn es Kundendienst kontanktieren.
- Page 54 Cher client, Notre objectif est de vous fournir des produits dont la qua- lité dépasse vos attentes, fabriqués dans des installations modernes et testés rigoureusement à des fins de qualité. Ce manuel a été préparé pour vous aider à utiliser votre ap- pareil, fabriqué...
- Page 55 CONTENU : 1. PRÉSENTATION ET TAILLES DU PRODUIT 2. AVERTISSEMENTS DE SÉCURITÉ 3. INSTALLATION ET PRÉPARATIONS AVANT UTILISATION 4. UTILISATION DE VOTRE FOUR 5. NETTOYAGE ET MAINTENANCE 6. SERVICE ET TRANSPORT FR - 2...
- Page 56 LAR- HAU- FON- GEUR TEUR DEUR (cm) (cm) (cm) KF-66FVDD22WM-CH KF-66FVDD22IM-CH 7- Pieds réglables 1- Couvercle 8- Lampe du four 2- Plaque de cuisson 9- Grille maillée 3- Panneau de commande 10- Plaque de cuisson peu profonde 4- Poignée de la porte du four 5- Porte du four 11- Plaque de cuisson Ø...
-
Page 57: Avertissements De Sécurité
AVERTISSEMENTS DE SÉ- tructions concernant CURITÉ l'utilisation de cet ap- LISEZ CES INSTRUCTIONS EN- pareil en toute sûreté TIÈREMENT AVEC ATTENTION et comprennent les AVANT D’UTILISER VOTRE AP- risques courus. Les PAREIL, ET GARDEZ-LES DANS UN EMPLACEMENT PRATIQUE enfants doivent POUR UNE CONSULTATION UL- pas jouer avec l'appa- TÉRIEURE, SI NÉCESSAIRE. - Page 58 cause d’incendie. avant de fermer le N’essayez JAMAIS couvercle. d’éteindre un feu avec • Cet appareil n’est pas de l’eau, mais coupez conçu pour être utilisé l’alimentation de l’ap- via une minuterie ou pareil puis recouvrez un système de télé- les flammes, par ex.
- Page 59 tallique pour nettoyer que par des techniciens de service autorisés. Les travaux d’installation le verre des plaques et de réparation effectués par des et les autres surfaces, techniciens non autorisés peuvent ceux-ci pouvant rayer vous mettre en danger. Il est dan- gereux d’altérer ou de modifier les les surfaces et provo- spécifications de l’appareil d’une...
- Page 60 raison, avant d’utiliser votre four, son agent de service ou par une faites-le tourner à vide à la tem- personne similairement qualifiée pour éviter tout risque. pérature maximale pendant 45 minutes. Au même moment vous • Lorsque la porte du four est devez ventiler correctement l’envi- ouverte, ne laissez pas les enfants ronnement dans lequel le produit...
- Page 61 débranchez-le. Gardez l’interrup- teur principal de contrôle à l’arrêt. Lorsque vous n’utilisez pas l’appa- reil, gardez aussi la vanne de gaz fermée. • Assurez-vous que les boutons de commande de l’appareil soient toujours en position « 0 » lorsqu’il n’est pas utilisé. •...
-
Page 62: Installation Du Four
Contactez un centre de service POUR MAINTENIR L’EFFICACI- autorisé pour l’installation de TÉ ET LA SÉCURITÉ DE VOTRE votre four. APPAREIL, NOUS VOUS RE- COMMANDONS DE TOUJOURS INSTALLATION DU FOUR UTILISER DES PIÈCES DÉTA- Vous devez faire attention à certains CHÉES ORIGINALES ET DE facteurs lors de l'installation de votre N’APPELER QUE NOS AGENTS... - Page 63 BRANCHEMENTS ÉLEC- au moins 11 cm des côtés du four. TRIQUES ET SÉCURITÉ Les hauteurs minimales des plaques du four à la hotte au-dessus du four Lors du raccordement, veillez à suivre sont illustrées ci-dessous. Ainsi, la les instructions ci-dessous. hotte doit être à...
- Page 64 électrique ou l'appareil pourrait être 5 broches pour la prise Perilex et endommagé. Cette situation peut éga- 25 A/250 V pour Norplug. lement provoquer des courts-circuits. Ces fiches peuvent uniquement Le fabricant rejette toute respon- être utilisées dans certains pays. sabilité...
- Page 65 PRÉCAUTIONS ET MESURES Ne laissez rien sur la porte ou le tiroir GÉNÉRALES du four lors de leur ouverture. Cela pourrait déséquilibrer votre appareil ou Votre appareil est conçu pour se endommager la porte. conformer aux instructions de sécurité appropriées s'appliquant aux appareils électriques.
- Page 66 APPARENCE GÉNÉRALE ET CA- RACTÉRISTIQUES TECHNIQUES INCORRECT INCORRECT WRONG YE66 WRONG small saucepan diameter saucepan’s base had not settled Petit diamètre de casserole Base de casserole non plate 1100 WATTS CUISINIÈRE Assurez-vous que la cuisinière est INFÉRIEURE éteinte, avec le bouton de commande 1200 WATTS CUISINIÈRE sur «...
- Page 67 PRÉSENTATION ET FONCTIONS DU PANNEAU DE COMMANDE Utilisation de la minuterie numérique signal sonore sera sélectionné. Utilisation de la minuterie mécanique MODE Appuyez simultanément sur les bou- tons (+) et (-) de la minuterie numé- rique. Lorsque l'écran commence à Réglage de l'heure : clignoter, vous pouvez définir l'heure avec les boutons (+) et (-).
- Page 68 à l'écran. Lorsque ce symbole apparait nière constante. Lorsque le symbole à l'écran, vous pouvez manuellement commence à s'allumer de manière utiliser le four. L'heure étant réinitia- constante, le réglage de la minuterie lisée en cas de panne de courant, d'avertissement est effectué.
- Page 69 cera à clignoter. Réglez le temps de four est ajusté à la température requise cuisson pour les aliments que vous selon le plat à cuire. En pressant la souhaitez cuire en touche MODE jusqu'à ce que "end" (fin) s'affiche sur l'écran de minuterie, le symbole (A) et l'heure commence- ront à...
- Page 70 Cette fonction est utilisée pour cuire Une fois l'opération de réglage effec- après une certaine période de temps tuée, l'heure s'affichera sur l'écran et le pour une durée prédéfinie. Les ali- symbole (A) commencera à s'allumer ments à cuire sont placés dans le four. de manière constante sur l'écran.
-
Page 71: Fonction Gril
Fonctions du four qu’avec une seule grille avec cette fonction. Les fonctions de votre four peuvent différer selon le modèle de votre produit. Fonction ventilateur : Lampe du four Le thermostat du four et les voyants Seule la lampe du four s’allumera d’avertissements s’allumeront, et restera allumée durant toutes les... -
Page 72: Économie D'énergie
La fonction est utilisée pour griller les Le thermostat du four et les voyants aliments, utilisez la partie supérieure d’avertissement s’allumeront, l'élément du four. Graissez légèrement la de gril, l'élément chauffant supérieur et le grille avec de l’huile pour éviter que ventilateur commenceront à... -
Page 73: Accessoires Du Four
température. lentement. Sinon, le plateau ou plat de verre pourrait se briser. - La porte du four ne doit pas être trop souvent ouverte durant la cuisson. Si vous utilisez le four en fonction gril, nous recommandons d’utiliser la grille fournie avec le produit. (Si Accessoires utilisés dans le four cette pièce est fournie avec le four) Ainsi, la graisse et les éclaboussures... - Page 74 guides de la cavité du four et poussez- Veillez à débrancher le four avant de commencer le nettoyage. L'intérieur en émail du four se nettoie idéalement lorsque le four est chaud. Essuyez le four avec un chiffon doux trempé dans de l’eau savonneuse après chaque utilisation.
- Page 75 Gardez l’emballage original du Exigences avant de contacter produit et transportez-le dans son le centre de service emballage original si nécessaire. Suivez les instructions de transport sur Si le four ne fonctionne pas : l’emballage. Le four peut être débranché, il y a eu Scotchez les pièces supérieures, une panne de courant.
- Page 76 Gentile cliente, Il nostro obiettivo è offrire prodotti di qualità che superino le aspettative, offrendo prodotti realizzati in impianti moderni con test specifici per la qualità. Questo manuale è stato preparato per aiutarti a usare la tua apparecchiatura, che è stata fabbricata usando la più re- cente tecnologia con sicurezza e la massima efficienza.
- Page 77 CONTENUTI: 1. PRESENTAZIONE E DIMENSIONI DEL PRODOTTO 2. AVVERTENZE SULLA SICUREZZA 3. INSTALLAZIONE E PREPARAZIONI PER L'USO 4. USO DEL FORNO 5. PULIZIA E LA MANUTENZIONE 6. ASSISTENZA E TRASPORTO IT - 2...
- Page 78 PRO- LAR- ALTEZZA FONDI- GHEZZA (cm) TÀ (cm) (cm) KF-66FVDD22IM-CH KF-66FVDD22WM-CH 1- Coperchio 8- Illuminazione forno: 2- Fornello 9- Griglia 3- Pannello di controllo 10- Vassoio 4- Maniglia porta forno 11- Piastra Ø 180 5- Porta forno 12- Piastra Ø 145 6- Coperchio cassetto 13- Piastra Ø...
-
Page 79: Avvertenze Sulla Sicurezza
AVVERTENZE SULLA SI- ottenuto istruzioni in CUREZZA merito all'uso sicuro LEGGERE LE PRESENTI ISTRU- dell'apparecchiatura ZIONI CON ATTENZIONE E NEL- e comprendano i pe- LA LORO INTERESSA PRIMA DI ricoli coinvolti. L'appa- UTILIZZARE LA PROPRIA APPA- RECCHIATURA, E CONSERVAR- recchiatura non è un LE IN UN LUOGO ADATTO PER giocattolo. - Page 80 a spegnere gli incendi mer esterni o sistemi con l'acqua, ma spe- di controllo a distanza gnere l'apparecchia- separati. tura e coprire la fiam- • AVVERTENZE: ma con un coperchio evitare inclinare o una coperta d'a- l'apparecchiatura, in- mianto. stallare le staffe di •...
- Page 81 superficie, provocan- che) e i requisiti dell'apparecchia- tura siano compatibili. I requisiti do la rottura del vetro per questa apparecchiatura sono o danni alla superficie. indicati sull'etichetta. • Non usare pulitori a • ATTENZIONE: Questa apparec- chiatura è progettata esclusivamen- vapore per la pulizia te per la cottura degli alimenti e per dell'apparecchiatura.
- Page 82 Non collocare materiali infiammabili installata e operata da un tecnico o combustibili, all'interno o nelle autorizzato. Il produttore non è responsabile dei danni causati da vicinanze dell'apparecchiatura una collocazione e installazione quando è in funzione. difettosa effettuata da soggetti non Usare sempre guanti da forno per autorizzati.
- Page 83 Non collocare oggetti pesanti o prodotti infiammabili o incendiabili (nylon, borse di plastica, carta, panni...ecc.) nel cassetto. Questo include stoviglie con accessori di plastica (p.es. maniglie). Non appendere tovaglie, panni o indumenti all'apparecchiatura o alle relative maniglie. Durante la pulizia e la manuten- zione Spegnere sempre l'apparecchiatura prima di operazioni come la pulizia...
- Page 84 Contatta il centro di assistenza seguito. Quindi la cappa deve essere autorizzato per l'installazione ad almeno 650 mm di altezza dal pan- del tuo forno. nello del fornello. INSTALLAZIONE DEL FORNO Se non è presente una cappa, l'altezza non deve essere inferiore a 700 mm. Ci sono alcuni fattori a cui fare atten- zione durante l'installazione del forno.
- Page 85 COLLEGAMENTO ELETTRICO dell'apparecchiatura può danneggiarsi. E SICUREZZA Ciò può causare corto circuiti. Quando si esegue il collegamento elet- L'azienda produttrice dichiara di non trico, seguire le istruzioni seguenti. essere responsabile di nessun tipo di danni Il cavo di messa a terra deve essere connesso al terminale.
- Page 86 AVVISI E MISURE GENERALI Norplug. La tua apparecchiatura è prodotta secondo tutti gli standard di sicurezza Questi spinotti possono essere usati degli apparecchi elettrici. La manuten- solo in alcuni paesi. zione e la riparazione devono essere Potenza del Tensione Cavo di eseguite esclusivamente da tecnici di prodotto alimenta-...
- Page 87 Non collocare oggetti pesanti o pro- dotti infiammabili o incendiabili (nylon, borse di plastica, carta, panni...ecc.) nel cassetto inferiore. Staccare l'apparecchiatura quando non viene usata. Proteggere l'apparecchiatura dagli effetti atmosferici. Non esporla agli effetti di sole, pioggia, neve, ecc. 3x4 mm² 220V~ 4x2.5 mm²...
- Page 88 l'interruttore di controllo è su "0" dopo CARATTERISTICHE TECNICHE la cottura. E ASPETTO GENERALE DELL'USO Non toccare se il fornello è caldo per YE66 un periodo specifico dopo essere stato 1100 WATT RISCALDATORE spento. INFERIORE Non permettere ai bambini di avvici- 1200 WATT RISCALDATORE narsi.
- Page 89 PRESENTAZIONE E FUNZIONALITÀ DEL PANNELLO DI CONTROLLO Uso del contatore di minuti meccanico. Uso del timer digitale MODE Contemporaneamente premere i Regolazione ora: pulsanti (+) e (-) del contatore di minuti meccanico. Il display inizia a lampeg- giare e quindi è possibile impostare L'ora deve essere regolata prima di l'ora usando i pulsanti (+) e (-).
- Page 90 bolo viene visualizzato sullo schermo. il completamento della regolazione, il Quando questo simbolo appare sullo simbolo inizia a lampeggiare in modo schermo, la parte del forno può essere continuo. Quando il simbolo inizia a operata manualmente. L'ora impostata lampeggiare in modo continuo, la rego- viene azzerata in caso di mancanza di lazione dell'ora del segnale di avviso è...
- Page 91 zato il messaggio "stop" sullo schermo Questa funzione viene usata per cuo- del timer.. Quando sullo schermo del cere nell'intervallo di completamento timer viene visualizzato "stop", il sim- desiderato. Gli alimenti da cuocere bolo (A) inizia a lampeggiare. Regolare vengono messi nel forno. Il forno viene il periodo di cottura per gli alimenti da regolato sulla funzione di cottura desi- cuocere...
- Page 92 È possibile impostare un periodo di cottura compreso tra le0 e le 10 ore. d u r Secondo; tenere premuto il tasto MODE fino a che non viene visualizza- to il messaggio "fine" sullo schermo del MODE timer. Quando sullo schermo del timer viene visualizzato "fine", il simbolo (A) e l'ora del giorno iniziano a lampeggia- re, con l'aggiunta del periodo di cot-...
- Page 93 Funzioni forno Funzione ventola: * Le funzioni del forno potrebbero essere diverse a seconda del modello. Il termostato e le luci di avviso del forno si accendono, la ventola e gli elementi Illuminazione forno: riscaldanti superiore e inferiore vengo- Si illumina solo la luce del forno e resta no azionati.
-
Page 94: Risparmio Energia
centro della griglia. Collocare sempre vengono alimentati insieme alla ventola un vassoio sotto per raccogliere le per assicurare una cottura uniforme. gocce di olio o grasso. Si raccomanda di preriscaldare il forno per circa Usare gli scaffali superiori del forno. 10 minuti. - Page 95 sul mercato, oltre ai vassoi da forno e versare acqua per facilitare la pulizia. agli spiedini per griglia in dotazione. Usare il quarto e il quindo scaffale Fare attenzione alle informazioni in durante la grigliatura e oliare la griglia merito fornite dall'azienda produttrice. per evitare che gli ingredienti usati si Nel caso di uso di piatti di piccole attacchino alla griglia.
- Page 96 al meglio quando il forno è caldo. Spazzare il forno con un panno morbido immerso in acqua insaponata dopo ciascun uso. Più tardi spazzare con un panno umido e quindi lasciare asciugare. Potrebbe essere necessario l'uso di un materiale pulente liquido di tanto in tanto e fare una pulizia completa.
- Page 97 trasportarlo. Seguire i contrassegni di Requisiti prima di contattare trasporto sul contenitore. l'assistenza Collocare con del nastro il fornello sulle parti superiori, il coperchio e le testate Se il forno non funziona: ai pannelli da cucina. Il forno potrebbe essere staccato, si Collocare un foglio di carta tra il è...
- Page 98 Благодарим Ви, че закупихте този продукт. Това ръководство за потребителя съдържа важна информация за безопасността и инструкции относно работата и поддръжката на Вашия уред. Моля, отделете време да прочетете това ръководство за потребителя, преди да използвате уреда си и го запазете за бъдещи...
- Page 99 СЪДЪРЖАНИЕ 1.ИНСТРУКЦИИ ЗА БЕЗОПАСНОСТ ................5 1.1. Общи правила за безопасност ...................5 1.2. Предупреждения при монтаж ..................8 1.3. По време на употреба ....................9 1.4. По време на почистването и поддръжката ..............10 2.Монтаж и подготовка за използване ................12 2.1. Инструкции за монтажника ..................12 2.2.
- Page 100 Контролен панел за 4 нагревател: РАЗМЕРИ НА ПРОДУКТА МОДЕЛ ДЪЛБОЧИНА ШИРИНА ВИСОЧИНА (cm) (cm) (cm) KF-66FVDD22WM-CH KF-66FVDD22IM-CH 1- член 8- Лампа за фурните 2- плот 9- Решетка 3- Контролен панел 10- Плитка тава 4- Дръжка за врата на фурната 11- Ø 180 Плоча...
- Page 101 1. ИНСТРУКЦИИ ЗА ако е осигурен контрол БЕЗОПАСНОСТ или им е предоставена информация относно • Внимателно опасностите. Децата прочетете всички не трябва да си играят инструкции, преди с уреда. Почистването да използвате уреда и поддръжката и ги съхранявайте не трябва да се на...
- Page 102 инструкцията за комплекта срещу ПРЕДУПРЕЖДЕНИЕ: наклоняване.) Опасност от пожар: не • По време на работа съхранявайте нищо уредът ще се нагрее. върху повърхността за Внимавайте да не готвене. докосвате горещите части на фурната. ПРЕДУПРЕЖДЕНИЕ: • Дръжките могат да се Ако повърхността е нагорещят...
- Page 103 смените лампата. че условията за поставяне на ВНИМАНИЕ: уреда (вид на газта Достъпните части могат и налягане или да се нагорещят по електрическото време на готвене или напрежение и честота) печене. Дръжте малките и спецификациите на деца далеч от уреда, уреда...
- Page 104 счупи, трябва да се Производителят не внимава по време на носи отговорност за почистването, за да се повреди, които могат избегне надраскване. да бъдат причинени от Избягвайте да удряте неправилно поставяне или да почуквате и монтиране от стъклото с аксесоари. неоторизирани...
- Page 105 да могат да издържат • Не поставяйте на минимална горими или запалими температура от 100 ° материали в или близо до уреда, когато той работи. 1.3. По време • Винаги използвайте на употреба ръкавици за фурната, • Когато за пръв път за...
- Page 106 изключете главния и др.). Това включва контролен ключ. съдове с пластмасови Изключете газовия принадлежности клапан, когато (например дръжки). газовите уреди не се ВНИМАНИЕ: използват. Вътрешната повърхност • Уверете се, че на отделението за бутоните за съхранение може да се управление на уреда нагорещи, когато...
- Page 107 на Вашия уред, ви препоръчваме винаги да използвате оригинални резервни части и да се обадите на нашите оторизирани сервизни агенти, когато е необходимо. BG - 11...
- Page 108 2. Монтаж и подготовка горими или запалими материали за използване като завеси, масла, плат и др., които могат да се възпламенят. ПРЕДУПРЕЖДЕНИЕ : Този уред трябва да бъде монтиран от • Работният плот и мебелите около оторизиран сервизен персонал или уреда...
- Page 109 че се използват изолирани 2.2. Електрическо свързване кабели. Неправилното свързване и безопасност може да повреди уреда. Смяната ПРЕДУПРЕЖДЕНИЕ: на повредения захранващ Електрическото свързване на кабел трябва да се извърши от този уред трябва да се извърши от квалифициран персонал. оторизиран сервиз или •...
- Page 110 захранване е различно, свържете се с упълномощения сервизен персонал или квалифициран Винт (x1) електротехник. Скоба против • Захранващият кабел (H05VV-F) наклоняване (x1) (ще бъде трябва да е достатъчно дълъг, за монтирана на стената) да бъде свързан към уреда. Дюбел (x1) •...
- Page 111 3. ХАРАКТЕРИСТИКИ НА ПРОДУКТА Важно: Спецификациите за продукта варират и външният вид на Вашия уред може да се различава от този, показан на фигурите по-долу. Списък на компонентите Панел за управление 1. Таймер 2. Бутон за управление на функциите на фурната 3.
- Page 112 4. ИЗПОЛЗВАНЕ НА ПРОДУКТА нагревателна плоча, завъртете еднократно бутона в позиция . И 4.1. Бутони за управление на плота двете външни зони ще се включат. Керамичен нагревател За да изключите външната зона на двойната/овална нагревателна Керамичният нагревател се плоча, завъртете еднократно бутона контролира...
- Page 113 плота за готвене без тенджери. • Ако забележите пукнатина върху плота, то трябва незабавно да го • Използвайте само плоски изключите и същият да се смени тенджери с достатъчно плътна от оторизиран сервизен персонал. основа. • Уверете се, че дъното на тигана 4.2.
- Page 114 отдолу. Препоръчваме да поставите разпределя топлината на фурната, тава под храната за размразяване, докато долният нагревателен за да съберете водата, която ще се елемент пече храната. появи в резултат на топенето на лед. Тази функция няма да готви или пече храната...
- Page 115 поставете храна в центъра на решетката. Винаги поставяйте тава Функция “Бързо гриловане”: под храната, за да уловите капки Термостатът на фурната и олио или мазнина. Препоръчваме да предупредителните светлини загреете предварително фурната за ще светнат, а грилът и горните около 10 минути. нагревателни...
- Page 116 3. Символът ще 1. Натиснете остане осветен, едновременно времето ще бутони “+” и “-”. бъде запазено и символът ще се предупреждението появи и точката в ще бъде настроено. средата на екрана ще започне да мига. 2. Докато точката Когато таймерът достигне нула, ще мига, настройте...
- Page 117 за да спрете звуковото предупреждение. храната за готвене и я поставете във Символите ще изчезнат и таймерът ще фурната. се върне към ръчна функция. 1. Изберете желаната функция за Получавтоматично настройване на готвене и температурата с помощта на времето (време на приключване) контролните...
- Page 118 4.4. Аксесоари 8. Текущото време ще Дълбока тава се появи отново на екрана, а символите Дълбоката тава е най-добре да се “A”, и ще останат използва за задушаване. осветени. Поставете тавата в който и да е рафт и я натиснете докрай, за да се уверите, че...
- Page 119 Решетъчна скара които не съдържат частици. Не използвайте каустик (корозивни) Решетъчната скара е най-добре кремове, абразивни почистващи да се използва за печене или за прахове, груба вата или твърди обработка на храни в съдове, инструменти, тъй като те могат подходящи за фурна. да...
- Page 120 Почистване на керамичното ерозия на повърхността. стъкло 3. Използване на грешни керамични Керамичното стъкло може да материали. издържи на тежки прибори, но може Почистване на стъклените части да се счупи, ако се удари с остър • Редовно почиствайте стъклените предмет. части...
- Page 121 Не оставяйте оцет, кафе, мляко, 5.2. Поддръжка сол, вода, лимон или доматен ПРЕДУПРЕЖДЕНИЕ: сок върху частите от неръждаема Поддръжката на този уред стомана за дълго време. трябва да се извършва само от оторизиран сервиз или Сваляне на вратата на фурната квалифициран...
- Page 122 6. ОТСТРАНЯВАНЕ НА НЕИЗПРАВНОСТИ И ТРАНСПОРТИРАНЕ 6.1. Отстраняване на неизправности Ако все още имате проблем с уреда си, след като проверите тези основни с т ъ п к и з а о т с т р а н я в а н е н а неизправности, моля, свържете...
- Page 123 Service & Support Visit Our Website sharphomeappliances.com...
Need help?
Do you have a question about the KF-66FVDD22WM-CH and is the answer not in the manual?
Questions and answers